Konica Minolta bizhub C3350 bizhub C3850/C3350 Scan Functions User Guide - Page 9
To con settings: [Utility] - [User Settings] - [Scan/Fax Settings] - [Default Scan Settings]
 |
View all Konica Minolta bizhub C3350 manuals
Add to My Manuals
Save this manual to your list of manuals |
Page 9 highlights
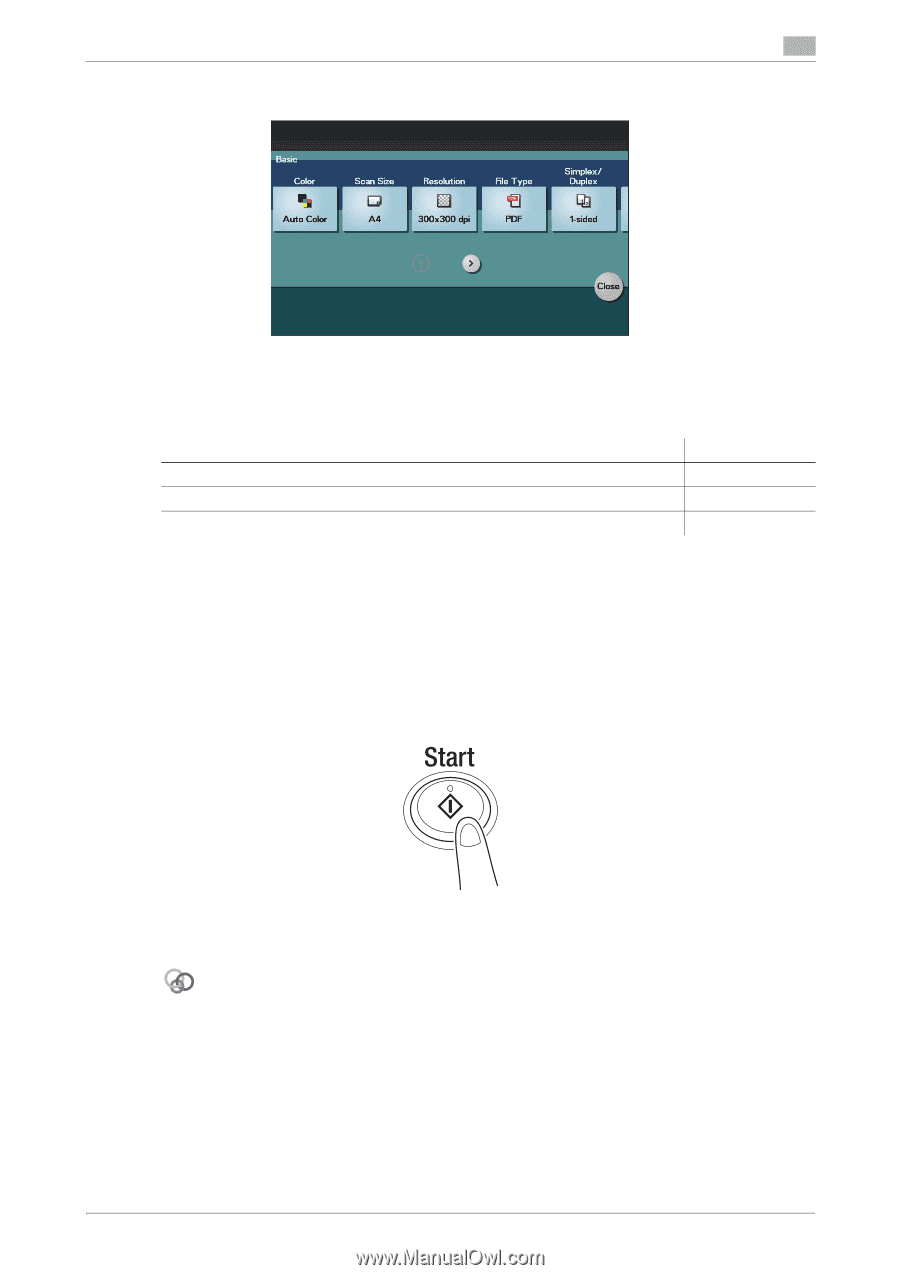
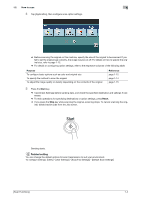
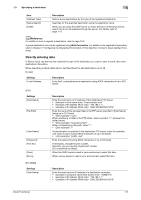
1.2 How to scan 1 4 Tap [Application], then configure scan option settings. % Before scanning the original on this machine, specify the size of the original to be scanned. If you fail to set the original size correctly, the image may be cut off. For details on how to specify the original size, refer to page 1-12. % For details on configuring option settings, refer to the respective columns of the following table. Purpose To configure basic options such as color and original size To specify the method to scan the original To adjust the image quality or density depending on the contents of the original Reference page 1-12 page 1-14 page 1-15 5 Press the Start key. % Tap [Check Settings] before sending data, and check the specified destination and settings if necessary. % To redo operations for specifying destinations or option settings, press Reset. % If you press the Stop key while scanning the original, scanning stops. To cancel scanning the orig- inal, delete inactive jobs from the Job screen. Sending starts. Related setting You can change the default options for scan transmission to suit your environment. To configure settings: [Utility] - [User Settings] - [Scan/Fax Settings] - [Default Scan Settings] [Scan Functions] 1-4
-
 1
1 -
2
-
3
-
 4
4 -
 5
5 -
 6
6 -
 7
7 -
 8
8 -
 9
9 -
 10
10 -
 11
11 -
 12
12 -
 13
13 -
 14
14 -
15
-
16
-
17
-
18
-
19
-
20
-
21
-
22
-
23
-
24
-
25
-
26
-
27
-
28
-
29
-
30
-
31
-
32
-
33
-
34
-
35
-
36
-
37
-
38
-
39
-
40
-
41
-
42
-
43
-
44
-
45
-
46
-
47
-
48
-
49
-
50
-
51
-
52
-
53
-
54
-
55
-
56
-
57
-
58
-
59
-
60
-
61
-
62
-
63
-
64
-
65
-
66
-
67
-
68
-
69
-
70
-
71
-
72
-
73
-
74
-
75
-
76
-
77
-
78
-
79
-
80
-
81
-
82
-
83
-
84
-
85
-
86
-
87
-
88
-
89
-
90
-
91
-
92
-
93
-
94
-
95
-
96
-
97
-
98
-
99
-
100
-
101
 |
 |