Konica Minolta bizhub C3350 bizhub C3850/C3350 PC-Fax Functions User Guide - Page 26
Configuring the fax transmission function, The [FAX Transmission Popup] window, Settings
 |
View all Konica Minolta bizhub C3350 manuals
Add to My Manuals
Save this manual to your list of manuals |
Page 26 highlights
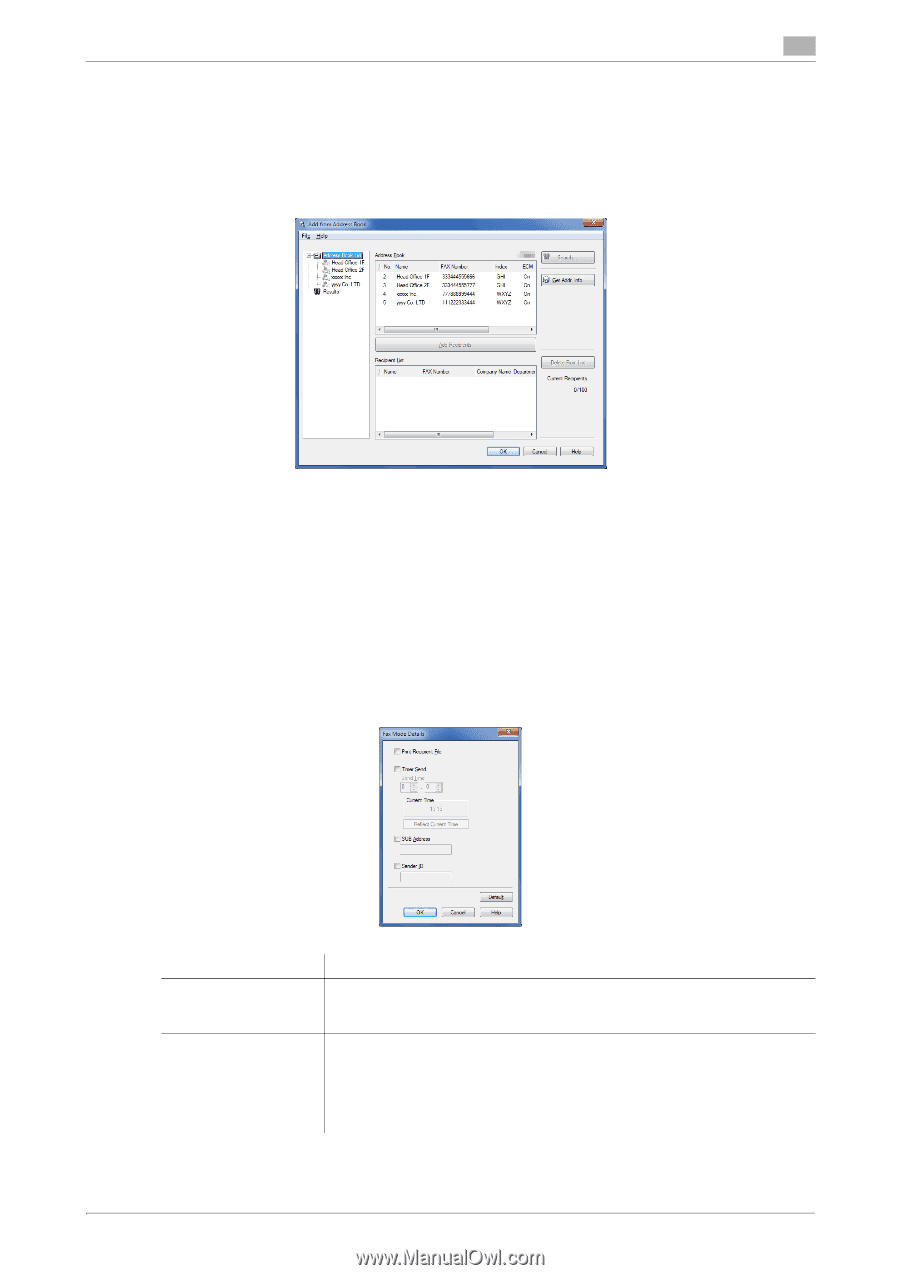
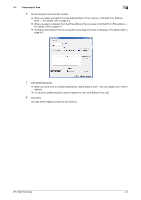
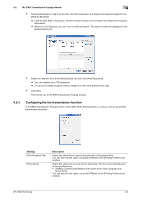
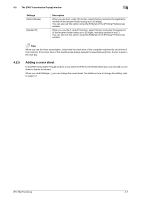
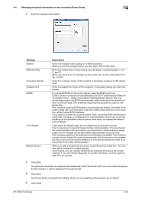
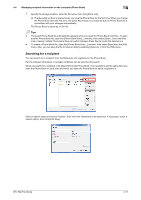
4.2 The [FAX Transmission Popup] window 4 2 Select [Address Book List] from the list in the left-hand pane, and display the desired recipient in the [Address Book] list. % Click the [Get Addr. Info] button, and this machine starts communication and obtains the recipient information. % When you click [Search], you can use a conditional search. The search results are displayed in the [Address Book] list. 3 Select the recipient from the [Address Book] list, then click [Add Recipients]. % You can register up to 100 recipients. % To cancel an added recipient, select a target one, then click [Delete From List]. 4 Click [OK]. This returns you to the [FAX Transmission Popup] window. 4.2.4 Configuring the fax transmission function In the [FAX Transmission Popup] window, select [Fax Mode Setting Details...], and you can set up the Fax transmission functions. Settings [Print Recipient File] [Timer Send] Description Select this check box to send a fax and print it at the same time. You can also set this option using the [FAX] tab of the [Printing Preferences] window. Select this check box to set a time to send a fax. The fax is automatically sent at the specified time. • [Reflect Current Time]: Reflects the current time of the computer onto [Send Time]. You can also set this option using the [FAX] tab of the [Printing Preferences] window. [PC-FAX Functions] 4-6
-
 1
1 -
2
-
3
-
4
-
5
-
6
-
7
-
8
-
9
-
10
-
11
-
12
-
13
-
14
-
15
-
16
-
17
-
18
-
19
-
20
-
 21
21 -
 22
22 -
 23
23 -
 24
24 -
 25
25 -
 26
26 -
 27
27 -
 28
28 -
 29
29 -
 30
30 -
 31
31 -
32
-
33
-
34
-
35
-
36
-
37
-
38
-
39
-
40
-
41
-
42
-
43
-
44
-
45
-
46
-
47
-
48
-
49
-
50
-
51
-
52
-
53
-
54
-
55
-
56
-
57
-
58
-
59
-
60
-
61
 |
 |