Konica Minolta bizhub PRESS C6000 IC-601 Color Centro User Guide - Page 40
Color Setting Workflows by Color Centro
 |
View all Konica Minolta bizhub PRESS C6000 manuals
Add to My Manuals
Save this manual to your list of manuals |
Page 40 highlights
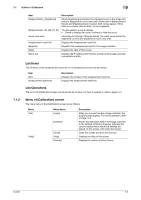
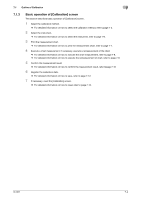
6.4 Color Setting Workflows by Color Centro 6 6.4 Color Setting Workflows by Color Centro This section describes color setting workflows by Color Centro. To consistently maintain proper color output, we recommend to execute any of the following workflows or combination of those for daily management of color settings. Workflow Color Settings by using Default Profile Color Settings by using the Color Configuration Management Function Color Settings by using Functions of both Profile Management and Color Default Settings Description This is the simplest workflow. If you don't have much knowledge about profile, we recommend to use this workflow. For detailed information, refer to page 6-5. This is a recommended workflow which makes use of functions of Color Centro efficiently. You can execute the proper color settings with an easy procedure. For detailed information, refer to page 6-6. This is a workflow which is to examine proper setting as setting the individual profile using functions of Color Centro. When you get proper result of the examination, we recommend that you shift to a workflow described in page 6-6 to execute the color settings more efficiently. For detailed information, refer to page 6-6. 6.4.1 Color Settings by using Default Profile The procedure of the simplest workflow is below: In this workflow, color setting is executed by using the default profile registered into the image controller at factory shipping. 1 Set the default profile. % Use the profile registered into the image controller at factory shipping. If you create a new profile, the measurement instrument is necessary. % The default profile is set by using Color Default Settings function or Color Configuration Management function. % For detailed information of Color Default Setting function, refer to page 12-2. % For detailed information of Color Configuration Management function, refer to page 13-2. 2 Execute the calibration. % When the main body has a scanner part, you can execute the calibration using its scanner part. Unless, prepare the measurement instrument and use it. % For detailed information of Calibration function, refer to page 7-2. 3 Execute the fine adjustment using Tone Curve Adjustment function, Spot Color Adjustment function, Alternative Adjustment function, etc. % For detailed information of Tone Curve Adjustment function, refer to page 8-2. % For detailed information of Spot Color Adjustment function, refer to page 9-2. % For detailed information of Alternative Adjustment function, refer to page 10-2. 4 Repeat above steps as needed. The default color settings which are set on this function are applied to the job without settings by the printer driver and to the direct printing job. IC-601 6-5
-
 1
1 -
2
-
3
-
4
-
5
-
6
-
7
-
8
-
9
-
10
-
11
-
12
-
13
-
14
-
15
-
16
-
17
-
18
-
19
-
20
-
21
-
22
-
23
-
24
-
25
-
26
-
27
-
28
-
29
-
30
-
31
-
32
-
33
-
34
-
 35
35 -
 36
36 -
 37
37 -
 38
38 -
 39
39 -
 40
40 -
 41
41 -
 42
42 -
 43
43 -
 44
44 -
 45
45 -
46
-
47
-
48
-
49
-
50
-
51
-
52
-
53
-
54
-
55
-
56
-
57
-
58
-
59
-
60
-
61
-
62
-
63
-
64
-
65
-
66
-
67
-
68
-
69
-
70
-
71
-
72
-
73
-
74
-
75
-
76
-
77
-
78
-
79
-
80
-
81
-
82
-
83
-
84
-
85
-
86
-
87
-
88
-
89
-
90
-
91
-
92
-
93
-
94
-
95
-
96
-
97
-
98
-
99
-
100
-
101
-
102
-
103
-
104
-
105
-
106
-
107
-
108
-
109
-
110
-
111
-
112
-
113
-
114
-
115
-
116
-
117
-
118
-
119
-
120
-
121
-
122
-
123
-
124
-
125
-
126
-
127
-
128
-
129
-
130
-
131
-
132
-
133
-
134
-
135
-
136
-
137
-
138
-
139
-
140
-
141
-
142
-
143
-
144
-
145
-
146
-
147
-
148
-
149
-
150
-
151
-
152
-
153
-
154
-
155
-
156
-
157
-
158
-
159
-
160
-
161
-
162
-
163
-
164
-
165
-
166
-
167
-
168
-
169
-
170
-
171
-
172
-
173
-
174
-
175
-
176
-
177
-
178
-
179
-
180
-
181
-
182
-
183
-
184
-
185
-
186
-
187
-
188
-
189
-
190
-
191
-
192
-
193
-
194
-
195
-
196
-
197
-
198
-
199
-
200
-
201
-
202
-
203
-
204
-
205
-
206
-
207
-
208
-
209
-
210
-
211
-
212
-
213
-
214
-
215
-
216
-
217
-
218
-
219
-
220
-
221
-
222
-
223
-
224
-
225
-
226
-
227
-
228
-
229
-
230
-
231
-
232
-
233
-
234
-
235
-
236
-
237
-
238
-
239
-
240
-
241
-
242
-
243
-
244
-
245
-
246
-
247
-
248
-
249
-
250
-
251
-
252
-
253
-
254
-
255
-
256
-
257
-
258
-
259
-
260
-
261
-
262
-
263
-
264
-
265
-
266
-
267
-
268
-
269
-
270
-
271
-
272
-
273
-
274
-
275
-
276
-
277
-
278
-
279
 |
 |