Konica Minolta bizhub PRESS C6000 IC-601 Color Centro User Guide - Page 58
Menu of [Tone Curve Adjustment] screen
 |
View all Konica Minolta bizhub PRESS C6000 manuals
Add to My Manuals
Save this manual to your list of manuals |
Page 58 highlights
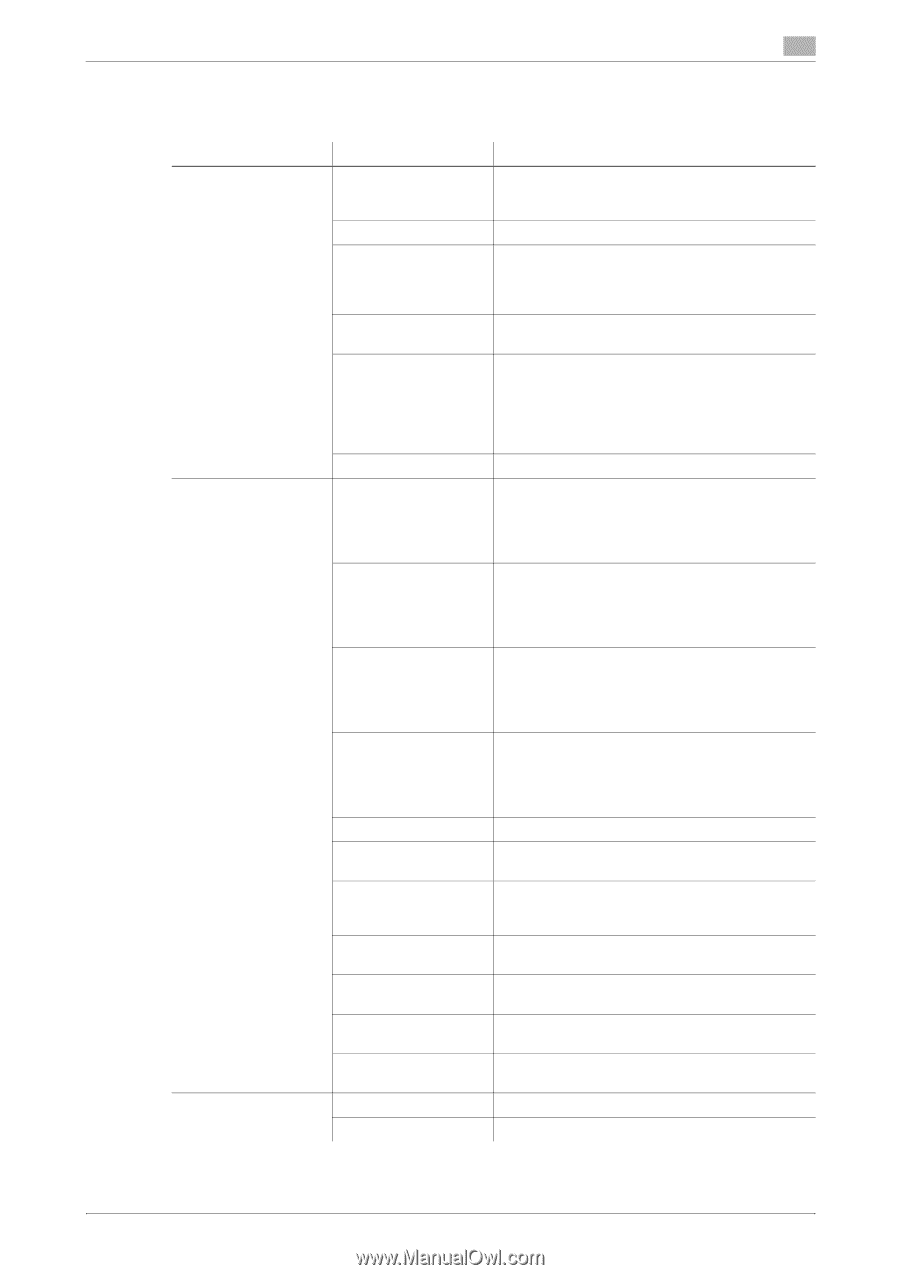
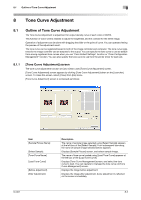
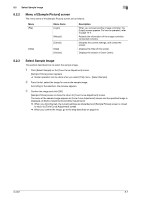
8.1 Outline of Tone Curve Adjustment 8 8.1.2 Menu of [Tone Curve Adjustment] screen The menu items of the [Tone Curve Adjustment] screen are as follows; Menu [File] [View] [Help] Menu Items [Login] [New Tone Curve] [Tone Curve Management] [Select Sample] [Confirmation Print] [Close] [Previous Page] [Next Page] [First Page] [Last Page] [Rotation (Clockwise)] [Rotation (Counter clockwise)] [Scale Up] [Scale Down] [Display only before adjustment] [Display only after adjustment] [Display before and after the adjustment] [Help] [Version] Description When you connect another image controller, the [Login] screen appears. For how to operate it, refer to page 14-2. Creates the new tone curve. Displays [Tone Curve Management] screen to select the tone curve which you want to load. You can operate to manage the tone curve on [Tone Curve Management] screen. Displays [Sample Picture] screen to select sample image. Adopts the setting and execute printing to confirm the result of adjustment. This function is available only when [Hold(Cont..)] is selected on the [Sample Picture] screen in [Select Sample]. (This function is not available as of April 2011. ) Close this screen and exits this function. It is available when multiple images are included in the job of the image controller selected on [Sample Picture] screen. Displays the image of the previous page. (This function is not available as of April 2011. ) It is available when multiple images are included in the job of the image controller selected on [Sample Picture] screen. Displays the image of the next page. (This function is not available as of April 2011. ) It is available when multiple images are included in the job of the image controller selected on [Sample Picture] screen. Displays the image of the first page. (This function is not available as of April 2011. ) It is available when multiple images are included in the job of the image controller selected on [Sample Picture] screen. Displays the image of the last page. (This function is not available as of April 2011. ) Rotates the image by 90 degrees to right. Rotates the image by 90 degrees to left. Displays the image enlarged. You can scale up the image size selecting the magnification from among 4 levels which are 2, 4, 8, and 16 times. Displays the image shrinked. You can scale down the image size until the whole image appears. Displays only the image of [Before Adjustment] on the screen. Displays only the image of [After Adjustment] on the screen. Displays both of [Before Adjustment] and [After Adjustment] on the screen. Displays the Help of this screen. Displays the version of Color Centro. IC-601 8-4
-
 1
1 -
2
-
3
-
4
-
5
-
6
-
7
-
8
-
9
-
10
-
11
-
12
-
13
-
14
-
15
-
16
-
17
-
18
-
19
-
20
-
21
-
22
-
23
-
24
-
25
-
26
-
27
-
28
-
29
-
30
-
31
-
32
-
33
-
34
-
35
-
36
-
37
-
38
-
39
-
40
-
41
-
42
-
43
-
44
-
45
-
46
-
47
-
48
-
49
-
50
-
51
-
52
-
 53
53 -
 54
54 -
 55
55 -
 56
56 -
 57
57 -
 58
58 -
 59
59 -
 60
60 -
 61
61 -
 62
62 -
 63
63 -
64
-
65
-
66
-
67
-
68
-
69
-
70
-
71
-
72
-
73
-
74
-
75
-
76
-
77
-
78
-
79
-
80
-
81
-
82
-
83
-
84
-
85
-
86
-
87
-
88
-
89
-
90
-
91
-
92
-
93
-
94
-
95
-
96
-
97
-
98
-
99
-
100
-
101
-
102
-
103
-
104
-
105
-
106
-
107
-
108
-
109
-
110
-
111
-
112
-
113
-
114
-
115
-
116
-
117
-
118
-
119
-
120
-
121
-
122
-
123
-
124
-
125
-
126
-
127
-
128
-
129
-
130
-
131
-
132
-
133
-
134
-
135
-
136
-
137
-
138
-
139
-
140
-
141
-
142
-
143
-
144
-
145
-
146
-
147
-
148
-
149
-
150
-
151
-
152
-
153
-
154
-
155
-
156
-
157
-
158
-
159
-
160
-
161
-
162
-
163
-
164
-
165
-
166
-
167
-
168
-
169
-
170
-
171
-
172
-
173
-
174
-
175
-
176
-
177
-
178
-
179
-
180
-
181
-
182
-
183
-
184
-
185
-
186
-
187
-
188
-
189
-
190
-
191
-
192
-
193
-
194
-
195
-
196
-
197
-
198
-
199
-
200
-
201
-
202
-
203
-
204
-
205
-
206
-
207
-
208
-
209
-
210
-
211
-
212
-
213
-
214
-
215
-
216
-
217
-
218
-
219
-
220
-
221
-
222
-
223
-
224
-
225
-
226
-
227
-
228
-
229
-
230
-
231
-
232
-
233
-
234
-
235
-
236
-
237
-
238
-
239
-
240
-
241
-
242
-
243
-
244
-
245
-
246
-
247
-
248
-
249
-
250
-
251
-
252
-
253
-
254
-
255
-
256
-
257
-
258
-
259
-
260
-
261
-
262
-
263
-
264
-
265
-
266
-
267
-
268
-
269
-
270
-
271
-
272
-
273
-
274
-
275
-
276
-
277
-
278
-
279
 |
 |