Kyocera KM-3035 Network Fax Online Manual (Revision) - Page 49
Reception Notification E-mail Address Reception Notification PC Address, Browse for Computer
 |
View all Kyocera KM-3035 manuals
Add to My Manuals
Save this manual to your list of manuals |
Page 49 highlights
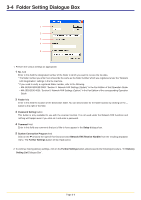
3-6 Delivery Setting Dialogue Box 4 5 6 7 4 Reception Notification E-mail Address (Reception Notification PC Address) list The notice of fax reception can be sent to computers on the network through e-mail or using the Scanner File Utility. Up to 10 e-mail addresses or computer addresses can be entered. Perform the following procedure to enter the desired email addresses or computer addresses. (To select the transmission method for the notice of fax reception, refer to the setting explained under "3-5 Delivery Setting List Dialogue Box" on page 3-7.) Note: To send the notice of fax reception to a computer on the network using the Scanner File Utility, the Scanner File Utility must be installed on the destination computer. In addition, the delivery folder must also be set so that it is shared on the network. 1) Click on the New button. The edit box will be displayed over the list. 2) Enter the mail address (max. 64 characters). In the case of a computer address, you can only enter a maximum of 32 characters. Example of mail address registration Example of computer address registration 5 ... button Click on this button to add an e-mail address or a computer address. When registering e-mail addresses, the E-Mail Address dialogue box will be displayed. (Refer to "G Adding an e-mail address" on page 3-12.) When sending the notice of fax reception to a computer on the network, the Browse for Computer dialogue box will be displayed. (Refer to "G Adding a computer address" on page 3-12.) 6 Edit button Click on this button to edit the e-mail address or computer address that you selected in the list. 7 Delete button Click on this button to delete the e-mail address or computer address that you selected in the list. Page 3-11
-
 1
1 -
2
-
3
-
4
-
5
-
6
-
7
-
8
-
9
-
10
-
11
-
12
-
13
-
14
-
15
-
16
-
17
-
18
-
19
-
20
-
21
-
22
-
23
-
24
-
25
-
26
-
27
-
28
-
29
-
30
-
31
-
32
-
33
-
34
-
35
-
36
-
37
-
38
-
39
-
40
-
41
-
42
-
43
-
 44
44 -
 45
45 -
 46
46 -
 47
47 -
 48
48 -
 49
49 -
 50
50 -
 51
51 -
 52
52 -
 53
53 -
 54
54 -
55
-
56
-
57
-
58
-
59
-
60
-
61
-
62
-
63
-
64
-
65
-
66
-
67
-
68
-
69
-
70
-
71
-
72
-
73
-
74
-
75
-
76
-
77
-
78
-
79
-
80
-
81
-
82
-
83
-
84
-
85
-
86
-
87
-
88
-
89
-
90
-
91
-
92
-
93
-
94
-
95
-
96
-
97
-
98
-
99
-
100
-
101
-
102
-
103
-
104
-
105
-
106
-
107
-
108
 |
 |
