Kyocera KM-3035 Network Fax Online Manual (Revision) - Page 63
(3) Search/Replace the Contents of a Particular Entry Item, Replace, Replace text, Find text, Address
 |
View all Kyocera KM-3035 manuals
Add to My Manuals
Save this manual to your list of manuals |
Page 63 highlights
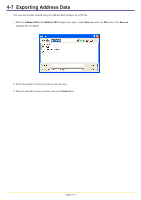
4-4 Editing Individual and Group Destination Information (3) Search/Replace the Contents of a Particular Entry Item It is possible to search for and replace data for any entry item for multiple registered individual or group destinations. For example, if a change is made to a city's area code, you can select multiple destinations and change the area code for their fax number with the new one all in one batch. 1. With the Address Book for Network FAX dialogue box open, select the multiple individual or group destinations that you want to edit. 2. Point at Replace under the Edit menu, or click on the Replace button. The Replace text dialogue box will be displayed. 3. Put a check mark in the checkbox of the common item that you want to edit ("Registration Name", "FAX Number", "Subaddress", "Password", "Company Name", "Department Name", and "Recipient Name" for an individual destination and "Registration Name" for Group Destinations). 4. Enter the information that you want to change in the Find text field (left column) for the corresponding item. Enter the new information in the edit box of the Replace text field (right column). Note: For fax numbers, the leftmost sequence that matches the entered information will be replaced. (Example) With fax number "555-33-1555", if you enter "555" in the Find text field and "111" in the Replace text field, the fax number will be changed to "111-33-1555". For other items, all matching sequences will be replaced. 5. Click on the OK button. The display will return to the Address Book for Network FAX dialogue box and the edited information will be displayed. 6. In order to actually register the edited information in the Address Book, select Apply from the File menu (or click on the Apply button). Page 4-9
-
 1
1 -
2
-
3
-
4
-
5
-
6
-
7
-
8
-
9
-
10
-
11
-
12
-
13
-
14
-
15
-
16
-
17
-
18
-
19
-
20
-
21
-
22
-
23
-
24
-
25
-
26
-
27
-
28
-
29
-
30
-
31
-
32
-
33
-
34
-
35
-
36
-
37
-
38
-
39
-
40
-
41
-
42
-
43
-
44
-
45
-
46
-
47
-
48
-
49
-
50
-
51
-
52
-
53
-
54
-
55
-
56
-
57
-
 58
58 -
 59
59 -
 60
60 -
 61
61 -
 62
62 -
 63
63 -
 64
64 -
 65
65 -
 66
66 -
 67
67 -
 68
68 -
69
-
70
-
71
-
72
-
73
-
74
-
75
-
76
-
77
-
78
-
79
-
80
-
81
-
82
-
83
-
84
-
85
-
86
-
87
-
88
-
89
-
90
-
91
-
92
-
93
-
94
-
95
-
96
-
97
-
98
-
99
-
100
-
101
-
102
-
103
-
104
-
105
-
106
-
107
-
108
 |
 |
