Kyocera KM-C2030 KM-C3130/C2030 Operation Guide Basic Oper Rev-1B - Page 136
To print scanned data move it from the list on the Scanned Job screen to the, Print List screen
 |
View all Kyocera KM-C2030 manuals
Add to My Manuals
Save this manual to your list of manuals |
Page 136 highlights
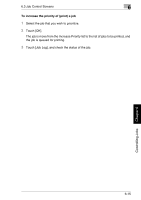
6.3 Job Control Screens 6 No. Paper Format 7 Original 8 Copy 9 Beginning time Description Displays the number of pages in the original document Displays the number of pages in the copy While the job is being printed, the number of pages remaining to be printed is counted down. Displays the time that the job was programmed To print scanned data (move it from the list on the Scanned Job screen to the Print List screen) 1 Select the job that you wish to print from the Scanned Job screen. To print mul- tiple jobs, continue selecting all jobs that you wish to print. 2 Touch [OK]. The job is deleted from the list on the Scanned Job screen and added to the Print List screen. The status of the job changes from "Job Stored" to "Waiting Print", and the job is queued for printing. 3 Touch [Job Log], and check the status of the job. For details on setting the "Scan to Memory" function, refer to "Storing the Scanned Image in the Memory ("Scan to Memory" Function)" of "Auxiliary Functions" in the Advanced Operations volume. Controlling Jobs Chapter 6 6-11
-
 1
1 -
2
-
3
-
4
-
5
-
6
-
7
-
8
-
9
-
10
-
11
-
12
-
13
-
14
-
15
-
16
-
17
-
18
-
19
-
20
-
21
-
22
-
23
-
24
-
25
-
26
-
27
-
28
-
29
-
30
-
31
-
32
-
33
-
34
-
35
-
36
-
37
-
38
-
39
-
40
-
41
-
42
-
43
-
44
-
45
-
46
-
47
-
48
-
49
-
50
-
51
-
52
-
53
-
54
-
55
-
56
-
57
-
58
-
59
-
60
-
61
-
62
-
63
-
64
-
65
-
66
-
67
-
68
-
69
-
70
-
71
-
72
-
73
-
74
-
75
-
76
-
77
-
78
-
79
-
80
-
81
-
82
-
83
-
84
-
85
-
86
-
87
-
88
-
89
-
90
-
91
-
92
-
93
-
94
-
95
-
96
-
97
-
98
-
99
-
100
-
101
-
102
-
103
-
104
-
105
-
106
-
107
-
108
-
109
-
110
-
111
-
112
-
113
-
114
-
115
-
116
-
117
-
118
-
119
-
120
-
121
-
122
-
123
-
124
-
125
-
126
-
127
-
128
-
129
-
130
-
 131
131 -
 132
132 -
 133
133 -
 134
134 -
 135
135 -
 136
136 -
 137
137 -
 138
138 -
 139
139 -
 140
140 -
 141
141 -
142
-
143
-
144
-
145
-
146
-
147
-
148
-
149
-
150
-
151
-
152
-
153
-
154
 |
 |
