Netgear WAX204-WiFi User Manual
Netgear WAX204-WiFi Manual
 |
View all Netgear WAX204-WiFi manuals
Add to My Manuals
Save this manual to your list of manuals |
Netgear WAX204-WiFi manual content summary:
- Netgear WAX204-WiFi | User Manual - Page 1
User Manual WiFi 6 AX1800 Dual Band Wireless Access Point Model WAX204 November 2020 202-12147-01 NETGEAR, Inc. 350 E. Plumeria Drive San Jose, CA 95134, USA - Netgear WAX204-WiFi | User Manual - Page 2
ce document en français canadien à https://www.netgear.com/support/download/. (If this product is sold in Canada, you can access this document in Canadian French at https://www.netgear.com/support/download/.) For regulatory compliance information including the EU Declaration of - Netgear WAX204-WiFi | User Manual - Page 3
through an Ethernet cable..........32 Use Wi-Fi Protected Setup to join the WiFi network 33 Manually join the WiFi network 33 Chapter 3 Manually Set Up Internet Settings Use the Setup Wizard 36 Manually set up the access point Internet connection [router mode 37 Specify a dynamic or fixed WAN IP - Netgear WAX204-WiFi | User Manual - Page 4
the PIN method 73 Chapter 5 Security, Firewall, and Access Rules Firewall WAN settings [router mode 76 Manage port scan protection and denial of service protection [router mode 76 Set up a default DMZ server [router mode 77 Manage IGMP proxying [router mode 78 Manage NAT filtering [router mode - Netgear WAX204-WiFi | User Manual - Page 5
Remove a service blocking rule [router mode 94 Assign a trusted device [router mode 95 Schedule blocking [router mode 96 Set up security event email notifications 97 Chapter 6 Optimize Performance Enable QoS and automatically set the Internet bandwidth........100 Enable QoS and manually set the - Netgear WAX204-WiFi | User Manual - Page 6
button to return to factory defaults 138 Use the local browser UI to return to factory defaults 140 Time and Network Time Protocol server 142 Manually set the time zone and adjust the daylight saving time 142 Change the Network Time Protocol server 143 Logs...144 Specify which activities the - Netgear WAX204-WiFi | User Manual - Page 7
point and connect to a VPN server [router mode 174 Disconnect the access point from the VPN server [router mode].176 Chapter 11 VPN Server and Service with OpenVPN [Router Mode] Enable and configure OpenVPN and VPN client access on the access point [router mode 178 OpenVPN client utility and VPN - Netgear WAX204-WiFi | User Manual - Page 8
a local web server public [router mode 213 Port triggering for services and applications [router mode]......214 Add a port triggering rule [router device 224 Standard LED behavior when the access point is powered on...225 Troubleshoot with the LEDs 225 Power LED is off 225 Power LED does not - Netgear WAX204-WiFi | User Manual - Page 9
Check the Internet WAN IP address [router mode 231 Check or manually start the PPPoE connection [router mode].233 Troubleshoot Internet browsing 234 Troubleshoot the WiFi connectivity 235 Changes are not saved 236 Troubleshoot your network using the ping utility of your computer or mobile device - Netgear WAX204-WiFi | User Manual - Page 10
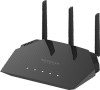
the antennas for best WiFi performance • Access point label Note: For more information about the topics that are covered in this manual, visit the support website at netgear.com/support/. Note: Firmware updates with new features and bug fixes are made available from time to time at netgear.com - Netgear WAX204-WiFi | User Manual - Page 11
, the top panel contains the Power LED, Internet LED, WiFi LED, LAN LED, and WPS LED. Figure 1. Top panel with LEDs Hardware Overview 11 User Manual - Netgear WAX204-WiFi | User Manual - Page 12
. For more information, see Use Wi-Fi Protected Setup to join the WiFi network on page 33. Off. WPS is disabled. Hardware Overview 12 User Manual - Netgear WAX204-WiFi | User Manual - Page 13
in access point mode, see Connect the access point to a router and log in for the first time on page 22. Hardware Overview 13 User Manual - Netgear WAX204-WiFi | User Manual - Page 14
name (SSID), default WiFi passphrase, serial number and MAC address of the access point, and other information. Figure 3. Access point label Hardware Overview 14 User Manual - Netgear WAX204-WiFi | User Manual - Page 15
2 Installation and Initial Log-in This chapter describes how you can install and access the access point in your network and go through the initial log-in process. By default, the access point is in router mode. You can also change the mode to access point mode. IMPORTANT: To obtain full and - Netgear WAX204-WiFi | User Manual - Page 16
receives its IP address settings from your Internet service provider (ISP) and delivers IP address settings mode to access point mode. The router must support a DHCP server, or another DHCP server must through dynamic DHCP (the default setting), a manually specified static IP address, an IP address - Netgear WAX204-WiFi | User Manual - Page 17
Internet security settings, including the option to block sites and services, and the option to set up port forwarding and port triggering rules. • VPN service and VPN client. • Internet traffic meter. • Bridge port Get a registration key on page 26. Installation and Initial Log-in 17 User Manual - Netgear WAX204-WiFi | User Manual - Page 18
connection is dynamic DHCP, the access point automatically receives an IP address from your Internet service provider (ISP) and you do need to provide any IP address information. This type which type of WAN connection your Internet service uses, contact your ISP before you start the following procedure. Installation - Netgear WAX204-WiFi | User Manual - Page 19
the first time: 1. Unplug your modem's power, leaving the modem connected to the wall jack for your Internet service. 2. If the modem uses a battery backup, remove the battery. 3. Connect the Ethernet cable to the yellow solid green or blinks green. Installation and Initial Log-in 19 User Manual - Netgear WAX204-WiFi | User Manual - Page 20
on page 228. 10. Follow the prompts. Note the following: • Trouble connecting to the Internet? If the access point does not connect to the Internet, see Troubleshoot Internet browsing on page 234. • WAN connection type. If the your certificate trust Installation and Initial Log-in 20 User Manual - Netgear WAX204-WiFi | User Manual - Page 21
to this website (not recommended) link. - Microsoft Edge. If Microsoft Edge displays a There is a problem with this website's security certificate message or a similar warning, select Details > Go on to the webpage and monitor the access point. Installation and Initial Log-in 21 User Manual - Netgear WAX204-WiFi | User Manual - Page 22
yellow Internet port on the access point. 2. Connect the other end of the cable to a LAN port on your network router. Your network router must support a DHCP server so that it assigns an IP address to the access pointand its clients and provides Internet access. 3. Power on the access point and - Netgear WAX204-WiFi | User Manual - Page 23
page 229. 6. Follow the prompts. Note the following: • Trouble connecting to the Internet? If the access point does not connect to the Internet, see Troubleshoot Internet browsing on page 234. • WAN connection type. If the can choose the questions). Installation and Initial Log-in 23 User Manual - Netgear WAX204-WiFi | User Manual - Page 24
to this website (not recommended) link. - Microsoft Edge. If Microsoft Edge displays a There is a problem with this website's security certificate message or a similar warning, select Details > Go on to the webpage. up the access point and complete Installation and Initial Log-in 24 User Manual - Netgear WAX204-WiFi | User Manual - Page 25
now assigned to the access point. b. Save the LAN IP address of the access point for later use. Installation and Initial Log-in 25 User Manual - Netgear WAX204-WiFi | User Manual - Page 26
website connectivity problems. If you experience connectivity problems, see one of the following sections: • You cannot log in to the access point [access point mode] on page 229 • Troubleshoot Internet browsing the serial number of the access point. Installation and Initial Log-in 26 User Manual - Netgear WAX204-WiFi | User Manual - Page 27
the access point or you might log in to the other NETGEAR device, depending on your network situation. Installation and Initial Log-in 27 User Manual - Netgear WAX204-WiFi | User Manual - Page 28
NETGEAR Insight, and download and install the app. 2. Connect your mobile device to the access point WiFi network. Installation and Initial Log-in 28 User Manual - Netgear WAX204-WiFi | User Manual - Page 29
IP address of the access point displays in the device list. 5. Save the IP address for future use. Installation and Initial Log-in 29 User Manual - Netgear WAX204-WiFi | User Manual - Page 30
to this website (not recommended) link. • Microsoft Edge. If Microsoft Edge displays a There is a problem with this website's security certificate message or a similar warning, select Details > Go on to the webpage. .net in the address field. Installation and Initial Log-in 30 User Manual - Netgear WAX204-WiFi | User Manual - Page 31
is case-sensitive. The BASIC Home page displays. 4. In the upper right corner, select a language from the menu. Installation and Initial Log-in 31 User Manual - Netgear WAX204-WiFi | User Manual - Page 32
network (LAN). A message might display on your computer screen to notify you that an Ethernet cable is connected. Installation and Initial Log-in 32 User Manual - Netgear WAX204-WiFi | User Manual - Page 33
to the network are Wi-Fi certified and support WPS. During the connection process, the client (its WiFi LED is lit). 2. Check the WPS instructions for your computer or WiFi device. 3. Press the WPS network of the access point. Manually join the WiFi network You can manually add a WiFi device such as - Netgear WAX204-WiFi | User Manual - Page 34
default WiFi password. 5. Click the Connect button. The device connects to the WiFi network of the access point. Installation and Initial Log-in 34 User Manual - Netgear WAX204-WiFi | User Manual - Page 35
setup, you can use the Setup Wizard at any time. If the access point is in router mode, you can specify the WAN (Internet) settings manually, including IPv6 settings. For information about changing the LAN settings if the access point is in router mode, see LAN IP address settings [router mode - Netgear WAX204-WiFi | User Manual - Page 36
Wizard to detect the WAN IP address that is issued by your Internet service provider (ISP) or an existing router in your network and automatically set can then set up the Internet connection manually. For more information, see Manually set up the access point Internet connection [router mode] on page - Netgear WAX204-WiFi | User Manual - Page 37
. When the access point connects to the Internet, you are prompted to change the local device password (also referred to as the admin password). Manually set up the access point Internet connection [router mode] If the access point is in router mode, you can view or change the access point - Netgear WAX204-WiFi | User Manual - Page 38
) string, enter it in the Client Identifier String (option 61) field. If your ISP did not give you a client ID string, leave this field blank. Manually Set Up Internet 38 Settings User - Netgear WAX204-WiFi | User Manual - Page 39
the following sections: • You cannot access the Internet [router mode] on page 231 • Troubleshoot Internet browsing on page 234 Specify a PPPoE Internet connection that uses a login [router mode] Select BASIC > Internet. The Internet Setup page displays. Manually Set Up Internet 39 Settings User - Netgear WAX204-WiFi | User Manual - Page 40
enter the password that you use to log in to your Internet service. 9. If your ISP requires a service name, type it in the Service Name (if Required) field. 10. From the Connection Mode menu, select Always On, Dial on Demand, or Manually Connect. 11. If you select Dial on Demand from the Connection - Netgear WAX204-WiFi | User Manual - Page 41
of the following sections: • You cannot access the Internet [router mode] on page 231 • Troubleshoot Internet browsing on page 234 Specify a PPTP or L2TP Internet connection that uses a login [ Select BASIC > Internet. The Internet Setup page displays. Manually Set Up Internet 41 Settings User - Netgear WAX204-WiFi | User Manual - Page 42
field, enter the password that you use to log in to your Internet service. 9. If your ISP requires a service name, type it in the Service Name field. 10. From the Connection Mode menu, select Always On, Dial on Demand, or Manually Connect. 11. If you select Dial on Demand from the Connection Mode - Netgear WAX204-WiFi | User Manual - Page 43
mode] on page 231 • Troubleshoot Internet browsing on page 234 IPv6 Internet connections and IPv6 addresses [router mode] The access point supports multiple types of IPv6 Internet connections an IPv6 fixed Internet connection [router mode] on page 52. Manually Set Up Internet 43 Settings User - Netgear WAX204-WiFi | User Manual - Page 44
login window but displays a security message and does not let you proceed, see Log in to the access point after initial setup on page 30. Manually Set Up Internet 44 Settings User - Netgear WAX204-WiFi | User Manual - Page 45
Server. This method passes more information to LAN devices but some IPv6 systems might not support the DHCPv6 client function. • Auto Config. This is the default setting. This setting router inspects UDP packets only. 9. Click the Apply button. Manually Set Up Internet 45 Settings User - Netgear WAX204-WiFi | User Manual - Page 46
the IPv6 address. If no address is acquired, the field displays Not Available. 6. (Optional) In the DHCP User Class (if Required) field, enter a host name. Manually Set Up Internet 46 Settings User - Netgear WAX204-WiFi | User Manual - Page 47
DHCP Server. This method passes more information to LAN devices but some IPv6 systems might not support the DHCPv6 client function. • Auto Config. This is the default setting. This setting specifies . 12. Click the Apply button. Your settings are saved. Manually Set Up Internet 47 Settings User - Netgear WAX204-WiFi | User Manual - Page 48
static IPv4 address of the remote relay router. Your IPv6 ISP usually provides this address. 7. Select an IPv6 Domain Name Server (DNS) Address radio button: Manually Set Up Internet 48 Settings User - Netgear WAX204-WiFi | User Manual - Page 49
systems might not support the DHCPv6 client service provider's IPv4 network. 6rd (also referred to as IPv6 rapid deployment) uses the service service provider's network and is under direct control of the service provider. The IPv6 service the service provider's RFC5969 standard, supporting two ways to - Netgear WAX204-WiFi | User Manual - Page 50
(IPv6 Rapid Development) Configuration. The access point detects the service provider's IPv4 network and attempts to establish an IPv6 6rd does not automatically receive the 6rd parameters, you might need to enter them manually. • Router's IPv6 Address on LAN. This field shows the IPv6 address - Netgear WAX204-WiFi | User Manual - Page 51
information to devices on your LAN than the Auto Config method, but some IPv6 systems might not support the DHCPv6 client function. • Auto Config. This method lets the access point assign IPv6 addresses to point does not process any IPv6 header packets. Manually Set Up Internet 51 Settings User - Netgear WAX204-WiFi | User Manual - Page 52
know the IP address, see Find the IP address of the access point when you cannot use routerlogin.net on page 27. A login window displays. Manually Set Up Internet 52 Settings User - Netgear WAX204-WiFi | User Manual - Page 53
are configured for the IPv4 Internet connection on the WAN Setup page. (See Manually set up the access point Internet connection [router mode] on page 37.) passes more information to LAN devices but some IPv6 systems might not support the DHCPv6 client function. • Auto Config. This is the default - Netgear WAX204-WiFi | User Manual - Page 54
on LAN. This field shows the IPv6 address that is acquired for the access point's LAN interface. The number after the slash (/) is the length Manually Set Up Internet 54 Settings User - Netgear WAX204-WiFi | User Manual - Page 55
DHCP Server. This method passes more information to LAN devices but some IPv6 systems might not support the DHCPv6 client function. • Auto Config. This is the default setting. This setting specifies . 12. Click the Apply button. Your settings are saved. Manually Set Up Internet 55 Settings User - Netgear WAX204-WiFi | User Manual - Page 56
want to use the same login information for IPv6, select the Use the same Login information as IPv4 PPPoE check box and go to Step 8. Manually Set Up Internet 56 Settings User - Netgear WAX204-WiFi | User Manual - Page 57
manually configure the PPPoE settings for IPv6, specify the following settings: • Login. Enter the login name that your ISP gave you. • Password. Enter the password for the ISP connection. • Service Name (if Required). Enter a service some IPv6 systems might not support the DHCv6 client function. • - Netgear WAX204-WiFi | User Manual - Page 58
4 Basic WiFi and Radio Features This chapter describes how you can manage the basic WiFi and radio settings of the access point. For information about the advanced WiFi and radio settings, see Advanced WiFi and Radio Features on page 187. Tip: If you want to change the WiFi network settings, use a - Netgear WAX204-WiFi | User Manual - Page 59
change the names of the default SSIDs and the default WiFi passwords. For each WiFi network, the access point simultaneously supports the 2.4 GHz band for 802.11b/g/n/ax devices and the 5 GHz band for 802.11a/n/ac/ax devices. . A login window displays. Basic WiFi and Radio Features 59 User Manual - Netgear WAX204-WiFi | User Manual - Page 60
network. By default, the Wireless 1 network is enabled and the other two WiFi networks are disabled. The SSID (service set identifier) is the WiFi network name. If you do not change the SSID, the default SSID displays, in broadcast on both radio bands. Basic WiFi and Radio Features 60 User Manual - Netgear WAX204-WiFi | User Manual - Page 61
join the WiFi network. WPA2 provides a secure connection but some legacy WiFi devices do not detect WPA2 and support only WPA. If your network includes such older devices, select WPA-Personal [TKIP] + WPA2-Personal [AES] clear text, click the eye icon. Basic WiFi and Radio Features 61 User Manual - Netgear WAX204-WiFi | User Manual - Page 62
+ WPA2-Personal [AES] This option, which is the same as WPA2-PSK/WPA-PSK, enables WiFi devices that support either WPA2 or WPA to join the WiFi network. This option uses AES and TKIP encryption. WPA-PSK (which uses current settings for your network. Basic WiFi and Radio Features 62 User Manual - Netgear WAX204-WiFi | User Manual - Page 63
Configure WPA and WPA2 Enterprise WiFi security with a RADIUS server Remote Authentication Dial In User Service (RADIUS) is an enterprise-level method for centralized Authentication, Authorization, and Accounting (AAA) WPA2 Enterprise settings display. Basic WiFi and Radio Features 63 User Manual - Netgear WAX204-WiFi | User Manual - Page 64
TKIP] + WPA2 [AES] security. • WPA [TKIP] +WPA2 [AES]. This type of security enables WiFi devices that support either WPA or WPA2 to join the WiFi network. This is the default mode. 8. In the RADIUS Server IP Address network name (SSID) and password? Basic WiFi and Radio Features 64 User Manual - Netgear WAX204-WiFi | User Manual - Page 65
them. • Disable. Disables the WiFi network. By default, the Wireless 1 network is enabled, but you can disable it. Basic WiFi and Radio Features 65 User Manual - Netgear WAX204-WiFi | User Manual - Page 66
clear the check box, the WiFi network hides the SSID. 7. Click the Apply button. Your settings are saved. Basic WiFi and Radio Features 66 User Manual - Netgear WAX204-WiFi | User Manual - Page 67
Home page displays. 4. Select BASIC > Wireless. The Wireless Network page displays. 5. Select the WiFi network (Wireless 2 or Wireless 3). Basic WiFi and Radio Features 67 User Manual - Netgear WAX204-WiFi | User Manual - Page 68
, see Find the IP address of the access point when you cannot use routerlogin.net on page 27. Basic WiFi and Radio Features 68 User Manual - Netgear WAX204-WiFi | User Manual - Page 69
device that is connected to the access point network. 2. Enter http//www.routerlogin.net in the address field. Basic WiFi and Radio Features 69 User Manual - Netgear WAX204-WiFi | User Manual - Page 70
only enable or disable both radios simultaneously. That means that you cannot enable or disable each radio individually. Basic WiFi and Radio Features 70 User Manual - Netgear WAX204-WiFi | User Manual - Page 71
check box. • Turn on the radio. Select the Enable Wireless Router Radio check box. 7. Click the Apply button. Basic WiFi and Radio Features 71 User Manual - Netgear WAX204-WiFi | User Manual - Page 72
the PIN method, you must know the PIN of the computer or device that you are trying to connect. WPS supports WPA and WPA2 WiFi security. If your WiFi network is open (no WiFi security is set, which is not Enter the access point local device password. Basic WiFi and Radio Features 72 User Manual - Netgear WAX204-WiFi | User Manual - Page 73
IP address of the access point when you cannot use routerlogin.net on page 27. A login window displays. Basic WiFi and Radio Features 73 User Manual - Netgear WAX204-WiFi | User Manual - Page 74
connected to the access point's WiFi network, select BASIC > Attached Devices. The WiFi device displays on the page. Basic WiFi and Radio Features 74 User Manual - Netgear WAX204-WiFi | User Manual - Page 75
: • Firewall WAN settings [router mode] • Network access control lists • Block specific Internet sites [router mode] • Block specific applications and services from the Internet [router mode] • Assign a trusted device [router mode] • Schedule blocking [router mode] • Set up security event email - Netgear WAX204-WiFi | User Manual - Page 76
access point is in router mode, the basic firewall settings let you manage port scan protection and denial of service (DoS) protection, specify whether the access point can respond to a ping from the Internet (WAN) port, Home page displays. Security, Firewall, and Access 76 Rules User Manual - Netgear WAX204-WiFi | User Manual - Page 77
discards incoming traffic from the Internet that is not a response to one of your local computers or a service or application for which you set up a port forwarding or port triggering rule (see Port Forwarding and 27. A login window displays. Security, Firewall, and Access 77 Rules User Manual - Netgear WAX204-WiFi | User Manual - Page 78
is the one that you specified. The local device password is case-sensitive. The BASIC Home page displays. Security, Firewall, and Access 78 Rules User Manual - Netgear WAX204-WiFi | User Manual - Page 79
on the LAN from attacks from the Internet but might prevent some Internet services, point-to-point applications, or multimedia applications from working. Open NAT from attacks from the Internet but might prevent some Internet services, point-to-point Security, Firewall, and Access 79 Rules User - Netgear WAX204-WiFi | User Manual - Page 80
ALG check box. The SIP ALG is enabled by default. 6. Click the Apply button. Your settings are saved. Security, Firewall, and Access 80 Rules User Manual - Netgear WAX204-WiFi | User Manual - Page 81
in to the access point after initial setup on page 30. 3. Enter the access point local device password. Security, Firewall, and Access 81 Rules User Manual - Netgear WAX204-WiFi | User Manual - Page 82
device in the table. b. Click the Edit button. The Edit Allowed Device or Edit Blocked Device page displays. Security, Firewall, and Access 82 Rules User Manual - Netgear WAX204-WiFi | User Manual - Page 83
is case-sensitive. The BASIC Home page displays. 4. Select ADVANCED > Security > Access Control. The Access Control page displays. Security, Firewall, and Access 83 Rules User Manual - Netgear WAX204-WiFi | User Manual - Page 84
defines which WiFi and wired devices are blocked from accessing your network. You do so by adding the Security, Firewall, and Access 84 Rules User Manual - Netgear WAX204-WiFi | User Manual - Page 85
for the device. b. Click the Remove from the list button. The device is removed from the blocked list. Security, Firewall, and Access 85 Rules User Manual - Netgear WAX204-WiFi | User Manual - Page 86
IP address of the access point when you cannot use routerlogin.net on page 27. A login window displays. Security, Firewall, and Access 86 Rules User Manual - Netgear WAX204-WiFi | User Manual - Page 87
names field (which is also referred to as the blocked list). 8. To add more keywords or domains, repeat the previous two steps. The keyword list supports up to 32 entries. 9. Click the Apply button. Your settings are saved. Security, Firewall, and Access 87 Rules User - Netgear WAX204-WiFi | User Manual - Page 88
. The keyword or domain is removed from the blocked list. 7. Click the Apply button. Your settings are saved. Security, Firewall, and Access 88 Rules User Manual - Netgear WAX204-WiFi | User Manual - Page 89
are saved. Block specific applications and services from the Internet [router mode] If the access point is in router mode, you can add service blocking rules to prevent access from your LAN to specific services and applications on the Internet. In addition, you can - Netgear WAX204-WiFi | User Manual - Page 90
service blocking rule for a predefined service or application [router mode] If the access point is in router mode, it lists many predefined services and 4. Select ADVANCED > Security > Block Services. The Block Services page displays. 5. In the Services Blocking section, specify how the access point - Netgear WAX204-WiFi | User Manual - Page 91
uses. You can usually find this information by contacting the publisher of the service or application or through online user or news groups. 2. Launch a web browser from a computer or mobile device that is connected to the access point network. Security, Firewall, and Access 91 Rules User Manual - Netgear WAX204-WiFi | User Manual - Page 92
Services. The Block Services page displays. 6. The first time that you add an outbound firewall rule, in the Services Services Setup page displays. 8. From the Service Type menu, select User Defined. 9. Specify a new service UDP) that is associated with the service or application. If you are unsure, - Netgear WAX204-WiFi | User Manual - Page 93
added to the Service Table on the Block Services page. Change a service blocking rule [router mode] you can change an existing service blocking rule. To change a service blocking rule: 1. Launch a Security > Block Services. The Block Services page displays. 5. In the Service Table, select the - Netgear WAX204-WiFi | User Manual - Page 94
the settings, see Add a service blocking rule for a custom service or application [router mode] you can remove a service blocking rule that you no longer need. To remove a service blocking rule: 1. > Security > Block Services. The Block Services page displays. 5. In the Service Table, select the - Netgear WAX204-WiFi | User Manual - Page 95
the DHCP server address pool [router mode] on page 110. 7. Click the Apply button. Your settings are saved. Security, Firewall, and Access 95 Rules User Manual - Netgear WAX204-WiFi | User Manual - Page 96
in router mode, you can set up a schedule that you can apply to keyword and domain blocking, Internet service and application blocking, or both. The schedule can specify the days and times that these features are active. check box is selected. Security, Firewall, and Access 96 Rules User Manual - Netgear WAX204-WiFi | User Manual - Page 97
logs of router activity. The log records activity and security events such as attempts to access blocked sites or services. To set up email notifications: 1. Launch a web browser from a computer or mobile device that is (such as mail.myISP.com). Security, Firewall, and Access 97 Rules User Manual - Netgear WAX204-WiFi | User Manual - Page 98
the access point cannot email the log and the log buffer fills, the access point overwrites the log. Security, Firewall, and Access 98 Rules User Manual - Netgear WAX204-WiFi | User Manual - Page 99
through the access point. The chapter contains the following sections: • Enable QoS and automatically set the Internet bandwidth • Enable QoS and manually set the Internet bandwidth • Enable or disable the automatic update of the Performance Optimization Database • Manage WiFi Multimedia (WMM) for - Netgear WAX204-WiFi | User Manual - Page 100
automated speedtest. Although can you manually set the download and upload speed (see Enable QoS and manually set the Internet bandwidth on Home page displays. 4. Select BASIC > Quality of Service. The QoS Setup page displays. By default, Quality of Service (QoS) is enabled, and the Enable QoS check - Netgear WAX204-WiFi | User Manual - Page 101
on the access point network and change device information on page 154. Enable QoS and manually set the Internet bandwidth If you enable QoS, we recommend that you use the automatic method BASIC Home page displays. 4. Select BASIC > Quality of Service. Optimize Performance 101 User Manual - Netgear WAX204-WiFi | User Manual - Page 102
find out what bandwidths your Internet connection supports, click the Take A Speedtest button. windows displays. 7. Click the OK button. The fields for manual configuration display. 8. In the Download Speed (Mbps) field, the most popular applications and services for the implementation of dynamic - Netgear WAX204-WiFi | User Manual - Page 103
-sensitive. The BASIC Home page displays. 4. Select BASIC > Quality of Service. The QoS Setup page displays. In the Performance Optimization Database section, the normal traffic. For WMM to function correctly, WiFi clients must also support WMM. By enabling WMM, you allow WMM to control upstream - Netgear WAX204-WiFi | User Manual - Page 104
is case-sensitive. The BASIC Home page displays. 4. Select ADVANCED > Setup > QoS Setup. The QoS Setup page displays. 5. Select the WMM tab. The Quality of Service page displays. 6. Clear the Enable WMM (Wi-Fi multimedia) settings check box for the radio to disable WWM, or clear both check boxes for - Netgear WAX204-WiFi | User Manual - Page 105
access the network and connect to other devices as needed. UPnP devices can automatically discover the services from other registered UPnP devices on the network. If the access point is in router mode a device cannot control port forwarding on the access point. Optimize Performance 105 User Manual - Netgear WAX204-WiFi | User Manual - Page 106
access point is in router mode and you enabled QoS (Enable QoS and automatically set the Internet bandwidth on page 100 or Enable QoS and manually set the Internet bandwidth on page 101), the access point automatically assigns a priority to any device that connects to it. By default, an attached - Netgear WAX204-WiFi | User Manual - Page 107
currently on the access point network and change device information on page 154. 8. Click the Apply button. Your settings are saved. Optimize Performance 107 User Manual - Netgear WAX204-WiFi | User Manual - Page 108
7 Network Settings This chapter describes how you can manage various network settings of the access point. The chapter includes the following sections: • LAN IP address settings [router mode] • Change the access point network device name • Reserved LAN IP addresses [router mode] • Static routes • - Netgear WAX204-WiFi | User Manual - Page 109
, see Find the IP address of the access point when you cannot use routerlogin.net on page 27. A login window displays. Network Settings 109 User Manual - Netgear WAX204-WiFi | User Manual - Page 110
to any LAN device that requests DHCP: • An IP address from the range that you define • Subnet mask • Gateway IP address Network Settings 110 User Manual - Netgear WAX204-WiFi | User Manual - Page 111
reconnect to get a new (or the same) IP address from the DHCP server. 8. Click the Apply button. Your settings are saved. Network Settings 111 User Manual - Netgear WAX204-WiFi | User Manual - Page 112
server and do not specify another DHCP server or no other DHCP server is available on your network, you must set your computer IP addresses manually so that they can access the access point. To disable the DHCP server: 1. Launch a web browser from a computer or mobile device that is connected to - Netgear WAX204-WiFi | User Manual - Page 113
. 6. From the RIP Version menu, select the RIP version: • Disabled. The RIP version is disabled. This is the default setting. • RIP-1. This format is universally supported. It is adequate for most networks, unless you are using an unusual network setup. Network Settings 113 User - Netgear WAX204-WiFi | User Manual - Page 114
displays. 5. Type a new name in the Device Name field. You can type up to 15 alphanumeric characters. 6. Click the Apply button. Network Settings 114 User Manual - Netgear WAX204-WiFi | User Manual - Page 115
> LAN Setup. The LAN Setup page displays. 5. Below the Address Reservation table, click the Add button. The Address Reservation page displays. Network Settings 115 User Manual - Netgear WAX204-WiFi | User Manual - Page 116
> Setup > LAN Setup. The LAN Setup page displays. 5. In the Address Reservation table, select the radio button for the reserved address. Network Settings 116 User Manual - Netgear WAX204-WiFi | User Manual - Page 117
Address Reservation table, select the radio button for the reserved address. 6. Click the Delete button. The IP address entry is removed. Network Settings 117 User Manual - Netgear WAX204-WiFi | User Manual - Page 118
Access Point WAX204 Static routes The access point supports IPv4 static routes. Static routes can provide detailed denied by the company's firewall. In this case, you must define a static route, instructing your router that 203.0.113.0 is accessed through the ISDN router at 192.168.1.158 User Manual - Netgear WAX204-WiFi | User Manual - Page 119
the destination. Usually, a setting of 2 or 3 works, but if this is a direct connection, set it to 2. 10. Click the Apply button. Network Settings 119 User Manual - Netgear WAX204-WiFi | User Manual - Page 120
route on page 118. 8. Click the Apply button. The route settings are updated in the table on the Static Routes page. Network Settings 120 User Manual - Netgear WAX204-WiFi | User Manual - Page 121
firewall. Based on what your Internet service provider (ISP) requires, for the device to connect to the ISP's network directly, you can enable a bridge either between the device and the access point's Internet (WAN) port or between the device and a VLAN tag group. Network Settings 121 User Manual - Netgear WAX204-WiFi | User Manual - Page 122
ISP provides directions on how to set up a bridge port or VLAN tag group for IPTV, Internet service, or both, follow those directions. Note: The information in this section and subsections does not apply if ADVANCED > Advanced Setup > VLAN / Bridge Settings. Network Settings 122 User Manual - Netgear WAX204-WiFi | User Manual - Page 123
sent between the IPTV device and the access point Internet (WAN) port to circumvent the access point's NAT service, which otherwise could drop the packets. The access point includes a default VLAN tag group with the name //www.routerlogin.net in the address field. Network Settings 123 User Manual - Netgear WAX204-WiFi | User Manual - Page 124
LAN port (Port 1, Port 2, Port 3, or Port 4) or WiFi network (Wireless1, Wireless2, or Wireless2) to which the device that must circumvent the access point's NAT service is connected. You must select at least one LAN port or one WiFi network. You can select more than one LAN port and WiFi network - Netgear WAX204-WiFi | User Manual - Page 125
: • You experience problems connecting to your ISP or other Internet service, and the technical support of the ISP recommends problems. • You used a program to optimize MTU for performance reasons and now you are experiencing connectivity or performance problems. Network Settings 125 User Manual - Netgear WAX204-WiFi | User Manual - Page 126
Point WAX204 Note: An incorrect MTU setting can cause Internet communication problems. For example, you might not be able to access certain bytes. 6. Click the Apply button. Your settings are saved. If you suspect an MTU problem, a common solution is to change the MTU to 1400. If you are willing to - Netgear WAX204-WiFi | User Manual - Page 127
size to use for pinging. (Larger packets are fragmented.) Used in some DHCP environments. Used in PPTP environments or with VPN. Network Settings 127 User Manual - Netgear WAX204-WiFi | User Manual - Page 128
8 Maintain and Monitor This chapter describes how you can maintain the access point by changing the password for local login, by managing the firmware, configuration file, and logs, and by setting up the traffic meter. The chapter also describes how you can monitor the access point and its network - Netgear WAX204-WiFi | User Manual - Page 129
You can log in to the access point and check if new firmware is available, or you can manually load a specific firmware version to your access point. Let the access point check for new firmware and The Firmware Update page displays. 5. Click the Check button. Maintain and Monitor 129 User Manual - Netgear WAX204-WiFi | User Manual - Page 130
Home page displays. The version firmware is stated in the Firmware Version field at the top right of the page. Maintain and Monitor 130 User Manual - Netgear WAX204-WiFi | User Manual - Page 131
to the access point using an Ethernet connection to update the firmware. To download new firmware manually and update the access point manually: 1. Visit netgear.com/support/download/ and locate the support page for the router. 2. If available, download the new firmware to your computer or mobile - Netgear WAX204-WiFi | User Manual - Page 132
Home page displays. The version firmware is stated in the Firmware Version field at the top right of the page. Maintain and Monitor 132 User Manual - Netgear WAX204-WiFi | User Manual - Page 133
file on your computer. The backup file ends in .cfg. 7. Follow the directions of your browser to save the file. Maintain and Monitor 133 User Manual - Netgear WAX204-WiFi | User Manual - Page 134
not turn off the access point. Wait until the access point finishes restarting and the Power LED turns solid green. Maintain and Monitor 134 User Manual - Netgear WAX204-WiFi | User Manual - Page 135
device password is case-sensitive. The BASIC Home page displays. 4. Select ADVANCED > Administration > Set Password. The Set Password page displays. Maintain and Monitor 135 User Manual - Netgear WAX204-WiFi | User Manual - Page 136
user name admin. If you forget this password, you can recover it. The recovery process is supported in the Internet Explorer, Firefox, Chrome, and Safari browsers. You can change the password recovery questions > Set Password. The Set Password page displays. Maintain and Monitor 136 User Manual - Netgear WAX204-WiFi | User Manual - Page 137
three local login failures occur, you can try to recover the password. This recovery process is supported in the Internet Explorer, Firefox, Chrome, and Safari browsers. To recover your local device password: button. A window displays your recovered password. Maintain and Monitor 137 User Manual - Netgear WAX204-WiFi | User Manual - Page 138
settings and reset the registration status. Return the access point to factory default settings and reset the NETGEAR registration status Maintain and Monitor 138 User Manual - Netgear WAX204-WiFi | User Manual - Page 139
the Reset button for more than 10 seconds. This option requires you to first contact NETGEAR support at netgear.com/support so that the NETGEAR registration status on the NETGEAR server can be reset. Then, you can reboots. This process takes about two minutes. Maintain and Monitor 139 User Manual - Netgear WAX204-WiFi | User Manual - Page 140
access point under a different name or account. This option requires two steps: 1. Contact NETGEAR support at netgear.com/support so that the NETGEAR registration status on the NETGEAR server can be reset. 2. Return the access the access point. If you do not Maintain and Monitor 140 User Manual - Netgear WAX204-WiFi | User Manual - Page 141
to factory default settings and unregister the device. This option requires you to first contact NETGEAR support at netgear.com/support so that the NETGEAR registration status on the NETGEAR server can be reset. Then, you can the Power LED turns solid green. Maintain and Monitor 141 User Manual - Netgear WAX204-WiFi | User Manual - Page 142
time settings from a NETGEAR Network Time Protocol (NTP) server. You can change to another NTP server or set the time zone and daylight saving time manually. Manually set the time zone and adjust the daylight saving time The access point might detect the time zone automatically or you might need to - Netgear WAX204-WiFi | User Manual - Page 143
over the Internet to the new NTP server, the date and time that display on the page might be adjusted. Maintain and Monitor 143 User Manual - Netgear WAX204-WiFi | User Manual - Page 144
default, all check boxes are selected, and the following activities are logged: • Attempted access to allowed sites • Attempted access to blocked sites and services • Connections to the local browser UI of the access point • Router operations such as startup, getting the time, and so on • Known DoS - Netgear WAX204-WiFi | User Manual - Page 145
WAX204 • Port forwarding and port triggering • WiFi access • Scheduled deactivation of the WiFi signal • VPN service 6. Clear the check boxes that correspond to the activities that you do not want to be logged. log entries onscreen, click the Refresh button. Maintain and Monitor 145 User Manual - Netgear WAX204-WiFi | User Manual - Page 146
specified. The local device password is case-sensitive. The BASIC Home page displays. 4. Select ADVANCED. The ADVANCED Home page displays. Maintain and Monitor 146 User Manual - Netgear WAX204-WiFi | User Manual - Page 147
, a green circle displays if the network is enabled and secured. • Red circle. Settings are disabled, a problem exists, or the connection is down. For a WiFi network, a red circle displays if the network is disabled DHCP server [router mode] on page 112). Maintain and Monitor 147 User Manual - Netgear WAX204-WiFi | User Manual - Page 148
) port. IP Address The WAN IP address that the access point receives from your ISP (through your modem) or the WAN IP address that you manually configured. Connection The type of Internet connection that the access point uses, which can be DHCP (the default setting), Static IP, PPPoE, PPTP, or - Netgear WAX204-WiFi | User Manual - Page 149
device password is the one that you specified. The local device password is case-sensitive. The BASIC Home page displays. Maintain and Monitor 149 User Manual - Netgear WAX204-WiFi | User Manual - Page 150
if the network is enabled and secured. • Red circle. Settings are disabled, a problem exists, or the connection is down. For a WiFi network, a red circle displays static (fixed) IP address that you manually configured. IP Subnet Mask The IP subnet mask that the access point uses. Maintain - Netgear WAX204-WiFi | User Manual - Page 151
or mobile device that is connected to the access point network. 2. Enter http//www.routerlogin.net in the address field. Maintain and Monitor 151 User Manual - Netgear WAX204-WiFi | User Manual - Page 152
IP address is a LAN IP address. In router mode, the IP address is a WAN IP address. • DNS Server. The IP address of the Domain Name Service server that provides translation of network names to IP addresses. Maintain and Monitor 152 User - Netgear WAX204-WiFi | User Manual - Page 153
Port pane (in router mode) or in the LAN Port pane (in access point mode), click the Show Statistics button. Maintain and Monitor 153 User Manual - Netgear WAX204-WiFi | User Manual - Page 154
clear. - RxPkts. The number of packets received on this port since reset or manual clear. - Collisions. The number of collisions on this port since reset or manual clear. - Tx B/s. The current transmission (outbound) bandwidth used on the WAN and LAN ports. - Rx B/s. The current reception (inbound - Netgear WAX204-WiFi | User Manual - Page 155
the device in the network. • If you enabled QoS (see Enable QoS and automatically set the Internet bandwidth on page 100 or Enable QoS and manually set the Internet bandwidth on page 101), the page displays the detected download and upload speeds for the access point and the automatically assigned - Netgear WAX204-WiFi | User Manual - Page 156
automatically set the Internet bandwidth on page 100 or Enable QoS and manually set the Internet bandwidth on page 101), the unload speed in Mbps information displays only if the access point is in router mode and supports VPN clients devices. Field Description VPN Client Devices Device Name The - Netgear WAX204-WiFi | User Manual - Page 157
the Attached Devices page. f. If QoS is enabled (see Enable QoS and automatically set the Internet bandwidth on page 100 or Enable QoS and manually set the Internet bandwidth on page 101), select one of the following Device Priority buttons: Highest, High, Medium, or Low. g. Click the Apply button - Netgear WAX204-WiFi | User Manual - Page 158
monitor the data traffic. For more information, see View the Internet traffic volume and statistics [router mode] on page 162. Maintain and Monitor 158 User Manual - Netgear WAX204-WiFi | User Manual - Page 159
connection by field. 10. In the Traffic Counter section, set the traffic counter to begin at a specific time and date. Maintain and Monitor 159 User Manual - Netgear WAX204-WiFi | User Manual - Page 160
device password is the one that you specified. The local device password is case-sensitive. The BASIC Home page displays. Maintain and Monitor 160 User Manual - Netgear WAX204-WiFi | User Manual - Page 161
monitor the data traffic. For more information, see View the Internet traffic volume and statistics [router mode] on page 162. Maintain and Monitor 161 User Manual - Netgear WAX204-WiFi | User Manual - Page 162
data traffic and to change the polling interval, click the Traffic Status button. The Traffic Status pop-up windows displays. Maintain and Monitor 162 User Manual - Netgear WAX204-WiFi | User Manual - Page 163
Control section, clear the Disconnect and disable the Internet connection check box. 6. Click the Apply button. Your settings are saved. Maintain and Monitor 163 User Manual - Netgear WAX204-WiFi | User Manual - Page 164
device password is the one that you specified. The local device password is case-sensitive. The BASIC Home page displays. Maintain and Monitor 164 User Manual - Netgear WAX204-WiFi | User Manual - Page 165
202. 6. Click the Apply button. Your settings are saved and the access point is reconfigured in the new system mode. Maintain and Monitor 165 User Manual - Netgear WAX204-WiFi | User Manual - Page 166
LED, select the Turn off all LEDs except Power LED radio button. 7. Click the Apply button. Your settings are saved. Maintain and Monitor 166 User Manual - Netgear WAX204-WiFi | User Manual - Page 167
by using the IP address. If you use OpenVPN software to set up VPN tunnels, the access point requires an account with a Dynamic DNS service. This chapter contains the following sections: • About Dynamic DNS [router mode] • Set up a new Dynamic DNS account [router mode] • Use an existing Dynamic DNS - Netgear WAX204-WiFi | User Manual - Page 168
set up a VPN tunnel to the access point, you can get a free account with a Dynamic DNS (DDNS) service that lets you use a domain name to access your office or home network. To use this account, you must set 3. Enter the access point local device password. Dynamic DNS [Router Mode] 168 User Manual - Netgear WAX204-WiFi | User Manual - Page 169
6 and 32 characters. 11. Click the Register button. 12. Follow the onscreen instructions to register for your NETGEAR Dynamic DNS service. Use an existing Dynamic DNS account [router mode] If you already created a on page 27. A login window displays. Dynamic DNS [Router Mode] 169 User Manual - Netgear WAX204-WiFi | User Manual - Page 170
Dynamic DNS page displays. 5. Select the Use a Dynamic DNS Service check box. 6. From the Service Provider menu, select your provider. 7. Select the Yes radio . Your settings are saved. 12. To verify that your DDNS service is enabled in the access point, click the Show Status button. A pop-window - Netgear WAX204-WiFi | User Manual - Page 171
Dynamic DNS page displays. 5. Change your DDNS account settings as necessary. 6. Click the Apply button. Your settings are saved. Dynamic DNS [Router Mode] 171 User Manual - Netgear WAX204-WiFi | User Manual - Page 172
(PureVPN) so that you can obtain a license. For information about using the router as a VPN server, see VPN Server and Service with OpenVPN [Router Mode] on page 177. This chapter includes the following sections: • About setting up the access point as a VPN client [router mode] • Enable - Netgear WAX204-WiFi | User Manual - Page 173
network (VPN) to securely access your own network over the Internet when you are not home (see VPN Server and Service with OpenVPN [Router Mode] on page 177), you can also set up the access point as a VPN client to a VPN server [router mode] on page 174). VPN Client [Router Mode] 173 User Manual - Netgear WAX204-WiFi | User Manual - Page 174
access point comes with a commercial VPN service provider (HideMyAss) predefined. To use the you can select one of two predefined VPN services and establish a connection to the VPN server. To you do not have a VPN license or a predefined VPN service, do the following: a. From the VPN Server menu, - Netgear WAX204-WiFi | User Manual - Page 175
Wireless Access Point WAX204 c. Follow the instructions on the web page. d. When you obtain a license, save your user name and password for the VPN service. For more information about VPN service, click the Help Center button. 7. logs, see Logs on page 144. VPN Client [Router Mode] 175 User Manual - Netgear WAX204-WiFi | User Manual - Page 176
from the VPN server, the Disconnect button changes into the Connect button, allowing you to reestablish the VPN connection. VPN Client [Router Mode] 176 User Manual - Netgear WAX204-WiFi | User Manual - Page 177
• About setting up an OpenVPN connection [router mode] • About VPN access to your network or Internet service at your office or home [router mode] • Use a VPN tunnel to remotely access your Internet service [router mode] Note: The information in this chapter does not apply if the access point is in - Netgear WAX204-WiFi | User Manual - Page 178
the one that you specified. The local device password is case-sensitive. The BASIC Home page displays. 4. Select ADVANCED > Advanced Setup > VPN Service. The VPN Service page displays. 5. Select the Enable VPN Service check box. VPN Server and Service with 178 OpenVPN [Router Mode] User Manual - Netgear WAX204-WiFi | User Manual - Page 179
the Internet & Home Network. The VPN client can access the Internet and all sites and services on the access point network, that is, behind the access point firewall. Accessing the Internet and the access point VPN configuration VPN Server and Service with 179 OpenVPN [Router Mode] User Manual - Netgear WAX204-WiFi | User Manual - Page 180
displays. 5. Select ADVANCED > Advanced Setup > VPN Service. The VPN Service page displays. 6. Make sure that the Enable VPN Service check box is selected. For more information, see Enable the OpenVPN client utility is installed. VPN Server and Service with 180 OpenVPN [Router Mode] User Manual - Netgear WAX204-WiFi | User Manual - Page 181
access point local device password. The local device password is the one that you specified. The local device password is case-sensitive. VPN Server and Service with 181 OpenVPN [Router Mode] User Manual - Netgear WAX204-WiFi | User Manual - Page 182
For more information about using OpenVPN on a Mac, visit openvpn.net/vpn-server-resources/installation-guide-for-openvpn-connect-client-on-macos/. Install OpenVPN on an iOS device [router mode] To The BASIC Home page displays. VPN Server and Service with 182 OpenVPN [Router Mode] User Manual - Netgear WAX204-WiFi | User Manual - Page 183
Point WAX204 5. Select ADVANCED > Advanced Setup > VPN Service. The VPN Service page displays. 6. Make sure that the Enable VPN Service check box is selected. For more information, see Enable access point local device password. VPN Server and Service with 183 OpenVPN [Router Mode] User Manual - Netgear WAX204-WiFi | User Manual - Page 184
, the access point must be in router mode, and you must enable and configure OpenVPN service on the access point. Remote users must install and run OpenVPN client software on their computer the network over a VPN connection.) VPN Server and Service with 184 OpenVPN [Router Mode] User Manual - Netgear WAX204-WiFi | User Manual - Page 185
. You might want to do this if you travel to a geographic location that does not support all the Internet services that you use at your office or home. For example, your Netflix account might work at [router mode] on page 109). VPN Server and Service with 185 OpenVPN [Router Mode] User Manual - Netgear WAX204-WiFi | User Manual - Page 186
and VPN configuration files [router mode] on page 179). To remotely access your Internet service: 1. On your computer, launch the OpenVPN application. 2. Right-click the icon and select is established, launch your web browser. VPN Server and Service with 186 OpenVPN [Router Mode] User Manual - Netgear WAX204-WiFi | User Manual - Page 187
12 Advanced WiFi and Radio Features This chapter describes how you can manage the advanced WiFi and radio features of the access point. For information about the basic WiFi and radio settings, see Basic WiFi and Radio Features on page 58. Tip: If you want to change the settings of the access point's - Netgear WAX204-WiFi | User Manual - Page 188
the Apply button. Your settings are saved. The access point restarts with the settings for the new region. Advanced WiFi and Radio 188 Features User Manual - Netgear WAX204-WiFi | User Manual - Page 189
password. The local device password is the one that you specified. The local device password is case-sensitive. Advanced WiFi and Radio 189 Features User Manual - Netgear WAX204-WiFi | User Manual - Page 190
bands do not match, the WiFi settings for 2.4 GHz band overwrite the WiFi settings for the 5 GHz band. Advanced WiFi and Radio 190 Features User Manual - Netgear WAX204-WiFi | User Manual - Page 191
. 6. Click the Apply button. Your settings are saved. The radios restart and WiFi clients might need to reconnect. Advanced WiFi and Radio 191 Features User Manual - Netgear WAX204-WiFi | User Manual - Page 192
you can disable 20/40 MHz coexistence to increase the WiFi speed on the 2.4 GHz radio to the maximum supported speed for the WiFi mode. 20/40 MHz coexistence does not apply to the 5 GHz radio. To enable or is selected. 6. Click the Apply button. Advanced WiFi and Radio 192 Features User Manual - Netgear WAX204-WiFi | User Manual - Page 193
is called the Advanced Wireless Settings page. (As you scroll down on the page, the page name changes.) Advanced WiFi and Radio 193 Features User Manual - Netgear WAX204-WiFi | User Manual - Page 194
can access a WiFi network on the access point, that is, the WiFi throughput modes on the access point support 802.11ax, 802.11ac, 802.11a, 802.11n, 802.11g and 802.11b clients. You can change the ADVANCED > Advanced Setup > Wireless Settings. Advanced WiFi and Radio 194 Features User Manual - Netgear WAX204-WiFi | User Manual - Page 195
to 286 Mbps. This mode supports a 20 MHz-wide channel the default mode. This mode supports a 40 MHz-wide channel 286 Mbps. This mode supports a 20 MHz-wide channel to 573 Mbps. This mode supports a 40 MHz-wide channel supports a 80 MHz-wide channel and 1024 QAM. Advanced WiFi and Radio - Netgear WAX204-WiFi | User Manual - Page 196
is called the Advanced Wireless Settings page. (As you scroll down on the page, the page name changes.) Advanced WiFi and Radio 196 Features User Manual - Netgear WAX204-WiFi | User Manual - Page 197
device that is connected to the access point network. 2. Enter http//www.routerlogin.net in the address field. Advanced WiFi and Radio 197 Features User Manual - Netgear WAX204-WiFi | User Manual - Page 198
12:00 midnight but you can end it at 11:30 p.m. or 12:30 a.m. 8. Click the Apply button. Advanced WiFi and Radio 198 Features User Manual - Netgear WAX204-WiFi | User Manual - Page 199
improves performance when multiple MU-MIMO-capable WiFi clients transfer data at the same time. WiFi clients must support MU-MIMO. This feature is enabled by default, but you can disable it. Note: When MU-MIMO access point local device password. Advanced WiFi and Radio 199 Features User Manual - Netgear WAX204-WiFi | User Manual - Page 200
range, and throughput while minimizing interference. Explicit beamforming functions whether or not the client supports beamforming. Note: When MU-MIMO is enabled, explicit beamforming is automatically enabled and page 27. A login window displays. Advanced WiFi and Radio 200 Features User Manual - Netgear WAX204-WiFi | User Manual - Page 201
purposes. PMF, which is enabled by default, requires devices on the access point WiFi networks to support PMF. However, you can disable PMF, for example, if your network includes many legacy WiFi clients that you cannot use routerlogin.net on page 27. Advanced WiFi and Radio 201 Features User Manual - Netgear WAX204-WiFi | User Manual - Page 202
devices such as a NAS, Smart TV, NeoTV, and Blu-ray player using a high-speed (802.11ax) WiFi link. Advanced WiFi and Radio 202 Features User Manual - Netgear WAX204-WiFi | User Manual - Page 203
Access Point WAX204 Note: The Internet (WAN) and LAN ports of the WAX204 access point support gigabit speed. That means that speeds over 1 GB can be achieved only between the access point page displays. 6. Select the Bridge Mode radio button. Advanced WiFi and Radio 203 Features User Manual - Netgear WAX204-WiFi | User Manual - Page 204
check box is automatically cleared. b. Enter all static IP address information and, if applicable, static DNS address information. Advanced WiFi and Radio 204 Features User Manual - Netgear WAX204-WiFi | User Manual - Page 205
settings are intended for WiFi testing.) CAUTION: Do not change these settings unless directed by NETGEAR support or unless you are sure what the consequences are. Incorrect settings might disable the WiFi function of The BASIC Home page displays. Advanced WiFi and Radio 205 Features User Manual - Netgear WAX204-WiFi | User Manual - Page 206
might disable the WiFi function for the selected radio unexpectedly. 8. Click the Apply button. Your settings are saved. Advanced WiFi and Radio 206 Features User Manual - Netgear WAX204-WiFi | User Manual - Page 207
an advanced function of the access point firewall, you can use port forwarding and port triggering to set up port traffic rules for Internet services and applications. These rules apply specifically to ports. You need networking knowledge to set up port traffic rules. Note: The information in this - Netgear WAX204-WiFi | User Manual - Page 208
to provide. 2. Find the local IP address of the computer on your network that will provide the service. The server computer must always receive the same IP address. To specify this setting, use the reserved login window displays. Port Forwarding and Port 208 Triggering [Router Mode] User Manual - Netgear WAX204-WiFi | User Manual - Page 209
In the Server IP Address field, enter the LAN IP address of the computer or server that must provide the service or that runs the application. 10. Click the Add button. Your settings are saved and the rule is added to you do not Port Forwarding and Port 209 Triggering [Router Mode] User Manual - Netgear WAX204-WiFi | User Manual - Page 210
or ports are identical, leave the Use the same port range for Internal port check box selected. - If the service or application uses a range or ranges of ports, clear the check box and specify the range in the Internal the table. Port Forwarding and Port 210 Triggering [Router Mode] User Manual - Netgear WAX204-WiFi | User Manual - Page 211
. The Ports - Custom Services page displays. 8. Change the settings. For information about the settings, see Add a port forwarding rule for a custom service or application [router mode] on page 209. 9. Click the Apply button. Port Forwarding and Port 211 Triggering [Router Mode] User Manual - Netgear WAX204-WiFi | User Manual - Page 212
name. 7. Click the Delete Service button. The rule is removed from the table. A default rule remains available in the Service Name menu. A custom rule is removed. If you want to reinstate the custom rule, you must redefine it. Port Forwarding and Port 212 Triggering [Router Mode] User Manual - Netgear WAX204-WiFi | User Manual - Page 213
Port Forwarding / Port Triggering page, configure the access point to forward the HTTP service to the local address of your web server at 192.168.1.33. HTTP (port servers. 3. (Optional) Register a host name with a Dynamic DNS service, and specify that name on the Dynamic DNS page of the access point. - Netgear WAX204-WiFi | User Manual - Page 214
, you must know the IP address that the ISP assigned, which typically changes. Port triggering for services and applications [router mode] If the access point is in router mode, port triggering can function as address field. Port Forwarding and Port 214 Triggering [Router Mode] User Manual - Netgear WAX204-WiFi | User Manual - Page 215
service or application by specifying the following settings: • Service Name. Enter the name of the custom service or application. • Service User. From the Service this service. - Single address. Restricts the service to Service Type. Select the protocol (TCP or UDP) that is associated with the service - Netgear WAX204-WiFi | User Manual - Page 216
Point WAX204 8. Set up the inbound connection by specifying the following settings: • Service Type. Select the protocol (TCP or UDP) that is associated with the inbound Table, select the radio button for the service or application name. Port Forwarding and Port 216 Triggering [Router Mode] User - Netgear WAX204-WiFi | User Manual - Page 217
WiFi 6 AX1800 Dual Band Wireless Access Point WAX204 7. Click the Edit Service button. The Port Triggering - Services page displays. 8. Change the settings. For information about the settings, see Add a triggering settings display. Port Forwarding and Port 217 Triggering [Router Mode] User Manual - Netgear WAX204-WiFi | User Manual - Page 218
be in router mode.) A time-out period is required because the access point cannot detect when the service or application terminates. To specify the time-out for port triggering: 1. Launch a web browser from a the Apply button. Port Forwarding and Port 218 Triggering [Router Mode] User Manual - Netgear WAX204-WiFi | User Manual - Page 219
port triggering rules even if you specified them. 7. Click the Apply button. Your settings are saved. Port Forwarding and Port 219 Triggering [Router Mode] User Manual - Netgear WAX204-WiFi | User Manual - Page 220
its session table, and incoming traffic is no longer accepted on port numbers 33333 or 113. Port Forwarding and Port 220 Triggering [Router Mode] User Manual - Netgear WAX204-WiFi | User Manual - Page 221
14 Diagnostics and Troubleshooting This chapter provides information to help you diagnose and solve problems you might experience with the access point. If you do not find the solution here, visit the NETGEAR support site at netgear.com/support for more product and contact information. The chapter - Netgear WAX204-WiFi | User Manual - Page 222
Point WAX204 Reboot the access point from the local browser UI You or NETGEAR technical support can reboot the access point from its local browser UI, either locally or remotely, for displays. 6. Click the Yes button. The access point restarts. Diagnostics and 222 Troubleshooting User Manual - Netgear WAX204-WiFi | User Manual - Page 223
6 AX1800 Dual Band Wireless Access Point WAX204 Quick tips for troubleshooting Many common problems can be resolved by following our tips for troubleshooting. Restart your access point network if in router mode If exactly. If you did not change Diagnostics and 223 Troubleshooting User Manual - Netgear WAX204-WiFi | User Manual - Page 224
but not directly connected. If you are not directly connected to the access point, make sure that the IP address of your Diagnostics and 224 Troubleshooting User Manual - Netgear WAX204-WiFi | User Manual - Page 225
LEDs on the top panel of the access point for troubleshooting (see Troubleshoot with the LEDs on page 225) Troubleshoot with the LEDs You can troubleshoot by checking the LEDs. Power LED is off This could that NETGEAR supplied for this product. Diagnostics and 225 Troubleshooting User Manual - Netgear WAX204-WiFi | User Manual - Page 226
the problem occurs again, try one more time. If the error persists, a hardware problem might be the cause. Contact NETGEAR technical support at netgear.com/support/. that your Internet service provider (ISP) is not experiencing an Internet outage. Diagnostics and 226 Troubleshooting User Manual - Netgear WAX204-WiFi | User Manual - Page 227
receive an IP address from a network router or a DHCP server. • Make sure that your Internet service provider (ISP) is not experiencing an Internet outage. If the access point is in access point mode and a WiFi schedule for a radio on page 197). Diagnostics and 227 Troubleshooting User Manual - Netgear WAX204-WiFi | User Manual - Page 228
are unable to log in to the access point's local browser UI from a computer or mobile device, troubleshooting depends on whether the access point is in the default router mode or access point mode. You cannot also printed on the access point label. Diagnostics and 228 Troubleshooting User Manual - Netgear WAX204-WiFi | User Manual - Page 229
to the access point. If you connect the LAN port on your computer directly to the access point, check the Ethernet cable Diagnostics and 229 Troubleshooting User Manual - Netgear WAX204-WiFi | User Manual - Page 230
device is on the same subnet as the LAN subnet of the existing network router to which the access point is connected. Diagnostics and 230 Troubleshooting User Manual - Netgear WAX204-WiFi | User Manual - Page 231
cannot get an Internet connection, check if the access point can obtain an IP address from your Internet service provider (ISP). Check the Internet WAN IP address [router mode] If the access point is in -sensitive. The BASIC Home page displays. Diagnostics and 231 Troubleshooting User Manual - Netgear WAX204-WiFi | User Manual - Page 232
on page 223. If the access point is still unable to obtain an IP address from the ISP, the problem might be one of the following: • Your ISP might require a login program. Ask your ISP whether they your computer or mobile device, and verify the DNS Diagnostics and 232 Troubleshooting User Manual - Netgear WAX204-WiFi | User Manual - Page 233
Internet, you might no longer need to run that software after installing your access point. Check or manually start the PPPoE connection [router mode] If the access point is in router mode and your ISP uses if your PPPoE connection is up and working. Diagnostics and 233 Troubleshooting User Manual - Netgear WAX204-WiFi | User Manual - Page 234
an incorrect PPPoE login name, password, or service name, or your ISP might be experiencing a provisioning problem. Note: Unless you connect manually, the access point does not authenticate using PPPoE until data is transmitted to the network. Troubleshoot Internet browsing If the access point can - Netgear WAX204-WiFi | User Manual - Page 235
Point WAX204 Troubleshoot the WiFi connectivity If you are experiencing trouble connecting over WiFi to the access point, try to isolate the problem: • the SSID for a WiFi network on page 66. • Does your WiFi device support the security that you are using for your WiFi network? For information about - Netgear WAX204-WiFi | User Manual - Page 236
changes occurred, but the old settings might be in the web browser's cache. Troubleshoot your network using the ping utility of your computer or mobile device Most network devices an echo reply. You can troubleshoot a network using the ping utility in your computer or mobile device Diagnostics - Netgear WAX204-WiFi | User Manual - Page 237
the access point, verify that the Ethernet card driver software and TCP/IP software are both installed and configured on your computer. Diagnostics and 237 Troubleshooting User Manual - Netgear WAX204-WiFi | User Manual - Page 238
ISP assigned a host name to your registered computer, use that host name as the account name (see Manually set up the access point Internet connection [router mode] on page 37). • Your ISP might be " the MAC address from the authorized computer. Diagnostics and 238 Troubleshooting User Manual - Netgear WAX204-WiFi | User Manual - Page 239
A Factory Default Settings and Technical Specifications This appendix includes the following sections: • Factory default settings • Technical specifications 239 - Netgear WAX204-WiFi | User Manual - Page 240
. Security for the optional Wireless 2 and Wireless 3 networks WPA2 Personal [AES] The default WiFi passphrase is sharedsecret. Factory Default Settings and 240 Technical Specifications User Manual - Netgear WAX204-WiFi | User Manual - Page 241
only) WPS WPS capability Enabled QoS QoS for Internet bandwidth Disabled 802.11e WMM Enabled UPnP Enabled Factory Default Settings and 241 Technical Specifications User Manual - Netgear WAX204-WiFi | User Manual - Page 242
in router mode (does not apply to access point mode) Block services None in router mode (does not apply to access point mode) sheet, which you can download by visiting netgear.com/support/download/. Table 5. WAX204 access point specifications Feature Technical Specifications User Manual - Netgear WAX204-WiFi | User Manual - Page 243
, and network overhead, affect the data throughput rate. Maximum number of supported clients The access point can support a maximum of 256 WiFi clients: Maximum number of 2.4 GHz WiFi Safety Certification CE (EN60950) Factory Default Settings and 243 Technical Specifications User Manual - Netgear WAX204-WiFi | User Manual - Page 244
B Positioning and Wall-Mounting This appendix includes the following sections: • Position the access point • Wall-mount the access point 244 - Netgear WAX204-WiFi | User Manual - Page 245
glass surfaces, insulated walls, and items such as these: - Solid metal door - Aluminum studs - Fish tanks - Mirrors - Brick - Concrete Positioning and Wall-Mounting 245 User Manual - Netgear WAX204-WiFi | User Manual - Page 246
the access point so that the antennas are at the top. 6. Slide down the access point into lock position. Positioning and Wall-Mounting 246 User Manual
-
 1
1 -
 2
2 -
 3
3 -
 4
4 -
 5
5 -
 6
6 -
 7
7 -
8
-
9
-
10
-
11
-
12
-
13
-
14
-
15
-
16
-
17
-
18
-
19
-
20
-
21
-
22
-
23
-
24
-
25
-
26
-
27
-
28
-
29
-
30
-
31
-
32
-
33
-
34
-
35
-
36
-
37
-
38
-
39
-
40
-
41
-
42
-
43
-
44
-
45
-
46
-
47
-
48
-
49
-
50
-
51
-
52
-
53
-
54
-
55
-
56
-
57
-
58
-
59
-
60
-
61
-
62
-
63
-
64
-
65
-
66
-
67
-
68
-
69
-
70
-
71
-
72
-
73
-
74
-
75
-
76
-
77
-
78
-
79
-
80
-
81
-
82
-
83
-
84
-
85
-
86
-
87
-
88
-
89
-
90
-
91
-
92
-
93
-
94
-
95
-
96
-
97
-
98
-
99
-
100
-
101
-
102
-
103
-
104
-
105
-
106
-
107
-
108
-
109
-
110
-
111
-
112
-
113
-
114
-
115
-
116
-
117
-
118
-
119
-
120
-
121
-
122
-
123
-
124
-
125
-
126
-
127
-
128
-
129
-
130
-
131
-
132
-
133
-
134
-
135
-
136
-
137
-
138
-
139
-
140
-
141
-
142
-
143
-
144
-
145
-
146
-
147
-
148
-
149
-
150
-
151
-
152
-
153
-
154
-
155
-
156
-
157
-
158
-
159
-
160
-
161
-
162
-
163
-
164
-
165
-
166
-
167
-
168
-
169
-
170
-
171
-
172
-
173
-
174
-
175
-
176
-
177
-
178
-
179
-
180
-
181
-
182
-
183
-
184
-
185
-
186
-
187
-
188
-
189
-
190
-
191
-
192
-
193
-
194
-
195
-
196
-
197
-
198
-
199
-
200
-
201
-
202
-
203
-
204
-
205
-
206
-
207
-
208
-
209
-
210
-
211
-
212
-
213
-
214
-
215
-
216
-
217
-
218
-
219
-
220
-
221
-
222
-
223
-
224
-
225
-
226
-
227
-
228
-
229
-
230
-
231
-
232
-
233
-
234
-
235
-
236
-
237
-
238
-
239
-
240
-
241
-
242
-
243
-
244
-
245
-
246
 |
 |

User Manual
WiFi 6 AX1800 Dual Band
Wireless Access Point
Model WAX204
NETGEAR, Inc.
350 E. Plumeria Drive
November 2020
San Jose, CA 95134, USA
202-12147-01