Netgear WAX204-WiFi User Manual - Page 33
Use Wi-Fi Protected Setup to join the WiFi network, Manually join the WiFi network
 |
View all Netgear WAX204-WiFi manuals
Add to My Manuals
Save this manual to your list of manuals |
Page 33 highlights
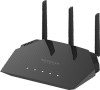
WiFi 6 AX1800 Dual Band Wireless Access Point WAX204 Use Wi-Fi Protected Setup to join the WiFi network You can use Wi-Fi Protected Setup (WPS) to add a WiFi device such as a WiFi-enabled computer, tablet, or smartphone to the WiFi network of the access point. WPS is a standard for easily adding computers and other devices to a home network while maintaining security. To use WPS (Push 'N' Connect), make sure that all WiFi devices to be connected to the network are Wi-Fi certified and support WPS. During the connection process, the client device gets the security settings from the access point so that every device in the network supports the same security settings. To use WPS to connect a device to the WiFi network of the access point: 1. Make sure that the access point is receiving power (its Power LED is lit) and is connected to the Internet (its Internet LED is lit), and that the WiFi radios are on (its WiFi LED is lit). 2. Check the WPS instructions for your computer or WiFi device. 3. Press the WPS button on the access point for three seconds. For more information, see Back panel with ports, buttons, and a power connector on page 13. 4. Within two minutes, press the WPS button on your WiFi device, or follow the WPS instructions that came with the device. The WPS process automatically sets up the device with the WiFi passphrase and connects the device to the WiFi network of the access point. Manually join the WiFi network You can manually add a WiFi device such as a WiFi-enabled computer, tablet, or smartphone to the WiFi network of the access point. On the WiFi device that you want to connect to the access point, use the software application that manages your WiFi connections. Note: By default, the access point's second and third WiFi network are disabled. To connect a device manually to the WiFi network: 1. Make sure that the access point is receiving power (its Power LED is lit) and is connected to the Internet (its Internet LED is lit), and that the WiFi radios are on (its WiFi LED is lit). 2. On the WiFi device, open the software application that manages your WiFi connections. This application scans for all WiFi networks in your area. Installation and Initial Log-in 33 User Manual
-
 1
1 -
2
-
3
-
4
-
5
-
6
-
7
-
8
-
9
-
10
-
11
-
12
-
13
-
14
-
15
-
16
-
17
-
18
-
19
-
20
-
21
-
22
-
23
-
24
-
25
-
26
-
27
-
 28
28 -
 29
29 -
 30
30 -
 31
31 -
 32
32 -
 33
33 -
 34
34 -
 35
35 -
 36
36 -
 37
37 -
 38
38 -
39
-
40
-
41
-
42
-
43
-
44
-
45
-
46
-
47
-
48
-
49
-
50
-
51
-
52
-
53
-
54
-
55
-
56
-
57
-
58
-
59
-
60
-
61
-
62
-
63
-
64
-
65
-
66
-
67
-
68
-
69
-
70
-
71
-
72
-
73
-
74
-
75
-
76
-
77
-
78
-
79
-
80
-
81
-
82
-
83
-
84
-
85
-
86
-
87
-
88
-
89
-
90
-
91
-
92
-
93
-
94
-
95
-
96
-
97
-
98
-
99
-
100
-
101
-
102
-
103
-
104
-
105
-
106
-
107
-
108
-
109
-
110
-
111
-
112
-
113
-
114
-
115
-
116
-
117
-
118
-
119
-
120
-
121
-
122
-
123
-
124
-
125
-
126
-
127
-
128
-
129
-
130
-
131
-
132
-
133
-
134
-
135
-
136
-
137
-
138
-
139
-
140
-
141
-
142
-
143
-
144
-
145
-
146
-
147
-
148
-
149
-
150
-
151
-
152
-
153
-
154
-
155
-
156
-
157
-
158
-
159
-
160
-
161
-
162
-
163
-
164
-
165
-
166
-
167
-
168
-
169
-
170
-
171
-
172
-
173
-
174
-
175
-
176
-
177
-
178
-
179
-
180
-
181
-
182
-
183
-
184
-
185
-
186
-
187
-
188
-
189
-
190
-
191
-
192
-
193
-
194
-
195
-
196
-
197
-
198
-
199
-
200
-
201
-
202
-
203
-
204
-
205
-
206
-
207
-
208
-
209
-
210
-
211
-
212
-
213
-
214
-
215
-
216
-
217
-
218
-
219
-
220
-
221
-
222
-
223
-
224
-
225
-
226
-
227
-
228
-
229
-
230
-
231
-
232
-
233
-
234
-
235
-
236
-
237
-
238
-
239
-
240
-
241
-
242
-
243
-
244
-
245
-
246
 |
 |
