Olympus E-300 EVOLT E-300 Advanced Manual (English)
Olympus E-300 - EVOLT Digital Camera SLR Manual
 |
UPC - 050332298859
View all Olympus E-300 manuals
Add to My Manuals
Save this manual to your list of manuals |
Olympus E-300 manual content summary:
- Olympus E-300 | EVOLT E-300 Advanced Manual (English) - Page 1
Appendix Information ● Thank you for purchasing an Olympus digital camera. Before you start to use your new camera, please read these instructions carefully to enjoy optimum performance and a longer service life. ● This manual explains advanced techniques such as shooting and playback functions - Olympus E-300 | EVOLT E-300 Advanced Manual (English) - Page 2
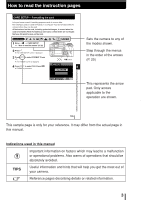
familiar with or about which you want to learn more, you can search the index to find the relevant page. Camera part names and monitor indications are listed at the end of the manual. For example If you want to know more about the term "HQ" V Go to the index at the end - Olympus E-300 | EVOLT E-300 Advanced Manual (English) - Page 3
to read the instruction pages CARD SETUP - Formatting the card Lets you format a card. Formatting prepares cards to receive data. Non-Olympus cards or cards formatted on a computer must be formatted with the camera before they can be used. All data stored on the card, including protected images - Olympus E-300 | EVOLT E-300 Advanced Manual (English) - Page 4
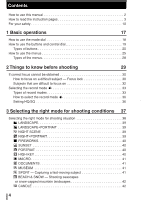
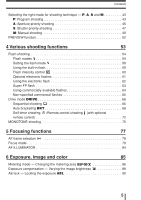
this manual 2 How to read the instruction pages 3 For your safety 10 1 Basic operations 17 How to use the mode dial 18 How to use the buttons and control dial +PORTRAIT 39 FIREWORKS 40 SUNSET 40 PORTRAIT 40 HIGH KEY 40 MACRO 41 DOCUMENTS 41 MUSEUM 41 SPORT - Capturing a fast-moving - Olympus E-300 | EVOLT E-300 Advanced Manual (English) - Page 5
61 Using the electronic flash 62 Super FP flash 63 Using commercially available flashes 64 Non-specified commercial flashes 65 Drive mode DRIVE 66 Sequential shooting 66 Auto bracketing BKT 68 Self-timer shooting /Remote control shooting (with optional remote control 72 MONOTONE shooting 75 - Olympus E-300 | EVOLT E-300 Advanced Manual (English) - Page 6
images 117 Protecting images - Preventing accidental erasure 119 Erasing images 120 Single-frame erase 120 All-frame erase 121 8 Customizing the settings/functions of your camera 123 AEL METERING 124 EV STEP 124 MANUAL FLASH 124 CUSTOM OK 125 RESET LENS 126 FOCUS RING 126 6 - Olympus E-300 | EVOLT E-300 Advanced Manual (English) - Page 7
RESET - Restoring the factory before TV connection 134 CARD SETUP - Formatting the card 135 9 Printing 137 143 Resetting print reservation 144 Direct printing (PictBridge 146 Connecting the camera to OLYMPUS Master software 158 What is OLYMPUS Master 158 Installing OLYMPUS Master 159 7 - Olympus E-300 | EVOLT E-300 Advanced Manual (English) - Page 8
functions by shooting mode 196 Names of parts 198 Camera 198 Viewfinder indications 200 Monitor indications (only for playback 201 Control panel screen 202 Memory gauge 203 Battery check 203 Specifications 204 Index 207 Additional functions available after updating firmware 209 8 - Olympus E-300 | EVOLT E-300 Advanced Manual (English) - Page 9
300 Trade Name : OLYMPUS Responsible Party : Address : 2 Corporate Center Drive, PO Box 9058, Melville, New York 11747-9058 U.S.A. Telephone Number : 1-631-844-5000 Tested environment and customer protection. "CE" mark cameras are intended for sales in Europe. Trademarks • IBM is a - Olympus E-300 | EVOLT E-300 Advanced Manual (English) - Page 10
OPEN CAUTION: TO REDUCE THE RISK OF ELECTRICAL SHOCK, DO NOT REMOVE COVER (OR BACK). NO USER-SERVICEABLE PARTS INSIDE. REFER SERVICING TO QUALIFIED OLYMPUS SERVICE PERSONNEL. Lightning flash with an arrowhead, enclosed in a triangle, alerts you to the presence of uninsulated voltage points inside - Olympus E-300 | EVOLT E-300 Advanced Manual (English) - Page 11
instructions as improper adjustment of other controls could damage the product and require extensive repair work by a qualified technician. d) The product has been dropped or damaged in any way. e) The product exhibits a distinct change in performance. Replacement Parts - When replacement parts - Olympus E-300 | EVOLT E-300 Advanced Manual (English) - Page 12
dropped in water, or if liquid is spilled into the camera, stop using it, allow it to dry, and then remove the battery. Contact the nearest authorized Olympus service center. ੬ Do not touch the battery or the battery charger while battery charging is in progress. Wait until charging is complete and - Olympus E-300 | EVOLT E-300 Advanced Manual (English) - Page 13
cases occur, stop using and contact an Olympus dealer or customer support center. - The power plug or cable produces heat, burning smell, or smoke. - The power plug or cable is cracked or broken. The contact is bad on the power plug. Battery handling precautions Follow these important guidelines to - Olympus E-300 | EVOLT E-300 Advanced Manual (English) - Page 14
camera immediately. ● Contact your dealer or an authorized Olympus service center. Continued use may result in fire or electric shock. ੬ If the battery electric shock. ੬ Do not use the charger if it is covered with cloth such as a blanket. ● Do not use the charger if something is covering it (such as - Olympus E-300 | EVOLT E-300 Advanced Manual (English) - Page 15
੬ Do not damage the charger's cable. ● Do not pull on the charger's cable or add another cable to it. Be sure to connect or disconnect the charger's cable while holding the power plug. If the following cases occur, stop using and contact an Olympus dealer or authorized customer support center. - The - Olympus E-300 | EVOLT E-300 Advanced Manual (English) - Page 16
use these written materials or software or equipment. Some countries do not allow the exclusion or limitation of liability for consequential or incidental damages, so the above limitations may not apply to you. ● Olympus reserves all rights to this manual. WARNING Unauthorized photographing or use - Olympus E-300 | EVOLT E-300 Advanced Manual (English) - Page 17
are drawn from years of experience. Now, with your digital camera, you'll be able to take advantage of those same advanced techniques simply by pressing a few buttons. You'll find a wide choice of shooting functions listed in the camera's menus that make it easy to change the focusing area - Olympus E-300 | EVOLT E-300 Advanced Manual (English) - Page 18
priority shooting Allows you to set the aperture manually. The camera sets the shutter speed automatically. ~ P. 45 S Shutter priority shooting Allows you to set the shutter speed manually. The camera sets the aperture automatically. ~ P. 47 M Manual shooting Allows you to set the aperture and - Olympus E-300 | EVOLT E-300 Advanced Manual (English) - Page 19
dial, or menu. Functions available using the : Change camera settings with the buttons and 1 buttons control dial, while referring to the monitor menus or control panel screen. Functions available using the : Change camera settings with the monitor monitor menus menus while referring to - Olympus E-300 | EVOLT E-300 Advanced Manual (English) - Page 20
, your setting is confirmed. ● If you press the button again, you can confirm the setting and exit the menu immediately. Control dial MENU Basic operations When setting on the control panel screen P 1/320 ESP F5.6 ISO FP WB FOCUS S-AF AF ILLUMINATOR AUTO AUTO sRGB DRIVE SQ 3264 2448 - Olympus E-300 | EVOLT E-300 Advanced Manual (English) - Page 21
How to use the buttons and control dial 1 (Flash mode) button ~P. 58 Selects a flash mode from auto-flash, red-eye reduction flash, slow synchronization or fill-in flash. 1 Basic operations Press P 1/320 ESP F5.6 AUTO ISO FP WB FOCUS S-AF AF ILLUMINATOR AUTO AUTO sRGB DRIVE HQ 3264 - Olympus E-300 | EVOLT E-300 Advanced Manual (English) - Page 22
How to use the buttons and control dial Basic operations 3 (Record mode) button 1 Selects image quality. Press P 1/320 ESP F5.6 AUTO ISO FP WB FOCUS S-AF AF ILLUMINATOR AUTO AUTO sRGB DRIVE - Olympus E-300 | EVOLT E-300 Advanced Manual (English) - Page 23
How to use the buttons and control dial 6 (Metering) button Selects the metering mode. Press P 1/320 ESP F5.6 AUTO ISO FP WB FOCUS S-AF AF ILLUMINATOR AUTO AUTO sRGB DRIVE HQ 3264 - Olympus E-300 | EVOLT E-300 Advanced Manual (English) - Page 24
) button ~ P. 112 Shooting: Displays shooting information on the control panel screen. Playback: Displays shooting information or histogram of the button is pressed, the information display is changed. 3 (flash) switch ~ P. 58 Raises the flash. 4 AEL button Locks the exposure. ~ P. 90 - Olympus E-300 | EVOLT E-300 Advanced Manual (English) - Page 25
or set them. This section explains how the menu works using the P mode. 1 1 Press the MENU button to display the menu on the monitor. MENU button Basic operations 1 CARD SETUP 2 DRIVE 1 2 MONOTONE CANCEL MENU SELECT 0.0 OFF GO MENU OK Operation guide is displayed at the bottom of the screen - Olympus E-300 | EVOLT E-300 Advanced Manual (English) - Page 26
HQ AUTO S-AF AUTO GO 1 CARD SETUP 2 DRIVE 1 2 MONOTONE tab CANCEL MENU SELECT 0.0 OFF GO tab 1 2 EDIT 1 2 CANCEL MENU SELECT OFF GO tab 1 EV STEP 2 ISO BOOST MANUAL FLASH 1 2 CUSTOM WB CANCEL MENU SELECT 1/3EV OFF OFF GO 2 tab 1 '04.01.01 01:01 2 RESET FILE NAME AUTO 1 REC VIEW 2 5sec - Olympus E-300 | EVOLT E-300 Advanced Manual (English) - Page 27
How to use the menus 3 Press to move to the functions of the tab you have selected. 4 Press to select a function. Function Press 1 CARD SETUP 2 DRIVE 0.0 1 2 MONOTONE OFF Press CANCEL MENU SELECT GO Press 1 Basic operations 5 Press to move to the settings of the function you have - Olympus E-300 | EVOLT E-300 Advanced Manual (English) - Page 28
manual CARD SETUP 2 DRIVE Tab 0.0 1 2 MONOTONE OFF CANCEL MENU SELECT GO : Sets the functions that are available using the buttons and control dial. : Sets shooting functions. : Sets playback functions. : Customizes shooting functions. 2 : Sets functions that allow you to use the camera - Olympus E-300 | EVOLT E-300 Advanced Manual (English) - Page 29
know before shooting The camera focuses automatically if you simply press the shutter button in the P mode. However, sometimes you may come across a subject that this kind of problem, always check the record mode before shooting. SHQ SQ SQ PIXEL COUNT COMPRESSION 1280x980 1/8 CANCEL SELECT GO - Olympus E-300 | EVOLT E-300 Advanced Manual (English) - Page 30
uses three AF frames to automatically detect the subject to focus on. Because the camera uses contrast level to detect the subject, it may not be able to correctly detect modes P A S M 1 Position the AF frame on the subject you want to focus on. AF frame SCENE Shutter button Card access lamp 30 - Olympus E-300 | EVOLT E-300 Advanced Manual (English) - Page 31
. ● The control panel screen disappears. 3 While keeping the shutter button pressed halfway, re-compose your shot. If correct focus cannot be obtained Halfway down 2 AF confirmation mark Things to know before shooting 4 Press the shutter button all the way. ● A picture is taken. ● The card access - Olympus E-300 | EVOLT E-300 Advanced Manual (English) - Page 32
to focus on Under the following conditions, AF may not work properly. Take a picture using focus lock (~ P. 30), manual focus (~ P. 83), or by selecting an AF frame lines, hold the camera vertically and adjust the focus, then return the camera to the horizontal position to take the picture. 32 - Olympus E-300 | EVOLT E-300 Advanced Manual (English) - Page 33
record modes and number of pixels, refer to the table on P. 35. Types of record modes 2 Record mode allows you to select a combination of pixel count and compression rate for the images you record. An image consists of pixels (dots). When you enlarge an image with a low pixel - Olympus E-300 | EVOLT E-300 Advanced Manual (English) - Page 34
processing such as white balance, sharpness, contrast and color space, etc. OLYMPUS Master software is required to display RAW images on a PC. A Photoshop plug-in is also available to allow you to open RAW images in Photoshop (you can download it from our website). It is not possible to display RAW - Olympus E-300 | EVOLT E-300 Advanced Manual (English) - Page 35
Selecting the record mode Record mode Number of pixels Record mode (PIXEL COUNT) Compression RAW TIFF SHQ HQ SQ 3264 x 2448 3200 x 2400 2560 x 1920 1600 x 1200 1280 x 960 1024 x 768 640 x 480 Uncompressed Uncompressed 1/2.7 1/4 1/8 1/2.7 1/4 1/8 1/2.7 1/4 1/8 1/2.7 1/4 1/8 1/2.7 1/4 1/8 1/2.7 - Olympus E-300 | EVOLT E-300 Advanced Manual (English) - Page 36
dial button Things to know before shooting MENU SQ When the control panel screen is off OK button Setting HQ/SQ You can select the number of pixels (PIXEL COUNT) and compression rate (COMPRESSION). Available modes P A S M SCENE 1 Menu T T HQ, SQ. ~ "How to use the menus" (P. 25) 2 Press - Olympus E-300 | EVOLT E-300 Advanced Manual (English) - Page 37
mode, and concentrate on your composition; no complicated settings as with other cameras. You can also select the exposure mode, which allows you to set the aperture value and shutter speed. With precise value setting, images come out better. The more you shoot, the more possibilities you will - Olympus E-300 | EVOLT E-300 Advanced Manual (English) - Page 38
Selecting the right mode for shooting conditions This camera has 4 different exposure modes (Program shooting, aperture shooting, shutter speed, manual shooting) and more than 10 different situationrelated shooting modes. The shooting modes can be set using the mode dial and menus. See below. 3 ~ - Olympus E-300 | EVOLT E-300 Advanced Manual (English) - Page 39
true appearance of the street. • Since the shutter speed is slow, be sure to stabilize the camera. NIGHT+PORTRAIT Suitable for shooting both the main subject and background at night. • Since the shutter speed is slow, be sure to stabilize the camera. • The flash fires in the red-eye reduction mode - Olympus E-300 | EVOLT E-300 Advanced Manual (English) - Page 40
the right mode for the shooting situation FIREWORKS Suitable for shooting fireworks. • Since the shutter speed is slow, be sure to stabilize the camera. • The flash cannot be used. • AF is not possible. Use manual focus (MF). 3 SUNSET Suitable for taking sunset pictures. Vivid red and yellow color - Olympus E-300 | EVOLT E-300 Advanced Manual (English) - Page 41
Selecting the right mode for shooting conditions Selecting the right mode for the shooting situation MACRO Suitable for taking close-up pictures (macro shooting). • If you use the flash, shadows may be noticeable and the correct exposure may not be achieved. 3 DOCUMENTS Suitable for shooting - Olympus E-300 | EVOLT E-300 Advanced Manual (English) - Page 42
BEACH & SNOW Suitable for shooting snow-capped mountain landscapes, white sand beaches, seascapes, etc. 3 CANDLE Suitable for shooting under candlelight. Warm colors are reproduced. • The flash cannot be used. • SHQ and HQ cannot be selected. ~ "Selecting the record mode" (P. 33) 42 - Olympus E-300 | EVOLT E-300 Advanced Manual (English) - Page 43
right mode for shooting conditions Selecting the right mode for the shooting technique - P, A, S and M P : Program shooting The camera sets the optimum aperture value and shutter speed automatically according to the subject brightness. You can also perform program shift as needed to change the - Olympus E-300 | EVOLT E-300 Advanced Manual (English) - Page 44
1/15 1/30 1/60 1/125 1/250 1/500 1/10001/20001/4000 Shutter speed : When using the fixed focal lens (ED 50mm f2 MACRO) : Maximum wide setting when using the zoom lens (14mm-54mm f2.8-f3.5) : Maximum tele setting when using the zoom lens (14mm-54mm f2.8-f3.5) Aperture value Selecting the right mode - Olympus E-300 | EVOLT E-300 Advanced Manual (English) - Page 45
The camera sets the optimum shutter speed automatically for the aperture value you have selected. When you decrease the aperture value (F-number), the camera will is increased 1 Set the mode dial to A. 2 Rotate the control dial to set the aperture value. Large aperture (F-number is decreased - Olympus E-300 | EVOLT E-300 Advanced Manual (English) - Page 46
is performed and the AF confirmation mark lights on the viewfinder. ● The shutter speed that has been set automatically by the camera is displayed on the viewfinder. Halfway down Shutter speed Shutter speed 3 Viewfinder Aperture value Viewfinder Aperture value Selecting the right mode for - Olympus E-300 | EVOLT E-300 Advanced Manual (English) - Page 47
mode for the shooting technique - P, A, S and M S : Shutter priority shooting The camera sets the optimum aperture value automatically for the shutter speed you have selected. Set the shutter speed depending on the type of effect you want: a higher speed shutter allows you to capture a fast-moving - Olympus E-300 | EVOLT E-300 Advanced Manual (English) - Page 48
mark lights on the viewfinder. ● The aperture value that has been set automatically by the camera is displayed on the viewfinder. Shutter speed Aperture value 3 Viewfinder Shutter speed Viewfinder Aperture value Selecting the right mode for shooting conditions AF confirmation mark Exposure - Olympus E-300 | EVOLT E-300 Advanced Manual (English) - Page 49
S and M TIPS The picture looks blurred. T The possibility of camera shake spoiling your picture increases greatly during macro or ultra-telephoto shooting. Set the shutter speed higher or use a monopod or tripod to stabilize the camera. The aperture value indication does not stop blinking after the - Olympus E-300 | EVOLT E-300 Advanced Manual (English) - Page 50
the exposure value calculated by the currently selected aperture and shutter speed compared to the exposure value considered optimum by the camera. Fast shutter speed Selecting the right mode for shooting conditions Control panel screen M 1/320 ESP F5.6 -0.3 ISO FP WB FOCUS S-AF - Olympus E-300 | EVOLT E-300 Advanced Manual (English) - Page 51
be done using the optional power battery holder and remote cable. TIPS The picture looks blurred. T The possibility of camera shake spoiling your picture increases greatly when you take a picture at slow shutter speed. Use a monopod or tripod to stabilize the camera. To change the EV step interval - Olympus E-300 | EVOLT E-300 Advanced Manual (English) - Page 52
PREVIEW function If you press the OK button, the viewfinder shows the actual depth of field (the distance from the nearest to the furthest point of perceived "sharp" focus) in a picture, with the selected aperture value. Assign preview function to the OK button beforehand. ~ "CUSTOM OK" (P. 125) - Olympus E-300 | EVOLT E-300 Advanced Manual (English) - Page 53
and drive modes (sequential shooting) are the keys to advanced shooting techniques. Selecting a flash mode to suit a specific shooting situation or adjusting the amount of light emitted by the flash will produce an image that is different from what would be obtained when less precise settings are - Olympus E-300 | EVOLT E-300 Advanced Manual (English) - Page 54
-eye phenomenon. The subject's eyes appear red. Various shooting functions Note ● After the pre-flashes, it takes about 1 second before the shutter is released. Hold the camera firmly to avoid camera movement. ● Effectiveness may be limited if the subject is not looking directly at preflashes, or - Olympus E-300 | EVOLT E-300 Advanced Manual (English) - Page 55
speed is set to 2 sec. 2 sec. 2nd curtain 2 sec. 2nd curtain flash fires Shutter closes 0 1st curtain 1st curtain flash fires Shutter fully opens Slow synchronization + Red-eye reduction flash SLOW This mode is for when you want to use slow synchronization, yet also reduce the red-eye - Olympus E-300 | EVOLT E-300 Advanced Manual (English) - Page 56
as shadows from tree leaves), in a backlight situation, or for correcting the color shift produced by artificial lighting (especially fluorescent light). 4 Note ● When the flash fires, the shutter speed is set to 1/180 sec. or less. When shooting a subject against a bright background with the - Olympus E-300 | EVOLT E-300 Advanced Manual (English) - Page 57
(2nd curtain) Fill-in flash Flash off Fill-in flash Fill-in flash (Red-eye reduction) Fill-in flash (2nd curtain) Flash off Flash timing 1st curtain 2nd curtain 1st curtain 1st curtain 1st curtain 2nd curtain Conditions to fire the flash Shutter speed restrictions Fires automatically in - Olympus E-300 | EVOLT E-300 Advanced Manual (English) - Page 58
setting is displayed on the monitor. 4 3 Rotate the control dial until the desired setting is displayed. Flash (flash mode) button (flash) switch MENU Various shooting functions AUTO When the control panel screen is off MANUAL FLASH When MANUAL FLASH (~ P. 124) in the fixed amount of light - Olympus E-300 | EVOLT E-300 Advanced Manual (English) - Page 59
using a lens that is wider than 14 mm (equivalent to 28 mm on a 35 mm film camera), the light emitted by the flash may produce a vignette effect. Available modes P A S M 1 Press the (flash) switch to raise the flash. (flash) switch 4 Various shooting functions 2 Press the shutter button halfway - Olympus E-300 | EVOLT E-300 Advanced Manual (English) - Page 60
button. Note ● This does not work when the flash control mode on the electronic flash is set to MANUAL. ● If light emission is adjusted on the electronic flash, it will be combined with the camera's light emission setting. ● Flash intensity control is applicable to the flash you are using (built-in - Olympus E-300 | EVOLT E-300 Advanced Manual (English) - Page 61
FL-36 FL-20 Flash control mode TTL-AUTO (Super FP flash), TTLAUTO, AUTO, MANUAL, MANUAL (Super FP flash) Using the external flash with the built-in flash The external flash cannot be used with the built-in flash while the former is attached to the camera's hot shoe. GN (guide number) GN 50 (85 - Olympus E-300 | EVOLT E-300 Advanced Manual (English) - Page 62
pull the lock pin back inside. ● For instructions on how to attach the flash, refer to the FL-50's manual. Lock pin Shoe lock dial 3 Turn on the flash. ● When the charge lamp on the flash lights up, charging is complete. ● The flash will be synchronized with the camera at a speed of 1/180 sec or - Olympus E-300 | EVOLT E-300 Advanced Manual (English) - Page 63
5 Select the desired flash control mode. Viewfinder 6 Press the shutter button on the camera halfway. ● Shooting information such as ISO sensitivity, aperture value, and shutter speed is communicated between the camera and flash. ● lights up in the viewfinder. 7 Press the shutter button all the - Olympus E-300 | EVOLT E-300 Advanced Manual (English) - Page 64
mode, then set the aperture value and shutter speed. ~ "Manual shooting" (P. 49) ● A slower shutter speed may produce blurred images. 3 Turn on the flash. ● Be sure to turn on the flash after attaching the flash unit to the camera. 4 Set the flash control mode on the flash to AUTO. Also set the ISO - Olympus E-300 | EVOLT E-300 Advanced Manual (English) - Page 65
with the flash.) (3) Use a flash with an illumination angle that matches the focal length of the lens. The focal length of the lens for 35 mm film is approximately twice as long as the focal length of the lenses designed for this camera. (4) Do not use a flash unit or other accessory TTL flash that - Olympus E-300 | EVOLT E-300 Advanced Manual (English) - Page 66
mode DRIVE The following drive modes are available with this camera. Single-frame shooting Sequential shooting 4 Auto-bracketing BKT Self-timer shooting remote control shooting Sequential shooting : Shoots 1 frame at a time when the shutter button is pressed. (Normal shooting mode, single-frame - Olympus E-300 | EVOLT E-300 Advanced Manual (English) - Page 67
shooting is not possible when NOISE REDUCTION is set to ON. ● During sequential shooting, if the battery check blinks due to low battery, the camera stops shooting and starts saving the pictures you have taken on the card. The camera may not save all of the pictures depending on how much - Olympus E-300 | EVOLT E-300 Advanced Manual (English) - Page 68
are appropriate and you don't have time to take several test shots at different settings. AE bracketing The camera automatically shoots a number of pictures at different exposure values for frames : 3 Available modes P A S M 1 Menu T T DRIVE T BKT ~ "How to use the menus" (P. 25) Shutter button 68 - Olympus E-300 | EVOLT E-300 Advanced Manual (English) - Page 69
button until the selected number of frames are taken. EV step The camera shoots each frame at a different exposure. ● Releasing the shutter button stops auto bracketing shooting. Various shooting functions How AE bracketing compensates exposure in each exposure mode Depending on the selected - Olympus E-300 | EVOLT E-300 Advanced Manual (English) - Page 70
, only the part within the scale flash is on. ● During WB bracketing, the camera cannot shoot in sequence if there is not enough memory in the camera and card for storing more than the selected number of frames. ● During sequential shooting, if the battery check blinks due to low battery, the camera - Olympus E-300 | EVOLT E-300 Advanced Manual (English) - Page 71
in the blue direction. All three images are saved on the card. Available modes P A S M 1 Menu T T WB BKT T OFF, 3F 2STEP, 3F 4STEP, 3F 6STEP ~ "How to use the menus" (P. 25) Shutter button 4 2 Take the picture. ● When the shutter button is pressed down all the way, three images are automatically - Olympus E-300 | EVOLT E-300 Advanced Manual (English) - Page 72
mode Self-timer shooting /Remote control shooting (with optional remote control) You can select self-timer shooting or remote control shooting. Various shooting functions Self-timer shooting : This function lets you take pictures using the self-timer. You can set the camera to trigger the shutter - Olympus E-300 | EVOLT E-300 Advanced Manual (English) - Page 73
without looking through the viewfinder, such as when using the self-timer, attach the eyepiece cover to the viewfinder so that the light does not enter the viewfinder. To attach the eyepiece cover, remove the eyecup from the camera as illustrated. Eyecup Eyepiece cover Note Do not press the - Olympus E-300 | EVOLT E-300 Advanced Manual (English) - Page 74
the remote control 1 Mount the camera on a tripod or place it on a stable, flat surface. 2 Point the remote control at the remote control receiver on the camera and press the shutter button on the remote control. ● When is selected: The focus and exposure 4 are locked, the remote control lamp - Olympus E-300 | EVOLT E-300 Advanced Manual (English) - Page 75
if the remote control is too far from the camera. Move the remote control closer to the camera and press the shutter button on the remote control again. 4 T There is signal interference. Change the channel as described in the remote control's instruction manual. To cancel the remote control shooting - Olympus E-300 | EVOLT E-300 Advanced Manual (English) - Page 76
MEMO 4 76 Various shooting functions - Olympus E-300 | EVOLT E-300 Advanced Manual (English) - Page 77
get used to this style of focusing. Fortunately, your digital camera provides not only manual focus, but also auto focus and various other focus modes shutter speed is important. But you can also use focusing to achieve the same effect - when the focus mode is set to continuous AF mode, the camera - Olympus E-300 | EVOLT E-300 Advanced Manual (English) - Page 78
camera measures the distance to the subject using the 3 AF frames in the viewfinder and selects the most appropriate point. This function allows you to select only one AF frame. Center AF frame (AUTO) : Focuses using the 3 AF frames. (Factory monitor. 2 Rotate the control dial until the desired - Olympus E-300 | EVOLT E-300 Advanced Manual (English) - Page 79
focus modes are available with this camera: S-AF (single AF), C-AF (continuous AF) and MF (manual focus). Available modes P A S M 1 Press the AF (focus mode) button. ● The current setting is displayed on the monitor. Control dial 2 Rotate the control dial until the desired setting is displayed - Olympus E-300 | EVOLT E-300 Advanced Manual (English) - Page 80
AF confirmation mark lights up. ● A beep sound is output when the subject is in focus. 2 Press the shutter button all the way. Shutter button Focusing functions Viewfinder AF confirmation mark TIPS To adjust focus manually while using AF: ~ "Simultaneous use of S-AF mode and MF mode" (P. 81) 80 - Olympus E-300 | EVOLT E-300 Advanced Manual (English) - Page 81
Simultaneous use of S-AF mode and MF mode This function allows you to fine-adjust focus manually by turning the focus ring after AF is performed in the S-AF mode. Available modes P A S M 1 Press the shutter button halfway to use AF. ● When the focus is locked, the AF confirmation mark lights up - Olympus E-300 | EVOLT E-300 Advanced Manual (English) - Page 82
its movement (Predictive AF). Even if the subject moves or you change the composition of the picture, the camera continues trying to focus. 5 Focusing functions Available modes P A S M 1 Press the shutter button halfway and keep it in this position. ● When the subject is in focus and exposure is - Olympus E-300 | EVOLT E-300 Advanced Manual (English) - Page 83
to suit your preference for how the lens adjusts to the focusing point. ~ "FOCUS RING" (P. 126) Focus aid When you focus the lens on a subject manually (by turning the focus ring), the AF confirmation mark lights. When 3 AF frames are selected, the camera performs focusing in the center AF frame - Olympus E-300 | EVOLT E-300 Advanced Manual (English) - Page 84
AF ILLUMINATOR When AF ILLUMINATOR is set to ON, the flash provides light if a subject is in a dark environment and auto focus does not work. To use this function, raise the flash. Available modes P A S M Setting the AF ILLUMINATOR 1 Menu T T AF ILLUMINATOR T ON, OFF ~ "How to use the menus" (P. - Olympus E-300 | EVOLT E-300 Advanced Manual (English) - Page 85
you wish to go beyond simple shooting using only the shutter button, you will find various functions that can be subject would strongly reflect the flash light, shooting without the flash would typically result in a blurred or dark picture. To overcome this problem, try adjusting the ISO setting - Olympus E-300 | EVOLT E-300 Advanced Manual (English) - Page 86
area There are 3 ways of measuring the subject brightness: Digital ESP metering, Center weighted averaging metering and spot metering. Select displayed on the monitor. 2 Rotate the control dial until the desired setting is displayed. Viewfinder Control dial MENU 6 button The selected metering - Olympus E-300 | EVOLT E-300 Advanced Manual (English) - Page 87
mode-Changing the metering area Ⅵ Digital ESP metering ESP The camera meters and calculates the light levels or do not want the light level of background to affect the exposure value. Ⅵ Spot metering The camera meters a very small area around the center of the subject, defined by the spot metering - Olympus E-300 | EVOLT E-300 Advanced Manual (English) - Page 88
may get better results if you manually compensate (adjust) the exposure value set automatically by the camera. In many cases, bright indicator appears on the monitor. ؓ0 Adjust toward - +2.0 EV Control dial 2 Rotate the control dial to make adjustment. ● Adjust toward +: up to +5.0 EV - Olympus E-300 | EVOLT E-300 Advanced Manual (English) - Page 89
compensation-Varying the image brightness Example: When adjusting the exposure in -1/3 step Press the button. Rotate the control dial to set the desired exposure compensation value. Control panel screen P 1/320 ESP F5.6 -0.7 AUTO ISO FP WB FOCUS S-AF AF ILLUMINATOR AUTO AUTO sRGB DRIVE - Olympus E-300 | EVOLT E-300 Advanced Manual (English) - Page 90
the current shooting conditions. Normally, pressing the shutter button halfway locks both AF (auto focus) you lock the exposure, the metering mode (digital ESP metering, center weighted averaging metering or spot 124) Available modes P A S 1 Aim the camera toward the subject. 2 Hold down AEL. 6 - Olympus E-300 | EVOLT E-300 Advanced Manual (English) - Page 91
sensitivity to light The higher the ISO value, the greater the camera's light sensitivity and the better its ability to shoot in low When the control panel screen is off Note The ISO sensitivity when it is set to auto is usually ISO 100. If the subject is too far away for the flash illumination, - Olympus E-300 | EVOLT E-300 Advanced Manual (English) - Page 92
ISO sensitivity-Setting the desired sensitivity to light ISO BOOST This allows you to make ISO 800 and 1600 available for ISO setting. Available modes P A S M 1 Menu T T ISO BOOST T ON. ~ "How to use the menus" (P. 25) 2 Press the OK button. MENU OK button 6 Exposure, image and color 92 - Olympus E-300 | EVOLT E-300 Advanced Manual (English) - Page 93
color balance using different films for different light conditions or by using filters. With a digital camera, on the other hand, white color can be adjusted to reproduce more natural white with a digital processor. This mechanism is called white balance. There are three options for setting the WB - Olympus E-300 | EVOLT E-300 Advanced Manual (English) - Page 94
temperature. The 4000K, 4500K and 6600K preset settings in this camera are correlated color temperatures, and should not be considered strictly as , image and color TIPS White balance with a flash: T Auto WB is recommended when taking pictures with the flash. If you intend to use preset WB, select - Olympus E-300 | EVOLT E-300 Advanced Manual (English) - Page 95
the desired setting is displayed. Viewfinder MENU 6 Exposure, image and color WB AUTO 0 STEP Displayed when any WB setting except AUTO is selected. When the control panel screen is off TIPS When subjects with no white appear white in the image: T In the auto WB setting, if there is no near - Olympus E-300 | EVOLT E-300 Advanced Manual (English) - Page 96
day, or to capture the reds in a sunset or the colors in a fireworks display For shooting outdoors on a cloudy day (when using the flash) ¥ 7500K ˙ For shooting outdoors in the shadows on a clear day ¥ CWB1 ˙ ¥ CWB2 ˙ ¥ CWB3 ˙ ¥ CWB4 ˙ ¥ Color temperature set in custom white balance menu. When - Olympus E-300 | EVOLT E-300 Advanced Manual (English) - Page 97
no shadows. 4 Set the aperture and shutter speed to obtain the optimum exposure. 5 Press the OK button. ● The white balance is registered. ● The registered white balance will be stored in the camera as a preset WB setting. Turning the power off does not reset the data. ~ "Setting the white balance - Olympus E-300 | EVOLT E-300 Advanced Manual (English) - Page 98
White balance-Adjusting the color tone TIPS After pressing OK, "WB NG RETRY" is displayed. T When there is not enough white in the image, or when the image is too bright, too dark or the colors look unnatural, you cannot register the white balance. Repeat the procedure from Step 1. WB compensation - Olympus E-300 | EVOLT E-300 Advanced Manual (English) - Page 99
in 7 increments in both the RED and BLUE directions. AUTO BLUE 0 SAMPLE IMAGE MODE AEL RED CANCEL MENU SELECT GO 5 Point the camera at the subject to take test shots. 6 Press the AEL button. ● Sample images that have been taken with the current WB settings are displayed. ● The WB compensation - Olympus E-300 | EVOLT E-300 Advanced Manual (English) - Page 100
White balance-Adjusting the color tone CUSTOM WB You can reset the current custom white balance values to different color temperatures. Available modes P A S M 1 Menu T T CUSTOM WB ~ "How to use the menus" (P. 25) 2 Press . MENU ● The CUSTOM - Olympus E-300 | EVOLT E-300 Advanced Manual (English) - Page 101
SHARPNESS This function adjusts the sharpness of the image. Available modes P A S M 1 Menu T T SHARPNESS ~ "How to use the menus" (P. 25) 2 Press . ● The setting screen is displayed. S MENU Exposure, image and color 3 Press to move ࡗ. To increase the sharpness (Hi): Press . The image contours - Olympus E-300 | EVOLT E-300 Advanced Manual (English) - Page 102
CONTRAST C This function adjusts the contrast (distinction between light and dark) of images. For example, you can make images with marked differences in light and shadow softer, and those with less differences more vivid. Available modes P A S M 1 Menu T T CONTRAST ~ "How to use the menus" (P. 25 - Olympus E-300 | EVOLT E-300 Advanced Manual (English) - Page 103
SATURATION This function sets the color depth of images. Available modes P A S M 1 Menu T T SATURATION ~ "How to use the menus" (P. 25) 2 Press . ● The setting screen is displayed. RGB MENU 3 Press to move ࡗ. To increase the saturation (Hi): Press . The color becomes more vivid. To reduce the - Olympus E-300 | EVOLT E-300 Advanced Manual (English) - Page 104
GRADATION Lets you select the brightness of the entire image. Suitable when you want to produce a brighter image for a bright object and a darker image for a dark object. HI KEY : A brighter image is produced. 6 Available modes P A S M 1 Menu T T GRADATION T NORMAL, HI KEY, LOW KEY ~ "How to use - Olympus E-300 | EVOLT E-300 Advanced Manual (English) - Page 105
reduces the noise that is generated during long exposures. When shooting night scenes, shutter speeds are slower and noise tends to appear in images. When NOISE REDUCTION is set to ON, the camera automatically reduces noise to produce clearer images. However, shooting time is approximately twice - Olympus E-300 | EVOLT E-300 Advanced Manual (English) - Page 106
COLOR SPACE sRGB, Adobe RGB This function lets you select how colors are reproduced on the monitor or printer. The first character in image file names indicates the current color space. ~ "FILE NAME" (P. 129) Pmdd0000.jpg P : sRGB _ : Adobe RGB sRGB : Standardized color space for Windows Adobe - Olympus E-300 | EVOLT E-300 Advanced Manual (English) - Page 107
, you can erase it and try again. With a film camera, on the other hand, you won't know if there is a problem with the picture until you get the film developed. Because a digital camera lets you erase those unwanted images, you can keep more memory free to store images and take more shots. You can - Olympus E-300 | EVOLT E-300 Advanced Manual (English) - Page 108
operations are performed. After about 1 hour without being used, the camera will turn off automatically. Turn on the camera again. The last recorded image appears. button MENU SQ Arrow pad . ● Pressing the shutter button halfway resumes the shooting mode. Note When the AC adapter is used, the - Olympus E-300 | EVOLT E-300 Advanced Manual (English) - Page 109
the monitor. It is useful when you want to check the details in an image. Each time you rotate the control dial toward , the image is enlarged in steps of 2x 10x. Control dial Viewing still images 7 1 2x 3x 4x Playback Rotating the dial toward to the original size. returns Displacing the - Olympus E-300 | EVOLT E-300 Advanced Manual (English) - Page 110
or return to the original size, press the OK button. Displaying close-up position You can check which part of the image is enlarged. 1 Press the INFO button during closeup playback. ● The part you have enlarged is displayed with a frame. When you release the button, the frame disappears. 2.0x 15 - Olympus E-300 | EVOLT E-300 Advanced Manual (English) - Page 111
when you want to quickly search a number of pictures to find a particular image. Each time you rotate the control dial toward , the number of images shown changes from 4 to 9 to 16. Control dial : Moves to the previous frame. : Moves to the next frame. : Displays the index previous to the top - Olympus E-300 | EVOLT E-300 Advanced Manual (English) - Page 112
Information display This allows you to display detailed information about the image. Luminance information can also be displayed with histogram and highlight graphs. INFO MENU INFO button 1 Press the INFO button repeatedly until the desired information is displayed. ● This setting is stored and - Olympus E-300 | EVOLT E-300 Advanced Manual (English) - Page 113
of brightness in recorded images. Checking the histogram will enable more precise exposure control for subsequent shots. x 10 SQ [ 1280x960 , 1/8 ] '04.01 . Playback Highlight SQ The overexposed parts of the recorded image blink. Overexposed parts Shooting information Displays the exposure mode - Olympus E-300 | EVOLT E-300 Advanced Manual (English) - Page 114
Slideshow This function displays images stored on the card one after another in succession. Images are the slideshow. OK button 7 1 2 Playback 3 4 When selecting Note If the camera is running on battery power during slideshow, the camera will turn off automatically in about 30 minutes. 114 - Olympus E-300 | EVOLT E-300 Advanced Manual (English) - Page 115
with the camera held vertically. 1 Menu T T T ON ~ "How to use the menus" (P. 25) button 2 Press the (flash mode) button . ● Each press of the button turns the image MENU 90 degrees clockwise. ● The rotated image will be recorded on the card. '04.09.12 - Olympus E-300 | EVOLT E-300 Advanced Manual (English) - Page 116
, refer to the TV's instruction manual. button 3 Turn the camera on and press the (playback mode) buttton. VIDEO OUT jack 7 Video cable Video input terminal Playback Note ● To connect the camera to a TV, use the provided video cable. ● Make sure that the camera's video output signal type is - Olympus E-300 | EVOLT E-300 Advanced Manual (English) - Page 117
selection screen is displayed. 7 MENU button ~ "How to use the menus" (P. 25) Playback 2 Press to select the image, then MENU press the OK button. ● The camera recognizes the image data format. OK button RAW HQ '04.03.01 12:00 100-0020 20 CANCEL MENU SELECT GO Image in RAW data - Olympus E-300 | EVOLT E-300 Advanced Manual (English) - Page 118
CANCEL MENU SELECT GO When editing JPEG/TIFF image CANCEL MENU SELECT GO When editing RAW image 4 When you select : Press to select the pixel count. Press the OK button. 7 5 To edit another image, press to select the desired image. ● Press the MENU button to exit the menu. Playback Note The - Olympus E-300 | EVOLT E-300 Advanced Manual (English) - Page 119
. MENU ● is displayed on the screen. button Protect mark 7 Playback To cancel the protection Display the images that are protected and press . Note ● Formatting the card erases all image even if they have been protected. ● Protected images cannot be rotated. 119 - Olympus E-300 | EVOLT E-300 Advanced Manual (English) - Page 120
single-frame erase, which erases only the currently displayed image, or all-frame erase, which erases all the images stored on the card. Note ● Protected images cannot be erased. Cancel protected images, then erase them. ● Once erased, images cannot be restored. ~ "Protecting images - Preventing - Olympus E-300 | EVOLT E-300 Advanced Manual (English) - Page 121
ALL ERASE screen is displayed. 4 Press to select YES, then press OK. ● All frames will be erased. MENU OK button CARD SETUP ALL ERASE FORMAT 7 CANCEL MENU SELECT GO CARD SETUP screen ALL ERASE YES NO CANCEL MENU SELECT GO ALL ERASE screen Playback ERASE SETTING In the ERASE SETTING screens in - Olympus E-300 | EVOLT E-300 Advanced Manual (English) - Page 122
Playback MEMO 7 122 - Olympus E-300 | EVOLT E-300 Advanced Manual (English) - Page 123
. Try these functions to find ways to use your camera even more effectively. SHORT CUT DRIVE MONOTONE GRADATION CANCEL MENU SELECT GO RESET YES NO CANCEL MENU SELECT GO MENU Lo -2 Hi CANCEL MENU SELECT GO 1 EV STEP 2 ISO BOOST MANUAL FLASH 1 2 CUSTOM WB CANCEL MENU SELECT 1/3EV 1/2EV 1EV GO - Olympus E-300 | EVOLT E-300 Advanced Manual (English) - Page 124
the camera to shutter speed, aperture value or exposure compensation value, etc. Available modes P A S M 1 Menu T T EV STEP T 1/3EV, 1/2EV, 1EV ~ "How to use the menus" (P. 25) 2 Press the OK button. MANUAL FLASH This allows the built-in flash to output a fixed amount of light. With MANUAL FLASH - Olympus E-300 | EVOLT E-300 Advanced Manual (English) - Page 125
Lets you switch between AF and MF. While holding down the OK button, you can adjust the focus manually in the S-AF mode or operate AF in the MF mode. Available modes P A S M 1 Menu GO Customizing the settings/functions of your camera 4 Press to select the item to set. Press the OK button. 125 - Olympus E-300 | EVOLT E-300 Advanced Manual (English) - Page 126
(infinity) when the power is turned off. Available modes P A S M 1 Menu T 2 T RESET LENS T ON ~ "How to use the menus" (P. 25) SCENE 2 Press the OK button. MENU OK button FOCUS RING This allows you to customize how the lens adjusts to the focal point by selecting 8 the rotational direction of - Olympus E-300 | EVOLT E-300 Advanced Manual (English) - Page 127
month setting. ● To return to the previous setting, press . ● The first two digits of the year are fixed. 5 Repeat this procedure until the date and time are saved for approximately 3 months using the built-in battery. Depending on how the camera is used, the date/time setting may be erased earlier. - Olympus E-300 | EVOLT E-300 Advanced Manual (English) - Page 128
RESET -Restoring the factory default setting Normally, current camera settings (including any changes you have made) are retained when the power is turned off. If you prefer the original setting to be restored, you can use this function to restore the factory default settings after the power is - Olympus E-300 | EVOLT E-300 Advanced Manual (English) - Page 129
FILE NAME When you take a picture, the camera assigns it a unique file name and saves it in a folder. following the highest number on the previous card. RESET When a new card is inserted, folder numbers start at 100 and file numbers start at 0001. If a card containing images is inserted, the file - Olympus E-300 | EVOLT E-300 Advanced Manual (English) - Page 130
of the picture you have just taken. Pressing the shutter button halfway during REC VIEW lets you resume shooting immediately. OFF : The picture being recorded to the card is not displayed. 5SEC : The picture being recorded to the card is displayed for 5 seconds. 20SEC: The picture being recorded - Olympus E-300 | EVOLT E-300 Advanced Manual (English) - Page 131
Setting the warning tone The camera beeps when buttons are pressed. It also beeps to alert you to warnings. You can turn the beep sound on displayed. 3 Press to adjust the brightness. Press the OK button. Lo -2 Hi CANCEL MENU SELECT GO Customizing the settings/functions of your camera 131 - Olympus E-300 | EVOLT E-300 Advanced Manual (English) - Page 132
to the PC. Also, select to use the OLYMPUS master software via PC connection. CONTROL : Allows you to control the camera from a PC using the optional OLYMPUS Studio. PRINT : Allows you to connect the camera to a PictBridge-compatible printer. Pictures can be printed directly without using a PC - Olympus E-300 | EVOLT E-300 Advanced Manual (English) - Page 133
A S M 1 Menu T 2 T PC MODE T AUTO, STORAGE, CONTROL, PRINT ~ "How to use the menus" (P. 25) 2 Press the OK use. Press the OK button. ● You can add another language to your camera with the provided OLYMPUS Master software. For details, refer to Help. ESPAÑOL CANCEL MENU SELECT GO Customizing the - Olympus E-300 | EVOLT E-300 Advanced Manual (English) - Page 134
type. Make sure the correct video signal type is selected before connecting the AV cable. If you use the wrong video signal type, recorded pictures will not play back types & main regions Check the video signal type before connecting the camera to your TV. NTSC 8 PAL North America, Japan, Taiwan, - Olympus E-300 | EVOLT E-300 Advanced Manual (English) - Page 135
- Formatting the card Lets you format a card. Formatting prepares cards to receive data. Non-Olympus cards or cards formatted on a computer must be formatted with the camera before they can be used. All data stored on the card, including protected images, is erased when the card is formatted. When - Olympus E-300 | EVOLT E-300 Advanced Manual (English) - Page 136
MEMO 8 136 Customizing the settings/functions of your camera - Olympus E-300 | EVOLT E-300 Advanced Manual (English) - Page 137
. Print reservation allows you to save the number of prints and the date and time information on the card. If you print on a printer, there are a number of different ways to do it. One method is to connect your digital camera to an exclusive printer and print out recorded pictures directly from the - Olympus E-300 | EVOLT E-300 Advanced Manual (English) - Page 138
pictures stored on the card. With print reservation, you can print out pictures easily either at home using a personal DPOF-compatible printer or at a photo lab that supports DPOF. DPOF is a standard format used to record automatic print information from digital cameras. You can print out pictures - Olympus E-300 | EVOLT E-300 Advanced Manual (English) - Page 139
DPOF reservations set by another device, entering reservations using this camera will erase the previous reservations. ● If there is not enough space in the card memory, CARD FULL will be displayed and you may not be able to enter the reservation data. ● You can make DPOF print reservations - Olympus E-300 | EVOLT E-300 Advanced Manual (English) - Page 140
-frame reservation or all-frame reservation . Follow the operation guide on the camera's monitor. Play back a still picture (~ "Single-frame guide displayed here. Select whether to apply print reservation to 9 selected pictures or apply print reservation to all the pictures stored on the card - Olympus E-300 | EVOLT E-300 Advanced Manual (English) - Page 141
time. ~ P. 143 Confirm the print reservation you have set. SET CANCEL CANCEL MENU SELECT GO The print reservation you have made is stored on the card. ~ P. 143 9 Printing 141 - Olympus E-300 | EVOLT E-300 Advanced Manual (English) - Page 142
the card The RESET/KEEP selection screen appears, giving you the choice of resetting the data or keeping it. ~ "Resetting print be applied. If all-frame reservation is used after single-frame reservation, specifications for the number of prints will be overwritten and only one copy of - Olympus E-300 | EVOLT E-300 Advanced Manual (English) - Page 143
Print reservation (DPOF) Setting printing data You can print the shooting date and time on all the pictures selected for printing. NO DATE TIME CANCEL MENU SELECT GO NO : The pictures are printed without the date and time. DATE : All the selected pictures are printed with the shooting date. TIME : - Olympus E-300 | EVOLT E-300 Advanced Manual (English) - Page 144
If print reservation data is already stored on the card, the RESET/KEEP selection screen appears, giving you the choice of resetting the data or keeping it. OK button Resetting the print reservation data for all pictures 4 Press to select RESET, then press OK. 9 5 Press the MENU button. ● The - Olympus E-300 | EVOLT E-300 Advanced Manual (English) - Page 145
6 Press to select the frame with print reservation data you want to reset, then press to set the number of prints to 0. ● To reset print reservation data of other frames, repeat this step. 7 Press OK when you are finished. ● The screen is displayed. Print reservation (DPOF) Set to 0. x 0 - Olympus E-300 | EVOLT E-300 Advanced Manual (English) - Page 146
using the print reservation data. ~ P. 138 To find out if your printer is compatible with PictBridge, refer to the printer's instruction manual. PictBridge It is the standard that enables digital cameras and printers made by different manufacturers to be connected, and also allows pictures to be - Olympus E-300 | EVOLT E-300 Advanced Manual (English) - Page 147
PictBridge) Connecting the camera to a printer Use the USB cable provided to connect the camera to a PictBridge-compatible printer. The USB port, refer to the printer's instruction manual. 2 Plug the USB cable into the camera's USB connector and turn the camera on. ● The selection screen for the - Olympus E-300 | EVOLT E-300 Advanced Manual (English) - Page 148
to a printer successfully, you can apply print reservation to selected pictures or you can print a currently displayed picture. Follow the operation guide on the camera's monitor. Press to select the item you want. PRINT MODE SELECT PRINT ALL PRINT MULTI PRINT ALL INDEX EXIT SELECT GO - Olympus E-300 | EVOLT E-300 Advanced Manual (English) - Page 149
Select frames you want to print. Direct printing (PictBridge) 123 - 3456 SELECT SINGLE PRINT PRINT OK MORE Display the picture you want to print. You can print the currently displayed picture immediately. If you have selected an image, you can also apply print reservation. ~ P. 151 Set the - Olympus E-300 | EVOLT E-300 Advanced Manual (English) - Page 150
separate frames on a single sheet. ALL INDEX : Prints an index of all the pictures stored in the card. PRINT ORDER : Prints according to the print reservation you made. If there is no picture with print reservation type of printer. For details, refer to the printer's instructions. Printing 150 - Olympus E-300 | EVOLT E-300 Advanced Manual (English) - Page 151
STANDARD STANDARD PRINT PAPER SIZE BORDERLESS STANDARD 16 CANCEL SELECT GO CANCEL SELECT GO SIZE : Sets the paper size that the printer supports. BORDERLESS : Selects whether the picture is printed on the entire page or inside a blank frame. PICS/SHEET : Selects the number of pictures - Olympus E-300 | EVOLT E-300 Advanced Manual (English) - Page 152
CANCEL SELECT GO Print when you have set the pictures for printing and printing data. OK : Transfers images you print to the printer. CANCEL : Resets the settings. All print reservation data will be lost. If you want to keep the print reservation data and make other settings, press . This - Olympus E-300 | EVOLT E-300 Advanced Manual (English) - Page 153
more details on solutions, refer to the printer's instruction manual. ● If other codes are displayed, refer to "Error codes" (P. 174). Monitor indication Possible cause Corrective action The camera is not connected Disconnect the camera and to the printer correctly. connect it again correctly - Olympus E-300 | EVOLT E-300 Advanced Manual (English) - Page 154
MEMO 9 154 Printing - Olympus E-300 | EVOLT E-300 Advanced Manual (English) - Page 155
a computer Transferring images to your computer is a great way to make the most of the potential of digital imaging. Not only can you print the images of your choice, you can also use image processing software to organize, edit, and manipulate images. There are so many things you can do. Sort images - Olympus E-300 | EVOLT E-300 Advanced Manual (English) - Page 156
you can easily transfer images stored on the card to the computer with the provided OLYMPUS Master software. Installing OLYMPUS Master ~P. 159 ¥ Connecting the camera to the computer using the provided USB cable ~P. 163 ¥ Starting OLYMPUS Master ¥ Saving images in the computer ¥ Disconnecting - Olympus E-300 | EVOLT E-300 Advanced Manual (English) - Page 157
using graphics applications, be sure to download them to your computer first. Depending on the software, image files may be destroyed if the images are processed (rotated, etc.) while they are on the card. When your computer cannot read the camera's image data with the USB connection Transferring - Olympus E-300 | EVOLT E-300 Advanced Manual (English) - Page 158
the provided OLYMPUS Master software Install the OLYMPUS Master software from the provided CD-ROM to edit and manage images on your computer. What is OLYMPUS Master? OLYMPUS Master is an image management program with viewing and editing features for pictures taken with your digital camera. Once - Olympus E-300 | EVOLT E-300 Advanced Manual (English) - Page 159
before installing the software. For the latest information on compatible operating systems, visit the OLYMPUS web site (http://www.olympus.com). System restart it. - Unplug the cable connected between the camera and computer. - Turn off the camera. - Open the camera's card compartment cover. 159 - Olympus E-300 | EVOLT E-300 Advanced Manual (English) - Page 160
prompts to continue installing the program. ● When the software license agreement window appears, read the license agreement test, then click [Yes]. ● When a dialog box prompting you for User Information appears, enter your name and the OLYMPUS Master serial number that is printed on the label on - Olympus E-300 | EVOLT E-300 Advanced Manual (English) - Page 161
● A confirmation window appears, asking you if you want to install Adobe Reader. To view the OLYMPUS Master software user's guide, Adobe Reader must be installed. If Acrobat Reader is preinstalled on your computer, the confirmation window will not appear. 5 If you want to install Adobe - Olympus E-300 | EVOLT E-300 Advanced Manual (English) - Page 162
desktop. 2 Double-click the [Installer] icon. ● Follow the on-screen prompts to continue installing the program. OLYMPUS Master Installer will automatically launch. ● When the software license agreement window appears, read the license agreement text, then click [Continue] and [Agree]. ● A window - Olympus E-300 | EVOLT E-300 Advanced Manual (English) - Page 163
of the USB port varies depending on the computer. For details, refer to your computer's manual. 2 Insert the provided USB cable into the USB connector. USB port Terminal USB connector Smaller terminal USB cable 3 Set the camera's power switch to ON. 4 Press to select PC. Press the OK button - Olympus E-300 | EVOLT E-300 Advanced Manual (English) - Page 164
[Removable Disk ]. ● Windows XP You can download image files from the camera easily. To transfer images with OLYMPUS Master, click [Cancel]. ● Mac OS X iPhoto is the default image management application for Mac OS. When you connect your Olympus digital camera for the first time, iPhoto will start up - Olympus E-300 | EVOLT E-300 Advanced Manual (English) - Page 165
program, a dialog box appears, prompting you for User Information. Enter your name and the OLYMPUS Master serial number that is printed on the affixed Transfers images from the camera or removable media. 2 [Upgrade] button Displays the dialog box that allows upgrade to OLYMPUS Master PLUS. 3 [ - Olympus E-300 | EVOLT E-300 Advanced Manual (English) - Page 166
A confirmation message appears. 10 4 Click the [Browse images now.] button. ● The images downloaded to the Browse window appear. ● Clicking [Menu] in the Browse window returns to the main menu. ● Never open the camera's battery/card compartment cover or disconnect or connect the AC adapter while the - Olympus E-300 | EVOLT E-300 Advanced Manual (English) - Page 167
's images on your computer Disconnecting the camera from your computer After downloading images from the camera to your computer, you can disconnect the camera from your computer. 1 Make sure that the card access lamp goes out. MENU 2 Windows 98SE: 1 Double-click the [My Computer] icon and right - Olympus E-300 | EVOLT E-300 Advanced Manual (English) - Page 168
sure that no image data is being downloaded from the camera, and that there are no applications open that were accessing the camera image files. Close any such applications and click [Unplug or Eject Hardware] again and then remove the cable. Transferring images to a computer Viewing still images - Olympus E-300 | EVOLT E-300 Advanced Manual (English) - Page 169
The print menus include menus such as [Photo], [Index], [Postcard], [Calendar] etc. The examples in the instructions below are taken from the [Photo] menu. 1 Click (Print Images) in the OLYMPUS Master main menu. ● The print menu appears. 2 Click (Photo). ● The photo print window appears. 3 Click - Olympus E-300 | EVOLT E-300 Advanced Manual (English) - Page 170
OLYMPUS Master. The following operating systems are compatible with the USB connection: Windows : Windows 98SE/Me/2000 Professional/XP Macintosh : Mac OS 9.0-9.2/X Note ● Users running Windows 98SE need to install the USB driver. Before connecting the camera to your computer with the USB cable - Olympus E-300 | EVOLT E-300 Advanced Manual (English) - Page 171
appendix will assist in solving most problems you may encounter. Solutions to error messages, operational problems, blurry pictures, camera storage, basic terminology and more can easily be found in this section. If you encounter problems CaSmaeferTtaryompurbaeliecnastehuEnotriaoorontnirncsegcodes - Olympus E-300 | EVOLT E-300 Advanced Manual (English) - Page 172
Card basics "Card" in this manual refers to a recording medium. This camera can use a Compact Flash or Microdrive (optional). An xD-Picture Card can also be used with a card adapter (optional). Compact Flash A Compact Flash is a large-capacity solid state flash memory card. You can use - Olympus E-300 | EVOLT E-300 Advanced Manual (English) - Page 173
equivalent to 100-400 mm on a 35 mm lens ZUIKO DIGITAL ED 40mm-150mm f3.5-4.5: Telephoto zoom lens equivalent to 80-300 mm on a 35 mm lens Note ● When you attach or remove the body cap and lens from the camera, keep the lens mount on the camera pointed downward. This helps prevent dust 11 and - Olympus E-300 | EVOLT E-300 Advanced Manual (English) - Page 174
set to read-only setting with the computer. Reset the card with the computer. No The card is full. Replace the card or indication No more pictures erase unwanted CARD FULL can be taken or no pictures. Before more information erasing, download such as print important images to a reservation - Olympus E-300 | EVOLT E-300 Advanced Manual (English) - Page 175
on this camera. The card cover is open. Use image processing software to view the picture on a PC. If that cannot be done, the image file is damaged. Close the card cover. CARD-COVER OPEN The card is not formatted. CARD ERROR Format the card. No indication BATTERY EMPTY The battery is drained - Olympus E-300 | EVOLT E-300 Advanced Manual (English) - Page 176
to a PC. The optional OLYMPUS Studio software is required in the CONTROL mode. P. 132 No picture is taken when the shutter button is pressed. The battery is drained. Charge the battery. - Subjects are difficult to focus on (AF does not work properly). Use manual focus or focus lock to focus - Olympus E-300 | EVOLT E-300 Advanced Manual (English) - Page 177
power is turned Set RESET to ON, then turn off the camera. off. The picture is out of focus. P. 128 The subject is too close. Subjects are difficult to focus on (AF does not work properly). Move back to the closest focusing distance for the lens and take the picture. Use manual focus or focus - Olympus E-300 | EVOLT E-300 Advanced Manual (English) - Page 178
was taken Use manual focus or focus lock to focus on the subject and then shoot. P. 30, 83 The camera moved when Camera vibrations will result in a blurred picture. - the shutter button was Hold the camera correctly and press the shutter pressed. button gently. When a telephoto lens is used - Olympus E-300 | EVOLT E-300 Advanced Manual (English) - Page 179
problems Possible cause The picture is too dark. Corrective action Ref. Page The subject was too small Set the metering system to spot metering. Or and was backlit. use the flash shutter speed is set Reduce the shutter supports manual for the graphics application you are using. Appendix 179 - Olympus E-300 | EVOLT E-300 Advanced Manual (English) - Page 180
The USB driver was not successfully installed. Install the OLYMPUS Master. P. 158 The camera's PC MODE is set to CONTROL. Set PC MODE to AUTO or STORAGE. When AUTO is set, the selection screen for USB connection is displayed every time you connect the USB cable to the camera. P. 132 180 - Olympus E-300 | EVOLT E-300 Advanced Manual (English) - Page 181
the lens, mirror, or focusing screen by non-authorized service persons, the camera will be damaged. Storage • When storing the camera for extended periods, remove the battery and card. Store the camera in a cool, dry place that is well ventilated. • Replace the battery periodically and test camera - Olympus E-300 | EVOLT E-300 Advanced Manual (English) - Page 182
to follow the instructions below. When cleaning the CCD, the specified AC adapter should be used (~ P. 206). If a battery is used and power runs out during cleaning, the shutter will close, which may cause the shutter curtain and mirror to break. 1 Remove the lens from the camera. 2 Set the power - Olympus E-300 | EVOLT E-300 Advanced Manual (English) - Page 183
. When PIXEL MAPPING is finished, the menu is restored. Note ● If you accidentally turn the camera off during PIXEL MAPPING, start again from Step 1. OK button 1 PIXEL MAPPING 2 CLEANING MODE RESET LENS OFF 1 ERASE SETTING NO 2 COLOR SPACE s RGB CANCEL MENU SELECT GO 11 Appendix BUSY 183 - Olympus E-300 | EVOLT E-300 Advanced Manual (English) - Page 184
magnetism (e.g. credit card, floppy disk, etc.). Doing so may destroy the data on these items. Battery handling precautions ● This camera uses a lithium ion battery specified by Olympus. Do not use any other type of battery. For safe and proper use, read the battery's instruction manual 11 carefully - Olympus E-300 | EVOLT E-300 Advanced Manual (English) - Page 185
the battery charger is plugged in to the same outlet. If this occurs, plug the battery charger into a malfunction. ● When a subject is viewed diagonally in the camera, the edges may appear zigzagged on the monitor. This is not angle at which you are viewing the monitor. This is not a - Olympus E-300 | EVOLT E-300 Advanced Manual (English) - Page 186
user selects the aperture and the camera sets the shutter speed, and S mode, in which the user selects the shutter speed and the camera sets the aperture. In M mode, the user selects both the aperture and the shutter speed. Aperture The adjustable lens opening which controls also digital ESP - Olympus E-300 | EVOLT E-300 Advanced Manual (English) - Page 187
digital cameras. By entering which images to print and the number of copies of each, the user can easily have the desired images printed by a printer or print lab that supports the DPOF format. Eclipsing (Vignetting) 11 This refers to when an object obscures part an incorrect lens hood is used - Olympus E-300 | EVOLT E-300 Advanced Manual (English) - Page 188
of time the shutter is open (shutter speed) and the amount of light that passes through the lens (aperture). Flash Bracket A mount used to attach an external flash to the camera. Shadows on the subject can be changed by detaching the flash. The flash is used in combination with the flash cable. ISO - Olympus E-300 | EVOLT E-300 Advanced Manual (English) - Page 189
Shutter Priority AE mode. The user selects the shutter speed and the camera automatically varies the aperture so that the picture is taken with the best exposure. Single-lens reflex camera A camera with a shooting lens working also as the viewfinder lens also digital ESP software programs for scanners - Olympus E-300 | EVOLT E-300 Advanced Manual (English) - Page 190
constructed using thin-film technology. TTL phase-contrast detection system This is used to measure the distance to the subject. The camera determines if the image is focused by the detected phase contrast. TTL (Through-The-Lens) System To help adjust exposure, a light receptor built into the - Olympus E-300 | EVOLT E-300 Advanced Manual (English) - Page 191
's functions already described in Chapters 1 through 11. You can refer to the names of the camera's buttons and parts, the names and meanings of the icons displayed on the monitor, and the menu lists as necessary. Use the index when you want to find - Olympus E-300 | EVOLT E-300 Advanced Manual (English) - Page 192
Menu directory ⅷShooting Menu Menu Function AF WB ISO : Factory default setting Setting -5.0 - 0.0 - +5.0 RAW, TIFF, SHQ, HQ , SQ, RAW+SHQ, RAW+HQ, RAW+SQ AUTO , , SLOW, SLOW, SLOW2, , S-AF , C-AF, MF, S-AF+MF AUTO , 3000K, - Olympus E-300 | EVOLT E-300 Advanced Manual (English) - Page 193
Menu Function CARD SETUP DRIVE MONOTONE GRADATION SATURATION CONTRAST SHARPNESS WB BKT HQ SQ NOISE REDUCTION : Factory default setting Menu directory Setting Ref. Page ALL ERASE FORMAT YES, NO YES, NO BKT 3F 0.3EV , 3F 0.7EV, 3F 1.0EV , , -2.0 - 0.0 - +2.0 YES , NO OFF , BLACK & - Olympus E-300 | EVOLT E-300 Advanced Manual (English) - Page 194
Menu directory ⅷPlayback Menu Menu Function EDIT ⅷCustom Menu Menu Function EV STEP ISO BOOST MANUAL FLASH CUSTOM WB 12 AF ILLUMINATOR AEL METERING CUSTOM OK Information : Factory default setting Setting Ref. Page , , , P. 114 OFF , ON P. 115 JPEG/TIFF EDIT BLACK & WHITE , P. - Olympus E-300 | EVOLT E-300 Advanced Manual (English) - Page 195
134 PIXEL MAPPING P. 183 CLEANING MODE P. 182 RESET LENS OFF, ON P. 126 ERASE SETTING YES, NO P. 128 COLOR SPACE sRGB , Adobe RGB P. 106 FOCUS RING , P. 126 FIRMWARE * Settings differ depending on the region where the camera is sold. : Factory default setting 12 Information 195 - Olympus E-300 | EVOLT E-300 Advanced Manual (English) - Page 196
Available functions by shooting mode Mode Function Aperture value Shutter speed Bulb shooting Flash shooting AUTO SLOW SLOW SLOW2 PA SM -ߜ - - ߜ -ߜ ߜ ߜ - ߜ ߜ ߜ - ߜ - ߜ - ߜ - - ߜ ߜ ߜ Flash mode AF mode ߜ ISO ߜ White balance ߜ Metering ߜ AF target mark Preview ߜ DRIVE ߜ - Olympus E-300 | EVOLT E-300 Advanced Manual (English) - Page 197
Mode PA SM SCENE HQ SQ NOISE REDUCTION EV STEP ISO BOOST MANUAL FLASH CUSTOM WB AF ILLUMINATOR AEL METERING CUSTOM OK RESET FILE NAME REC VIEW SLEEP PC MODE VIDEO OUT PIXEL MAPPING CLEANING MODE RESET LENS ERASE SETTING COLOR SPACE FOCUS RING ߜ ߜ(Cannot be selected in / mode) ߜ ߜ(Cannot - Olympus E-300 | EVOLT E-300 Advanced Manual (English) - Page 198
indicator ~ P. 181 Strap eyelet Flash ~ P. 58 Self-timer/ Remote control lamp/Remote control receiver ~ P. 74 Mirror Lens lock pin Lens release button Lens attachment mark 12 Battery compartment lock Mount (Attach the lens after removing the body cap from the camera to prevent dust and dirt - Olympus E-300 | EVOLT E-300 Advanced Manual (English) - Page 199
Erase) button ~ P. 120 INFO (Information display) button ~ P. 112 MENU button ~ P. 25 (Playback) button ~ P. 108 (Flash) switch ~ P. 58 AEL button ~ P. 90 (AF frame selection) MENU button ~ P. 78 Card access lamp ~ P. 167 Arrow pad ~ P. 25, 108 OK/ (Protect) button ~ P. 25, 119, 125 ISO - Olympus E-300 | EVOLT E-300 Advanced Manual (English) - Page 200
Names of parts Names of parts Viewfinder indications 2 3 4 5 6 7 1 8 9 10 11 Items Indication examples 1 AF frame 2 Aperture value 3 Shutter speed Record mode (appears only when the (record mode) button has been pressed) 4 AF confirmation mark 5 Flash 6 White balance 7 AE lock - Olympus E-300 | EVOLT E-300 Advanced Manual (English) - Page 201
parts Names of parts Battery check 2 Print reservation, Number of prints 3 Protect 4 Record mode 5 Date and time 6 File number Frame number 7 Exposure mode 8 Metering mode 9 ISO 10 Color space 11 Focal length 12 Shutter speed 13 Aperture value 14 Exposure compensation 15 Flash intensity control - Olympus E-300 | EVOLT E-300 Advanced Manual (English) - Page 202
Shutter speed 1/2000 4 Aperture value F2.8 5 Exposure compensation +2.0 6 Noise reduction NR 7 AE lock AEL 8 Metering mode ESP, , 9 Exposure level indicator Exposure compensation indicator 10 Flash mode Super FP flash Flash intensity control code CARD ERROR, NO CARD 18 Memory gauge - Olympus E-300 | EVOLT E-300 Advanced Manual (English) - Page 203
Names of parts Names of parts Memory gauge Battery check P 1/250 ESP F5.6 ISO FP WB FOCUS S-AF AF ILLUMINATOR AUTO AUTO sRGB DRIVE HQ 3264 2448 Memory gauge Each time you press the shutter button, the memory gauge lights on the control panel screen, indicating that the picture you - Olympus E-300 | EVOLT E-300 Advanced Manual (English) - Page 204
Specifications Specifications -Camera Specifications Ⅵ Product type Product type : Single-lens reflex digital camera with interchangeable lens system Lens : Zuiko Digital, Four Thirds System Lens Lens mount : Four Thirds Mount Equivalent focal length on a 35 mm film camera : Approx. - Olympus E-300 | EVOLT E-300 Advanced Manual (English) - Page 205
shooting, Self-timer, Remote control : 2.5 frames/sec. (Max. no. of storable sequential pictures: 4 frames in RAW/TIFF) : Operation time: 12 sec., 2 sec. : Operation time: 2 sec., 0 sec. (instantaneous shooting) Information Ⅵ Flash Synchronization : Synchronized with the camera at 1/180 - Olympus E-300 | EVOLT E-300 Advanced Manual (English) - Page 206
) Humidity : 30 - 90 % (operation)/10 - 90 % (storage) Specifications - Provided accessories BLM-1 Lithium ion battery Type Standard voltage Standard capacity Battery life Recommended temperature Dimensions Weight : Lithium ion battery : DC 7.2 V : 1500 mAh : Approx. 500 full recharges *Varies - Olympus E-300 | EVOLT E-300 Advanced Manual (English) - Page 207
82 CANDLE 42 CARD SETUP 135 Card adapter 157 Center weighted averaging metering 86 CLEANING MODE 182 Close-up playback 109 COLOR SPACE 106 Compact Flash 172 Compression 34 CONTRAST 102 CONTROL 132 CUSTOM OK 125 CUSTOM WB 100 Index D Date/time setting 127 Digital ESP metering 86 - Olympus E-300 | EVOLT E-300 Advanced Manual (English) - Page 208
39 Index M MACRO 41 MANUAL FLASH 124 Manual focus 83 Manual shooting M 49 Menus flash 54 Remote control 72 RESET 128 RESET LENS 126 S S-AF 80 S-AF+MF 81 SATURATION 103 Self-timer shooting 72 Sequential shooting 66 SHARPNESS 101 SHQ 35 Shutter priority shooting S 47 Shutter - Olympus E-300 | EVOLT E-300 Advanced Manual (English) - Page 209
Especially when a wide-angle lens is used, this function is able to work effectively. To enable the function, in the Camera 2 menu, select the S-AF mode, you can release the shutter button and take a picture without waiting until focusing and flash charge are finished. This function is useful when - Olympus E-300 | EVOLT E-300 Advanced Manual (English) - Page 210
select ON and then press the OK button. Notes: UNDERWATER MACRO: Suitable for shooting close-ups of fish. The natural color of the water will appear. If you use the flash, you can enhance the red tones. UNDERWATER WIDE: Suitable for shooting a wide area, such as a school of fish. This mode lets you - Olympus E-300 | EVOLT E-300 Advanced Manual (English) - Page 211
MEMO 211 - Olympus E-300 | EVOLT E-300 Advanced Manual (English) - Page 212
: Tel. 1-800-260-1625 (Toll-free) Our phone customer support is available from 8 am to 10 pm (Monday to Friday) ET E-Mail: [email protected] Olympus software updates can be obtained at: http://www.olympus.com/digital Premises: Wendenstrasse 14-18, 20097 Hamburg, Germany Tel. +49 40 - 23
-
 1
1 -
 2
2 -
 3
3 -
 4
4 -
 5
5 -
 6
6 -
 7
7 -
8
-
9
-
10
-
11
-
12
-
13
-
14
-
15
-
16
-
17
-
18
-
19
-
20
-
21
-
22
-
23
-
24
-
25
-
26
-
27
-
28
-
29
-
30
-
31
-
32
-
33
-
34
-
35
-
36
-
37
-
38
-
39
-
40
-
41
-
42
-
43
-
44
-
45
-
46
-
47
-
48
-
49
-
50
-
51
-
52
-
53
-
54
-
55
-
56
-
57
-
58
-
59
-
60
-
61
-
62
-
63
-
64
-
65
-
66
-
67
-
68
-
69
-
70
-
71
-
72
-
73
-
74
-
75
-
76
-
77
-
78
-
79
-
80
-
81
-
82
-
83
-
84
-
85
-
86
-
87
-
88
-
89
-
90
-
91
-
92
-
93
-
94
-
95
-
96
-
97
-
98
-
99
-
100
-
101
-
102
-
103
-
104
-
105
-
106
-
107
-
108
-
109
-
110
-
111
-
112
-
113
-
114
-
115
-
116
-
117
-
118
-
119
-
120
-
121
-
122
-
123
-
124
-
125
-
126
-
127
-
128
-
129
-
130
-
131
-
132
-
133
-
134
-
135
-
136
-
137
-
138
-
139
-
140
-
141
-
142
-
143
-
144
-
145
-
146
-
147
-
148
-
149
-
150
-
151
-
152
-
153
-
154
-
155
-
156
-
157
-
158
-
159
-
160
-
161
-
162
-
163
-
164
-
165
-
166
-
167
-
168
-
169
-
170
-
171
-
172
-
173
-
174
-
175
-
176
-
177
-
178
-
179
-
180
-
181
-
182
-
183
-
184
-
185
-
186
-
187
-
188
-
189
-
190
-
191
-
192
-
193
-
194
-
195
-
196
-
197
-
198
-
199
-
200
-
201
-
202
-
203
-
204
-
205
-
206
-
207
-
208
-
209
-
210
-
211
-
212
 |
 |

DIGITAL CAMERA
ADVANCED MANUAL
ADVANCED MANUAL
DIGITAL CAMERA
●
Thank you for purchasing an Olympus digital camera. Before you start to use your new
camera, please read these instructions carefully to enjoy optimum performance and a
longer service life.
●
This manual explains advanced techniques such as shooting and playback functions,
customizing functions or settings and transferring recorded images to a computer, etc.
●
We recommend that you take test shots to get accustomed to your camera before
taking important photographs.
●
The screen and camera illustrations shown in this manual were produced during the
development stages and may differ from the actual product.
Printing
Transferring images to a
computer
Basic operations
Selecting the right mode for
shooting conditions
Focusing functions
Playback
Things to know before shooting
Various shooting functions
Exposure, image and color
Customizing the settings/
functions of your camera
Appendix
Information