Panasonic KX-FLB851 Multi-function Laser Fax - Page 46
To select the input tray and paper size, To stop copying, IN TRAY #1, LETTER, LEGAL
 |
UPC - 037988809851
View all Panasonic KX-FLB851 manuals
Add to My Manuals
Save this manual to your list of manuals |
Page 46 highlights
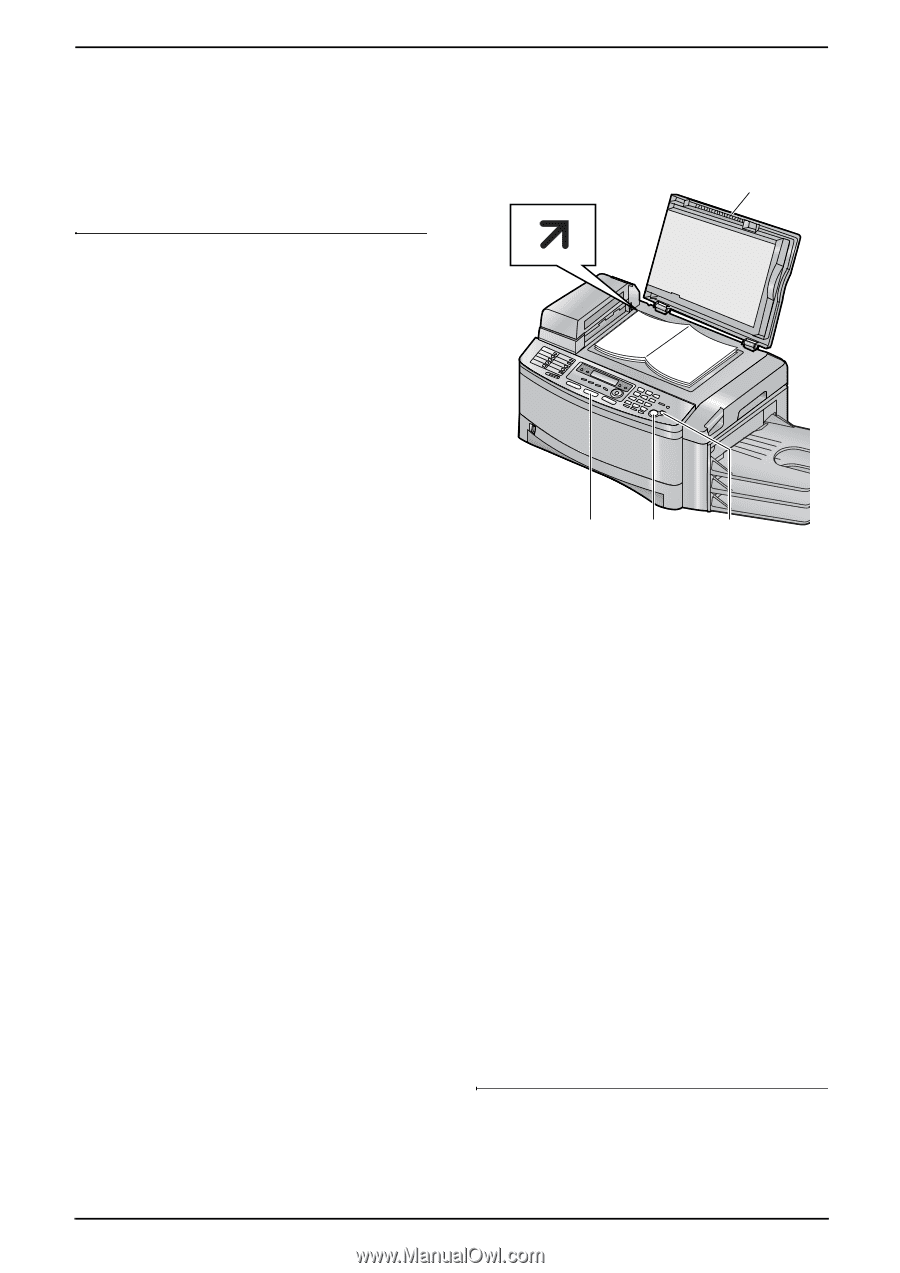
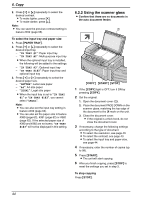
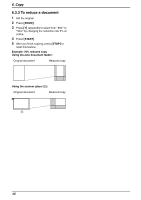
6. Copy 2. Press {V} or {^} repeatedly to select the desired contrast. L To make lighter, press {V}. L To make darker, press {^}. Note: L You can save the previous contrast setting in feature #462 (page 66). To select the input tray and paper size 1. Press {PAPER TRAY}. 2. Press {V} or {^} repeatedly to select the desired input tray. - "IN TRAY #1": Paper input tray - "IN TRAY #2": Multi-purpose input tray L When the optional input tray is installed, the following will be added to the settings. - "IN TRAY #3": Optional input tray - "IN TRAY #1#3": Paper input tray and optional input tray 3. Press {} repeatedly to select the desired paper size. - "LETTER": Letter size paper - "A4": A4 size paper - "LEGAL": Legal size paper L When the input tray is set to "IN TRAY #1" or "IN TRAY #1#3", you cannot select "LEGAL". Note: L You can also set the input tray setting in feature #460 (page 66). L You can also set the paper size in feature #380 (page 62), #381 (page 62) or #382 (page 62). If the selected paper size of #380 and #382 are not same, "IN TRAY #1#3" will not be displayed in this setting. 6.2.2 Using the scanner glass L Confirm that there are no documents in the auto document feeder. 1 {COPY} {START} {STOP} 1 If the {COPY} light is OFF, turn it ON by pressing {COPY}. 2 Set the original. 1. Open the document cover (1). 2. Place the document FACE DOWN on the scanner glass, matching the top edge of the document to the l mark on the unit. 3. Close the document cover. L If the original is a thick book, do not close the document cover. 3 If necessary, change the following settings according to the type of document. L To select the resolution, see page 43. L To select the contrast, see page 43. L To select the input tray and paper size, see page 44. 4 If necessary, enter the number of copies (up to 99). 5 Press {START}. L The unit will start copying. 6 After you finish copying, press {STOP} to reset the settings you set in step 3. To stop copying Press {STOP}. 44
-
 1
1 -
2
-
3
-
4
-
5
-
6
-
7
-
8
-
9
-
10
-
11
-
12
-
13
-
14
-
15
-
16
-
17
-
18
-
19
-
20
-
21
-
22
-
23
-
24
-
25
-
26
-
27
-
28
-
29
-
30
-
31
-
32
-
33
-
34
-
35
-
36
-
37
-
38
-
39
-
40
-
 41
41 -
 42
42 -
 43
43 -
 44
44 -
 45
45 -
 46
46 -
 47
47 -
 48
48 -
 49
49 -
 50
50 -
 51
51 -
52
-
53
-
54
-
55
-
56
-
57
-
58
-
59
-
60
-
61
-
62
-
63
-
64
-
65
-
66
-
67
-
68
-
69
-
70
-
71
-
72
-
73
-
74
-
75
-
76
-
77
-
78
-
79
-
80
-
81
-
82
-
83
-
84
-
85
-
86
-
87
-
88
-
89
-
90
-
91
-
92
-
93
-
94
-
95
-
96
-
97
-
98
-
99
-
100
-
101
-
102
-
103
-
104
-
105
-
106
-
107
-
108
-
109
-
110
 |
 |