Panasonic KX-FLB851 Multi-function Laser Fax - Page 67
Receive Alert, Mode=on, Friendly Rcv, Fax Input Tray, Pcfax Setting, Always, Connected - problems
 |
UPC - 037988809851
View all Panasonic KX-FLB851 manuals
Add to My Manuals
Save this manual to your list of manuals |
Page 67 highlights
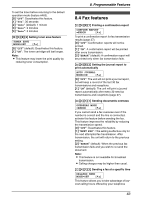
3. Press {1} to select "ON". 4. Press {SET}. 5. Enter your code from 2 to 4 digits, using 0-9, {*} and {#}. L The default code is ";#9". L Do not enter "0000". 6. Press {SET}. 7. Press {MENU}. {#}{4}{3}{7} Setting the memory reception alert RECEIVE ALERT MODE=ON [V^] To alert you with a beeping sound when a received fax document is stored into memory due to some existing problem. The slow beeps will continue until you clear the printing problem and make sure the unit is supplied with enough paper to print the stored document. {0} "OFF": Deactivates this feature. {1} "ON" (default): You will be alerted to a reception problem by a beeping sound. {#}{4}{3}{8} Setting friendly reception FRIENDLY RCV MODE=ON [V^] To receive a fax automatically when you answer a call and hear a fax calling tone (slow beep). {0} "OFF": You have to press {START} for fax reception. {1} "ON" (default): You do not have to press {START} for fax reception. {#}{4}{4}{0} Setting the input tray to use for faxing FAX INPUT TRAY =#1 [V^] You can select the input tray that will be used for printing received faxes. {1} "#1" (default): Paper input tray {2} "#2": Multi-purpose input tray L When the optional input tray is installed, the following will be displayed. {1}: "#1" {2}: "#2" {3}: "#3" {4}: "#1+#3" (default) Note: L Lists or reports printed by pressing {HELP} (page 21) or {MENU} (page 91) will be fed from the paper input tray. 8. Programmable Features L When the input tray setting is set to "#1+#3", the paper size in the paper input tray (feature #380 on page 62) and the optional input tray (feature #382 on page 62) should be the same. If either of the paper size is changed, the input tray setting will be changed to "#1" automatically. {#}{4}{4}{1} Setting the output tray to use for faxing FAX OUTPUT TRAY =#3 [V^] You can select the output tray that will be used for printing received faxes. {1} "#1": Upper output tray (Up to approx. 100 sheets). {2} "#2": Middle output tray (Up to approx. 50 sheets). {3} "#3" (default): Lower output tray (Up to approx. 50 sheets). Note: L Lists or reports printed by pressing {HELP} (page 21) or {MENU} (page 91) will be stacked on the upper output tray. {#}{4}{4}{2} Receiving a fax into the computer assigned as the ADMIN PC PCFAX SETTING =OFF [V^] If you wish to receive a fax into the computer assigned as the ADMIN PC, activate this feature and select [PC FAX] from Multi-Function Station. {0} "OFF" (default): Deactivates this feature. {1} "ALWAYS": If the unit recognizes the connection to the computer assigned as the ADMIN PC, it will transfer a received document to the computer. If the unit cannot recognize the connection, it will store a received document in the memory once, then transfer the data after recognition of the connection. {2} "CONNECTED": If the unit recognizes the connection to the computer assigned as the ADMIN PC, it will transfer a received document to the computer. If the unit cannot recognize the connection, it will print out the data. {#}{4}{5}{9} Resetting fax features to their default settings SET FAX DEFAULT RESET=NO [V^] {0} "NO" (default) {1} "YES" To reset the fax features: 65
-
 1
1 -
2
-
3
-
4
-
5
-
6
-
7
-
8
-
9
-
10
-
11
-
12
-
13
-
14
-
15
-
16
-
17
-
18
-
19
-
20
-
21
-
22
-
23
-
24
-
25
-
26
-
27
-
28
-
29
-
30
-
31
-
32
-
33
-
34
-
35
-
36
-
37
-
38
-
39
-
40
-
41
-
42
-
43
-
44
-
45
-
46
-
47
-
48
-
49
-
50
-
51
-
52
-
53
-
54
-
55
-
56
-
57
-
58
-
59
-
60
-
61
-
 62
62 -
 63
63 -
 64
64 -
 65
65 -
 66
66 -
 67
67 -
 68
68 -
 69
69 -
 70
70 -
 71
71 -
 72
72 -
73
-
74
-
75
-
76
-
77
-
78
-
79
-
80
-
81
-
82
-
83
-
84
-
85
-
86
-
87
-
88
-
89
-
90
-
91
-
92
-
93
-
94
-
95
-
96
-
97
-
98
-
99
-
100
-
101
-
102
-
103
-
104
-
105
-
106
-
107
-
108
-
109
-
110
 |
 |