Samsung SGH-T249 User Manual (user Manual) (ver.f6) (English) - Page 82
Go to Photos, Shooting Mode
 |
View all Samsung SGH-T249 manuals
Add to My Manuals
Save this manual to your list of manuals |
Page 82 highlights
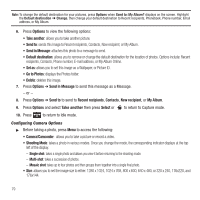
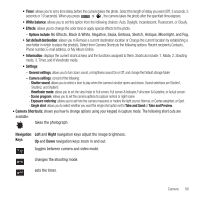
Note: To change the default destination for your pictures, press Options when Send to: My Album? displays on the screen. Highlight the Default destination ➔ Change, then change your default destination to Recent recipients, Phonebook, Phone number, Email address, or My Album. 6. Press Options to view the following options: • Take another: allows you to take another picture. • Send to: sends this image to Recent recipients, Contacts, New recipient, or My Album. • Send in Message: attaches this photo to a message to send. • Default destination: allows you to remove or change the default destination for the location of photos. Options include: Recent recipients, Contacts, Phone number, E-mail address, or My Album Online. • Set as: allows you to set this image as a Wallpaper, or Picture ID. • Go to Photos: displays the Photos folder. • Delete: deletes this image. 7. Press Options ➔ Send in Message to send this message as a Message. - or - 8. Press Options ➔ Send to to send to Recent recipients, Contacts, New recipient, or My Album. 9. Press Options and select Take another then press Select or to return to Capture mode. 10. Press to return to Idle mode. Configuring Camera Options ᮣ Before taking a photo, press Menu to access the following: • Camera/Camcorder: allows you to take a picture or record a video. • Shooting Mode: takes a photo in various modes. Once you change the mode, the corresponding indicator displays at the top left of the display. - Single shot: takes a single photo and allows you view it before returning to the shooting mode. - Multi-shot: takes a succession of photos. - Mosaic shot: takes up to four photos and then groups them together into a single final photo. • Size: allows you to set the image size to either: 1280 x 1024, 1024 x 768, 800 x 600, 640 x 480, or 320 x 240, 176x220, and 176x144. 79
-
 1
1 -
2
-
3
-
4
-
5
-
6
-
7
-
8
-
9
-
10
-
11
-
12
-
13
-
14
-
15
-
16
-
17
-
18
-
19
-
20
-
21
-
22
-
23
-
24
-
25
-
26
-
27
-
28
-
29
-
30
-
31
-
32
-
33
-
34
-
35
-
36
-
37
-
38
-
39
-
40
-
41
-
42
-
43
-
44
-
45
-
46
-
47
-
48
-
49
-
50
-
51
-
52
-
53
-
54
-
55
-
56
-
57
-
58
-
59
-
60
-
61
-
62
-
63
-
64
-
65
-
66
-
67
-
68
-
69
-
70
-
71
-
72
-
73
-
74
-
75
-
76
-
 77
77 -
 78
78 -
 79
79 -
 80
80 -
 81
81 -
 82
82 -
 83
83 -
 84
84 -
 85
85 -
 86
86 -
 87
87 -
88
-
89
-
90
-
91
-
92
-
93
-
94
-
95
-
96
-
97
-
98
-
99
-
100
-
101
-
102
-
103
-
104
-
105
-
106
-
107
-
108
-
109
-
110
-
111
-
112
-
113
-
114
-
115
-
116
-
117
-
118
-
119
-
120
-
121
-
122
-
123
-
124
-
125
-
126
-
127
-
128
-
129
-
130
-
131
-
132
-
133
-
134
-
135
-
136
-
137
-
138
-
139
-
140
-
141
-
142
-
143
-
144
 |
 |