Sharp GX17 User Guide
Sharp GX17 Manual
 |
View all Sharp GX17 manuals
Add to My Manuals
Save this manual to your list of manuals |
Sharp GX17 manual content summary:
- Sharp GX17 | User Guide - Page 1
, Sharp Telecommunications of Europe Limited, declares that this GX17 is in compliance with the essential requirements and other relevant provisions of Directive 1999/5/EC. A copy of the original declaration of conformity can be found at the following Internet address: http://www.sharp-mobile.com - Sharp GX17 | User Guide - Page 2
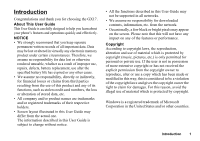
the GX17. About This User Guide This User Guide is carefully designed to help you learn about your phone's features User Guide is subject to change without notice. • All the functions described in this User Guide may not be supported in all networks. • We assume no responsibility for downloaded - Sharp GX17 | User Guide - Page 3
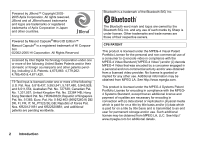
Bluetooth is a trademark of the Bluetooth SIG, Inc. The Bluetooth word mark and logos are owned by the Bluetooth SIG, Inc. and any use of such marks by Sharp for on a title by title basis and is transmitted to an end user for permanent storage and/or use. Such additional license may be obtained from - Sharp GX17 | User Guide - Page 4
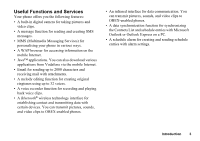
from Vodafone via the mobile Internet. • Email for sending up to 2000 characters and receiving mail with attachments. • A melody editing function for creating original ringtones using up to 32 voices. • A voice recorder function for recording and playing back voice clips. • A Bluetooth® wireless - Sharp GX17 | User Guide - Page 5
Services 3 Your Phone 7 Optional Accessories 7 Getting Started 8 Inserting the SIM Card and the Battery .... 10 Charging the Battery 12 Turning Your Phone List Entries 33 Viewing Groups 33 Group Call 34 Assigning a Ringtone to Each Contacts List Entry 34 Memory Status 35 Speed Dial - Sharp GX17 | User Guide - Page 6
Messages 36 Dialling a Service Phone Number 37 Camera 38 Take Picture 38 Record Video 42 Messages 46 Multimedia (MMS 46 Text (SMS 52 Email 55 Cell Broadcasts 57 Vodafone live 58 Starting the WAP Browser 58 Navigating a WAP Page 59 My Items 62 Pictures 62 Games & More 64 Sounds - Sharp GX17 | User Guide - Page 7
104 Changing the Language 105 Network 105 Security 109 Master Reset 110 Connecting GX17 to Your PC 111 System Requirements 111 GSM/GPRS Modem 111 Handset Manager 112 Software Installation 112 Note 112 Troubleshooting 114 Safety Precautions and Conditions of Use 116 CONDITIONS OF USE 116 - Sharp GX17 | User Guide - Page 8
with: • GSM 900/1800/1900 GPRS phone • Rechargeable Li-ion Battery • AC Charger • CD-ROM • User Guide • Quick Start Guide Optional Accessories • Li-ion Spare Battery (XN-1BT30) • Cigarette Lighter Charger (XN-1CL30) • USB Data Cable (XN-1DC30) • AC Charger (XN-1QC30, XN-1QC31) • Personal Hands - Sharp GX17 | User Guide - Page 9
Keys): Moves cursor to select menu items, etc. Up/Down arrow keys: Displays Contacts List a b entries in standby mode. a and b indicate in this manual these keys. Left arrow key: c Displays list of Applications in standby mode. 8 Getting Started 16 17 Right arrow key: d 3. Centre Key: 18 - Sharp GX17 | User Guide - Page 10
/Shift Key: P 8. Display 9. Right Soft Key: C 10.End/Power Key: F 11 function at the bottom right of the screen. Used to access "Vodafone live!" by opening the browser in standby mode. Ends a call, Connector: Used to connect either the charger or USB Data Cable. 15.Microphone 16.Infrared Port: - Sharp GX17 | User Guide - Page 11
Inserting the SIM Card and the Battery 1. Remove the battery cover as shown below. 3. Hold the battery so that the metal contacts of the battery are facing down, slide the guides on the top of the battery into the battery slots , and then insert it . 2 1 2. Slide the SIM card into the SIM holder. - Sharp GX17 | User Guide - Page 12
and disconnect the charger and other accessories. Remove the battery cover. 3. Hold down gently whilst sliding the SIM card out of the SIM holder . 2. Pick up the battery using the protruding edge and remove the battery from the phone. 1 2 Battery Disposal The device is supported by a battery. In - Sharp GX17 | User Guide - Page 13
from the external connector. 3. Put the cover back. Note • Do not use any non approved charger, this may damage your phone and invalidate any warranty, please see "Battery" on page 117 for details. When the phone is charging, the animated battery status icon ( ) in the upper right of the screen - Sharp GX17 | User Guide - Page 14
right hand side of the screen. Low Battery During Use When the battery is running low, an alarm will sound and the " " is displayed on the screen. If you are using your phone and you hear the "low battery" alarm, attach your charger as soon as possible. The phone may not be able to continue normal - Sharp GX17 | User Guide - Page 15
phone for the first time and use the Contacts List function, you are asked whether you wish to copy Contacts List entries on the SIM card (if using a previously used SIM). Follow the on-screen instructions standby. The soft and centre keys are not displayed when locked. To unlock, press P, then - Sharp GX17 | User Guide - Page 16
Centre key Status indicators Right soft key Status Indicators 1. / : Strength of received signal / Service out of range 2. : GPRS enabled and within range - flashes during GPRS transmission. 3. / : Text message alerts [unread / mailbox full] 4. / : Multimedia message alerts [unread / mailbox - Sharp GX17 | User Guide - Page 17
/ GPRS] 16. : Battery level 17. : Roaming outside network 18. : "Ringer Volume" (p. 92) set to "Silent" 19. : Vibration alert (p. 93) enabled 20. : USB Data Cable connected 21. / : "Infrared" connection [enabled (grey) / communicating (red)] 22. / : Bluetooth wireless setting [enabled - Sharp GX17 | User Guide - Page 18
left and right of the screen. Press the corresponding soft key (A or C). To return to the previous screen, press the right soft key if it displays "Back". To close the Main menu, press the right soft key if it displays "Exit". Each section in this User Guide starts with a list of items you will need - Sharp GX17 | User Guide - Page 19
emergency number) using the keypad and press D to dial. Note • Emergency calls may not be available on all mobile phone networks when certain network services and/ or phone features are in use. Contact your network operator for more information. • This Emergency number can normally be used to - Sharp GX17 | User Guide - Page 20
redial numbers in the call log. Select from specific categories or "All Calls". Specific category contains up to 10 numbers and the is connected to the phone, you can answer calls by pressing the Answer button. • If you have subscribed to the Calling Line Identification (CLI) service and the caller's - Sharp GX17 | User Guide - Page 21
to send a busy tone to the caller of an incoming call letting them know that you cannot answer the call. In Call Menu Your phone has additional functions available whilst a call is in progress. Adjusting the Earpiece Volume During a call, you can adjust the earpiece volume (and handsfree volume - Sharp GX17 | User Guide - Page 22
call to, then press D. Tip • You can also make another call by entering the phone number during a call instead of steps 1 and 2. The current call is automatically put on hold. Call Waiting This service notifies you of another incoming call whilst you have a call in progress. 1. During a call - Sharp GX17 | User Guide - Page 23
to answer the second call. 2. Select "Conference All" to join the conference call. 3. Press F to end the conference call. Note • Conference call service may not be available on all networks. Contact your network operator for more information. • You have more options for the Conference call in step - Sharp GX17 | User Guide - Page 24
To Add New Participants to the Conference Call 1. Press [Options] and select "Dial". 2. Enter the number you wish to include in the conference call and press D to dial. 3. Press [Options] and select "Multiparty". 4. Select "Conference All" to join the conference call. If you wish to add other - Sharp GX17 | User Guide - Page 25
Entering Characters When entering characters to create Contacts List entries, text messages or multimedia messages, etc., press the corresponding keys. In multi-tap input method, press each key until the desired character is displayed. For example, press H once for the letter "A" or twice for the - Sharp GX17 | User Guide - Page 26
Changing the Input Languages You can change the input language on the text entry screen. 1. On the text entry screen, press [Options]. 2. Select "Input Language". If "Input Language" is not displayed, select "Text Options" and then select "Input Language". 3. Select the desired language. Changing - Sharp GX17 | User Guide - Page 27
My Dictionary You can create your own word list for T9 text input. 1. On the text entry screen in T9 mode, press [Options]. 2. Select "My Dictionary". If "My Dictionary" is not displayed, select "Text Options" and then select "My Dictionary". 3. Select "Add New Word" and enter a new word. To edit a - Sharp GX17 | User Guide - Page 28
for the menu's corresponding number on the Main menu. See the following table for reference. Shortcuts are listed in the headings of this manual. For example: "M 9-7". Example: To Access "Language" Sub Menu Using Shortcut Keys Press O M. Note • The shortcut keys work for the first three menu levels - Sharp GX17 | User Guide - Page 29
™ Information 1 Vodafone live! 2 Games 3 Ringtones 4 Pictures 5 News 6 Sport 7 Find & Seek 8 Chat 9 Search 1 SIM Application* 2 Alarms 3 Calculator 4 Voice Recorder 5 Melody Editor 6 Phone Help 1 Create Message 2 Multimedia 3 Text 4 Email 5 Media Album 6 Vodafone Mail 7 Messenger 8 Cell Broadcasts - Sharp GX17 | User Guide - Page 30
Note for the menu indications for the Postcard and Media Album services • The menu indications for the Postcard and Media Album services vary in the United Kingdom and Ireland as follows: Current indications in the User Guide "Postcard" "As Postcard" "Media Album" "To Album" Indications in United - Sharp GX17 | User Guide - Page 31
phone can store up to 640 entries. In a Contacts List, you can store the following items. Items stored in the handset memory First Name Last Name Tel Mobile you use. Phone: Up to 40 digits Using the infrared or Bluetooth wireless function, you can send the Contacts List entry to a PC to share the - Sharp GX17 | User Guide - Page 32
or SIM card memory locations to store the new entry. For switching locations, see "Selecting the Storage Memory" on page 30. The amount of phone numbers that you can store to the SIM card is dependent on its capacity. Contact your network operator for details. "Contacts" → "Add New Contact" If - Sharp GX17 | User Guide - Page 33
→ [Options] → "Advanced" → "Copy All Entries" 1. Select "From SIM to Handset" or "From Handset to SIM". Note • When you insert the SIM card into your phone for the first time and use the Contacts List function, the confirmation screen appears automatically, asking you if you wish to copy or not. The - Sharp GX17 | User Guide - Page 34
Contacts List. On the details screen, select the desired phone number and press D. • If you select "SIM Memory" for the "Contacts Location " option in Contacts List menu (p. 30), only one phone number entry is displayed. Editing Contacts List Entries "Contacts" → "Contacts List" - Sharp GX17 | User Guide - Page 35
only the selected group or "Select All" to view all groups. Group Call Different ringtones can be set for each group. When you purchase this phone, groups are set to off. If you do not set a group ringtone, the ringtone assigned in the Settings menu is used. "Contacts" → "Contacts List" → [Options - Sharp GX17 | User Guide - Page 36
→ "Contacts List" 1. Highlight the desired entry. 2. Press [Options] and select "Send Contact". 3. Select "Via Bluetooth" or "Via Infrared". For "Via Bluetooth" The phone starts searching for Bluetooth wireless technology enabled devices within 10 metres. When detected, a list of enabled devices is - Sharp GX17 | User Guide - Page 37
Bluetooth wireless settings, see "Connectivity" on page 89. Sending Messages "Contacts" → "Contacts List" 1. Select the desired entry including the phone 46. Note • The Postcard service is not available on some service providers. Please contact your service provider for more information. 36 - Sharp GX17 | User Guide - Page 38
is displayed at the bottom of the list. "Contacts" 1. Select "Service Dialling No.". 2. Select the desired service phone number. Tip • If the SIM card contains only one service phone number, you can dial it in step 1 by pressing . • If no service phone number is stored in the SIM card, this menu is - Sharp GX17 | User Guide - Page 39
Picture (M 5-1) Put the phone into the digital camera mode service providers. Please contact your service provider for more information.) Large MMS messages may cause the size of attached pictures to be reduced. Using the Full Screen The preview can be displayed on the full screen without the soft - Sharp GX17 | User Guide - Page 40
rectify. • The digital camera uses a C-MOS sensor. Although this camera has been manufactured to the highest specifications, some pictures may still appear too bright or too dark. • If the phone has been left in a hot place for a long time before taking or registering a picture, the picture quality - Sharp GX17 | User Guide - Page 41
. Using the Timer (Delay Timer) "Camera" → "Take Picture" → [Options] → "Delay Timer" 1. Select "On" or "Off". " " or " " is displayed on the screen and the phone returns to digital camera mode. 2. Press to start the delay timer. 10 seconds after the timer sounds, the shutter sounds, and the camera - Sharp GX17 | User Guide - Page 42
with the timer, press [Cancel] whilst the delay timer is operating. Continuous Shoot Four pictures are taken in succession. Auto Shoot and Manual Shoot are available. Continuous Shoot indicators : When pictures are taken in Continuous Shoot mode, these indicators appear on the screen. * When delay - Sharp GX17 | User Guide - Page 43
Options] → "Shutter Sound" 1. Select the desired shutter sound. To play back the shutter sound, press [Play]. Note • Continuous Shoot uses the specialised cannot be changed for the above settings. Record Video (M 5-2) Put the phone into the video camera mode to record a video. Video clips are saved - Sharp GX17 | User Guide - Page 44
2. Select "Save". "Saving (file name) to My Items..." is displayed, then the video clip is registered. To preview a video clip before saving, select "Preview". To send a video clip by multimedia message after recording the video clip, select "Save and Send". To record a video clip again, press [ - Sharp GX17 | User Guide - Page 45
(exposure level) indicators : (Bright → Normal → Dark) Once the phone has returned to the standby screen, the brightness settings return to default. selected video clip is played back. To pause playback, press . To resume playback, press again. To stop playback, press [Back]. Tip • Your video clips - Sharp GX17 | User Guide - Page 46
To Record a Video Clip with the Timer "Camera" → "Record Video" → [Options] → "Delay Timer" 1. Select "On" or "Off". " " is displayed on the screen and the phone returns to video camera mode. 2. Press to start the delay timer. 10 seconds after the timer sounds, the camera starts recording the video - Sharp GX17 | User Guide - Page 47
Messages (M 4) Your phone allows you to send and receive text, multimedia and Email, and receive WAP alerts as well. Multimedia (MMS) (M 4-2) About Multimedia Messaging Multimedia Messaging Service (MMS) allows you to send and receive multimedia messages with graphical images, photographs, sound, - Sharp GX17 | User Guide - Page 48
• To add more recipients, select "Add Contact" in step 3. Select "To" or "Cc" and select the desired position for the recipient. Then enter the phone number or Email address. To Send a Voice Clip Message or Video Clip Message You can quickly send a voice or video clip file without entering a message - Sharp GX17 | User Guide - Page 49
control options available are: Add: To add a new slide. Remove: To remove the active slide. Previous: To navigate to the previous slide. Next The selected picture/sound/video clip is attached. When attaching is complete, press [Back] to return to the message creation screen. • To add more files, - Sharp GX17 | User Guide - Page 50
is deactivated when "Multimedia Volume" is set to "Silent". Storing the Phone Number or Email Address of a Sender in the Contacts List A → Highlight the alert you wish to download. 2. Press [Options] and select "Download". Tip • You can press downloading. instead of step 2 to start Messages 49 - Sharp GX17 | User Guide - Page 51
"Setting Up MMS". Setting Up MMS A → "Multimedia" → "Settings" 1. Select the item you wish to set up. • Roam. Download (Immediate, Deferred): Controls MMS download timing when roaming outside of your network. Immediate: Downloads MMS immediately from the server. Deferred: Asks if you would like to - Sharp GX17 | User Guide - Page 52
: Sets the slide display time when sending a message. 2. Change each item. Sending a Picture File with Postcard Your phone allows you to send multimedia messages to a Vodafone specific Postcard service centre that prints the picture and mail it to the recipient's address specified in the MMS message - Sharp GX17 | User Guide - Page 53
depending on the picture size. Text (SMS) (M 4-3) About Text Messaging The Short Message Service (SMS) allows you to send text messages of up to 1024 characters to other GSM users. To Use SMS with Your Phone Messages longer than 160 characters may be composed. During sending, the messages are split - Sharp GX17 | User Guide - Page 54
Note • When you send a message of more than 160 characters, a confirmation message is displayed. Tip • You can use the phone number from the Contacts List. (p. 32) To use a phone number in the Contacts List, press [Contacts] in step 2. • To add more recipients, select "Add Contact" in step 3. Select - Sharp GX17 | User Guide - Page 55
in the Contacts List, select "Save Number". Setting Up SMS (M 4-3-5) To Set Up the Service Centre Address A → "Text" → "Settings" → "Message Centre" 1. Enter the centre phone number. If you wish to enter a country code for a message to an international number, press and hold Q until a "+" sign - Sharp GX17 | User Guide - Page 56
Email provider, select an empty profile and enter the settings. Once the settings are complete, go to "Messages", "Email", "Check Email" to download new messages. The phone will notify you if there are any new messages. Note • You cannot send Email messages with files attached. If you forward Email - Sharp GX17 | User Guide - Page 57
phone, go to "Inbox" in "Email" to read them. Reading an Email Message Incoming Messages The Email indicator ( ) will appear when there are unread messages. A → "Email" → "Inbox" 1. Select the message you wish to view. 2. Scroll the screen to read the message. Tip • If you have problems downloading - Sharp GX17 | User Guide - Page 58
information is broadcast to subscribers in certain network areas. This function may not be available on all mobile phone networks. Contact your network operator for more information. Enabling/Disabling Cell Broadcasts (M 4-8-1) A → "Cell Broadcasts" → "Switch On/Off" 1. Select "On" or "Off". Reading - Sharp GX17 | User Guide - Page 59
on' which means there is no need to wait for dialling up. * If you have problems getting connected, please phone Vodafone Customer Support. Your phone contains a WAP browser used for surfing on the Mobile Internet, where you can get a lot of useful information. Normally, pages are designed for - Sharp GX17 | User Guide - Page 60
an action displayed in the lower right corner of the screen. Used to access "Vodafone live!" by opening the browser. • Q (press and hold): Starts the "Go Bookmark (WAP). • F: Exits the browser (short press). Turns off the phone. (press and hold) Browser Menu When you are browsing, you can reach - Sharp GX17 | User Guide - Page 61
a list of WAP push messages. You can receive push messages via WAP Services. This means that a service provider sends WAP content to your phone, without any set up. • Settings: Includes "Downloads", etc. • Security: Sets the security. • Clear...: Clears history, cache, etc. • Restart Browser - Sharp GX17 | User Guide - Page 62
of hotkeys is displayed. 5. Select the number to which you wish to assign hotkeys. The list of registered bookmarks is displayed. 6. Select the desired bookmark. Vodafone live! 61 - Sharp GX17 | User Guide - Page 63
via infrared or Bluetooth wireless technology to OBEX-enabled phones. Note • The phone can store approximately 1.8 Mbytes of data across Pictures, Games & More, Sounds and Videos. Pictures (M 6-1) Pictures that are taken by a digital camera or images that are downloaded from mobile Internet sites - Sharp GX17 | User Guide - Page 64
Saving to Contacts List You can use this option only for pictures saved in the handset memory. "My Items" → "Pictures" → "Saved Pictures" 1. Highlight the file you wish to add to Contacts List. 2. Press [Options] and select "Add to Contact". To overwrite, select "Existing Contact" and select the - Sharp GX17 | User Guide - Page 65
kinds of Vodafone specific applications can be used in this phone. To use applications, download the applications via the mobile Internet. Some the mobile Internet to update information/play games). The network may charge you more for using network-based applications. Please contact your service - Sharp GX17 | User Guide - Page 66
downloaded. Note • User authentication may be required before downloading the application on some information screens. Executing Applications (M 6-2-1) "My Items" → "Games & More" → "Applications" Downloaded default ringtones are not contained within Saved Sounds. : SMAF format : Original ringtone ( - Sharp GX17 | User Guide - Page 67
music data for mobile phones. Playing Back Sound Files "My Items" → "Sounds" → "Saved Sounds" 1. Select the file you wish to play back. To stop and select "Send". 3. Select "As Multimedia". If you select your original ringtone in step 1, perform the following. 4. Select the file format "SMAF", "MIDI - Sharp GX17 | User Guide - Page 68
6-4) Video clips that are recorded by a video camera or video clips that are downloaded from mobile Internet sites can be managed. Playing Back Video Clip Files "My Items" → "Videos" → "Saved Videos" 1. Select the file you wish to play back. 2. Press . To resume, press again. To stop playback, press - Sharp GX17 | User Guide - Page 69
→ "Videos" → "Saved Videos" 1. Highlight the desired file. 2. Press [Options] and select "Send". 3. Select "Via Bluetooth" or "Via Infrared". For "Via Bluetooth" The phone starts searching for Bluetooth wireless technology enabled devices within 10 metres. When detected, a list of enabled devices is - Sharp GX17 | User Guide - Page 70
cannot be sent. • When pairing, you need to enter your passcode when establishing contact with a Bluetooth wireless technology enabled device for the first time. Receiving the My Items Data When the phone receives the My Items data, a confirmation message appears in the standby mode screen. 1. Press - Sharp GX17 | User Guide - Page 71
Deleting Text Templates "My Items" → "Text Templates" 1. Highlight the text template you wish to delete. 2. Press [Options] and select "Delete". Memory Status (M 6-7) This function helps you to check the memory status of My Items. Memory status covers Applications, Pictures, Sounds, and Videos. "My - Sharp GX17 | User Guide - Page 72
Games & More (M 1) Applications (M 1-1) The list of Java™ applications is displayed. Downloaded applications are displayed in order can be set with this option. To Select the Function and Confirmation Method "Games & More" → "Applications" 1. Highlight the desired Java™ application. 2. Press - Sharp GX17 | User Guide - Page 73
the resume time in two digits using the digit key. More Games (M 1-3) You can download applications. "Games & More" → "More Games" The application download site is displayed. 1. Select the application you wish to download. After a WAP browser screen is displayed, the confirmation screen will appear - Sharp GX17 | User Guide - Page 74
as sound effect to one of the five levels or silent. When "Multimedia Volume" (p. 95) is set to "Silent", this setup has priority. "Games & More" → "Settings" → "Sound Volume" The current volume level is displayed. 1. Press a (or d) to increase the volume or press b (or c) to decrease the volume - Sharp GX17 | User Guide - Page 75
specified in the application, you can operate the vibration set in the SMAF file. Note • SMAF (Synthetic music Mobile Application Format) is a music data format for mobile phones. "Games & More" → "Settings" → "Vibration" 1. Select from "On", "Off" or "On & Link to Sound". When you set "On & Link to - Sharp GX17 | User Guide - Page 76
Contact your service provider for time. Note • The alarm functions even if the phone is switched off. • The alarm will not ring tone. For details on selecting a tone, see "Assigning Ringtone" on page 93. To Change the Vibration of Alarm 11.Press [Back]. To Set the Repeating Option 12.Select "Repeat - Sharp GX17 | User Guide - Page 77
Editing the Alarm Setting "Applications" → "Alarms" 1. Select the desired setting and edit it. Resetting an Alarm Setting "Applications" → "Alarms" 1. Select the alarm you wish to reset. 2. Select "Reset Alarm". Resetting All Alarm Settings "Applications" → "Alarms" → "Clear All" Calculator (M 3-3) - Sharp GX17 | User Guide - Page 78
Press to start recording. To stop recording before the recording time is over, press . 2. Select "Save" to save the voice clip. To play back the recorded voice clip, select "Playback". To record a voice clip again, press [Cancel]. Note • To change recorded size before recording, press [Options] and - Sharp GX17 | User Guide - Page 79
a New MMS" on page 46. Note • "Save and Send" is not displayed after recording in extended voice mode. Melody Editor (M 3-5) You can create an original ringtone, or you can send a melody attached to a multimedia message. You can input up to 95 tones × 32 voices, 190 tones × 16 voices, or 380 tones - Sharp GX17 | User Guide - Page 80
again after deleting unnecessary data (the current melody will be lost). • Melodies consisting of too many short notes (semiquavers and triplets) cannot be played back in step 8 and the following message is displayed: "Can not play due to too many notes per sec." The screen returns to step 5. The - Sharp GX17 | User Guide - Page 81
To Specify the Musical Scale and Rest Using the keys shown below, specify the musical scale and rest. Do Re Mi Fa Sol La Ti Rest GHIJKLMQ When you press the key shown above once, a crotchet is specified in the middle scale (no mark). When you press the same key repeatedly, the note will shift cycle - Sharp GX17 | User Guide - Page 82
highlight a tone. 4. Press . Now you can create an original ringtone. Tip • You can play back the melody in the selected tone by pressing [Options] and select "Play tone can be set in 3 levels for each part. When you purchase this phone, the strength of the tone is set to "Loud". 1. Press [Options - Sharp GX17 | User Guide - Page 83
copy and move a part of the melody to another position. Only original ringtones or editable melodies can be copied or moved. 1. In the Score input paste the notes. Phone Help (M 3-6) You can view the help list and use it to guide you in the phone's functions. "Applications" → "Phone Help" 1. Press - Sharp GX17 | User Guide - Page 84
also be sent via infrared or Bluetooth wireless technology to a PC to share the same schedules. the desired tone. For details on selecting a tone, see "Assigning Ringtone" on page 93. 8. Select "Vibration" and select from "On even if the phone is switched off. • The reminder will not sound when "Ringer - Sharp GX17 | User Guide - Page 85
day including schedule entries you wish to send. 2. Press [Options] and select "Send". 3. Select "Via Bluetooth" or "Via Infrared". For "Via Bluetooth" The phone starts searching for Bluetooth wireless technology enabled devices within 10 metres. When detected, a list of enabled devices is displayed - Sharp GX17 | User Guide - Page 86
a Schedule Entry When the phone receives a schedule entry, a confirmation message is displayed in the standby mode screen. 1. Press [Yes]. The received entry is registered in the Calendar. Press [No] to reject. Tip • For details on making Infrared or Bluetooth wireless settings, see "Connectivity - Sharp GX17 | User Guide - Page 87
log list is displayed. To switch logs, press c or d. 2. Select the phone number you wish to view. If you wish to dial the number, press D. on page 52. Note • The Postcard service is not available on some service providers. Please contact your service provider for more information. Deleting a Call - Sharp GX17 | User Guide - Page 88
stored in the Speed Dial List are displayed in order. My Numbers (M 8-5) You can check your own voice, data and fax phone numbers. "Contacts" → "My Numbers" 1. Select the phone number you wish to check from "Voice", "Data" or "Fax". Note • Numbers will only show up if saved into Contacts first - Sharp GX17 | User Guide - Page 89
Call Costs (M 8-8) This function lets you check the charges for your calls. Some networks do not support Charging Advice. Please check with your service provider for availability. Checking the Cost of the Last Call "Contacts" → "Call Costs" → "Last Call" The cost of the last call is displayed. - Sharp GX17 | User Guide - Page 90
the settings in this menu, you can connect to Bluetooth wireless technology or infrared enabled phones via these connections, as well as a PC via Bluetooth wireless technology, infrared or USB connections. Using the Bluetooth Wireless Function (M 9-1-1) To Turn On or Off "Settings" → "Connectivity - Sharp GX17 | User Guide - Page 91
paired device in the list. Bluetooth Wireless Settings With this setting you can rename your phone, prevent other devices from recognising your phone, turn the Bluetooth wireless function off automatically to save battery power, etc. To Rename Your Phone You can rename your phone. The name is shown - Sharp GX17 | User Guide - Page 92
communication. PC Software (M 9-1-3) By connecting your phone to a PC, you can transmit pictures, sounds, video clips, and Contacts List entries. Follow the procedure to select the connection method (Bluetooth wireless, USB or Infrared connection). For details on getting the PC link software, see - Sharp GX17 | User Guide - Page 93
Tone sound and vibration settings can be customised for each profile according to your environment. There are 6 profiles including one user definable profile: Normal, Meeting, Activity, Car, Headset and Silent. Activating a Profile "Settings" → "Profiles" 1. Select the desired profile. Note • When - Sharp GX17 | User Guide - Page 94
delete a ringtone that uses a sound in Saved Sounds, the default ringtone is set. Vibration When the vibration option is set on, the phone will vibrate melody to pulse in time with the melody. Please note that not all melodies support the "On & Link to Sound" option. Should you select such a melody - Sharp GX17 | User Guide - Page 95
alerts including warning tone, message alert and low battery alert. Warning Tone Your phone emits the warning tone when an error occurs Sounds" or "My Sounds". 8. Select the desired ringtone. For details on selecting a ringtone, see "Assigning Ringtone" on page 93. 9. Select "Vibration" and select - Sharp GX17 | User Guide - Page 96
Press [Options] and select "Personalise". 3. Select "Alerts". 4. Select "Low Battery Alert". 5. Select from "High", "Low" or "Silent". Keypad Tones When Select the desired tone. For details on selecting the tone, see "Assigning Ringtone" on page 93. 9. Select "Duration" and select the desired time. - Sharp GX17 | User Guide - Page 97
Power On Sound / Power Off Sound The phone can be set to emit a sound when it is switched on " or "My Sounds". 8. Select the desired sound. For details on selecting a sound, see "Assigning Ringtone" on page 93. 9. Select "Duration" and enter the desired time. Echo Reduction This function is for - Sharp GX17 | User Guide - Page 98
car kit for Bluetooth to your phone via Bluetooth wireless technology. You can select the desired time until your phone answers. "Settings" , 3 pictures are provided. Pictures taken with the digital camera or images downloaded from a WAP site can be used for wallpapers. Setting My Pictures " - Sharp GX17 | User Guide - Page 99
or when operating the alarm. Pictures taken by a digital camera or images downloaded from a WAP site can be used. To Set Built-in Pictures "Settings Greeting Message (M 9-3-3) You can set the message which will appear when the phone is turned on. "Settings" → "Display" → "Greeting Message" 1. Select - Sharp GX17 | User Guide - Page 100
screen on or off when you press the keypad or the optional Cigarette Lighter Charger is connected to the phone. You can change the time the backlight is on for, which will help conserve battery life. Tip • When you purchase this phone, Backlight is set to 15 seconds. To Select the Backlight Time Out - Sharp GX17 | User Guide - Page 101
settings. Call Settings (M 9-5) Set various types of functions and services. Diverts (M 9-5-1) This service is used to divert incoming calls to your voice mail system . • "Not Reachable": Diverts incoming calls when your phone is out of network service or switched off. 2. Select "On". 100 Settings - Sharp GX17 | User Guide - Page 102
whilst you have a call in progress, you must activate the Call Waiting service. "Settings" → "Call Settings" → "Call Waiting" 1. Select "On" or "Off". Note • The Call Waiting service may not be available on all mobile phone networks. Contact your network operator for more information. Showing Your - Sharp GX17 | User Guide - Page 103
on incoming and outgoing calls. To activate this option you will need the specified password, which is available from your service provider. "Settings" → "Call Settings" → "Restrict Calls" 1. Select from "Outgoing Calls" or "Incoming Calls". • Outgoing Calls: Restricts outgoing calls. • Incoming - Sharp GX17 | User Guide - Page 104
your PIN2 code. 2. Select "Edit Dial List". 3. Press [Options] and select "Add New Contact". 4. Add a name and a phone number. For details on adding a name and a phone number, see "Add New Contact" on page 31. 5. Press [Save]. Changing the Network Password "Settings" → "Call Settings" → "Restrict - Sharp GX17 | User Guide - Page 105
handset code, see "To Change Handset Code" on page 110. Date & Time (M 9-6) You need to set the correct time and date in order for your phone's various time-based functions to work correctly. "Settings" → "Date & Time" → "Set Date/Time" 1. Enter the day, month, year and time using the digit keys - Sharp GX17 | User Guide - Page 106
"Automatic" in step 1, the language preset on the SIM card is selected. • If the language preset on the SIM card is not supported, then the default language of the phone is selected. Network (M 9-8) Network Settings (M 9-8-1) To Select a Network Automatically Each time the power is turned on, your - Sharp GX17 | User Guide - Page 107
connection type ("GPRS Then CSD", "GPRS" or "CSD") "GPRS Settings": "APN"*: Access point name "Username": User name "Password": Password "Linger Time": Linger time (0-99999 sec.) "CSD Settings": "Phone No."*: Access point number "Line Type": Line type ("ISDN" or "Analogue") "Username - Sharp GX17 | User Guide - Page 108
connection type ("GPRS Then CSD", "GPRS" or "CSD") "GPRS Settings": "APN"*: Access point name "Username": User name "Password": Password "Linger Time": Linger time (0-99999 sec.) "CSD Settings": "Phone No."*: Access point number "Line Type": Line type ("ISDN" or "Analogue") "Username - Sharp GX17 | User Guide - Page 109
":Bearer connection type ("GPRS Then CSD", "GPRS" or "CSD") "GPRS Settings": "APN"*: Access point name "Username": User name "Password": Password "Linger Time": Linger time (0-99999 sec.) "CSD Settings": "Phone No."*: Telephone Number "Line Type": Line type ("ISDN" or "Analogue") "Username - Sharp GX17 | User Guide - Page 110
If the PIN code is enabled you are asked to enter the PIN code each time the phone is switched on. Your PIN code is stored on the SIM card and you should have been code three times in step 2, the SIM card will lock. To remove the lock, contact your service provider/SIM card vendor. Settings 109 - Sharp GX17 | User Guide - Page 111
code. 2. Enter a new PIN code. 3. Enter the new PIN code again. Changing PIN2 Code (M 9-9-3) PIN2 code is used to protect certain functions in the phone such as Fixed Dialling No. and call cost limits. The following shows you how to change PIN2 code. "Settings" → "Security" → "Change PIN2" 1. Enter - Sharp GX17 | User Guide - Page 112
** Service Pack 4 ***Service Pack 1a Supported Software: Microsoft® Outlook/Outlook Express Interface: Infrared port, USB port or Bluetooth wireless port CD-ROM drive GSM/GPRS Modem You can use GX17 as a GSM/GPRS modem to access the Internet from your PC. Connect your phone to your PC via Bluetooth - Sharp GX17 | User Guide - Page 113
Handset Manager function, see "PC Software" on page 91 and set your phone to Data Transfer mode. For details on software support, refer to the following site: http://www.sharp-mobile.com Software Installation 1. Insert the supplied CD-ROM into your CD-ROM drive. The GX17 CD-ROM screen is displayed - Sharp GX17 | User Guide - Page 114
be aligned with each other. Infrared port • Applications (Camera, My Items, etc.) do not run when the phone is connected to the PC via Bluetooth wireless technology interface, infrared port or USB Data Cable. • Infrared ports need to be placed within 20 cm of each other and within a 30° angle. GSM - Sharp GX17 | User Guide - Page 115
your dealer or network service provider. • Check your call barring, fixed dialling setting, remaining battery and call forwarding settings. • Check if your phone is currently performing data communication using Infrared (IrDA), Bluetooth wireless technology interface or a USB Data Cable. • Check the - Sharp GX17 | User Guide - Page 116
settings and configuration may be missing or incorrect or the network does not support it. Check your service provider's access point number. Contact your service provider to confirm the correct settings. Problem Limited memory available. Call is terminated unexpectedly. No entries are displayed in - Sharp GX17 | User Guide - Page 117
by authorised service personnel. • Do not drop your phone or subject it to severe impacts. Bending the body and pushing the display or keys with extreme force could damage the phone. • Do not use solvents to clean your phone. Use only a soft, dry cloth. • Do not carry your phone in your back pocket - Sharp GX17 | User Guide - Page 118
liability for damage caused by the use of other chargers, batteries or accessories. • Network configuration and phone usage will affect talk-time and standby time. Using the games or camera will increase battery consumption. • When the battery charging alert is displayed on the screen, charge the - Sharp GX17 | User Guide - Page 119
soft cloth before taking a picture. Others • As with any electronic storage unit, data may be lost or corrupted under various circumstances. • Before connecting the phone with a PC or a peripheral unit, read the operation manual for the other unit carefully. • If the phone's battery has been removed - Sharp GX17 | User Guide - Page 120
• It is the user's responsibility to check the local laws governing the use of a mobile phone in vehicles. Pay full problem occurs, please check with your dealer or car manufacturer before connecting your phone. • Only allow qualified service maintenance personnel to install the vehicle accessories - Sharp GX17 | User Guide - Page 121
known as the Specific Absorption Rate, or SAR. The SAR limit for mobile devices is 2 mobile devices offer a range of functions, they can be used in other positions, such as on the body as described in this user guide 'hands-free' device to keep the mobile phone away from the head and body. * - Sharp GX17 | User Guide - Page 122
for these products. A. Information on Disposal for Users (private households) 1. In the European Union some countries* your local retailer may also take back your old product free of charge if you your used electrical or electronic equipment has batteries or accumulators, please dispose of these - Sharp GX17 | User Guide - Page 123
.ch or www.sens.ch. B. Information on Disposal for Business Users. 1. In the European Union If the product is used for business purposes and you want to discard it: Please contact your SHARP dealer who will inform you about the take-back of the product. You might be charged for the costs arising - Sharp GX17 | User Guide - Page 124
on the body, as described in this user guide, is 0.544 W/kg. Body-worn Operation; This device was tested for typical body-worn operations with the back of the phone kept 1.5 cm from the body. To maintain compliance with FCC RF exposure requirements, use accessories that maintain a 1.5 cm separation - Sharp GX17 | User Guide - Page 125
additional protection for the public and to account for any variations in measurements. 124 Safety Precautions and Conditions of Use - Sharp GX17 | User Guide - Page 126
Index A Accessories 7 Alarms 75 B Battery 10 Bluetooth wireless function 89 C Calculator 76 Calendar 83 Call 104 Restrict Calls 102 Show Your Number 101 Call Timers 87 Cell Broadcasts 57 Centre key 8, 15 Contacts List 30 Assigning a ringtone 34 Changing the list 30 Changing the name order 31 Copying - Sharp GX17 | User Guide - Page 127
PC Software 91 Phone Help 82 Picture file 62 PIN code 109 PIN2 code 110 Power on and off 13 Profiles Activating 92 Alerts 94 Any Key Answer 96 Customising 92 Echo reduction 96 Keypad tones 95 Multimedia Volume 95 Power Off Sound 96 Power On Sound 96 Resetting 92 Ringer volume 92 Ringtone - Sharp GX17 | User Guide - Page 128
Extracting phone numbers 53 Reading 53 Setting up 54 Text template 69 Troubleshooting 114 V Video camera 42 Video clip file 67 Vodafone live! 58 Voice mail key 9 Voice Recorder 77 Index 127
-
 1
1 -
 2
2 -
 3
3 -
 4
4 -
 5
5 -
 6
6 -
 7
7 -
8
-
9
-
10
-
11
-
12
-
13
-
14
-
15
-
16
-
17
-
18
-
19
-
20
-
21
-
22
-
23
-
24
-
25
-
26
-
27
-
28
-
29
-
30
-
31
-
32
-
33
-
34
-
35
-
36
-
37
-
38
-
39
-
40
-
41
-
42
-
43
-
44
-
45
-
46
-
47
-
48
-
49
-
50
-
51
-
52
-
53
-
54
-
55
-
56
-
57
-
58
-
59
-
60
-
61
-
62
-
63
-
64
-
65
-
66
-
67
-
68
-
69
-
70
-
71
-
72
-
73
-
74
-
75
-
76
-
77
-
78
-
79
-
80
-
81
-
82
-
83
-
84
-
85
-
86
-
87
-
88
-
89
-
90
-
91
-
92
-
93
-
94
-
95
-
96
-
97
-
98
-
99
-
100
-
101
-
102
-
103
-
104
-
105
-
106
-
107
-
108
-
109
-
110
-
111
-
112
-
113
-
114
-
115
-
116
-
117
-
118
-
119
-
120
-
121
-
122
-
123
-
124
-
125
-
126
-
127
-
128
 |
 |
Declaration of Conformity
Hereby, Sharp Telecommunications of Europe Limited,
declares that this GX17 is in compliance with the essential
requirements and other relevant provisions of Directive
1999/5/EC.
A copy of the original declaration of conformity can be
found at the following Internet address: