Sharp GX17 User Guide - Page 64
Saving to Contacts List, Editing Pictures, Sending a Picture File, My Items, Pictures, Saved Pictures
 |
View all Sharp GX17 manuals
Add to My Manuals
Save this manual to your list of manuals |
Page 64 highlights
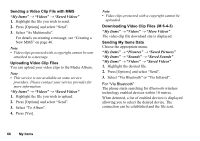
Saving to Contacts List You can use this option only for pictures saved in the handset memory. "My Items" → "Pictures" → "Saved Pictures" 1. Highlight the file you wish to add to Contacts List. 2. Press [Options] and select "Add to Contact". To overwrite, select "Existing Contact" and select the data you wish to save to. If the picture size exceeds 120 dots in width or 160 dots in height, specify the area you wish to display. To save as a new entry, select "New Contact". For details on entering a name, see "Add New Contact" on page 31. Editing Pictures "My Items" → "Pictures" → "Saved Pictures" 1. Highlight the file you wish to edit. 2. Press [Options] and select "Edit". 3. Select the desired option: "Rotate": The picture is rotated 90º anticlockwise. Press [Rotate] again for another 90º. "Adjust Size": Select the desired option. "Retouch": Select the retouching option. "Add Frame": Select the desired frame pattern. "Add Stamps": Press [Stamps] and select the desired stamp pattern. Repeat this step to add more patterns. Note • The size of pictures that you can retouch is 52 dots [W] × 52 dots [H] minimum. • The size of pictures that you can add stamps to is 24 dots [W] × 24 dots [H] minimum. • Images exceeding 120 [W] or 160 [H] are saved as 120 [W] × 160 [H] regardless of the original size. • "Adjust Size" may not be available depending on the original picture and copyright issued. Sending a Picture File "My Items" → "Pictures" → "Saved Pictures" 1. Highlight the file you wish to send. 2. Press [Options] and select "Send". 3. Select "As Multimedia" or "As Postcard". For details on creating a message, see "Creating a New MMS" on page 46. My Items 63
-
 1
1 -
2
-
3
-
4
-
5
-
6
-
7
-
8
-
9
-
10
-
11
-
12
-
13
-
14
-
15
-
16
-
17
-
18
-
19
-
20
-
21
-
22
-
23
-
24
-
25
-
26
-
27
-
28
-
29
-
30
-
31
-
32
-
33
-
34
-
35
-
36
-
37
-
38
-
39
-
40
-
41
-
42
-
43
-
44
-
45
-
46
-
47
-
48
-
49
-
50
-
51
-
52
-
53
-
54
-
55
-
56
-
57
-
58
-
 59
59 -
 60
60 -
 61
61 -
 62
62 -
 63
63 -
 64
64 -
 65
65 -
 66
66 -
 67
67 -
 68
68 -
 69
69 -
70
-
71
-
72
-
73
-
74
-
75
-
76
-
77
-
78
-
79
-
80
-
81
-
82
-
83
-
84
-
85
-
86
-
87
-
88
-
89
-
90
-
91
-
92
-
93
-
94
-
95
-
96
-
97
-
98
-
99
-
100
-
101
-
102
-
103
-
104
-
105
-
106
-
107
-
108
-
109
-
110
-
111
-
112
-
113
-
114
-
115
-
116
-
117
-
118
-
119
-
120
-
121
-
122
-
123
-
124
-
125
-
126
-
127
-
128
 |
 |