Sharp GX17 User Guide - Page 86
Receiving a Schedule Entry, Viewing an Entry, Deleting Entries, To Search By Date
 |
View all Sharp GX17 manuals
Add to My Manuals
Save this manual to your list of manuals |
Page 86 highlights
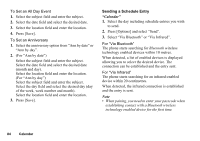
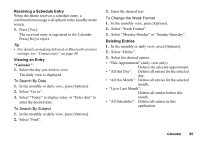
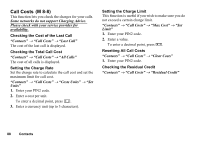
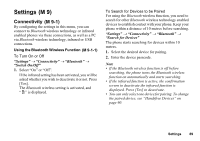
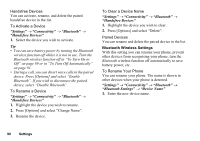
Receiving a Schedule Entry When the phone receives a schedule entry, a confirmation message is displayed in the standby mode screen. 1. Press [Yes]. The received entry is registered in the Calendar. Press [No] to reject. Tip • For details on making Infrared or Bluetooth wireless settings, see "Connectivity" on page 89. Viewing an Entry "Calendar" 1. Select the day you wish to view. The daily view is displayed. To Search By Date 1. In the monthly or daily view, press [Options]. 2. Select "Go to". 3. Select "Today" to display today or "Enter date" to enter the desired date. To Search By Subject 1. In the monthly or daily view, press [Options]. 2. Select "Find". 3. Enter the desired text. To Change the Week Format 1. In the monthly view, press [Options]. 2. Select "Week Format". 3. Select "Monday-Sunday" or "Sunday-Saturday". Deleting Entries 1. In the monthly or daily view, press [Options]. 2. Select "Delete". 3. Select the desired option. • "This Appointment" (daily view only): Deletes the selected appointment. • "All this Day": Deletes all entries for the selected day. • "All this Month": Deletes all entries for the selected month. • "Up to Last Month": Deletes all entries before this month. • "All Schedules": Deletes all entries in this application. Calendar 85
-
 1
1 -
2
-
3
-
4
-
5
-
6
-
7
-
8
-
9
-
10
-
11
-
12
-
13
-
14
-
15
-
16
-
17
-
18
-
19
-
20
-
21
-
22
-
23
-
24
-
25
-
26
-
27
-
28
-
29
-
30
-
31
-
32
-
33
-
34
-
35
-
36
-
37
-
38
-
39
-
40
-
41
-
42
-
43
-
44
-
45
-
46
-
47
-
48
-
49
-
50
-
51
-
52
-
53
-
54
-
55
-
56
-
57
-
58
-
59
-
60
-
61
-
62
-
63
-
64
-
65
-
66
-
67
-
68
-
69
-
70
-
71
-
72
-
73
-
74
-
75
-
76
-
77
-
78
-
79
-
80
-
 81
81 -
 82
82 -
 83
83 -
 84
84 -
 85
85 -
 86
86 -
 87
87 -
 88
88 -
 89
89 -
 90
90 -
 91
91 -
92
-
93
-
94
-
95
-
96
-
97
-
98
-
99
-
100
-
101
-
102
-
103
-
104
-
105
-
106
-
107
-
108
-
109
-
110
-
111
-
112
-
113
-
114
-
115
-
116
-
117
-
118
-
119
-
120
-
121
-
122
-
123
-
124
-
125
-
126
-
127
-
128
 |
 |
