Sharp GX17 User Guide - Page 84
Calendar, Select from Appointment, All Day Event or
 |
View all Sharp GX17 manuals
Add to My Manuals
Save this manual to your list of manuals |
Page 84 highlights
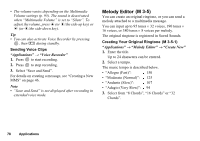
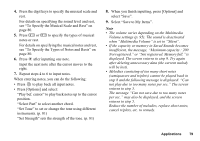
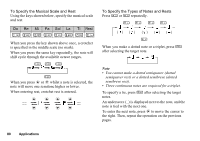
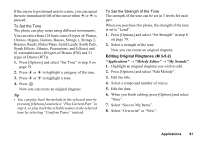
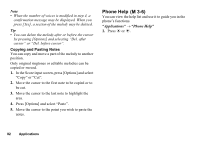
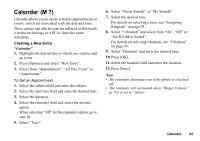
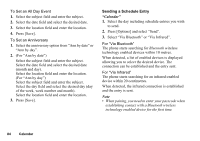
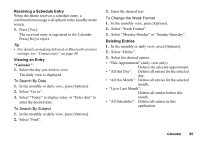
Calendar (M 7) Calendar allows you to easily schedule appointments or events, which are associated with the date and time. These entries can also be sent via infrared or Bluetooth wireless technology to a PC to share the same schedules. Creating a New Entry "Calendar" 1. Highlight the desired day to which you want to add an event. 2. Press [Options] and select "New Entry". 3. Select from "Appointment", "All Day Event" or "Anniversary". To Set an Appointment 1. Select the subject field and enter the subject. 2. Select the start time field and enter the desired time. 3. Select the duration. 4. Select the reminder field and select the desired option. When selecting "Off" for the reminder option, go to step 10. 5. Select "Tone". 6. Select "Preset Sounds" or "My Sounds". 7. Select the desired tone. For details on selecting a tone, see "Assigning Ringtone" on page 93. 8. Select "Vibration" and select from "On", "Off" or "On & Link to Sound". For details on selecting vibration, see "Vibration" on page 93. 9. Select "Duration" and enter the desired time. 10.Press [OK]. 11.Select the location field and enter the location. 12.Press [Save]. Note • The reminder functions even if the phone is switched off. • The reminder will not sound when "Ringer Volume" (p. 92) is set to "Silent". Calendar 83
-
 1
1 -
2
-
3
-
4
-
5
-
6
-
7
-
8
-
9
-
10
-
11
-
12
-
13
-
14
-
15
-
16
-
17
-
18
-
19
-
20
-
21
-
22
-
23
-
24
-
25
-
26
-
27
-
28
-
29
-
30
-
31
-
32
-
33
-
34
-
35
-
36
-
37
-
38
-
39
-
40
-
41
-
42
-
43
-
44
-
45
-
46
-
47
-
48
-
49
-
50
-
51
-
52
-
53
-
54
-
55
-
56
-
57
-
58
-
59
-
60
-
61
-
62
-
63
-
64
-
65
-
66
-
67
-
68
-
69
-
70
-
71
-
72
-
73
-
74
-
75
-
76
-
77
-
78
-
 79
79 -
 80
80 -
 81
81 -
 82
82 -
 83
83 -
 84
84 -
 85
85 -
 86
86 -
 87
87 -
 88
88 -
 89
89 -
90
-
91
-
92
-
93
-
94
-
95
-
96
-
97
-
98
-
99
-
100
-
101
-
102
-
103
-
104
-
105
-
106
-
107
-
108
-
109
-
110
-
111
-
112
-
113
-
114
-
115
-
116
-
117
-
118
-
119
-
120
-
121
-
122
-
123
-
124
-
125
-
126
-
127
-
128
 |
 |