Sharp GX17 User Guide - Page 85
Sending a Schedule Entry, To Set an All Day Event, To Set an Anniversary, For Via Bluetooth
 |
View all Sharp GX17 manuals
Add to My Manuals
Save this manual to your list of manuals |
Page 85 highlights
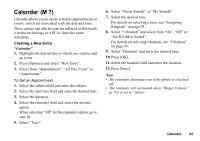
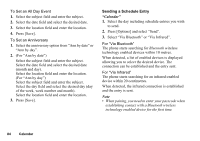
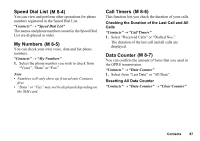
To Set an All Day Event 1. Select the subject field and enter the subject. 2. Select the date field and select the desired date. 3. Select the location field and enter the location. 4. Press [Save]. To Set an Anniversary 1. Select the anniversary option from "Ann by date" or "Ann by day". 2. (For "Ann by date") Select the subject field and enter the subject. Select the date field and select the desired date (month and day). Select the location field and enter the location. (For "Ann by day") Select the subject field and enter the subject. Select the day field and select the desired day (day of the week, week number and month). Select the location field and enter the location. 3. Press [Save]. Sending a Schedule Entry "Calendar" 1. Select the day including schedule entries you wish to send. 2. Press [Options] and select "Send". 3. Select "Via Bluetooth" or "Via Infrared". For "Via Bluetooth" The phone starts searching for Bluetooth wireless technology enabled devices within 10 metres. When detected, a list of enabled devices is displayed allowing you to select the desired device. The connection can be established and the entry sent. For "Via Infrared" The phone starts searching for an infrared-enabled device within 20 centimetres. When detected, the infrared connection is established and the entry is sent. Note • When pairing, you need to enter your passcode when establishing contact with a Bluetooth wireless technology enabled device for the first time. 84 Calendar
-
 1
1 -
2
-
3
-
4
-
5
-
6
-
7
-
8
-
9
-
10
-
11
-
12
-
13
-
14
-
15
-
16
-
17
-
18
-
19
-
20
-
21
-
22
-
23
-
24
-
25
-
26
-
27
-
28
-
29
-
30
-
31
-
32
-
33
-
34
-
35
-
36
-
37
-
38
-
39
-
40
-
41
-
42
-
43
-
44
-
45
-
46
-
47
-
48
-
49
-
50
-
51
-
52
-
53
-
54
-
55
-
56
-
57
-
58
-
59
-
60
-
61
-
62
-
63
-
64
-
65
-
66
-
67
-
68
-
69
-
70
-
71
-
72
-
73
-
74
-
75
-
76
-
77
-
78
-
79
-
 80
80 -
 81
81 -
 82
82 -
 83
83 -
 84
84 -
 85
85 -
 86
86 -
 87
87 -
 88
88 -
 89
89 -
 90
90 -
91
-
92
-
93
-
94
-
95
-
96
-
97
-
98
-
99
-
100
-
101
-
102
-
103
-
104
-
105
-
106
-
107
-
108
-
109
-
110
-
111
-
112
-
113
-
114
-
115
-
116
-
117
-
118
-
119
-
120
-
121
-
122
-
123
-
124
-
125
-
126
-
127
-
128
 |
 |
