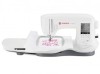
Singer SE340 LEGACY Instruction Manual and Troubleshooting Guide - Page 18
Nserting, Obbin, Inding, Ndependently
 |
View all Singer SE340 LEGACY manuals
Add to My Manuals
Save this manual to your list of manuals |
Page 18 highlights
THREADING THE MACHINE WINDING BOBBIN INDEPENDENTLY
-
 1
1 -
2
-
3
-
4
-
5
-
6
-
7
-
8
-
9
-
10
-
11
-
12
-
 13
13 -
 14
14 -
 15
15 -
 16
16 -
 17
17 -
 18
18 -
 19
19 -
 20
20 -
 21
21 -
 22
22 -
 23
23 -
24
-
25
-
26
-
27
-
28
-
29
-
30
-
31
-
32
-
33
-
34
-
35
-
36
-
37
-
38
-
39
-
40
-
41
-
42
-
43
-
44
-
45
-
46
-
47
-
48
-
49
-
50
-
51
-
52
-
53
-
54
-
55
-
56
-
57
-
58
-
59
-
60
-
61
-
62
-
63
-
64
-
65
-
66
-
67
-
68
-
69
-
70
-
71
-
72
-
73
-
74
-
75
-
76
-
77
-
78
-
79
-
80
-
81
-
82
-
83
-
84
-
85
-
86
-
87
-
88
-
89
-
90
-
91
-
92
-
93
-
94
-
95
-
96
-
97
-
98
-
99
-
100
-
101
-
102
-
103
-
104
-
105
-
106
-
107
-
108
-
109
-
110
-
111
-
112
-
113
-
114
-
115
-
116
-
117
-
118
-
119
-
120
-
121
-
122
-
123
-
124
-
125
-
126
-
127
-
128
-
129
-
130
-
131
-
132
-
133
-
134
-
135
-
136
-
137
-
138
-
139
-
140
-
141
-
142
-
143
-
144
-
145
-
146
-
147
-
148
-
149
-
150
-
151
-
152
-
153
-
154
-
155
-
156
-
157
-
158
-
159
-
160
-
161
-
162
-
163
-
164
-
165
-
166
-
167
-
168
-
169
-
170
-
171
-
172
-
173
-
174
-
175
-
176
-
177
-
178
-
179
-
180
-
181
-
182
-
183
-
184
-
185
-
186
-
187
-
188
-
189
-
190
-
191
-
192
 |
 |

18
I
NSERTING
THE
B
OBBIN
1.
Place bobbin into bobbin case, making sure the bobbin
turns in a counter-clockwise direction.
W
INDING
B
OBBIN
I
NDEPENDENTLY
<RX F´Q ZLQG W¶H EREELQ LQGHSHQGHQWO\ Z¶LOH VWLWF¶LQJµ
1.
Insert the auxiliary spool pin into the hole at the left side on
the top of the machine.
2.
Place the felt washer and spool of thread onto the auxiliary
spool pin.
3.
Bring thread to the right and hook the thread to the thread
guide from rear opening.
Þµ
)ROORZ W¶H QR³P´O ZLQGLQJ S³RFHGX³H I³RP 6WHSV â WR á »RQ
S´JH ÜßÁµ
D
T
HREADING
THE
M
ACHINE
âµ
'³´Z W¶³H´G LQWR QRWF¶ »´Á Z¶LOH ¶ROGLQJ W¶H EREELQ OLJ¶WO\
ZLW¶ \RX³ ¿QJH³µ
3.
Pull thread along the groove, up and around the top, to the
left, then down.
Pull thread to the right to cut the thread.
Þµ
5HSO´FH W¶H EREELQ FRYH³µ 6HW W¶H OHIW W´EV LQWR W¶H ¶ROHV LQ
needle plate and push the right side of bobbin cover down
until it clicks into place.
NOTE:
This machine can start to sew without drawing up the bobbin
thread.
If you want to draw up the bobbin thread, see page 20.
%H VX³H WR XVH RQO\ 6¸1*(5 &O´VV ÜÝ EREELQV »W³´QVS´³HQWÁ LQ
this machine.