TP-Link TD-W8950ND User Guide - Page 28
Advanced Setup
 |
UPC - 845973060404
View all TP-Link TD-W8950ND manuals
Add to My Manuals
Save this manual to your list of manuals |
Page 28 highlights
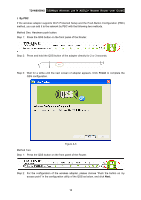
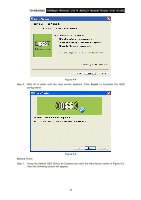
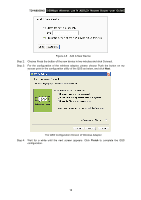
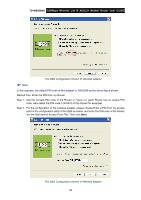
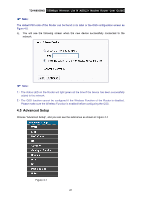
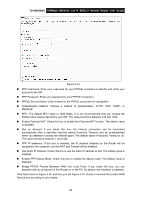
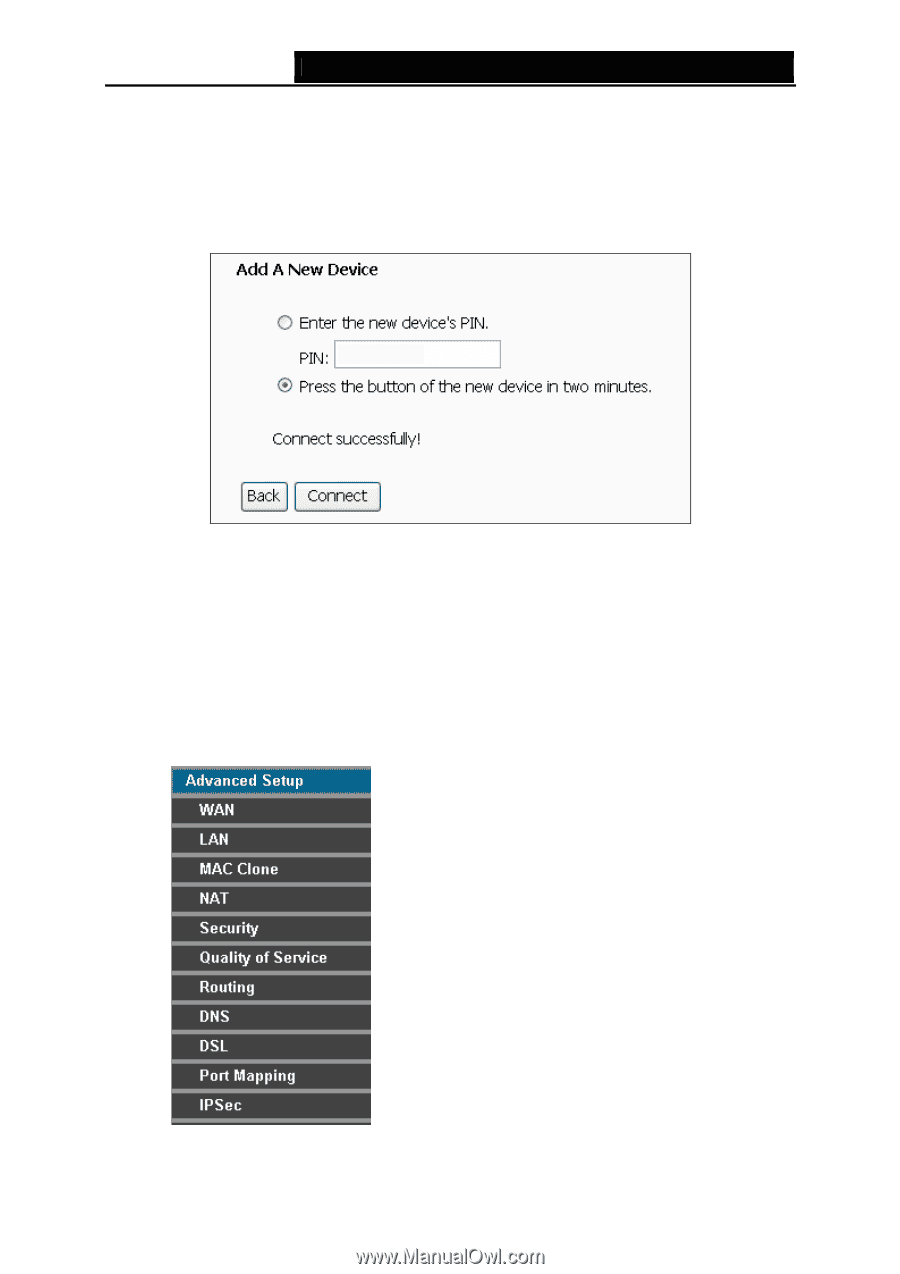
TD-W8950ND 150Mbps Wireless Lite N ADSL2+ Modem Router User Guide ) Note: The default PIN code of the Router can be found in its label or the QSS configuration screen as Figure 4-2. c). You will see the following screen when the new device successfully connected to the network. ) Note: 1) The status LED on the Router will light green all the time if the device has been successfully added to the network. 2) The QSS function cannot be configured if the Wireless Function of the Router is disabled. Please make sure the Wireless Function is enabled before configuring the QSS. 4.5 Advanced Setup Choose "Advanced Setup", and you can see the submenus as shown in Figure 4-7 Figure 4-7 21
-
 1
1 -
2
-
3
-
4
-
5
-
6
-
7
-
8
-
9
-
10
-
11
-
12
-
13
-
14
-
15
-
16
-
17
-
18
-
19
-
20
-
21
-
22
-
 23
23 -
 24
24 -
 25
25 -
 26
26 -
 27
27 -
 28
28 -
 29
29 -
 30
30 -
 31
31 -
 32
32 -
 33
33 -
34
-
35
-
36
-
37
-
38
-
39
-
40
-
41
-
42
-
43
-
44
-
45
-
46
-
47
-
48
-
49
-
50
-
51
-
52
-
53
-
54
-
55
-
56
-
57
-
58
-
59
-
60
-
61
-
62
-
63
-
64
-
65
-
66
-
67
-
68
-
69
-
70
-
71
-
72
-
73
-
74
-
75
-
76
-
77
-
78
-
79
-
80
-
81
-
82
-
83
-
84
-
85
-
86
-
87
-
88
-
89
-
90
-
91
-
92
-
93
-
94
 |
 |
TD-W8950ND
150Mbps Wireless Lite N ADSL2+ Modem Router User Guide
)
Note:
PIN code of the Router can be found in its label or the QSS configuration screen as
ill see the following screen when the new device successfully connected to the
The default
Figure 4-2
.
c).
You w
network.
)
Note:
tus LED on the Router will light green all the time if the device has been successfully
not be configured if the Wireless Function of the Router is disabled.
you can see the submenus as shown in Figure 4-7
1
)
The sta
added to the network.
2
)
The QSS function can
Please make sure the Wireless Function is enabled before configuring the QSS.
4.5 Advanced Setup
Choose “Advanced Setup”, and
Figure 4-7
21