Toshiba D-VR600 Owner's Manual - English - Page 50
Recording a TV program
 |
UPC - 022265000748
View all Toshiba D-VR600 manuals
Add to My Manuals
Save this manual to your list of manuals |
Page 50 highlights
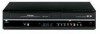
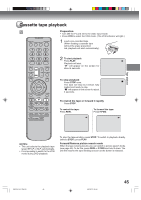
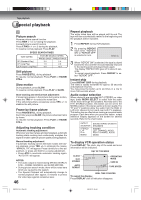
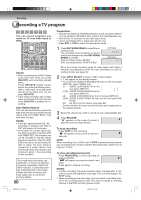
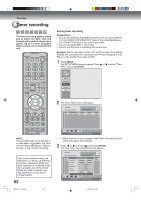
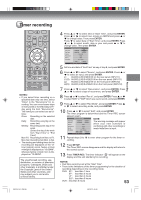
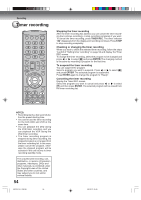
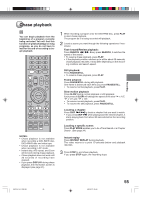
Recording Recording a TV program You can record programs you watch on TV onto video tapes or DVDs. NOTES: • When recording onto a DVD, it takes some time from when you press REC/OTR until recording actually starts. Press REC/OTR slightly earlier before the preferred starting point. With a video tape, recording starts almost at the same time as you press REC/OTR. • If the erase prevention tab of video tapes is removed, the tape will eject when REC/OTR is pressed for recording. Auto Rewind feature This unit will automatically rewind the tape when the tape has ended (except during OTR and TIMER REC). It will also eject the tape. NOTES: • If the disc space become full, the recording is stopped and "Disc is Full" will appear on the screen. • In the event of a power failure during DVD recording including OTR and TIMER REC, the program can not be recorded on the disc. When the power resumes, after the VCR/ DVD is turned on, the set checks the disc to repair the error which is caused by a power failure. This checking process may require a few minutes to about 1 hour according to disc condition. The unauthorized recording, use, distribution, or revision of television programs, videotapes, DVDs and other materials, is prohibited under the Copyright Laws of the United States and other countries, and may subject you to civil and/or criminal liability. 50 Preparation: • Connect the AUDIO (L/R)/VIDEO IN jacks on the rear panel (INPUT 1) to the AUDIO (L/R)/VIDEO OUT jacks of the Cable/Satellite box. • Turn ON the TV and set it to the video input mode. • Load a recordable DVD or video tape into the unit. • Press DVD or VCR to select the appropriate mode. 1 Press REC MODE/SPEED to select the recording mode. The recording mode will appear on the TV screen and change every time REC MODE/ SPEED is pressed. VCR recording modes: SP/SLP DVD recording modes: XP/SP/LP/SLP VCR mode 00 : 00 : 00 SP DVD mode SP SP is the normal recording mode for video tapes. SLP offers 3 times the recording time as SP. For more information on DVD recording modes, see page 48. 2 Press INPUT SELECT to select "LINE1" input position. "L1" will appear on the display window. • To record from AUDIO (L/R)/VIDEO IN jacks on the front panel (INPUT2), select "LINE2" (L2). L1: AUDIO (L/R)/VIDEO IN on the rear panel (INPUT1) L1(S): AUDIO (L/R)/S-VIDEO IN on the P rear panel (INPUT1) L2: AUDIO (L/R)/VIDEO IN on the front panel (INPUT2) L2(S): AUDIO (L/R)/S-VIDEO IN input on the front panel (INPUT2) DV: DV IN on the front panel (see page 69) Confirm whether the input source that you used is appeared on the display window. 3 Select the channel you wish to record on your cable/satellite box. 4 Press REC/OTR. " " appears on the screen for about 4 seconds and recording will start. To stop recording Press STOP to stop recording. " " will appear on the screen for about 4 seconds. NOTE: When recording onto a DVD, even if STOP is pressed during recording, recording does not stop instantly. Recording may continue for as long as 1 minute. To stop recording temporarily Press PAUSE/STILL to avoid recording unwanted material. " " will appear on screen for about 4 seconds. Press again to resume recording. NOTES: • In video recording, the pause function will be released after 5 min- utes to prevent damaging the video tape. The unit will change to the STOP mode. • When recording onto a video tape, you can select a recording channel in the recording pause mode. (You cannot change a recording channel in the DVD recording pause mode.) 2K70101A_E P44-51 50 08`02`07, 20:45
-
 1
1 -
2
-
3
-
4
-
5
-
6
-
7
-
8
-
9
-
10
-
11
-
12
-
13
-
14
-
15
-
16
-
17
-
18
-
19
-
20
-
21
-
22
-
23
-
24
-
25
-
26
-
27
-
28
-
29
-
30
-
31
-
32
-
33
-
34
-
35
-
36
-
37
-
38
-
39
-
40
-
41
-
42
-
43
-
44
-
 45
45 -
 46
46 -
 47
47 -
 48
48 -
 49
49 -
 50
50 -
 51
51 -
 52
52 -
 53
53 -
 54
54 -
 55
55 -
56
-
57
-
58
-
59
-
60
-
61
-
62
-
63
-
64
-
65
-
66
-
67
-
68
-
69
-
70
-
71
-
72
-
73
-
74
-
75
-
76
-
77
-
78
-
79
-
80
 |
 |