3Ware 7506-8 User Guide - Page 23
Step 1. Install the Escalade ATA RAID Controller, Step 2. Create arrays - pci 2 2
 |
UPC - 693494750683
View all 3Ware 7506-8 manuals
Add to My Manuals
Save this manual to your list of manuals |
Page 23 highlights
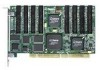
Step 1. Install the Escalade ATA RAID Controller Install the two, four, eight, or twelve port Escalade ATA RAID Controller in an available PCI slot. Slots closest to the Accelerated Graphics Port give the best performance. Step 2. Create arrays Verify your boot device precedes the Escalade ATA RAID Controller in the boot sequence, then press Alt-3 to activate the 3ware Disk Array Configuration Utility at boot time. Specify RAID arrays and hot spares. Step 3. Install system drivers The Escalade ATA RAID Controller drivers must be installed according to the type of installation and the operating system. Installations include: ■ Installing the ATA RAID Controller while installing the operating system. ■ Installing the ATA RAID Controller on systems that boot from a different device. ■ Replacing an existing ATA RAID Controller with a new version of the controller. Operating systems supporting the Escalade ATA RAID Controller include: ■ Windows 2000 (SP3 or newer), XP (SP1 or newer), or 2003 ■ Red Hat and SuSE Linux ■ FreeBSD Step 4. Install 3DM Install 3DM for Windows or Linux from the 3DM installation CD-ROM. Windows d(or letter of CD-Rom drive):\3DMsetup from Run... in the Start menu. Linux mount /dev/cdrom /mnt cd /mnt/linux/3dm ./install.3dm Answer questions concerning e-mail notification and the port number for WEB monitoring. cd / umount /mnt Note: When specifying multiple e-mail addresses for notification, separate e-mail addresses using a comma. www.3ware.com 15
-
 1
1 -
2
-
3
-
4
-
5
-
6
-
7
-
8
-
9
-
10
-
11
-
12
-
13
-
14
-
15
-
16
-
17
-
 18
18 -
 19
19 -
 20
20 -
 21
21 -
 22
22 -
 23
23 -
 24
24 -
 25
25 -
 26
26 -
 27
27 -
 28
28 -
29
-
30
-
31
-
32
-
33
-
34
-
35
-
36
-
37
-
38
-
39
-
40
-
41
-
42
-
43
-
44
-
45
-
46
-
47
-
48
-
49
-
50
-
51
-
52
-
53
-
54
-
55
-
56
-
57
-
58
-
59
-
60
-
61
-
62
-
63
-
64
-
65
-
66
-
67
-
68
-
69
-
70
-
71
-
72
-
73
-
74
-
75
-
76
-
77
-
78
-
79
-
80
-
81
-
82
-
83
-
84
-
85
-
86
-
87
-
88
-
89
-
90
-
91
-
92
-
93
-
94
-
95
-
96
-
97
-
98
-
99
-
100
-
101
-
102
-
103
-
104
-
105
-
106
-
107
-
108
-
109
-
110
-
111
-
112
-
113
-
114
-
115
-
116
-
117
-
118
-
119
-
120
-
121
-
122
-
123
-
124
-
125
-
126
 |
 |