3Ware 7506-8 User Guide - Page 77
Create disk arrays, Boot with the SuSE CD/DVD, RAID array initialization, depress
 |
UPC - 693494750683
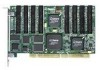
View all 3Ware 7506-8 manuals
Add to My Manuals
Save this manual to your list of manuals |
Page 77 highlights
SuSE Linux Installation ■ SuSE Linux Installation CD-ROM/DVD Note: We have tested systems where an IDE drive connected to the motherboard interfered with using the Escalade ATA RAID Controller as a boot device. Disconnecting the IDE drive while installing Linux will eliminate this problem. After Linux is installed, the drive can be reconnected. Create disk arrays Refer to the 3ware Hardware Installation and 3ware Disk Array Configuration Utility chapters. Boot with the SuSE CD/DVD 1 Boot directly from the SuSE installation CD #1 or DVD. 2 When installing SuSE 8.1, depress the Alt key when the main installation menu is displayed. You will then be prompted to insert the driver disk. When installing SuSE 8.2, depress the F3 key when the main installation menu is displayed. You will then be prompted to insert the driver disk. 3 Insert the 3ware Linux driver installation diskette. 4 Click OK and finish the installation. Note: If you receive a message about the controller timing out and resetting while installing on an SMP system, you will need to perform the installation using the Installation - Safe Mode option. RAID array initialization RAID 0 arrays do not need to be initialized and are immediately available for use with full performance when created. RAID 1 and 10 arrays are not initialized when created and are immediately available for use with full performance when created. The first time the array is verified (via the BIOS or 3ware 3DM), the array is initialized. Initialization results in data from one disk (the disk on the lower channel number) being copied to the other drive. In RAID 10 arrays, data from one half of the array is copied to the other half. After the initial verification, subsequent verifies to a RAID 1 or 10 array result in the data from one drive (or set of drives) being compared to the other drive (or set of drives). RAID 5 arrays are immediately initialized after being created in the BIOS by writing zeroes to all array members. The user can reboot the system before www.3ware.com 69
-
 1
1 -
2
-
3
-
4
-
5
-
6
-
7
-
8
-
9
-
10
-
11
-
12
-
13
-
14
-
15
-
16
-
17
-
18
-
19
-
20
-
21
-
22
-
23
-
24
-
25
-
26
-
27
-
28
-
29
-
30
-
31
-
32
-
33
-
34
-
35
-
36
-
37
-
38
-
39
-
40
-
41
-
42
-
43
-
44
-
45
-
46
-
47
-
48
-
49
-
50
-
51
-
52
-
53
-
54
-
55
-
56
-
57
-
58
-
59
-
60
-
61
-
62
-
63
-
64
-
65
-
66
-
67
-
68
-
69
-
70
-
71
-
 72
72 -
 73
73 -
 74
74 -
 75
75 -
 76
76 -
 77
77 -
 78
78 -
 79
79 -
 80
80 -
 81
81 -
 82
82 -
83
-
84
-
85
-
86
-
87
-
88
-
89
-
90
-
91
-
92
-
93
-
94
-
95
-
96
-
97
-
98
-
99
-
100
-
101
-
102
-
103
-
104
-
105
-
106
-
107
-
108
-
109
-
110
-
111
-
112
-
113
-
114
-
115
-
116
-
117
-
118
-
119
-
120
-
121
-
122
-
123
-
124
-
125
-
126
 |
 |
