Adaptec 412R User Guide - Page 19
Connecting the Power Cords, Disk Drives
 |
UPC - 760884139691
View all Adaptec 412R manuals
Add to My Manuals
Save this manual to your list of manuals |
Page 19 highlights
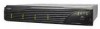
DuraStor 412R/6320SS/7320SS Installation and User's Guide 13 Install the disk drives. See Disk Drives on page 5-10 for detailed instructions on attaching drive carriers to disk drives and installing disk drives into the storage subsystem. 14 Replace the front bezel. Ensure that it mounts to the two posts and that the bezel lip fits under the chassis top. 15 Lock the front bezel by turning the screws one-quarter turn to the right. Connecting the Power Cords Once DuraStor is in place, the power cords can be attached and secured. 1 On the back of the storage subsystem, lift a security bale and plug in a power cord. 2 Place the bale over the cord. See Figure 2-5. This protects the power cord from accidental disconnection. 3 Plug the other end of the power cord into a grounded outlet or UPS power strip. 4 Repeat this process for the other power cord. Bale fits over and onto the power cord. Figure 2-5 Attaching the Power Cord Bales 2-6
-
 1
1 -
2
-
3
-
4
-
5
-
6
-
7
-
8
-
9
-
10
-
11
-
12
-
13
-
 14
14 -
 15
15 -
 16
16 -
 17
17 -
 18
18 -
 19
19 -
 20
20 -
 21
21 -
 22
22 -
 23
23 -
 24
24 -
25
-
26
-
27
-
28
-
29
-
30
-
31
-
32
-
33
-
34
-
35
-
36
-
37
-
38
-
39
-
40
-
41
-
42
-
43
-
44
-
45
-
46
-
47
-
48
-
49
-
50
-
51
-
52
-
53
-
54
-
55
-
56
-
57
-
58
-
59
-
60
-
61
-
62
-
63
-
64
-
65
-
66
-
67
-
68
-
69
-
70
-
71
-
72
-
73
-
74
-
75
-
76
-
77
-
78
-
79
-
80
-
81
-
82
-
83
-
84
-
85
-
86
-
87
-
88
-
89
-
90
-
91
-
92
-
93
-
94
-
95
-
96
-
97
-
98
-
99
-
100
-
101
-
102
-
103
-
104
-
105
-
106
-
107
-
108
-
109
-
110
-
111
-
112
-
113
-
114
-
115
-
116
-
117
-
118
-
119
-
120
-
121
-
122
-
123
-
124
-
125
-
126
-
127
-
128
-
129
-
130
-
131
-
132
-
133
-
134
-
135
-
136
-
137
-
138
-
139
-
140
-
141
-
142
-
143
-
144
-
145
-
146
-
147
-
148
-
149
-
150
-
151
-
152
-
153
-
154
-
155
-
156
-
157
-
158
-
159
-
160
-
161
-
162
-
163
-
164
-
165
-
166
-
167
-
168
-
169
-
170
-
171
-
172
-
173
-
174
-
175
-
176
-
177
-
178
-
179
-
180
-
181
-
182
-
183
-
184
-
185
-
186
-
187
-
188
-
189
-
190
-
191
-
192
-
193
-
194
-
195
-
196
-
197
-
198
-
199
-
200
-
201
-
202
-
203
-
204
-
205
-
206
-
207
-
208
-
209
-
210
 |
 |
