Brother International BAS-375E Instruction Manual - English - Page 36
Using production counter
 |
View all Brother International BAS-375E manuals
Add to My Manuals
Save this manual to your list of manuals |
Page 36 highlights
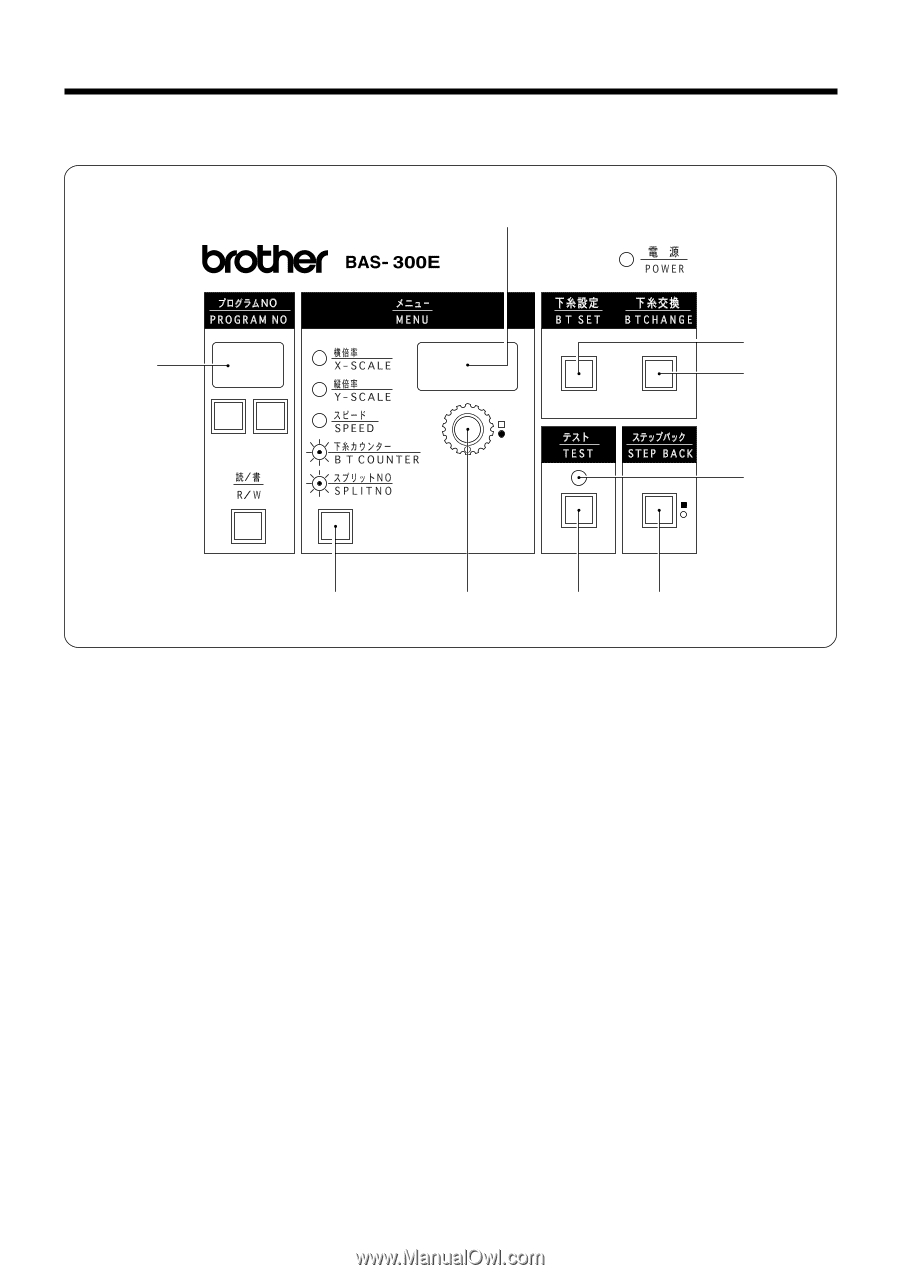
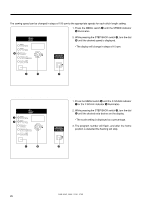
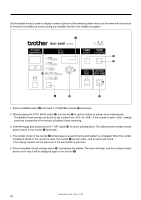
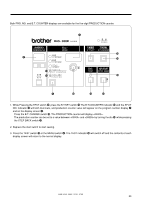
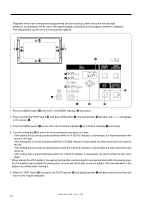
Chapter 5 OPERATING PROCEDURE 11. Using production counter Both PRO. NO. and B.T. COUNTER displays are available for the five-digit PRODUCTION counter. t series !3 w !4 !0 !1 !6 y !2 !5 !7 1. While Pressing the TEST switch !,5 press the B.T.SET switch !3 The B.T.COOUNTER indicator !0 and the SPLIT ON. Indicator !1 will both illuminate, and production counter value will appear on the program number display w and on the display screen t. q Press the B.T. CHANGE switch !4. The PRODUCTION counter will display . q The production counter can be set to a value between and by turning the dia !2 while pressing the STEP BACK switch !.7 2. Depress the start switch to start sewing. 3. Press the TEST switch !5 or the MENU switch y. The TEST indicator !6 will switch off and the contents of each display screen will return to the normal display. BAS-364E, 366E, 370E, 375E 30
-
 1
1 -
2
-
3
-
4
-
5
-
6
-
7
-
8
-
9
-
10
-
11
-
12
-
13
-
14
-
15
-
16
-
17
-
18
-
19
-
20
-
21
-
22
-
23
-
24
-
25
-
26
-
27
-
28
-
29
-
30
-
 31
31 -
 32
32 -
 33
33 -
 34
34 -
 35
35 -
 36
36 -
 37
37 -
 38
38 -
 39
39 -
 40
40 -
 41
41 -
42
-
43
-
44
-
45
-
46
-
47
-
48
-
49
-
50
-
51
-
52
-
53
-
54
-
55
-
56
-
57
-
58
-
59
-
60
-
61
-
62
-
63
-
64
-
65
-
66
-
67
-
68
 |
 |