Brother International BAS-375E Instruction Manual - English - Page 49
Needle cooler (Air bag specification - Option), 6. Installing the bottom plunger (Option
 |
View all Brother International BAS-375E manuals
Add to My Manuals
Save this manual to your list of manuals |
Page 49 highlights
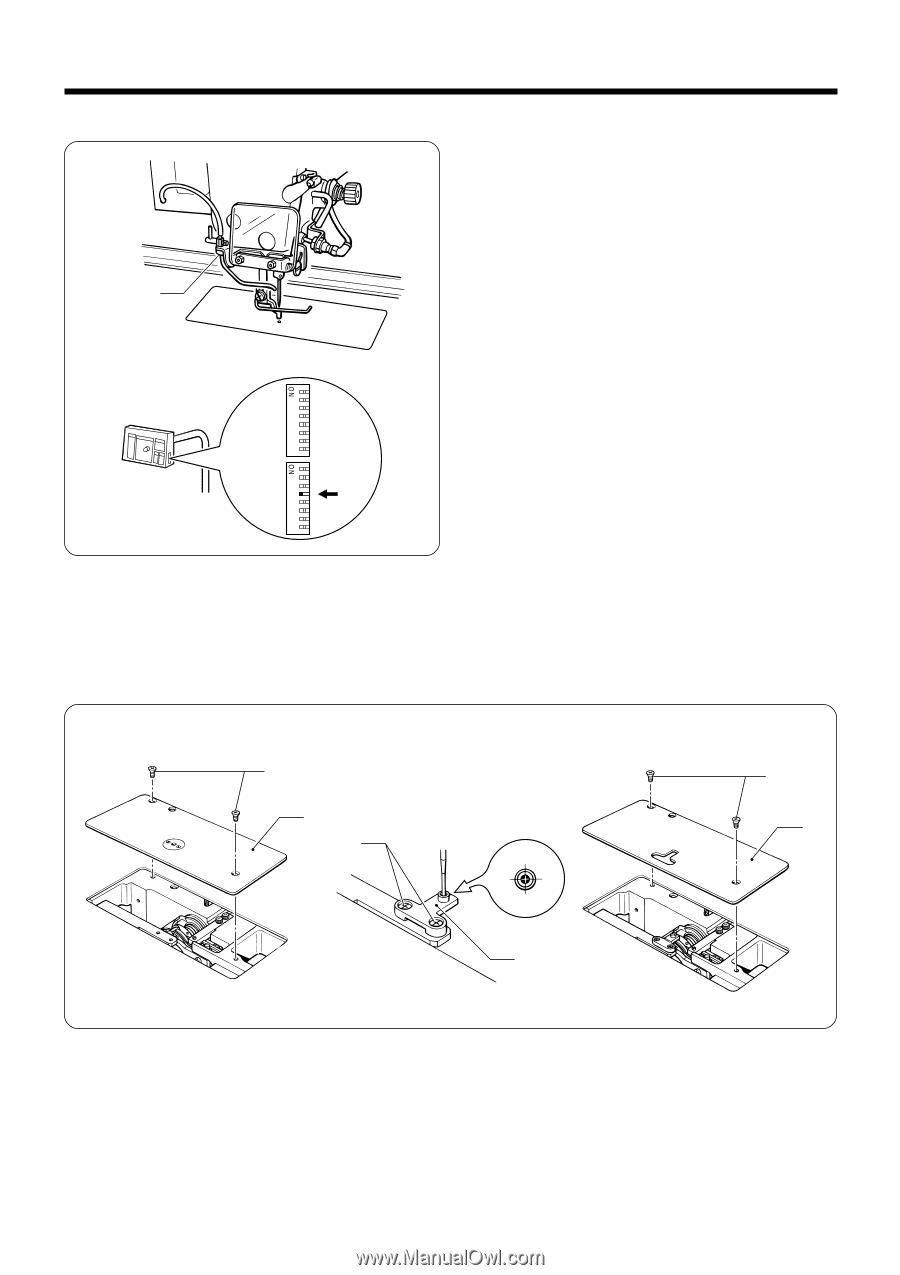
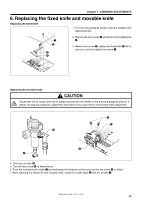
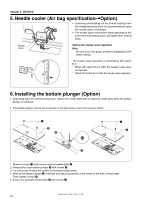
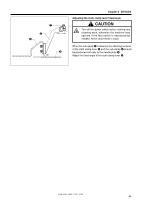
Chapter 8 DEVICES 5. Needle cooler (Air bag specification/Option) G Scorching and breakage of the thread resulting from the needle becoming warm can be prevented by using the needle cooler mechanism. G The needle cooler mechanism starts operating at the same time that sewing starts, and stops when sewing stops. Needle cooler Setting the needle cooler operation Note Be sure to turn the power off before changing the DIP switch setting. A The needle cooler operation is controlled by DIP switch B-4. * When DIP switch B-4 is OFF, the needle cooler does not operate. B * When DIP switch B-4 is ON, the needle cooler operates. 12345678 12345678 6. Installing the bottom plunger (Option) G Depending upon the material being sewn, replace the needle plate with the optional needle plate when the bottom plunger is removed. G The bottom plunger can be set to operate or not operate by means the memory switch. q w r q t e 1. Remove screws q, and remove optional needle plate w. 2. Temporarily install bottom plunger e with screws r. 3. Turn the pulley to lower the needle to the bottom dead center. 4. Hold up the bottom plunger e manually and adjust its position at the center of the hole in the plunger. Then, tighten screws r. 5. Secure the provided needle plate t with screws q. BAS-364E, 366E, 370E, 375E 43
-
 1
1 -
2
-
3
-
4
-
5
-
6
-
7
-
8
-
9
-
10
-
11
-
12
-
13
-
14
-
15
-
16
-
17
-
18
-
19
-
20
-
21
-
22
-
23
-
24
-
25
-
26
-
27
-
28
-
29
-
30
-
31
-
32
-
33
-
34
-
35
-
36
-
37
-
38
-
39
-
40
-
41
-
42
-
43
-
 44
44 -
 45
45 -
 46
46 -
 47
47 -
 48
48 -
 49
49 -
 50
50 -
 51
51 -
 52
52 -
 53
53 -
 54
54 -
55
-
56
-
57
-
58
-
59
-
60
-
61
-
62
-
63
-
64
-
65
-
66
-
67
-
68
 |
 |