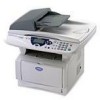
Brother International DCP 8045D Users Manual - English - Page 182
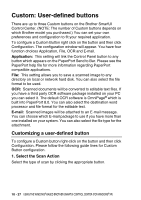
Custom: User-defined buttons, 1. Select the Scan Action
 |
UPC - 012502610335
View all Brother International DCP 8045D manuals
Add to My Manuals
Save this manual to your list of manuals |
Page 182 highlights
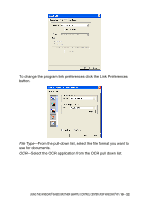
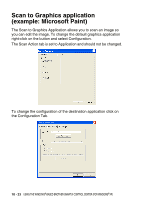
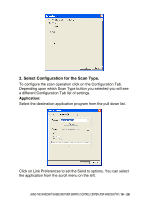
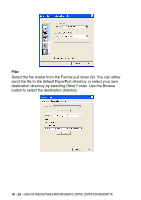
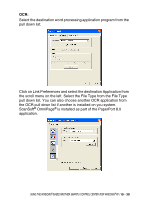
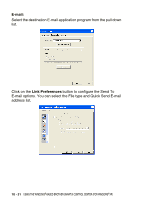
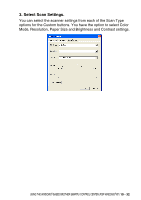
Custom: User-defined buttons There are up to three Custom buttons on the Brother SmartUI Control Center. (NOTE: The number of Custom buttons depends on which Brother model you purchased.) You can set your own preferences and configuration to fit your required application. To configure a Custom Button right click on the button and then click Configuration. The configuration window will appear. You have four function choices Application, File, OCR and E-mail. Application: This setting will link the Control Panel button to any button which appears on the PaperPort Send to Bar. Please see the PaperPort help file for more information regarding PaperPort compatible applications. File: This setting allows you to save a scanned image to any directory on local or network hard disk. You can also select the file format to be used. OCR: Scanned documents will be converted to editable text files. If you have a third party OCR software package installed on your PC you can select it. The default OCR software is OmniPage® which is built into PaperPort 8.0. You can also select the destination word processor and file format for the editable text. E-mail: Scanned images will be attached to an E-mail message. You can choose which E-mail package to use if you have more than one installed on your system. You can also select the file type for the attachment. Customizing a user-defined button To configure a Custom button right-click on the button and then click Configuration. Please follow the following guide lines for Custom Button configuration. 1. Select the Scan Action Select the type of scan by clicking the appropriate button. 10 - 27 USING THE WINDOWS®-BASED BROTHER SMARTUI CONTROL CENTER (FOR WINDOWS® XP)
-
 1
1 -
2
-
3
-
4
-
5
-
6
-
7
-
8
-
9
-
10
-
11
-
12
-
13
-
14
-
15
-
16
-
17
-
18
-
19
-
20
-
21
-
22
-
23
-
24
-
25
-
26
-
27
-
28
-
29
-
30
-
31
-
32
-
33
-
34
-
35
-
36
-
37
-
38
-
39
-
40
-
41
-
42
-
43
-
44
-
45
-
46
-
47
-
48
-
49
-
50
-
51
-
52
-
53
-
54
-
55
-
56
-
57
-
58
-
59
-
60
-
61
-
62
-
63
-
64
-
65
-
66
-
67
-
68
-
69
-
70
-
71
-
72
-
73
-
74
-
75
-
76
-
77
-
78
-
79
-
80
-
81
-
82
-
83
-
84
-
85
-
86
-
87
-
88
-
89
-
90
-
91
-
92
-
93
-
94
-
95
-
96
-
97
-
98
-
99
-
100
-
101
-
102
-
103
-
104
-
105
-
106
-
107
-
108
-
109
-
110
-
111
-
112
-
113
-
114
-
115
-
116
-
117
-
118
-
119
-
120
-
121
-
122
-
123
-
124
-
125
-
126
-
127
-
128
-
129
-
130
-
131
-
132
-
133
-
134
-
135
-
136
-
137
-
138
-
139
-
140
-
141
-
142
-
143
-
144
-
145
-
146
-
147
-
148
-
149
-
150
-
151
-
152
-
153
-
154
-
155
-
156
-
157
-
158
-
159
-
160
-
161
-
162
-
163
-
164
-
165
-
166
-
167
-
168
-
169
-
170
-
171
-
172
-
173
-
174
-
175
-
176
-
 177
177 -
 178
178 -
 179
179 -
 180
180 -
 181
181 -
 182
182 -
 183
183 -
 184
184 -
 185
185 -
 186
186 -
 187
187 -
188
-
189
-
190
-
191
-
192
-
193
-
194
-
195
-
196
-
197
-
198
-
199
-
200
-
201
-
202
-
203
-
204
-
205
-
206
-
207
-
208
-
209
-
210
-
211
-
212
-
213
-
214
-
215
-
216
-
217
-
218
-
219
-
220
-
221
-
222
-
223
-
224
-
225
-
226
-
227
-
228
-
229
-
230
-
231
-
232
-
233
-
234
-
235
-
236
-
237
-
238
-
239
-
240
-
241
-
242
-
243
-
244
-
245
-
246
-
247
-
248
-
249
-
250
-
251
-
252
-
253
-
254
-
255
-
256
-
257
-
258
-
259
-
260
-
261
-
262
-
263
-
264
-
265
-
266
-
267
-
268
-
269
-
270
-
271
-
272
-
273
-
274
-
275
-
276
-
277
-
278
-
279
-
280
-
281
-
282
-
283
-
284
 |
 |