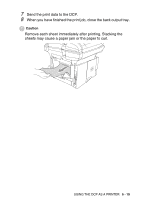
Brother International DCP 8045D Users Manual - English - Page 89
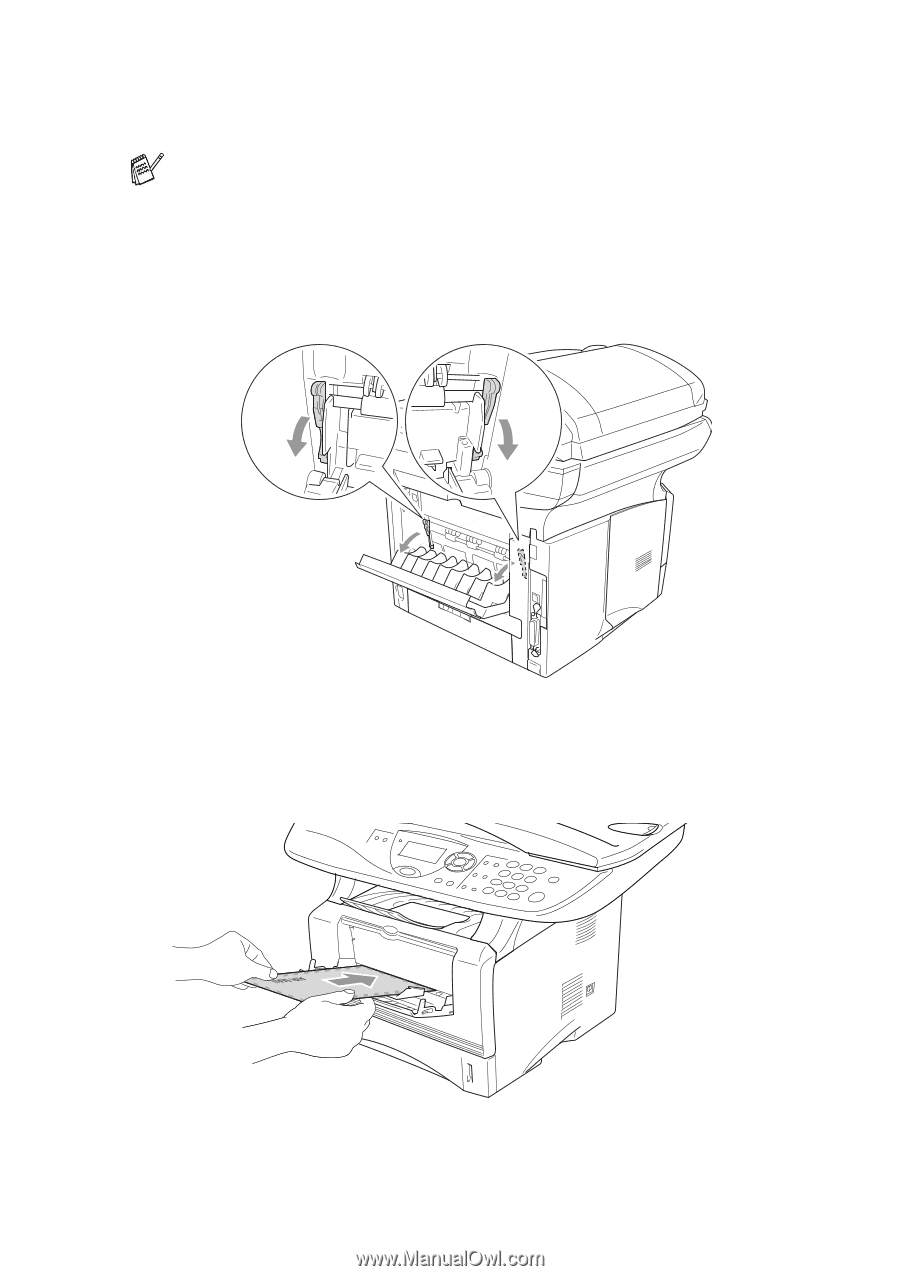
At the back of the DCP, open the back output tray and push
 |
UPC - 012502610335
View all Brother International DCP 8045D manuals
Add to My Manuals
Save this manual to your list of manuals |
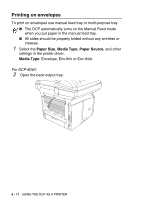
Page 89 highlights
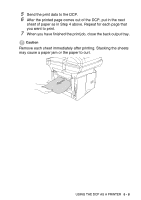
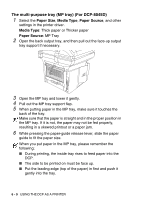
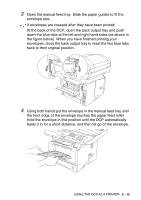
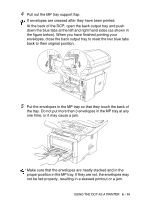
3 Open the manual feed tray. Slide the paper guides to fit the envelope size. If envelopes are creased after they have been printed: At the back of the DCP, open the back output tray and push down the blue tabs at the left and right hand sides (as shown in the figure below). When you have finished printing your envelopes, close the back output tray to reset the two blue tabs back to their original position. 4 Using both hands put the envelope in the manual feed tray until the front edge of the envelope touches the paper feed roller. Hold the envelope in this position until the DCP automatically feeds it in for a short distance, and then let go of the envelope. USING THE DCP AS A PRINTER 6 - 12
-
 1
1 -
2
-
3
-
4
-
5
-
6
-
7
-
8
-
9
-
10
-
11
-
12
-
13
-
14
-
15
-
16
-
17
-
18
-
19
-
20
-
21
-
22
-
23
-
24
-
25
-
26
-
27
-
28
-
29
-
30
-
31
-
32
-
33
-
34
-
35
-
36
-
37
-
38
-
39
-
40
-
41
-
42
-
43
-
44
-
45
-
46
-
47
-
48
-
49
-
50
-
51
-
52
-
53
-
54
-
55
-
56
-
57
-
58
-
59
-
60
-
61
-
62
-
63
-
64
-
65
-
66
-
67
-
68
-
69
-
70
-
71
-
72
-
73
-
74
-
75
-
76
-
77
-
78
-
79
-
80
-
81
-
82
-
83
-
 84
84 -
 85
85 -
 86
86 -
 87
87 -
 88
88 -
 89
89 -
 90
90 -
 91
91 -
 92
92 -
 93
93 -
 94
94 -
95
-
96
-
97
-
98
-
99
-
100
-
101
-
102
-
103
-
104
-
105
-
106
-
107
-
108
-
109
-
110
-
111
-
112
-
113
-
114
-
115
-
116
-
117
-
118
-
119
-
120
-
121
-
122
-
123
-
124
-
125
-
126
-
127
-
128
-
129
-
130
-
131
-
132
-
133
-
134
-
135
-
136
-
137
-
138
-
139
-
140
-
141
-
142
-
143
-
144
-
145
-
146
-
147
-
148
-
149
-
150
-
151
-
152
-
153
-
154
-
155
-
156
-
157
-
158
-
159
-
160
-
161
-
162
-
163
-
164
-
165
-
166
-
167
-
168
-
169
-
170
-
171
-
172
-
173
-
174
-
175
-
176
-
177
-
178
-
179
-
180
-
181
-
182
-
183
-
184
-
185
-
186
-
187
-
188
-
189
-
190
-
191
-
192
-
193
-
194
-
195
-
196
-
197
-
198
-
199
-
200
-
201
-
202
-
203
-
204
-
205
-
206
-
207
-
208
-
209
-
210
-
211
-
212
-
213
-
214
-
215
-
216
-
217
-
218
-
219
-
220
-
221
-
222
-
223
-
224
-
225
-
226
-
227
-
228
-
229
-
230
-
231
-
232
-
233
-
234
-
235
-
236
-
237
-
238
-
239
-
240
-
241
-
242
-
243
-
244
-
245
-
246
-
247
-
248
-
249
-
250
-
251
-
252
-
253
-
254
-
255
-
256
-
257
-
258
-
259
-
260
-
261
-
262
-
263
-
264
-
265
-
266
-
267
-
268
-
269
-
270
-
271
-
272
-
273
-
274
-
275
-
276
-
277
-
278
-
279
-
280
-
281
-
282
-
283
-
284
 |
 |
USING THE DCP AS A PRINTER
6 - 12
3
Open the manual feed tray. Slide the paper guides to fit the
envelope size.
4
Using both hands put the envelope in the manual feed tray until
the front edge of the envelope touches the paper feed roller.
Hold the envelope in this position until the DCP automatically
feeds it in for a short distance, and then let go of the envelope.
If envelopes are creased after they have been printed:
At the back of the DCP, open the back output tray and push
down the blue tabs at the left and right hand sides (as shown in
the figure below). When you have finished printing your
envelopes, close the back output tray to reset the two blue tabs
back to their original position.