Brother International HL 1240 Service Manual - Page 158
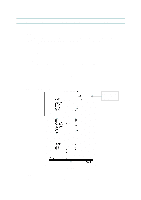
Check that the Drum LED goes ON and the Ready LED goes OFF. - error lights
 |
UPC - 012502600855
View all Brother International HL 1240 manuals
Add to My Manuals
Save this manual to your list of manuals |
Page 158 highlights
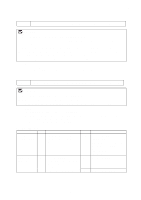
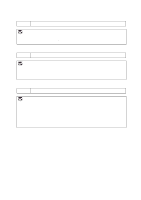
CHAPTER 6 TROUBLESHOOTING Paper eject sensor ON (Paper is detected.) Drum LED ON OFF (No paper is detected.) Drum LED OFF Lower paper cassette ON (No lower paper cassette is installed. Ready LED ON registration sensor / Paper is detected.) (HL-1250 only) OFF (The lower paper cassette is installed. / No paper is detected.) Ready LED OFF Cover sensor ON (The front cover is closed.) Data LED OFF OFF (The front cover is open.) Data LED ON The procedure for the factory inspection mode is as follows. (1) Turn off the printer power switch, open the front cover, and remove the drum unit. (2) Turn on the printer power switch while holding down the control panel button. The Drum LED comes ON. (3) Lightly press the panel button again. (4) Check that all the LEDs except the Ready LED are OFF. ✒ If the toner sensor is ON, the Drum LED stays ON (error). ✒ If the front registration sensor is ON, the Alarm LED stays ON (error). ✒ If the upper paper cassette sensor is ON, the Data LED stays ON. (error) (HL-1250 only) NOTE: The lower paper cassette solenoid is turned ON/OFF even if the panel button is not pressed. (5) Check the rear registration sensor. ✒ If the rear registration sensor is stuck backwards, the Ready LED stays OFF. (error) ✒ If the rear registration sensor is moved back and forth, the Ready LED comes ON at any time. (error) (6) Check that only the Data LED comes ON while pressing the panel button. ✒ If the paper eject sensor is ON, the Drum LED stays ON. (error) ✒ If the lower paper cassette registration sensor is ON, the Ready LED stays ON. (error) If the registration sensor is ON, the lower paper cassette solenoid is turned ON, and the Ready LED also stays ON. (HL-1250 only) NOTE: The lower paper cassette solenoid is turned ON/OFF even if the panel button is not pressed. (7) Install the drum unit. ✒ Check that the Drum LED goes ON and the Ready LED goes OFF. (8) Close the front cover. (9) Continue to press the control panel button. ✒ Check that the Data LED stays OFF. (10) Release the panel button. (11) If all the sensors except the toner sensor are correct, the printer goes back to the Ready status. If any error is detected, the printer stays in the inspection mode. NOTE: If the printer goes back to the Ready status after the toner sensor does not detect the drum unit, the printer starts to recognize the main motor. 6-48
-
 1
1 -
2
-
3
-
4
-
5
-
6
-
7
-
8
-
9
-
10
-
11
-
12
-
13
-
14
-
15
-
16
-
17
-
18
-
19
-
20
-
21
-
22
-
23
-
24
-
25
-
26
-
27
-
28
-
29
-
30
-
31
-
32
-
33
-
34
-
35
-
36
-
37
-
38
-
39
-
40
-
41
-
42
-
43
-
44
-
45
-
46
-
47
-
48
-
49
-
50
-
51
-
52
-
53
-
54
-
55
-
56
-
57
-
58
-
59
-
60
-
61
-
62
-
63
-
64
-
65
-
66
-
67
-
68
-
69
-
70
-
71
-
72
-
73
-
74
-
75
-
76
-
77
-
78
-
79
-
80
-
81
-
82
-
83
-
84
-
85
-
86
-
87
-
88
-
89
-
90
-
91
-
92
-
93
-
94
-
95
-
96
-
97
-
98
-
99
-
100
-
101
-
102
-
103
-
104
-
105
-
106
-
107
-
108
-
109
-
110
-
111
-
112
-
113
-
114
-
115
-
116
-
117
-
118
-
119
-
120
-
121
-
122
-
123
-
124
-
125
-
126
-
127
-
128
-
129
-
130
-
131
-
132
-
133
-
134
-
135
-
136
-
137
-
138
-
139
-
140
-
141
-
142
-
143
-
144
-
145
-
146
-
147
-
148
-
149
-
150
-
151
-
152
-
 153
153 -
 154
154 -
 155
155 -
 156
156 -
 157
157 -
 158
158 -
 159
159 -
 160
160 -
 161
161 -
 162
162 -
 163
163 -
164
-
165
-
166
-
167
-
168
-
169
-
170
-
171
-
172
-
173
-
174
-
175
-
176
-
177
-
178
-
179
-
180
-
181
-
182
-
183
-
184
-
185
-
186
-
187
-
188
-
189
-
190
-
191
-
192
-
193
-
194
-
195
-
196
-
197
-
198
-
199
-
200
-
201
-
202
-
203
-
204
-
205
-
206
-
207
-
208
-
209
-
210
-
211
-
212
-
213
-
214
-
215
-
216
-
217
-
218
-
219
-
220
-
221
-
222
-
223
-
224
-
225
-
226
-
227
-
228
-
229
-
230
-
231
-
232
-
233
-
234
-
235
-
236
-
237
-
238
-
239
-
240
-
241
-
242
-
243
-
244
-
245
-
246
-
247
-
248
-
249
-
250
-
251
-
252
-
253
-
254
-
255
-
256
-
257
-
258
-
259
-
260
-
261
-
262
-
263
-
264
-
265
-
266
-
267
-
268
-
269
-
270
-
271
-
272
-
273
-
274
-
275
-
276
-
277
-
278
-
279
-
280
-
281
-
282
-
283
-
284
-
285
-
286
-
287
-
288
-
289
-
290
-
291
-
292
-
293
-
294
-
295
-
296
-
297
-
298
-
299
-
300
-
301
-
302
-
303
-
304
-
305
-
306
-
307
-
308
-
309
-
310
-
311
-
312
-
313
-
314
-
315
-
316
-
317
-
318
-
319
-
320
-
321
-
322
-
323
-
324
-
325
-
326
-
327
-
328
-
329
-
330
-
331
-
332
-
333
 |
 |