Brother International MFC 3100C Users Manual - English - Page 35
Installing the Ink Cartridges, CHECK CARTRIDGE - print head
 |
UPC - 012502565819
View all Brother International MFC 3100C manuals
Add to My Manuals
Save this manual to your list of manuals |
Page 35 highlights
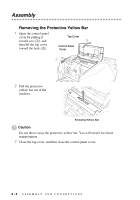
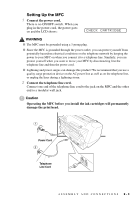
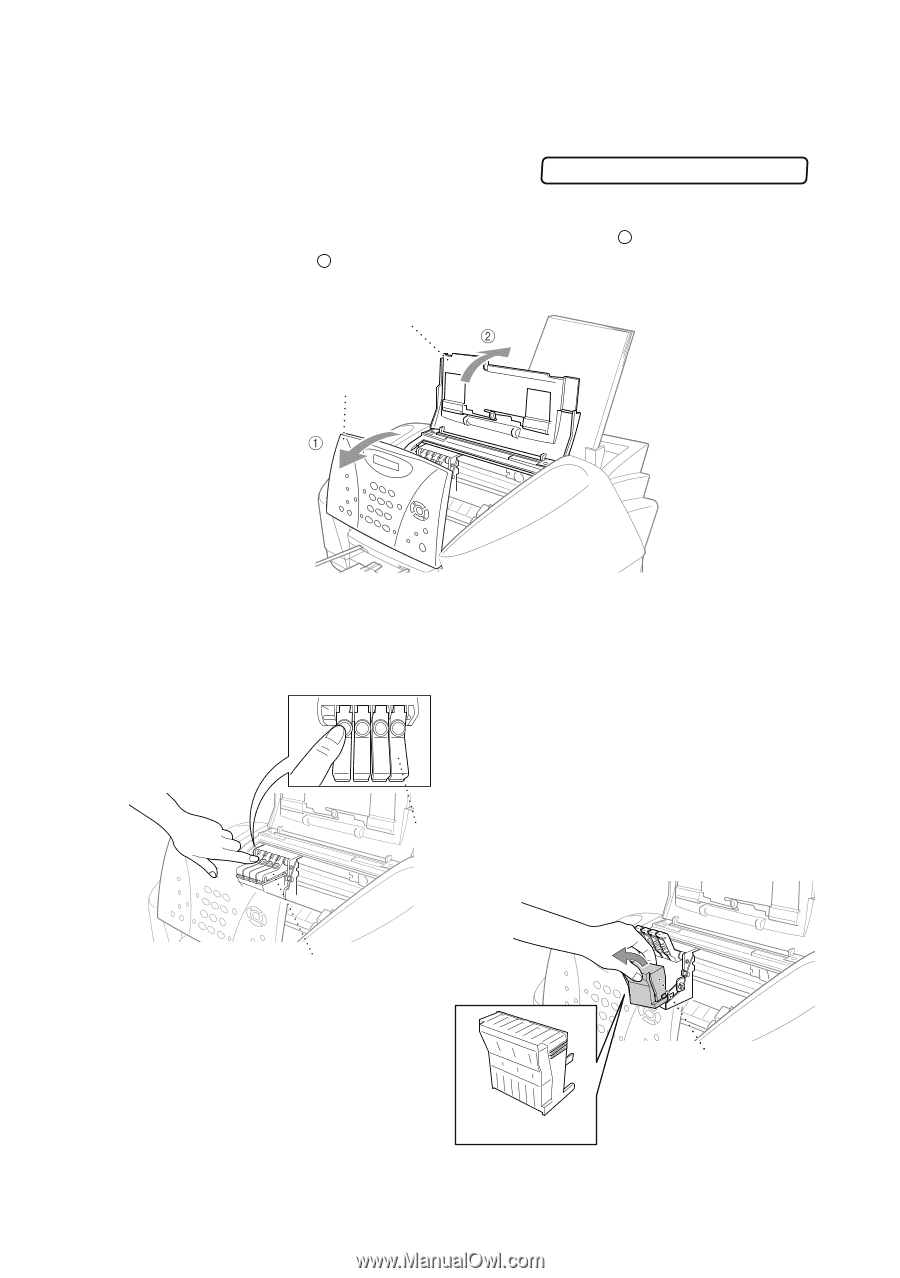
Installing the Ink Cartridges 1 Check that you turned on the power (by plugging in the power cord). The LCD shows: CHECK CARTRIDGE 2 Open the control panel cover by pulling it toward you ( 1 ), then lift the top cover toward the back ( 2 ). After a few seconds, the print head will move left to its replacement position. Top Cover Control Panel Cover 3 Remove the protective blue tape over the colored ink cartridge covers. 4 Push the four colored ink cartridge covers one at a time so they pop up. Then remove the white shipping cover by pulling it toward you and lifting it up and out. PUSH PUSH PUSH PUSH Colored Ink Cartridge Covers Ink Cartridge Covers White Shipping Cover White Shipping Cover ASSEMBLY AND CONNECTIONS 2-8
-
 1
1 -
2
-
3
-
4
-
5
-
6
-
7
-
8
-
9
-
10
-
11
-
12
-
13
-
14
-
15
-
16
-
17
-
18
-
19
-
20
-
21
-
22
-
23
-
24
-
25
-
26
-
27
-
28
-
29
-
 30
30 -
 31
31 -
 32
32 -
 33
33 -
 34
34 -
 35
35 -
 36
36 -
 37
37 -
 38
38 -
 39
39 -
 40
40 -
41
-
42
-
43
-
44
-
45
-
46
-
47
-
48
-
49
-
50
-
51
-
52
-
53
-
54
-
55
-
56
-
57
-
58
-
59
-
60
-
61
-
62
-
63
-
64
-
65
-
66
-
67
-
68
-
69
-
70
-
71
-
72
-
73
-
74
-
75
-
76
-
77
-
78
-
79
-
80
-
81
-
82
-
83
-
84
-
85
-
86
-
87
-
88
-
89
-
90
-
91
-
92
-
93
-
94
-
95
-
96
-
97
-
98
-
99
-
100
-
101
-
102
-
103
-
104
-
105
-
106
-
107
-
108
-
109
-
110
-
111
-
112
-
113
-
114
-
115
-
116
-
117
-
118
-
119
-
120
-
121
-
122
-
123
-
124
-
125
-
126
-
127
-
128
-
129
-
130
-
131
-
132
-
133
-
134
-
135
-
136
-
137
-
138
-
139
-
140
-
141
-
142
-
143
-
144
-
145
-
146
-
147
-
148
-
149
-
150
-
151
-
152
-
153
-
154
-
155
-
156
-
157
-
158
-
159
-
160
-
161
-
162
-
163
-
164
-
165
-
166
-
167
-
168
-
169
-
170
-
171
-
172
-
173
-
174
-
175
-
176
-
177
-
178
-
179
-
180
-
181
-
182
-
183
-
184
-
185
-
186
-
187
-
188
-
189
-
190
-
191
-
192
-
193
-
194
-
195
-
196
-
197
-
198
-
199
-
200
-
201
-
202
-
203
-
204
-
205
-
206
-
207
-
208
-
209
-
210
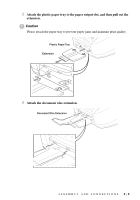
 |
 |
ASSEMBLY AND CONNECTIONS
2 - 8
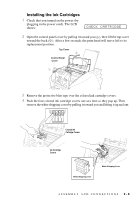
Installing the Ink Cartridges
1
Check that you turned on the power (by
plugging in the power cord). The LCD
shows:
2
Open the control panel cover by pulling it toward you (
), then lift the top cover
toward the back (
). After a few seconds, the print head will move left to its
replacement position.
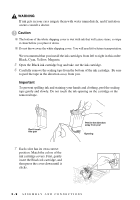
3
Remove the protective blue tape over the colored ink cartridge covers.
4
Push the four colored ink cartridge covers one at a time so they pop up. Then
remove the white shipping cover by pulling it toward you and lifting it up and out.
CHECK CARTRIDGE
1
2
Top Cover
Control Panel
Cover
PUSH
PUSH
PUSH
PUSH
Ink Cartridge
Covers
Colored Ink
Cartridge Covers
White Shipping Cover
White Shipping Cover