Brother International MFC-J4710DW Users Manual Basic - English - Page 29
Adding Scan Shortcuts, l
 |
View all Brother International MFC-J4710DW manuals
Add to My Manuals
Save this manual to your list of manuals |
Page 29 highlights
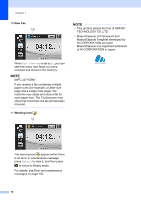
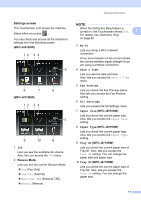
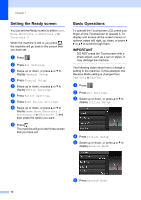
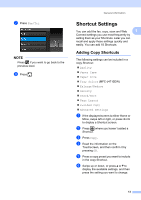
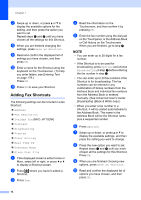
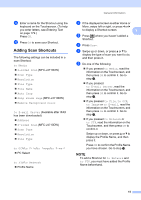
k Enter a name for the Shortcut using the keyboard on the Touchscreen. (To help you enter letters, see Entering Text on page 179.) Press OK. l Press OK to save your Shortcut. Adding Scan Shortcuts 1 The following settings can be included in a scan Shortcut: to Media 2-sided Scan (MFC-J4710DW) Scan Type Resolution File Type File Name Auto Crop Skip Blank Page (MFC-J4710DW) Remove Background Color to E-mail Server (Available after IFAX has been downloaded) Address 2-sided Scan (MFC-J4710DW) Scan Type Resolution File Type to OCR/to File/to Image/to E-mail PC Select to FTP/to Network Profile Name General information a If the displayed screen is either Home or More, swipe left or right, or press d or c to display a Shortcut screen. 1 b Press where you haven't added a Shortcut. c Press Scan. d Swipe up or down, or press a or b to display the type of scan you want to do, and then press it. e Do one of the following: If you pressed to Media, read the information on the Touchscreen, and then press OK to confirm it. Go to step h. If you pressed to E-mail Server, read the information on the Touchscreen, and then press OK to confirm it. Go to step f. If you pressed to File, to OCR, to Image or to E-mail, read the information on the Touchscreen, and then press OK to confirm it. Go to step g. If you pressed to Network or to FTP, read the information on the Touchscreen, and then press OK to confirm it. Swipe up or down, or press a or b to display the Profile Name, and then press it. Press OK to confirm the Profile Name you have chosen. Go to step m. NOTE To add a Shortcut for to Network and to FTP, you must have added the Profile Name beforehand. 15
-
 1
1 -
2
-
3
-
4
-
5
-
6
-
7
-
8
-
9
-
10
-
11
-
12
-
13
-
14
-
15
-
16
-
17
-
18
-
19
-
20
-
21
-
22
-
23
-
 24
24 -
 25
25 -
 26
26 -
 27
27 -
 28
28 -
 29
29 -
 30
30 -
 31
31 -
 32
32 -
 33
33 -
 34
34 -
35
-
36
-
37
-
38
-
39
-
40
-
41
-
42
-
43
-
44
-
45
-
46
-
47
-
48
-
49
-
50
-
51
-
52
-
53
-
54
-
55
-
56
-
57
-
58
-
59
-
60
-
61
-
62
-
63
-
64
-
65
-
66
-
67
-
68
-
69
-
70
-
71
-
72
-
73
-
74
-
75
-
76
-
77
-
78
-
79
-
80
-
81
-
82
-
83
-
84
-
85
-
86
-
87
-
88
-
89
-
90
-
91
-
92
-
93
-
94
-
95
-
96
-
97
-
98
-
99
-
100
-
101
-
102
-
103
-
104
-
105
-
106
-
107
-
108
-
109
-
110
-
111
-
112
-
113
-
114
-
115
-
116
-
117
-
118
-
119
-
120
-
121
-
122
-
123
-
124
-
125
-
126
-
127
-
128
-
129
-
130
-
131
-
132
-
133
-
134
-
135
-
136
-
137
-
138
-
139
-
140
-
141
-
142
-
143
-
144
-
145
-
146
-
147
-
148
-
149
-
150
-
151
-
152
-
153
-
154
-
155
-
156
-
157
-
158
-
159
-
160
-
161
-
162
-
163
-
164
-
165
-
166
-
167
-
168
-
169
-
170
-
171
-
172
-
173
-
174
-
175
-
176
-
177
-
178
-
179
-
180
-
181
-
182
-
183
-
184
-
185
-
186
-
187
-
188
-
189
-
190
-
191
-
192
-
193
-
194
-
195
-
196
-
197
-
198
-
199
-
200
-
201
-
202
-
203
-
204
-
205
-
206
-
207
-
208
-
209
-
210
-
211
 |
 |
