Brother International andtrade; QL-500 Users Manual - English
Brother International andtrade; QL-500 Manual
 |
View all Brother International andtrade; QL-500 manuals
Add to My Manuals
Save this manual to your list of manuals |
Brother International andtrade; QL-500 manual content summary:
- Brother International andtrade; QL-500 | Users Manual - English - Page 1
www.brother.com - Brother International andtrade; QL-500 | Users Manual - English - Page 2
- Brother International andtrade; QL-500 | Users Manual - English - Page 3
1 Brother® One-Year Limited Warranty and Replacement Service (USA Only)...2 Important Information ...5 General Precautions ...6 QL-500/550...6 DK Rolls (DK Die-cut Labels and DK Continuous Tape 6 CD-ROM & Software ...7 AC power cord ...7 Cutter unit ...7 Symbols Used in this Guide ...8 GETTING - Brother International andtrade; QL-500 | Users Manual - English - Page 4
Database ...58 APPENDIX ...62 Maintenance...62 Cleaning the Print Head...62 Cleaning the Roller ...62 Changing Cutter Unit ...64 Troubleshooting ...65 What to do when...65 Specifications ...66 QL-500 / QL-550...66 Operating Environment...66 Accessories (For USA Only) ...67 DK Rolls ...67 Replacement - Brother International andtrade; QL-500 | Users Manual - English - Page 5
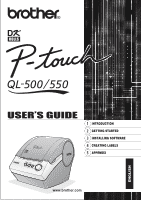
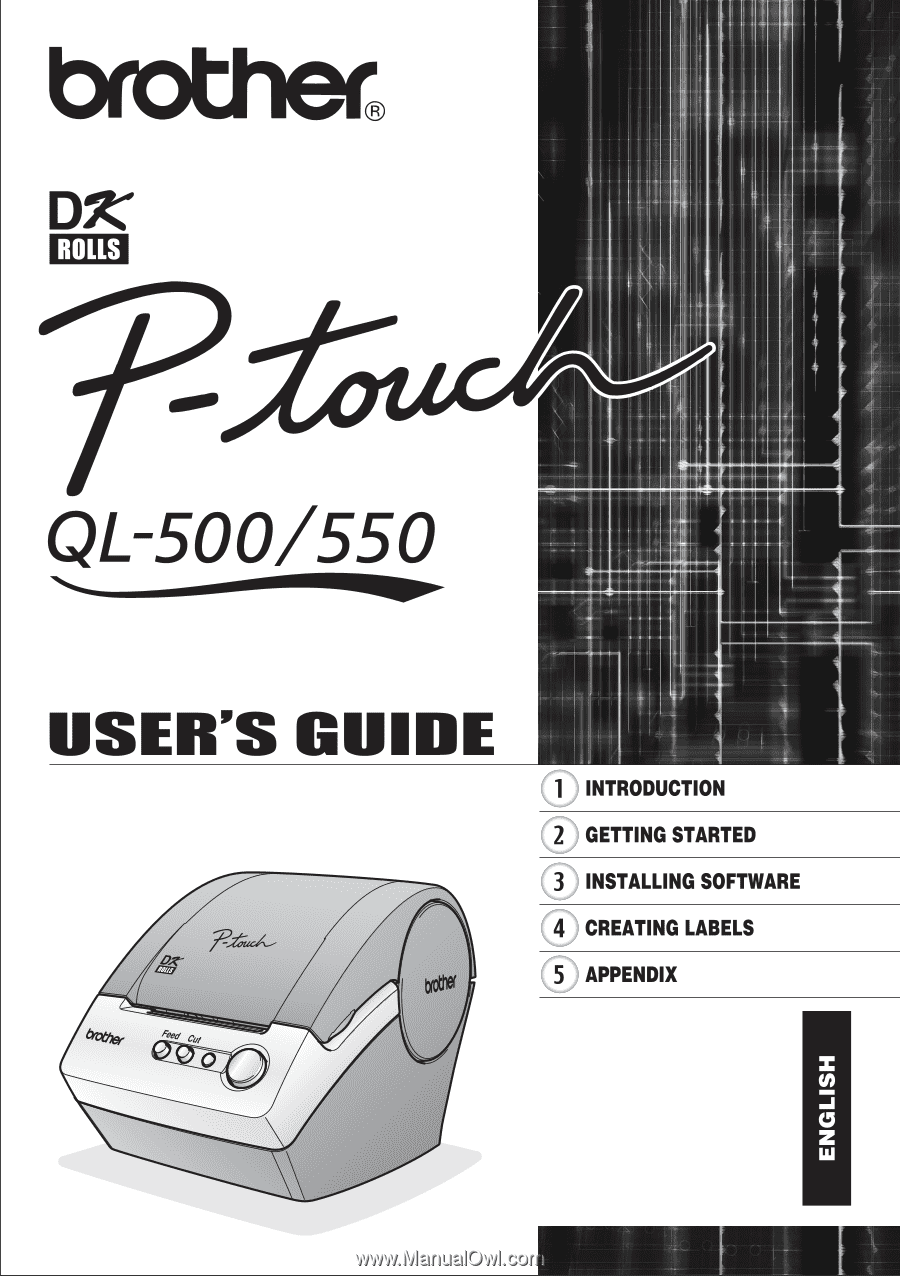
new QL-500/550 is a label printer that connects to your personal computer, enabling you to quickly and easily print professional custom labels that you have created on your personal computer using the label editing software provided. We strongly recommend that you read this User's Guide carefully - Brother International andtrade; QL-500 | Users Manual - English - Page 6
you think your Product is eligible for warranty service: Report your issue to our P-touch Customer Service Hotline at 1-877-478-6824 or to a Brother Authorized Service Center within the applicable warranty period. Supply Brother or the Brother Authorized Service Center with a copy of your dated bill - Brother International andtrade; QL-500 | Users Manual - English - Page 7
problem to Brother or an Authorized Service Center within the applicable warranty period, Brother or its Authorized Service Brother using the pre-paid freight bill supplied by Brother in accordance with the instructions provided by Brother. Since you will be in possession of two machines, Brother - Brother International andtrade; QL-500 | Users Manual - English - Page 8
loss of any equipment, media, programs or data related to the use of this Product. Except for that repair or replacement as described above, Brother shall not be liable for any direct, indirect, incidental or consequential damages or specific relief. Because some states do not allow the exclusion or - Brother International andtrade; QL-500 | Users Manual - English - Page 9
Important Information Should you have questions, or need information about your Brother Product, we have a variety of support options for you to choose from: USA-Customer Service: Customer Service 877-478-6824 (voice) Customer Service 901-379-1210 (fax) Automated Faxback 800-521-2846 World Wide - Brother International andtrade; QL-500 | Users Manual - English - Page 10
the retail outlet where the QL-500/550 was purchased or your local authorized service center. If you continue to use the QL-500/550 with water or a foreign object in the QL-500/550, the QL-500/550 may be damaged or personal injury could result. • Do not touch the cutter. Personal injury could result - Brother International andtrade; QL-500 | Users Manual - English - Page 11
cause a problem with the power cord. • The standard electrical outlet shall be installed near the QL-500/550 and shall be easily accessible. Cutter unit • To prevent injury from the broken cutter blade and unit, follow these points: Close the top cover when operating the cutter unit. Paper guide - Brother International andtrade; QL-500 | Users Manual - English - Page 12
The following symbols are used throughout this guide to indicate additional information of varying degrees of importance. This symbol indicates information indicates information or directions that can help you better understand or use the QL-500/550 more efficiently. 8 Symbols Used in this Guide - Brother International andtrade; QL-500 | Users Manual - English - Page 13
or damaged, please contact the retail outlet where the QL-500/550 was purchased. P-touch QL-500/550 USB cable QL-500 QL-550 Quick Start Guide (English and Spanish) CD-ROM DK Label & Tape Guide Starter roll Warranty Card The QL-500 includes one starter roll of DK Die-cut Standard Address - Brother International andtrade; QL-500 | Users Manual - English - Page 14
STARTED QL-500/550 Components QL-500/550 Label Printer „ Front QL-500 DK Roll compartment cover QL- QL-500/550 to your personal computer until directed to do so when installing the printer driver. If the QL500/550 is connected to a personal computer that does not have the printer driver software - Brother International andtrade; QL-500 | Users Manual - English - Page 15
QL-500/550 indicates the current operating condition. Lamp Not lit Power is OFF. Condition Lit Flashing fast Flashing slow Power is ON. (Normally lit while power is on, the LED flashes during cleaning or if an error has occurred.) Indicates one of the following errors. • Cutter error • Label - Brother International andtrade; QL-500 | Users Manual - English - Page 16
port of your personal computer yet. Do not connect the QL-500/550 to your personal computer until directed to do so when installing the printer driver. If the QL500/550 is connected to a personal computer that does not have the printer driver software installed, the dialog box shown here will appear - Brother International andtrade; QL-500 | Users Manual - English - Page 17
only genuine Brother accessories and DK Rolls. Installing the DK Roll 1 Press the ON/OFF button to turn the QL-500/550 off. Hold the DK Roll compartment cover at the sides near the front of the QL-500/550 and firmly lift up to open the cover. 2 Place the spool into the spool guides in - Brother International andtrade; QL-500 | Users Manual - English - Page 18
cutter. When unable to thread the end of the DK Roll to the slot, thread it as far as possible, lower the label lever and close the cover, then press the FEED button to set the roll. 4 Lower the label lever and then close the DK Roll compartment cover. Installing the Paper Guide Your QL-500 - Brother International andtrade; QL-500 | Users Manual - English - Page 19
label editor software and printer driver on your personal computer to design professional labels and print them on your QL-500/550. P-touch Editor Version 4.1 Use this powerful label design software to create a wide variety of custom labels such as address labels, file folder labels, CD/DVD labels - Brother International andtrade; QL-500 | Users Manual - English - Page 20
on the operating system running on your personal computer. Refer to the installation procedure for the appropriate operating system to install the software. Refer to "When using Microsoft Windows 98 SE" on page 21 for the installation procedure for that operating system. When using Microsoft - Brother International andtrade; QL-500 | Users Manual - English - Page 21
z INSTALLING SOFTWARE 3 Carefully read the license agreement. If you agree to the terms and conditions of the license agreement, click [Yes] to continue installation 4 Enter your "User Name" and the "Company Name", and then click [Next]. The Setup Type dialog box appears. 17 Installing the Software - Brother International andtrade; QL-500 | Users Manual - English - Page 22
a particular feature. For example, to install the printer driver only. The following items will be installed. Typical • P-touch Editor • P-touch Library • Fonts • Help • Clip Art • Auto Format Templates • Layout styles • Add-Ins • Manuals • Drivers Custom Click [Next] and select the features you - Brother International andtrade; QL-500 | Users Manual - English - Page 23
The Driver Setup dialog box does not appear if "Driver" is not selected in Custom installation. 8 When the Driver Setup dialog box instructs you to connect the QL-500/ 550, plug the connector on the USB cable into the USB port on the back of the QL-500/550. 19 Installing the Software z INSTALLING - Brother International andtrade; QL-500 | Users Manual - English - Page 24
driver software installation. When connecting the QL-500/550 to a personal computer via a USB hub, a proper connection may not be possible due to the type of hub used. If this occurs, connect the QL-500/ 550 directly to the personal computer. When using Microsoft® Windows P-touch Editor software is - Brother International andtrade; QL-500 | Users Manual - English - Page 25
z INSTALLING SOFTWARE When using Microsoft Windows 98 SE 1 Start your personal computer and insert the CD-ROM into the CD-ROM drive. A dialog box appears of the license agreement, click [Yes] to continue installation. The Customer Information dialog box appears. 21 Installing the Software - Brother International andtrade; QL-500 | Users Manual - English - Page 26
a particular feature. For example, to install the printer driver only. The following items will be installed. Typical • P-touch Editor • P-touch Library • Fonts • Help • Clip Art • Auto Format Templates • Layout styles • Add-Ins • Manuals • Drivers Custom Click [Next] and select the features you - Brother International andtrade; QL-500 | Users Manual - English - Page 27
(for easy, one click access) for Brother Software, and then click [Next]. If you do not want a shortcut created for an area, clear the check box for that area. Clear all check boxes to add no shortcuts. The Start Copying Files dialog box appears. 7 Review the settings to ensure all are correct - Brother International andtrade; QL-500 | Users Manual - English - Page 28
INSTALLING SOFTWARE 8 When the Driver Setup dialog box instructs you to connect the QL-500/ 550, plug the connector on the USB cable into the USB port on the back of the QL-500/550. 9 Check that the QL-500/550 is turned on, and then plug the connector on the USB cable into the USB port on your - Brother International andtrade; QL-500 | Users Manual - English - Page 29
New Hardware Wizard dialog box appears. The settings displayed on the screen may vary depending on the operating environment the software is being installed on. The software will automatically make the appropriate settings, so it is not necessary to change these settings. 13 Click [Next]. The next - Brother International andtrade; QL-500 | Users Manual - English - Page 30
10. „When an error dialog box appears. Refer to Error Recovery on page 28 to correct the error. „When the Add Printer Wizard dialog box appears. Click [Finish]. The new hardware has been detected. Go to step 15. 15 Click [Finish]. The User Registration dialog box appears. 26 Installing the Software - Brother International andtrade; QL-500 | Users Manual - English - Page 31
display the page." is selected, installation continues. The InstallShield Wizard Complete dialog box appears. 17 Click [Finish]. Installation of the P-touch Editor software is now completed. You may be required to restart your personal computer after installation. Select one of the restart options - Brother International andtrade; QL-500 | Users Manual - English - Page 32
the printer driver installer, and then simply follow the directions in the dialog boxes displayed to install the printer driver. You can also follow the above procedure to install the QL-500 or QL-550 printer driver on additional computers with Windows 98 SE installed. 28 Installing the Software - Brother International andtrade; QL-500 | Users Manual - English - Page 33
Version 4.1 This procedure removes the P-touch Editor software and associated software files. The printer driver is not removed by this procedure. 1 Start (→ Settings) → Control Panel → Add or Remove Programs → Brother P-touch Editor Version 4.1 (/Brother P-touch Quick Editor) → Change/Remove (Add - Brother International andtrade; QL-500 | Users Manual - English - Page 34
for Windows® XP (Home/ Professional)). For details, refer to Windows Help. 3 Select the Brother QL-500 (or Brother QL-550) icon and then select "Delete" from the "File" menu. Refer to Windows Help for other methods of removing a printer driver from your personal computer. 30 Uninstalling Software - Brother International andtrade; QL-500 | Users Manual - English - Page 35
instruction manual for the personal computer. Using the PS-9000 Print Server The QL-500/550 can also be used as a network printer by connecting it to the PS-9000 print server (sold separately) designed exclusively for label printers. Providing secure and reliable management of your P-touch network - Brother International andtrade; QL-500 | Users Manual - English - Page 36
shown below are a few label samples. Your QL-500/ 550 includes a standard address label. Picture the type of label you want to create. 2 Insert the appropriate DK Roll. Select the appropriate DK Roll for the label you are creating. [Label] DK Rolls and Accessory Guide 32 Overview Insert the DK - Brother International andtrade; QL-500 | Users Manual - English - Page 37
tools for drawing graphics on the label. Object dock The object dock contains icons for functions to add text, graphics, tables, frames and other decorative objects to the label. P-touch Editor Help 5 Print the label. Click The label is printed from the QL-500/550. p. 37 p. 37 Overview 33 - Brother International andtrade; QL-500 | Users Manual - English - Page 38
CREATING LABELS Starting P-touch Editor 1 To start P-touch Editor, click the Start button on the task bar, point to All Programs (or Programs), point to Ptouch Editor 4.1, and then click P-touch Editor. You can also start P-touch Editor by double-clicking the short-cut icon on the desktop or - Brother International andtrade; QL-500 | Users Manual - English - Page 39
text ¾ Apply formatting to text ¾ Add decorative objects to the label ¾ Print the completed label Each process in this work flow is described in the following sections. Layout Window The layout window appears after P-touch Editor starts and you select the type of layout from the layout selection - Brother International andtrade; QL-500 | Users Manual - English - Page 40
label as an example. In this example we will create a standard sized address label with label types. The tape length and width settings are automatically set to the size of a standard address label text. The label should now be ready for printing. Refer to Printing the Label for further details - Brother International andtrade; QL-500 | Users Manual - English - Page 41
printed. When printing a label you can select whether priority is given to print quality or print speed. When Printing Speed over Quality has been checked, some objects may not print or the printed image may appear slightly different. Click to open the Brother QL-500/550 Properties dialog box - Brother International andtrade; QL-500 | Users Manual - English - Page 42
folder where you want to save the file, enter the file name, and then click . The label layout is saved in the location specified. „ About file names File names can be up to 255 then click . The file is opened and the label layout is displayed in the layout window. 38 Using P-touch Editor - Brother International andtrade; QL-500 | Users Manual - English - Page 43
for the selected protocol The options that can be chosen may differ depending on the protocol selected. 6 Click [OK]. The bar code appears on the label in the layout work area. 39 Using P-touch Editor - Brother International andtrade; QL-500 | Users Manual - English - Page 44
bar code labels with narrow bar codes. • The QL-500/550 is not designed exclusively for creating bar code labels. Always check that bar code labels can be touch label printers to print bar code labels or the quality or legibility of bar code labels printed with your P-touch label printer. Brother - Brother International andtrade; QL-500 | Users Manual - English - Page 45
some optional features. Refer to How To in the online P-touch Editor Help for further details. 1: Making an address label with P-touch Editor Sample 2: Changing the font of the address label created in lesson 1 3: Making an address label by using an Add-In Options • Printing • Saving a layout - Brother International andtrade; QL-500 | Users Manual - English - Page 46
CREATING LABELS Using Help P-touch Editor has its own Help application that offers further detailed information on the features available with P-touch Editor and how to use these features. „ Opening Help 1 Start P-touch Editor. Refer to "Starting P-touch Editor" on page 34. The layout window appears - Brother International andtrade; QL-500 | Users Manual - English - Page 47
z CREATING LABELS „ Printing Help The contents of the Help topics can be printed to a standard printer (not the QL-500/550). 1 Select a topic in the Contents tab. . 4 Select any options for your standard printer, and then click . The specified Help topics will be printed. 43 Using P-touch Editor - Brother International andtrade; QL-500 | Users Manual - English - Page 48
List is a built-in database for storing information from previously created labels or for potentially new labels. How the Label List Works The Label List is displayed in the Label List window, and works similarly to a Database connection. Refer to "Using a Database" on page 58 for a details about - Brother International andtrade; QL-500 | Users Manual - English - Page 49
1 Click the File menu, point to Database, and then click Label List. The Label List window appears. „ Entering data In our example we will use the Label List view, the Title field for the name and the Body field for the address on a label. 1 Double-click on the Title field to place the cursor in - Brother International andtrade; QL-500 | Users Manual - English - Page 50
CREATING LABELS 4 To add the next record, right click in the Label List window, and select "Create New Record" from the pull down menu. A new record appears in the list. 5 Enter the name and address, etc., in the new record. 6 Repeat steps 4 and 5 to add more records. 46 The Label List - Brother International andtrade; QL-500 | Users Manual - English - Page 51
P-touch Editor's Layout window. • You can quickly create and print labels using the Merge Fields function to automatically arrange data from a Label List roll, for the type you wish to set the default style for, into the QL-500/550. 2 Click the Format menu, and then click Apply Layout Style to open - Brother International andtrade; QL-500 | Users Manual - English - Page 52
in the Merge Fields dialog box as Layout Object. For each field, assign an object from the Label List. To assign the object, click on the Layout Object in the left column, and the corresponding Label List Object in the right column. Repeat for all the objects. When finished, click to return - Brother International andtrade; QL-500 | Users Manual - English - Page 53
, click on the field selector of the field you want to add to the label, and then drag and drop it on the layout. A pop-up menu appears. 3 Select "Text" from the pop-up category dialog box appears. Enter a category name. Any layouts registered by you will be stored in this category. 49 The Label List - Brother International andtrade; QL-500 | Users Manual - English - Page 54
details. The "Auto Cut" option is not available when using the QL-500. 2 Select a Print Range option to select which records are printed. Refer to the Print Range Options table for details. 3 Click The specified labels are printed. Setting All Records Current Record Selected Record(s) Record Range - Brother International andtrade; QL-500 | Users Manual - English - Page 55
z CREATING LABELS Using P-touch Editor with Other Applications If during software installation the Add-In feature to All Programs (or Programs), point to P-touch Editor 4.1, point to P-touch Tools, and then click Add-In Utility. In the Brother P-touch Add-In Settings dialog box, check the checkbox - Brother International andtrade; QL-500 | Users Manual - English - Page 56
are then merged into a new label layout, which is displayed in the Add-In Preview window. „ Creating a label using data from Microsoft Word 1 Open a Microsoft Word document and select the data you wish to place on a label. To select the data, highlight the text. 52 Using P-touch Editor with Other - Brother International andtrade; QL-500 | Users Manual - English - Page 57
created label. Toolbar Preview window Displays a preview of the label with the copied data Add-In Preview window toolbar Print button Prints the current label. Print Settings button Opens the Print dialog box. Check Media button Checks the size of the DK Roll currently inserted in the QL-500/550 - Brother International andtrade; QL-500 | Users Manual - English - Page 58
List" checkbox in the Add-In Preview window when you do not want to register the data in the Label List. • The data is copied onto a label formatted with the default Layout Style. To change the Layout Style, click to open the full P-touch Editor screen and edit the layout or apply a different Layout - Brother International andtrade; QL-500 | Users Manual - English - Page 59
supported by P-touch Editor. • Refer to "How Microsoft Excel data is added to the Label List" on page 55 for details of how the selected data is automatically added to the Label List. • Refer to Add-In Preview window and printed in a single print job is 500. • When printing, the records selected to - Brother International andtrade; QL-500 | Users Manual - English - Page 60
List" checkbox in the Add-In Preview window when you do not want to register the data in the Label List. • The data is copied onto a label formatted with the default Layout Style. To change the Layout Style, click to open the full P-touch Editor screen and edit the layout or apply a different Layout - Brother International andtrade; QL-500 | Users Manual - English - Page 61
highlighted contains an object not supported by P-touch Editor. • Refer to "How Microsoft Outlook data is added to the Label List" on page 57 for is added to the Code field. When importing data from any other Outlook window, a new record is automatically created and the selected data is added to - Brother International andtrade; QL-500 | Users Manual - English - Page 62
labels containing database content - for example name/address labels or inventory labels with codes. The supported Label from the pull-down list of label types. The tape length and width settings are automatically set to the size of a Shipping label Prepare a rough label layout for the label you want - Brother International andtrade; QL-500 | Users Manual - English - Page 63
, the Database window appears below the Layout work area. 5 Click on the field selector of the field you want to add to the label, for this example we will use the Name field, and then drag and drop it on the layout. The field is added to the layout. Field selector 59 Using P-touch - Brother International andtrade; QL-500 | Users Manual - English - Page 64
printed. You can check the layout and content of each label by selecting the corresponding record in the Database window. You can also move from record to record by using the "Next Record" and "Previous Record" buttons in the "Database Properties" box. 60 Using P-touch Editor with Other Applications - Brother International andtrade; QL-500 | Users Manual - English - Page 65
Database window for the labels you want to print, and then click in the Print Properties box. •To print labels for all records, click the Print Setup button. Select "All Records" for "Print Range" and click to print the labels. The "Auto Cut" option is not available when using the QL-500. 61 - Brother International andtrade; QL-500 | Users Manual - English - Page 66
it in a dusty environment. Cleaning the Print Head The DK Paper Roll used in the QL-500/550 is designed to automatically clean the print head. As the DK Paper Roll passes over the head during printing or label feeding, the print head is cleaned. If necessary, simply feed the DK Paper Roll - Brother International andtrade; QL-500 | Users Manual - English - Page 67
into the slot immediately before the cutter. • Do not peel off section ( 1 ) of the sheet. • Make sure that the printed surface of the Cleaning Sheet is facing up. 5 After the Cleaning Sheet is inserted in the slot, peel of section ( 2 ) of the sheet. 6 Turn on the QL-500/550. 7 Press and hold the - Brother International andtrade; QL-500 | Users Manual - English - Page 68
a screw driver, loosen the screw securing the cutter unit. The screw securing the cutter unit cannot be completely removed. Simply loosen it to remove the cutter unit from the QL-500/550. 4 Grip the tab and lift out the cutter unit. Be very careful not to touch the sharp edge of the cutter. 5 Press - Brother International andtrade; QL-500 | Users Manual - English - Page 69
Problem The QL-500/550 does not print, or a printing error is received. The power button does not light up or flash. The printed label contains streaks or poor quality characters, or the label does not light up or flash, contact Brother Customer Service at 1-877-4-P-touch. ΠIs the print head or - Brother International andtrade; QL-500 | Users Manual - English - Page 70
(QL-550) Manual cutter (QL-500) Operating Environment Item Operating System Specification Microsoft Windows 98 SE/Me/2000 Professional /XP (Home/Professional) (Corresponding OS must be clean-installed in the PC environment which fulfills Microsoft's recommending conditions. ) Interface Hard - Brother International andtrade; QL-500 | Users Manual - English - Page 71
QL-500/550. The following supplies and accessories are available for your QL-500/550 and can be ordered directly from Brother should your retailer not stock them. DK Rolls „ DK Die-cut Label 58.99 $89.99 $89.99 Replacement Cutter Stock No. DK-BU99 Cutter unit (2 units) Description Price $11.99 - Brother International andtrade; QL-500 | Users Manual - English - Page 72
18, 22 CUT button 10 CUT lever 10 Cutter 64 D Database 58 Database properties 35 Database window 35 Date field 54, 55, 57 DK Label & Tape Guide 9 DK Roll 13 installing 13 DK Roll compartment cover 10 DK Rolls 6, 67 Draw toolbar 35 Drivers 22 F FEED button 10 Font settings 35 Fonts - Brother International andtrade; QL-500 | Users Manual - English - Page 73
Operating Environment 66 Output Directly To Printer Driver ..... 37 P Page properties 35 Paper Guide 9, 14 Power cord 10 Print properties 35 Print Range 50 Printer Driver 15 Uninstalling 30 Printing options 37 Property dock 35 PS-9000 Print Server 31 P-touch Editor 15, 18, 22 Help 42 - Brother International andtrade; QL-500 | Users Manual - English - Page 74
35 Title field 54, 55, 57 Troubleshooting 65 Typical setup 18, 22 U USB cable 9 USB port 10 © 1993-2004 Brother Industries, Ltd. Microsoft ®, Windows ® are registered trademarks of Microsoft Corporation in the US and other countries. This product includes the software module "USBPRINT.SYS" and - Brother International andtrade; QL-500 | Users Manual - English - Page 75
operational assistance you may call Brother Customer Service at: Voice 1-877-4-PTouch, or Fax 1-901-379-1210 Assistance on the Internet For product information and downloading the latest drivers: http://www.brother.com For purchasing accessories and certain Brother products: http://www.brothermall - Brother International andtrade; QL-500 | Users Manual - English - Page 76
-
 1
1 -
 2
2 -
 3
3 -
 4
4 -
 5
5 -
 6
6 -
 7
7 -
8
-
9
-
10
-
11
-
12
-
13
-
14
-
15
-
16
-
17
-
18
-
19
-
20
-
21
-
22
-
23
-
24
-
25
-
26
-
27
-
28
-
29
-
30
-
31
-
32
-
33
-
34
-
35
-
36
-
37
-
38
-
39
-
40
-
41
-
42
-
43
-
44
-
45
-
46
-
47
-
48
-
49
-
50
-
51
-
52
-
53
-
54
-
55
-
56
-
57
-
58
-
59
-
60
-
61
-
62
-
63
-
64
-
65
-
66
-
67
-
68
-
69
-
70
-
71
-
72
-
73
-
74
-
75
-
76
 |
 |
www.brother.com