Canon EOS 30D Digital Photo Professional Instruction Manual Macintosh (EOS 30D - Page 13
Deleting Images, Selecting the Image Display Mode, Copying an Image, Selecting the Thumbnail Size - eos 300d digital
 |
UPC - 013803065114
View all Canon EOS 30D manuals
Add to My Manuals
Save this manual to your list of manuals |
Page 13 highlights
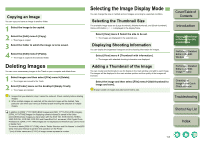
Copying an Image You can copy and save an image to another folder. 1 Select the image to be copied. 2 Select the [Edit] menu [Copy]. ¿ The image is copied. 3 Select the folder to which the image is to be saved. 4 Select the [Edit] menu [Paste]. ¿ The image is copied to the selected folder. Deleting Images You can move unnecessary images to the Trash on your computer and delete them. 1 Select images and then select [File] menu [Delete]. ¿ The images are moved to the Trash. 2 Select [Finder] menu on the desktop [Empty Trash]. ¿ The images are deleted. O Images that you deleted in step 2 cannot be restored. Check carefully before deleting images. O When multiple images are selected, all the selected images will be deleted. Take particular care when you have just finished a task involving the selection of multiple images. In addition to [CRW_YYYY.CRW] (RAW images) and [IMG_YYYY.JPG] (JPEG images), [CRW_YYYY.THM] (images for displaying camera indexes) is saved in the folder [xxxCANON] where images you have taken with the EOS 10D, EOS DIGITAL REBEL/ 300D DIGITAL, EOS D60, EOS D30 and PowerShot Pro1 are saved. With Digital Photo Professional, [CRW_YYYY.THM] images are not displayed and therefore you cannot move or delete them. To move or delete [CRW-YYY.THM], refer to "Folder Structure and File Names" in the EOS Utility Instruction Manual to perform this operation on the Finder. * [xxx] of folder names and [YYYY] of image names represent a number. Selecting the Image Display Mode You can change the size or method and sort images according to a selected condition. Selecting the Thumbnail Size The available image sizes are [Large thumbnail], [Middle thumbnail], and [Small thumbnail]. Various information (p.1-3) is displayed in the display frame. Select [View] menu Select the size to be set. ¿ The images are displayed in the selected size. Displaying Shooting Information You can display the brightness histogram and the shooting information for images. Select [View] menu [Thumbnail with information]. ¿ The images with attached shooting information are displayed. Adding a Thumbnail of the Image You can create new thumbnails to use for display in the main window, and add to each image. The images will be displayed in the main window quicker and the quality of the images will increase. Select the image and then select [File] menu [Add thumbnail to image and save]. A large number of images may take some time to add. Cover/Table of Contents Introduction 1 Displaying Thumbnail Images and Performing Basic Edits in the Main Window 2 Performing Detailed Edits in the Edit Window 3 Performing Detailed Edits in the Edit Image Window 4 Checking an Image in the Quick Check Window Troubleshooting Shortcut Key List Index 1-5
-
 1
1 -
2
-
3
-
4
-
5
-
6
-
7
-
 8
8 -
 9
9 -
 10
10 -
 11
11 -
 12
12 -
 13
13 -
 14
14 -
 15
15 -
 16
16 -
 17
17 -
 18
18 -
19
-
20
-
21
-
22
-
23
-
24
-
25
-
26
-
27
-
28
-
29
-
30
-
31
-
32
-
33
-
34
-
35
-
36
-
37
-
38
-
39
-
40
-
41
-
42
-
43
-
44
-
45
-
46
-
47
-
48
-
49
-
50
-
51
-
52
 |
 |