Canon EOS 30D Digital Photo Professional Instruction Manual Macintosh (EOS 30D - Page 33
Specifying Preferences
 |
UPC - 013803065114
View all Canon EOS 30D manuals
Add to My Manuals
Save this manual to your list of manuals |
Page 33 highlights
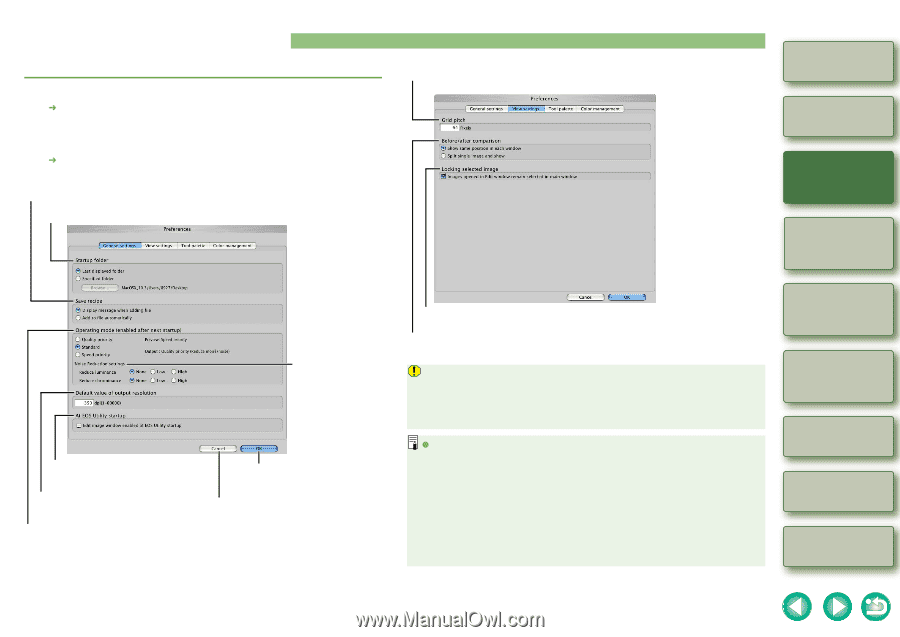
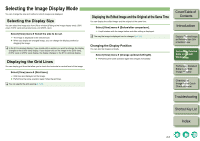
Specifying Preferences You can specify various settings for Digital Photo Professional. 1 Select [Digital Photo Professional] menu [Preferences]. ¿ The [Preferences] dialog box appears. 2 Select the desired tab, specify the settings, and then click the [OK] button. ¿ The settings are applied and the [Preferences] dialog box closes. Allows you to select whether the edited image is saved automatically or the confirmation dialog box is displayed, when you quit Digital Photo Professional or change images displayed in the main window to the ones in another folder. Allows you to select whether the folder that was open the last time is displayed or the specified folder is always displayed when Digital Photo Professional starts up. Allows you to specify the grid spacing in a range of 8 to 256 pixels used when the grid lines (p.2-3) are displayed in the edit window or the edit image window. Cover/Table of Contents Introduction 1 Displaying Thumbnail Images and Performing Basic Edits in the Main Window 2 Performing Detailed Edits in the Edit Window When [Quality priority] or [Standard] is selected in [Operating mode], you can set [Reduce luminance] or [Reduce chrominance]. If you check this checkbox, the edit image window is displayed automatically when you start up EOS Utility. Applies the settings and closes the window. Allows you to set the output resolution default value from 1 to 60,000 dpi when RAW images are converted to JPEG or TIFF images and saved. Cancels all settings and closes the window. You can set the image quality of images when they are displayed, and of RAW images converted to RGB (JPEG, TIFF) images. [Quality priority]: Noise (false color, luminance noise, chrominance noise) reduction processing is performed for both image display and converting/saving, so a more faithful image quality is achieved. However, display and converting/saving of an image takes longer. [Standard] : Noise (false color, luminance noise, chrominance noise) reduction processing is not performed for image display, so the display speed of an image is faster than [Quality priority]. When converting/saving, noise reduction processing is performed as in [Quality priority]. [Speed priority] : Noise (false color, luminance noise, chrominance noise) reduction processing is not performed for either image display or converting/saving, so the image display speed is the same as for [Standard], but when saving/converting the speed is faster than [Standard]. If you check this checkbox, an image opened in the edit window will appear selected in the main window. Select the display mode for displaying the edited and original images for comparison in the edit or edit image window (p.2-3). When [Reduce luminance] of [Noise Reduction settings] is set to [High] or [Low], the noise reduction included in the luminance signal (including jaggies, etc.) may decrease the resolution of some images. Further, when [Reduce chrominance] is set to [High] or [Low], the noise reduction included in the color signal may cause color bleeding of some images. O [Noise Reduction settings] is an effective function to reduce noise when shooting images of night scenes or when shooting images at a high ISO speed. When checking the results of the [Noise Reduction settings] on-screen, select [Quality priority] in [Operating mode]. Luminance noise : A granular type of noise that can occur in images shot at a high ISO speed or images shot at a low ISO speed and have their brightness adjusted. This noise can also appear as jags or serrations on sloping lines. Chrominance noise: Noise that can appear as colored smears or smudges in images shot at a high ISO speed or in the shadowed areas of images shot at a low ISO speed. 3 Performing Detailed Edits in the Edit Image Window 4 Checking an Image in the Quick Check Window Troubleshooting Shortcut Key List Index 1-25
-
 1
1 -
2
-
3
-
4
-
5
-
6
-
7
-
8
-
9
-
10
-
11
-
12
-
13
-
14
-
15
-
16
-
17
-
18
-
19
-
20
-
21
-
22
-
23
-
24
-
25
-
26
-
27
-
 28
28 -
 29
29 -
 30
30 -
 31
31 -
 32
32 -
 33
33 -
 34
34 -
 35
35 -
 36
36 -
 37
37 -
 38
38 -
39
-
40
-
41
-
42
-
43
-
44
-
45
-
46
-
47
-
48
-
49
-
50
-
51
-
52
 |
 |