Canon PIXMA MG2120 User Manual
Canon PIXMA MG2120 Manual
 |
View all Canon PIXMA MG2120 manuals
Add to My Manuals
Save this manual to your list of manuals |
Canon PIXMA MG2120 manual content summary:
- Canon PIXMA MG2120 | User Manual - Page 1
Canon On-screen Manual - MG2100 series Page 1 of 731 pages Overview of the Machine (Including Proper Care and Setting Changes) How to Use the On-Screen Manuals, Printing Procedures Useful Software MC-5801-V1.10 - Canon PIXMA MG2120 | User Manual - Page 2
You Can Do the Following Home You Can Do the Following Page 2 of 731 pages Printing Photos from a Computer Use Easy-PhotoPrint EX to Print Your Photos Copying the Original Use Various Copy Functions Scanning from a Computer Use MP Navigator EX to Scan Images - Canon PIXMA MG2120 | User Manual - Page 3
digital cameras. You can also create still images from videos, or correct/enhance images. Printing Photos Easy-PhotoPrint EX allows you to print your favorite photos in a variety of layouts (borderless photos, etc.). Creating an Album Easy-PhotoPrint EX allows you to create your own personalized - Canon PIXMA MG2120 | User Manual - Page 4
Easy-PhotoPrint EX allows you to create your own calendar using your favorite photos. Creating and Printing Still Images from Videos You can capture video frames, create and print still images. Correcting and Enhancing Photos You can correct red eyes or adjust the brightness and contrast of images - Canon PIXMA MG2120 | User Manual - Page 5
Transform your photos into unique and attractive images using special filters. Page 5 of 731 pages Easy-PhotoPrint EX has many other functions in addition to those mentioned above. See the section below for other function operations. Printing with the Bundled Application Software (Easy-PhotoPrint - Canon PIXMA MG2120 | User Manual - Page 6
platen glass. Making Copies Load the original on the platen glass to copy. Page 6 of 731 pages Reducing or Enlarging a Copy According to the Paper Size The Fit-to-Page copy function enables you to copy the original automatically enlarged or reduced to fit the selected page size. Copying functions - Canon PIXMA MG2120 | User Manual - Page 7
EX MP Navigator EX (supplied scanner software) enables you to easily scan photos and documents. Easy Scanning with Auto Scan You can scan photos and documents easily by automatically detecting the document type. Scanning Multiple Documents at One Time You can scan two or more small documents - Canon PIXMA MG2120 | User Manual - Page 8
Page 8 of 731 pages Easy Scanning with One-click You can complete from scanning to saving, etc. at one time by simply clicking the corresponding icon. Trimming Scanned Images You can trim (crop) scanned images. Correcting/Enhancing Images Automatically You can easily correct/enhance scanned photos. - Canon PIXMA MG2120 | User Manual - Page 9
Text from Scanned Images (OCR) You can scan magazines, newspapers, etc. as images and convert the text to editable text data. There are more functions to MP Navigator EX than those mentioned above. See the section below for more details. Scanning with the Bundled Application Software (MP Navigator - Canon PIXMA MG2120 | User Manual - Page 10
Printing Home Printing Printing Printing from a Computer Page 10 of 731 pages Page top - Canon PIXMA MG2120 | User Manual - Page 11
Printing from a Computer Home > Printing > Printing from a Computer Printing from a Computer Printing with the Bundled Application Software (Easy-PhotoPrint EX) Printing with Application Software (Printing with the Printer Driver) Page 11 of 731 pages Page top - Canon PIXMA MG2120 | User Manual - Page 12
Labels and Case Covers Printing Calendars Printing Stickers Printing Layout Printing Premium Content Correcting and Enhancing Photos Enhancing Photos Using Special Filters Creating and Printing Still Images from Videos Downloading Images from Photo Sharing Sites Photo Print Settings Other Settings - Canon PIXMA MG2120 | User Manual - Page 13
EX can only be used with Canon inkjet printers. It does not support some Canon compact photo printers, including SELPHY CP series. If a printer that supports Easy-PhotoPrint EX is not installed, you cannot print items you create. If Easy-PhotoPrint EX is installed on a computer that already has Easy - Canon PIXMA MG2120 | User Manual - Page 14
, you need to download and install the exclusive content. Refer to "Downloading Premium Content " for details on how to download content. You may only use the content downloaded or printed for personal purposes. You may not use the content for commercial purposes. Supported Image/Video Data Formats - Canon PIXMA MG2120 | User Manual - Page 15
Important Only MOV format videos recorded with Canon digital cameras are supported. When selecting an image, if Photo Professional, all image files supported by Digital Photo Professional will be displayed. File Formats (Extensions) Supported by Easy-PhotoPrint EX Easy-PhotoPrint EX Photo Print - Canon PIXMA MG2120 | User Manual - Page 16
> Printing from a Computer > Printing with the Bundled Application Software (EasyPhotoPrint EX) > Starting Easy-PhotoPrint EX A011 Starting Easy-PhotoPrint EX Click Here: Easy-PhotoPrint EX Easy-PhotoPrint EX starts and Menu appears. Note From the Start menu, select All Programs > Canon Utilities - Canon PIXMA MG2120 | User Manual - Page 17
Printing Photos Page 17 of 731 pages Home > Printing > Printing from a Computer > Printing with the Bundled Application Software (EasyPhotoPrint EX) > Printing Photos A010 Printing Photos Easy-PhotoPrint EX allows you to print your favorite photos in a variety of layouts. You can also create - Canon PIXMA MG2120 | User Manual - Page 18
print results will not be affected. 4. Select the folder that contains the image you want to print Printing Still Images from Videos You can also use images downloaded from photo sharing sites on the Internet. Downloading Images from Photo Sharing Sites 5. Click the image you want to print print - Canon PIXMA MG2120 | User Manual - Page 19
Printing Photos Page 19 of 731 pages 7. Set Paper Source, Paper Size, etc. according to the printer and paper to be used. Note The paper sizes and media types may vary depending on the printer. The paper sources may vary depending on the printer and the media type. 8. Click Layout/Print in the - Canon PIXMA MG2120 | User Manual - Page 20
you want to use. Click a borderless layout to print borderless photos. Note The layouts that can be selected may vary depending on the printer, paper size, and media type. Printing starts from the left side of the image displayed in the Layout/Print screen. Which Side of the Displayed Image Does the - Canon PIXMA MG2120 | User Manual - Page 21
an Album Page 21 of 731 pages Home > Printing > Printing from a Computer > Printing with the Bundled Application Software (EasyPhotoPrint EX) > Creating an Album A020 Creating an Album Easy-PhotoPrint EX allows you to create your own personalized photo album. Steps 1. Start Easy-PhotoPrint EX - Canon PIXMA MG2120 | User Manual - Page 22
Layout dialog box appears. In the Change Layout dialog box, you can change the layout or select whether to print the date (on which the photo was taken) on the photo. Note The layouts that can be selected may vary depending on the Paper Size, Orientation, Double page album, or the type of page - Canon PIXMA MG2120 | User Manual - Page 23
Still Images from Videos You can also use images downloaded from photo sharing sites on the Internet. Downloading Images from Photo Sharing Sites Page 23 of 731 pages 9. Select the image(s) you want to print, and click one of the buttons below. To print on the front cover: (Import to Front Cover - Canon PIXMA MG2120 | User Manual - Page 24
13. Set Media Type, Paper Source, etc. according to the printer and paper to be used. Note The media types may vary depending on the printer and the paper size. Duplex Printing appears if the selected printer and media type support duplex printing. Select this checkbox to print on both sides of the - Canon PIXMA MG2120 | User Manual - Page 25
Creating an Album Note You can correct or enhance the selected image before printing. Correcting and Enhancing Photos Enhancing Photos Using Special Filters See Help for details on each screen. Questions and Answers How Can I Move (or Copy) the Saved File? What Is "C1" or " - Canon PIXMA MG2120 | User Manual - Page 26
Software (EasyPhotoPrint EX) > Printing Disc Labels and Case Covers A004 Printing Disc Labels and Case Covers You can print your own disc labels and case covers using your favorite photos. Important Printing on the disc label is available with supported printers only. See your printer manual - Canon PIXMA MG2120 | User Manual - Page 27
and paper size that can be selected. In the Layout Option dialog box, you can select whether to place all the inserted images on one page the Print Type or Target Item. 6. If you want to change the background, click Background.... The Change Background dialog box appears. In the Change Background - Canon PIXMA MG2120 | User Manual - Page 28
Still Images from Videos You can also use images downloaded from photo sharing sites on the Internet. Downloading Images from Photo Sharing Sites Page 28 of 731 pages 9. Select the image(s) you want to print, and click (Import to Inside Pages). The selected image(s) is (are) displayed in - Canon PIXMA MG2120 | User Manual - Page 29
in the Page Setup screen, if a printer that supports disc label printing is not installed, you cannot display the Print Settings screen. 13. Set Media Type, Paper Source, etc. according to the printer and paper to be used. Note When Printable Disc is selected for Print Type in the Page Setup screen - Canon PIXMA MG2120 | User Manual - Page 30
Disc Labels and Case Covers Page 30 of 731 pages You can correct or enhance the selected image before printing. Correcting and Enhancing Photos Enhancing Photos Using Special Filters See Help for details on each screen. Questions and Answers How Can I Move (or Copy) the Saved File? Page top - Canon PIXMA MG2120 | User Manual - Page 31
Software (EasyPhotoPrint EX) > Printing Calendars A040 Printing Calendars Easy-PhotoPrint EX allows you to create your own calendar using your favorite photos. Steps 1. Start Easy-PhotoPrint EX. Starting Easy-PhotoPrint EX 2. Click Calendar from Menu. The Page Setup screen appears. 3. Set Paper - Canon PIXMA MG2120 | User Manual - Page 32
Printing Calendars See Help on the paper Change Background dialog box. To display the Change Background Printing Still Images from Videos You can also use images downloaded from photo sharing sites on the Internet. Downloading Images from Photo Sharing Sites 7. Select the image(s) you want to print - Canon PIXMA MG2120 | User Manual - Page 33
Printing Calendars Page 33 of 731 pages To delete all images from the selected image area, click (Delete All Imported Images calendar. It is recommended that you save the item if you want to edit it again. Saving 10. Click Print Settings in the step button area on the left side of the screen. The - Canon PIXMA MG2120 | User Manual - Page 34
11. Set Media Type, Paper Source, etc. according to the printer and paper to be used. Note The media types may vary depending on the printer and the paper size. Duplex Printing appears if the selected printer and media type support duplex printing. Select this checkbox to print on both sides of the - Canon PIXMA MG2120 | User Manual - Page 35
Bundled Application Software (EasyPhotoPrint EX) > Printing Stickers A050 Printing Stickers You can print your favorite photos on compatible sticker sheets. Steps 1. Start Easy-PhotoPrint EX. Starting Easy-PhotoPrint EX 2. Click Stickers from Menu. The Page Setup screen appears. 3. Set Paper Size - Canon PIXMA MG2120 | User Manual - Page 36
use still images captured from videos. Creating and Printing Still Images from Videos You can also use images downloaded from photo sharing sites on the Internet. Downloading Images from Photo Sharing Sites 6. Select the image(s) you want to print and click (Import to Inside Pages). The selected - Canon PIXMA MG2120 | User Manual - Page 37
edited stickers. It is recommended that you save the item if you want to edit it again. Saving 9. Click Print Settings in the step button area on the left side of the screen. The Print Settings screen appears. 10. Set Media Type, Paper Source, etc. according to the printer and paper to be used. Note - Canon PIXMA MG2120 | User Manual - Page 38
printer and the paper size. The paper sources may vary depending on the printer and the media type. You can set a custom print quality level in the Print Quality Settings dialog box. To display the Print image before printing. Correcting and Enhancing Photos Enhancing Photos Using Special Filters - Canon PIXMA MG2120 | User Manual - Page 39
Software (EasyPhotoPrint EX) > Printing Layout A150 Printing Layout You can add text to your favorite photos and print them in a variety of layouts. Steps 1. Start Easy-PhotoPrint EX. Starting Easy-PhotoPrint EX 2. Click Layout Print from Menu. The Page Setup screen appears. 3. Set Paper - Canon PIXMA MG2120 | User Manual - Page 40
use still images captured from videos. Creating and Printing Still Images from Videos You can also use images downloaded from photo sharing sites on the Internet. Downloading Images from Photo Sharing Sites 7. Select the image(s) you want to print and click (Import to Inside Pages). The selected - Canon PIXMA MG2120 | User Manual - Page 41
edited layout. It is recommended that you save the item if you want to edit it again. Saving 10. Click Print Settings in the step button area on the left side of the screen. The Print Settings screen appears. 11. Set Media Type, Paper Source, etc. according to the printer and paper to be used. - Canon PIXMA MG2120 | User Manual - Page 42
on the printer and the paper size. Duplex Printing appears if the selected printer and media type support duplex printing. Select this checkbox to print on both sides of the paper. Automatic appears if you select the Duplex Printing checkbox after selecting a printer that supports automatic duplex - Canon PIXMA MG2120 | User Manual - Page 43
Easy-PhotoPrint EX to edit and print content downloaded from the Canon website. Important Keep these points in mind when using PREMIUM Contents Print. To print with Easy-PhotoPrint EX, you need to download and install the exclusive content. Refer to "Downloading Premium Content " for details on how - Canon PIXMA MG2120 | User Manual - Page 44
Canon Web Service of Solution Menu EX and click the PREMIUM Contents Print icon to start Easy-PhotoPrint EX. 3. Set Paper change the paper size appears. Right-click a thumbnail and select Properties... from the displayed menu to check the allowed number of print copies, usage period, supported paper - Canon PIXMA MG2120 | User Manual - Page 45
When you click such a thumbnail, a dialog box in which you can change the paper size appears. Right-click a thumbnail and select Properties... from the displayed menu to check the allowed number of print copies, usage period, supported paper sizes, etc. of the selected layout. 6. Set Start from and - Canon PIXMA MG2120 | User Manual - Page 46
captured from videos, depending on the selected content. Creating and Printing Still Images from Videos You can also use images downloaded from photo sharing sites on the Internet, depending on the selected content. Downloading Images from Photo Sharing Sites 10. Select the image(s) you want to - Canon PIXMA MG2120 | User Manual - Page 47
displayed may vary depending on the selected content, printer and paper size. The paper sources may vary depending on the printer and the media type. You can set a custom print quality level in the Print Quality Settings dialog box. To display the Print Quality Settings dialog box, select Custom for - Canon PIXMA MG2120 | User Manual - Page 48
in the step button area on the left side of the screen. Note You can correct or enhance the selected image before printing. Correcting and Enhancing Photos Enhancing Photos Using Special Filters See Help for details on each screen. Questions and Answers How Can I Move (or Copy) the Saved File? Page - Canon PIXMA MG2120 | User Manual - Page 49
only use the content downloaded or printed for personal purposes. You may not use the content for commercial purposes. 1. From the Start menu, select All Programs > Canon Utilities > Solution Menu EX, then click Solution Menu EX. Solution Menu EX starts. 2. Select Canon Web Service, then click the - Canon PIXMA MG2120 | User Manual - Page 50
/Enhance Images) in the Select Images or Edit screen, or in the Layout/Print screen of Photo Print. You can make the following corrections and enhancements in the Correct/Enhance Images window. Important For Photo Print, if you select Enable ICC Profile in the Advanced tab of the Preferences dialog - Canon PIXMA MG2120 | User Manual - Page 51
Correcting and Enhancing Photos You can also blur the outline of the subjects or remove the base color. Adjusting Images Page 51 of 731 pages Page top - Canon PIXMA MG2120 | User Manual - Page 52
Function Page 52 of 731 pages Home > Printing > Printing from a Computer > Printing with the Bundled Application Software (EasyPhotoPrint EX) > Correcting and Enhancing Photos > Using the Auto Photo Fix Function A066 Using the Auto Photo Fix Function This function will automatically analyze the - Canon PIXMA MG2120 | User Manual - Page 53
Function The image appears in Preview. Note If only one image is selected, the thumbnail list does not appear below Preview. Page 53 of 731 pages 3. Make sure that Auto is selected. 4. Click Auto Photo Fix, then click OK. The entire photo is corrected automatically and the the upper left of the - Canon PIXMA MG2120 | User Manual - Page 54
Software (EasyPhotoPrint EX) > Correcting and Enhancing Photos > Using the Red-Eye Correction Function A061 Using the Red-Eye Correction Function You can correct red eyes caused by a camera flash. You can perform the Red-Eye Correction function either automatically or manually. Note Photo Print - Canon PIXMA MG2120 | User Manual - Page 55
side by side so that you can compare and check the result. Click Reset Selected Image to undo the correction operation. If you want to apply images checkbox. Manual Correction 3. Click Manual, then click Correct/Enhance. 4. Click Red-Eye Correction. Note Effect levels can be changed using the - Canon PIXMA MG2120 | User Manual - Page 56
Using the Red-Eye Correction Function Page 56 of 731 pages Red eye is corrected and the image. (Correction/Enhancement) mark appears on the upper left of the Note Click (Compare) to display the images before and after the correction side by side so that you can compare and check the result. - Canon PIXMA MG2120 | User Manual - Page 57
Using the Face Brightener Function Page 57 of 731 pages Home > Printing > Printing from a Computer > Printing with the Bundled Application Software (EasyPhotoPrint EX) > Correcting and Enhancing Photos > Using the Face Brightener Function A062 Using the Face Brightener Function You can brighten - Canon PIXMA MG2120 | User Manual - Page 58
Using the Face Brightener Function 3. Click Manual, then click Correct/Enhance. 4. Click Face Brightener. Page 58 of 731 pages Note Effect levels can be changed using the slider below Face Brightener. Move the cursor over the image. The shape of the cursor changes to (Cross). 5. Drag to select - Canon PIXMA MG2120 | User Manual - Page 59
Using the Face Brightener Function Important The corrections will be lost if you exit before saving corrected images. Page 59 of 731 pages Page top - Canon PIXMA MG2120 | User Manual - Page 60
either automatically or manually. 1. Select photos in the Select Images screen, then click Images). The Correct/Enhance Images window appears. (Correct/Enhance Note You can also display the Correct/Enhance Images window by clicking (Correct/Enhance Images) in the Layout/Print or Edit screen - Canon PIXMA MG2120 | User Manual - Page 61
by side so that you can compare and check the result. Click Reset Selected Image to undo the correction operation. If you want to apply all images checkbox. Manual Correction 3. Click Manual, then click Correct/Enhance. 4. Click Face Sharpener. Note Effect levels can be changed using the slider - Canon PIXMA MG2120 | User Manual - Page 62
Using the Face Sharpener Function Page 62 of 731 pages The facial area in and around the selected area is sharpened and the Enhancement) mark appears on the upper left of the image. (Correction/ Note You can also drag to rotate the selected area. Click (Compare) to display the images before and - Canon PIXMA MG2120 | User Manual - Page 63
either automatically or manually. 1. Select photos in the Select Images screen, then click Images). The Correct/Enhance Images window appears. (Correct/Enhance Note You can also display the Correct/Enhance Images window by clicking (Correct/Enhance Images) in the Layout/Print or Edit screen - Canon PIXMA MG2120 | User Manual - Page 64
side by side so that you can compare and check the result. Click Reset Selected Image to undo the enhancement operation. If you want to apply the checkbox. Manual Enhancement 3. Click Manual, then click Correct/Enhance. 4. Click Digital Face Smoothing. Note Effect levels can be changed using the - Canon PIXMA MG2120 | User Manual - Page 65
Using the Digital Face Smoothing Function Page 65 of 731 pages Skin in and around the selected area is enhanced beautifully and the mark appears on the upper left of the image. (Correction/Enhancement) Note You can also drag to rotate the selected area. Click (Compare) to display the images - Canon PIXMA MG2120 | User Manual - Page 66
Printing with the Bundled Application Software (EasyPhotoPrint EX) > Correcting and Enhancing Photos > Using the Blemish Remover Function A065 Using the Blemish Remover Function You can reduce moles. 1. Select photos in the Select Images screen, then click Images). The Correct/Enhance Images window - Canon PIXMA MG2120 | User Manual - Page 67
Using the Blemish Remover Function Page 67 of 731 pages Note Move the cursor over the image. The shape of the cursor changes to (Cross). 5. Drag to select the area you want to enhance, then click OK that appears over the image. Moles in and around the selected - Canon PIXMA MG2120 | User Manual - Page 68
Printing > Printing from a Computer > Printing with the Bundled Application Software (EasyPhotoPrint EX) > Correcting and Enhancing Photos Enhance Images window. The image appears in Preview. Note If only one image is selected, the thumbnail list does not appear below Preview. 3. Click Manual, then - Canon PIXMA MG2120 | User Manual - Page 69
to make fine adjustments to the image brightness and color tone. See " Advanced" in the descriptions of the Correct/Enhance Images window for details. Click Defaults to reset all adjustments. 5. Click Save Selected Image or Save All Corrected Images. You can save adjusted images as new files. Note - Canon PIXMA MG2120 | User Manual - Page 70
of 731 pages Home > Printing > Printing from a Computer > Printing with the Bundled Application Software (EasyPhotoPrint EX) > Correcting and Enhancing Photos > Correct/Enhance Images Window A068 Correct/Enhance Images Window You can correct/enhance images in this window. To display the Correct - Canon PIXMA MG2120 | User Manual - Page 71
Window Page 71 of 731 pages Auto Photo Fix Applies automatic corrections suitable for photos. Important The Auto Photo Fix function is not available for Photo Print. Photo Print allows you to automatically apply suitable corrections to all photos when printing, by selecting Enable Auto Photo - Canon PIXMA MG2120 | User Manual - Page 72
one). Save All Corrected Images Saves all the corrected/enhanced images displayed in the thumbnail list. Exit Click to close the Correct/Enhance Images window. Manual Tab There are two menus on the Manual to sharpen the image. Adjust the sharpness when the photo is out of focus or text is blurred. - Canon PIXMA MG2120 | User Manual - Page 73
Images Window Page . It is usually difficult to correct the image completely by adjusting only one color pair. It is recommended that you find a portion in the image pairs so that the portion turns white. Defaults Resets all adjustments. Close Closes the Advanced Adjustment dialog box. Note The Brightness - Canon PIXMA MG2120 | User Manual - Page 74
the Correct/Enhance Images window. Correct/Enhance Page 74 of 731 pages Red-Eye Correction Corrects red eyes in the selected area. You can adjust the effect level using the slider. Note For Photo Print, red eyes are automatically corrected when printing by selecting Enable Auto Photo Fix in Color - Canon PIXMA MG2120 | User Manual - Page 75
Selected Image Saves the corrected/enhanced/adjusted image (the selected one). Save All Corrected Images Saves all the corrected/enhanced/adjusted images displayed in the thumbnail list. Exit Click to close the Correct/Enhance Images window. Page 75 of 731 pages (2) Toolbar Toolbar (Zoom In/Zoom - Canon PIXMA MG2120 | User Manual - Page 76
Click (Special Image Filters) in the Select Images or Edit screen, or in the Layout/Print screen of Photo Print. You can make the following enhancements in the Special Image Filters window. Important For Photo Print, if you select Enable ICC Profile in the Advanced tab of the Preferences dialog box - Canon PIXMA MG2120 | User Manual - Page 77
Page 77 of 731 pages Toy Camera Effect You can enhance an image to resemble a retro photo taken with a toy camera. Enhancing with Toy Camera Effect Soft Focus You can soften an image to resemble a photo taken with a soft focus lens. Enhancing with Soft Focus Blur Background You can blur the - Canon PIXMA MG2120 | User Manual - Page 78
Enhancing with Fish-eye Effect Page 78 of 731 pages Home > Printing > Printing from a Computer > Printing with the Bundled Application Software (EasyPhotoPrint EX) > Enhancing Photos Using Special Filters > Enhancing with Fish-eye Effect A301 Enhancing with Fish-eye Effect You can enhance an - Canon PIXMA MG2120 | User Manual - Page 79
with Fish-eye Effect Page 79 of 731 pages Note The (Center) mark for setting the center position appears in Preview. Effect levels can be changed using the slider below Fish-eye Effect. 4. Drag the (Center) mark to set the center position, then click OK. The edges of the image are - Canon PIXMA MG2120 | User Manual - Page 80
saving enhanced images. Note When the Special Image Filters window is displayed via Solution Menu EX, Proceed to Print appears instead of Exit. When you click it, the Special Image Filters window closes and the Select Images screen of Photo Print of Easy-PhotoPrint EX appears. See the section below - Canon PIXMA MG2120 | User Manual - Page 81
Enhancing with Miniature Effect Page 81 of 731 pages Home > Printing > Printing from a Computer > Printing with the Bundled Application Software (EasyPhotoPrint EX) > Enhancing Photos Using Special Filters > Enhancing with Miniature Effect A302 Enhancing with Miniature Effect You can enhance an - Canon PIXMA MG2120 | User Manual - Page 82
frame (area that will not be blurred) appears in the Preview. The frame size can be changed using the slider below Miniature Effect. 4. Drag the frame up or down to specify the position enhanced images. Note When the Special Image Filters window is displayed via Solution Menu EX, Proceed to Print - Canon PIXMA MG2120 | User Manual - Page 83
with Miniature Effect Page 83 of 731 pages appears instead of Exit. When you click it, the Special Image Filters window closes and the Select Images screen of Photo Print of Easy-PhotoPrint EX appears. See the section below for how to print using Easy-PhotoPrint EX. Printing Photos Page top - Canon PIXMA MG2120 | User Manual - Page 84
Enhancing with Toy Camera Effect Page 84 of 731 pages Home > Printing > Printing from a Computer > Printing with the Bundled Application Software (EasyPhotoPrint EX) > Enhancing Photos Using Special Filters > Enhancing with Toy Camera Effect A303 Enhancing with Toy Camera Effect You can enhance - Canon PIXMA MG2120 | User Manual - Page 85
depending on the paper size and the amount of extension set. When the Special Image Filters window is displayed via Solution Menu EX, Proceed to Print appears instead of Exit. When you click it, the Special Image Filters window closes and the Select Images screen of Photo Print of Easy-PhotoPrint - Canon PIXMA MG2120 | User Manual - Page 86
Enhancing with Soft Focus Page 86 of 731 pages Home > Printing > Printing from a Computer > Printing with the Bundled Application Software (EasyPhotoPrint EX) > Enhancing Photos Using Special Filters > Enhancing with Soft Focus A304 Enhancing with Soft Focus You can soften an image to resemble a - Canon PIXMA MG2120 | User Manual - Page 87
saving enhanced images. Note When the Special Image Filters window is displayed via Solution Menu EX, Proceed to Print appears instead of Exit. When you click it, the Special Image Filters window closes and the Select Images screen of Photo Print of Easy-PhotoPrint EX appears. See the section below - Canon PIXMA MG2120 | User Manual - Page 88
Blurring the Background Page 88 of 731 pages Home > Printing > Printing from a Computer > Printing with the Bundled Application Software (EasyPhotoPrint EX) > Enhancing Photos Using Special Filters > Blurring the Background A305 Blurring the Background You can blur the background to emphasize the - Canon PIXMA MG2120 | User Manual - Page 89
. Move the cursor over the image. The shape of the cursor changes to (Pen). 4. Surround the focus area (area that will not will be connected with a straight line. Press the Delete key to undo the specified points one at a time. 5. When you finish surrounding the image, double-click the last point. - Canon PIXMA MG2120 | User Manual - Page 90
to a point next to it, where the cursor changes to point) Alternatively, after surrounding the image, click the window is displayed via Solution Menu EX, Proceed to Print appears instead of Exit. When you click it, the Special Image Filters window closes and the Select Images screen of Photo Print - Canon PIXMA MG2120 | User Manual - Page 91
ZoomBrowser EX Ver.6.7 or later is installed, Windows XP SP2 and Windows Vista (without service packs) are not supported. Videos may not play smoothly depending on your environment. When the color tone of a video is changed via the settings of the graphic driver (video card) or its utility, such - Canon PIXMA MG2120 | User Manual - Page 92
Creating and Printing Still Images from Videos Page 92 of 731 pages Note You can also display the Video Frame Capture window by be displayed as thumbnails (miniatures). Note Only MOV format videos recorded with Canon digital cameras are displayed. The selected video plays. 5. Select the video - Canon PIXMA MG2120 | User Manual - Page 93
Creating and Printing Still window. You can create an image (a layout image) in which multiple still images captured from a video are laid out on one page. Creating Layout Images from Videos You can overlap and merge multiple still images captured from a video in the order of the time code - Canon PIXMA MG2120 | User Manual - Page 94
side of the screen. The Select Paper screen appears. Select the printer and paper size to be used, etc. Note For items other than Photo Print, click Edit in the step button area on the left side of the screen to change the layout, enter text, etc. 11. Click Layout/Print in the step button area on - Canon PIXMA MG2120 | User Manual - Page 95
are laid out in the order of the time code. Still Images corrected in the Correct Captured Frames window cannot be used. The original uncorrected still images will be used. Note Refer to "Creating and Printing Still Images from Videos " for details on how to capture still images. 1. Select the - Canon PIXMA MG2120 | User Manual - Page 96
or checkbox in the selected image area. When still images are changed, click Apply Selection to update the layout image displayed in Print window is displayed via Solution Menu EX, you can print the created layout images. To print, specify the printer and media in the Print area, then click Print - Canon PIXMA MG2120 | User Manual - Page 97
the Bundled Application Software (EasyPhotoPrint EX) > Creating and Printing Still Images from Videos > Creating Images of Merged Video Frames A187 Creating Images of Merged Video Frames You can overlap and merge multiple still images captured from a video in the order of the time code to create an - Canon PIXMA MG2120 | User Manual - Page 98
selected image area. When still images are changed, click Apply Selection to merge the images Print window is displayed via Solution Menu EX, you can print the merged still images. To print, specify the printer and media in the Print area, then click Print. When you print from the Merge Frames window - Canon PIXMA MG2120 | User Manual - Page 99
also check terms of service in the photo sharing site before using the work of others. Canon is not responsible for the any copyright problems by using this function. This product uses the Flickr API but is not endorsed or certified by Flickr. Note Operation(s) for Photo Print is (are) used as - Canon PIXMA MG2120 | User Manual - Page 100
Downloading Images from Photo Sharing Sites Page 100 of 731 pages Note You can also display the Import Photos from Photo Sharing Sites window by clicking (Import photos from photo sharing sites) in the Add Image dialog box. To display the Add Image dialog box, select the page you want to add - Canon PIXMA MG2120 | User Manual - Page 101
side of the screen. The Select Paper screen appears. Select the printer and paper size to be used, etc. Note For items other than Photo Print, click Edit in the step button area on the left side of the screen to change the layout, enter text, etc. 12. Click Layout/Print in the step button area on - Canon PIXMA MG2120 | User Manual - Page 102
731 pages Home > Printing > Printing from a Computer > Printing with the Bundled Application Software (EasyPhotoPrint EX) > Downloading Images from Photo Sharing Sites > Import Photos from Photo Sharing Sites Window A171 Import Photos from Photo Sharing Sites Window In this window, you can search - Canon PIXMA MG2120 | User Manual - Page 103
keywords by selecting Clear History displayed at the bottom of the list. Sort by Select how to sort the search results in the Thumbnail window. Select Popularity or Date. You cannot change the setting after a search. Number of Results per Page Select the number of images displayed in the Thumbnail - Canon PIXMA MG2120 | User Manual - Page 104
all the images displayed in the Selections area. Exit Click to close the Import Photos from Photo Sharing Sites window. (2) Toolbar (Select all images) Selects all the images in the page displayed in the Thumbnail window. When you select an image, a checkmark appears in its checkbox. Note You can - Canon PIXMA MG2120 | User Manual - Page 105
the page of a photo sharing site on which the image is posted. (4) Selections Area Thumbnails of the images selected in the Thumbnail window are displayed, along with Note Refer to "Downloading Images from Photo Sharing Sites " for details on how to download images from photo sharing sites. Page top - Canon PIXMA MG2120 | User Manual - Page 106
Software (EasyPhotoPrint EX) > Photo Print Settings A101 Photo Print Settings Printing Vivid Photos Reducing Photo Noise Cropping Photos (Photo Print) Printing Dates on Photos (Photo Print) Printing Multiple Photos on One Page Printing an Index Printing ID Photos (ID Photo Print) Printing Photo - Canon PIXMA MG2120 | User Manual - Page 107
Software (EasyPhotoPrint EX) > Photo Print Settings > Printing Vivid Photos A071 Printing Vivid Photos Select the Vivid Photo checkbox in the Select Paper screen to boost the colors in a photo before printing. Important This function is available only with a printer that supports Vivid Photo - Canon PIXMA MG2120 | User Manual - Page 108
Application Software (EasyPhotoPrint EX) > Photo Print Settings > Reducing Photo Noise A072 Reducing Photo Noise When a photo is taken in a dark location such as night scene using digital camera, noise may appear in the image. Select the Photo Noise Reduction checkbox in the Select Paper screen - Canon PIXMA MG2120 | User Manual - Page 109
Cropping Photos (Photo Print) Page 109 of 731 pages Home > Printing > Printing from a Computer > Printing with the Bundled Application Software (EasyPhotoPrint EX) > Photo Print Settings > Cropping Photos (Photo Print) A073 Cropping Photos (Photo Print) Cropping a photo is the act of removing the - Canon PIXMA MG2120 | User Manual - Page 110
Cropping Photos (Photo Print) Page 110 of 731 pages Page top - Canon PIXMA MG2120 | User Manual - Page 111
on Photos (Photo Print) Page 111 of 731 pages Home > Printing > Printing from a Computer > Printing with the Bundled Application Software (EasyPhotoPrint EX) > Photo Print Settings > Printing Dates on Photos (Photo Print) A074 Printing Dates on Photos (Photo Print) To print the date the photo was - Canon PIXMA MG2120 | User Manual - Page 112
Photos on One Page Page 112 of 731 pages Home > Printing > Printing from a Computer > Printing with the Bundled Application Software (EasyPhotoPrint EX) > Photo Print Settings > Printing Multiple Photos on One Page A076 Printing Multiple Photos on One Page You can print multiple photos on one - Canon PIXMA MG2120 | User Manual - Page 113
paper sizes. - Credit Card You can print up to 80 images on one page. Note Refer to the following section for details on how to select photos etc. Printing Photos Photos are arranged in the following order. Example: Index (x20) You can change the printing order in Printing Order on the Print - Canon PIXMA MG2120 | User Manual - Page 114
Printing an Index Page 114 of 731 pages Page top - Canon PIXMA MG2120 | User Manual - Page 115
more images and print different types of ID photos on one page. Refer to the following section for details on how to select photos etc. Printing Photos Photos are arranged in the following order. Example: ID Photo 3.5x4.5cm You can change the printing order in Printing Order on the Print tab of the - Canon PIXMA MG2120 | User Manual - Page 116
Printing ID Photos (ID Photo Print) Page 116 of 731 pages To display the Preferences dialog box, click (Settings) or select Preferences... from the File menu. ID photos can only be printed on 4"x6" 10x15cm paper. Page top - Canon PIXMA MG2120 | User Manual - Page 117
the Bundled Application Software (EasyPhotoPrint EX) > Photo Print Settings > Printing Photo Information A079 Printing Photo Information You can print the photo and the Exif information side by side. To print them, select Letter 8.5"x11" 22x28cm or A4 for Paper Size in the Select Paper screen, and - Canon PIXMA MG2120 | User Manual - Page 118
Home > Printing > Printing from a Computer > Printing with the Bundled Application Software (EasyPhotoPrint EX) > Photo Print Settings > Saving Photos A092 Saving Photos You can save edited photos. The information Save will not be displayed in the Select Images or Select Paper screen. Page top - Canon PIXMA MG2120 | User Manual - Page 119
, or Windows XP, the contents of files cannot be displayed on Explorer. 2. Select the file you want to open and click Open. The Layout/Print screen appears. 3. Edit the file if necessary. Note Easy-PhotoPrint EX supports the following file format (extension). - Easy-PhotoPrint EX Photo Print file - Canon PIXMA MG2120 | User Manual - Page 120
Opening Saved Files Page 120 of 731 pages Page top - Canon PIXMA MG2120 | User Manual - Page 121
Printing with the Bundled Application Software (EasyPhotoPrint EX) > Other Settings A102 Other Settings Changing Layout Changing Background Adding Photos Swapping Positions of Photos Replacing Photos Changing Position, Angle and Size of Photos Cropping Photos Framing Photos Printing Dates on Photos - Canon PIXMA MG2120 | User Manual - Page 122
Software (EasyPhotoPrint EX) > Other Settings > Changing Layout A080 Changing Layout You can change the layout of each page separately. Important For PREMIUM Contents Print, you cannot change the layouts. Printing on the disc label is available with supported printers only. See your printer manual - Canon PIXMA MG2120 | User Manual - Page 123
Changing Layout Disc Label/Case Cover Disc Label Page 123 of 731 pages Case Cover Note The layouts that can be selected may vary depending on the Print Type or Target Item. Select the Apply to all pages checkbox to change the layouts of all pages to the one you newly selected. Calendar - Canon PIXMA MG2120 | User Manual - Page 124
Important The layouts of all pages are changed to the selected layout. All images that do not fit in the new layout will be collected on the last page. Note The layouts that can be selected may vary depending on the Paper Size and Orientation. Layout Print Important If the new layout has - Canon PIXMA MG2120 | User Manual - Page 125
Changing Layout Page 125 of 731 pages Page top - Canon PIXMA MG2120 | User Manual - Page 126
126 of 731 pages Home > Printing > Printing from a Computer > Printing with the Bundled Application Software (EasyPhotoPrint EX) > Other Settings > Changing Background A081 Changing Background You can change the background of each page. Important You cannot change the background of the Stickers - Canon PIXMA MG2120 | User Manual - Page 127
, click Search backgrounds... to access the Canon website from which you can download additional materials for free. Internet connection is required to access the website. Internet connection fees apply. Exit Easy-PhotoPrint EX before installing backgrounds. When Single color Is Selected Select - Canon PIXMA MG2120 | User Manual - Page 128
Changing Background Page 128 of 731 pages Note For Disc Label/Case Cover, when you select Image file and specify the Image File Path, Set the cropping area to suit the disc label or case cover size. See Help for details on how to set the background in the Change Background dialog box. Page top - Canon PIXMA MG2120 | User Manual - Page 129
window on the right. Note Click an image to select it (background turns blue) or deselect it (background turns white). You can also select multiple images. You can also use still images captured from videos. Creating and Printing Still Images from Videos You can also use images downloaded from photo - Canon PIXMA MG2120 | User Manual - Page 130
Adding Photos Page 130 of 731 pages Note In the Add Image dialog box, you can select all images at one time or change the display size and order of the thumbnails. See Help for details. Page top - Canon PIXMA MG2120 | User Manual - Page 131
Page 131 of 731 pages Home > Printing > Printing from a Computer > Printing with the Bundled Application Software (EasyPhotoPrint EX) > Other Settings > Swapping Positions of Photos A083 Swapping Positions of Photos You can swap the positions of images. Click (Swap Image Positions) in the - Canon PIXMA MG2120 | User Manual - Page 132
132 of 731 pages Home > Printing > Printing from a Computer > Printing with the Bundled Application Software (EasyPhotoPrint EX) > Other Settings > Replacing Photos A084 Replacing Photos You can replace an image with another image. Select the image you want to replace in the Edit screen, then - Canon PIXMA MG2120 | User Manual - Page 133
Replacing Photos Page 133 of 731 pages Page top - Canon PIXMA MG2120 | User Manual - Page 134
, Angle and Size of Photos Page 134 of 731 pages Home > Printing > Printing from a Computer > Printing with the Bundled Application Software (EasyPhotoPrint EX) > Other Settings > Changing Position, Angle and Size of Photos A085 Changing Position, Angle and Size of Photos You can adjust the - Canon PIXMA MG2120 | User Manual - Page 135
Changing Position, Angle and Size of Photos For PREMIUM Contents Print, you cannot use (Free Rotate). See Help for details on the position and size of images. Page 135 of 731 pages Page top - Canon PIXMA MG2120 | User Manual - Page 136
Page 136 of 731 pages Home > Printing > Printing from a Computer > Printing with the Bundled Application Software (EasyPhotoPrint EX) > Other Settings > Cropping Photos A086 Cropping Photos Cropping an image is the act of removing the unnecessary portions of the image by selecting the necessary - Canon PIXMA MG2120 | User Manual - Page 137
Page 137 of 731 pages Home > Printing > Printing from a Computer > Printing with the Bundled Application Software (EasyPhotoPrint EX) > Other Settings > Framing Photos A087 Framing Photos You can add frames to images. Important You cannot add frames to images in Disc Label/Case Cover, Stickers - Canon PIXMA MG2120 | User Manual - Page 138
application. Click Search frames... to access the Canon website from which you can download additional materials for free. Internet connection is required to access the website. Internet connection fees apply. Exit Easy-PhotoPrint EX before installing frames. Search frames... will be displayed only - Canon PIXMA MG2120 | User Manual - Page 139
pages Home > Printing > Printing from a Computer > Printing with the Bundled Application Software (EasyPhotoPrint EX) > Other Settings > Printing Dates on Photos A088 Printing Dates on Photos You can print dates on images. Important For PREMIUM Contents Print, you cannot print dates. Select the - Canon PIXMA MG2120 | User Manual - Page 140
Printing Dates on Photos Page 140 of 731 pages The date is displayed in the short date format (mm/dd/yyyy, etc.) specified in your operating system. See Help for details on setting dates. Page top - Canon PIXMA MG2120 | User Manual - Page 141
Attaching Comments to Photos Page 141 of 731 pages Home > Printing > Printing from a Computer > Printing with the Bundled Application Software (EasyPhotoPrint EX) > Other Settings > Attaching Comments to Photos A089 Attaching Comments to Photos You can attach comments to images and display them - Canon PIXMA MG2120 | User Manual - Page 142
Attaching Comments to Photos Page 142 of 731 pages Select the Show comment box checkbox. Select the checkboxes of the items you want to display, and enter comments. Set the size and color of font, and position of the comments, etc., then click OK. Note See Help for details on comments. Page top - Canon PIXMA MG2120 | User Manual - Page 143
Printing > Printing from a Computer > Printing with the Bundled Application Software (EasyPhotoPrint EX) > Other Settings > Adding Text to Photos A090 Adding Text to Photos You can add text to photos. Important For PREMIUM Contents Print Box dialog box, you can change the position, angle and size - Canon PIXMA MG2120 | User Manual - Page 144
Adding Text to Photos Page 144 of 731 pages Type in the Page Setup screen of Disc Label/Case Cover. Select this checkbox to place the text along the circumference of the disc. See Help for details. Page top - Canon PIXMA MG2120 | User Manual - Page 145
145 of 731 pages Home > Printing > Printing from a Computer > Printing with the Bundled Application Software (EasyPhotoPrint EX) > Other Settings > Saving A091 Saving You can save edited items. Click Save in the Edit or Print Settings screen. Note The screen(s) for Album printing is (are) used as - Canon PIXMA MG2120 | User Manual - Page 146
Setting Holidays Page 146 of 731 pages Home > Printing > Printing from a Computer > Printing with the Bundled Application Software (EasyPhotoPrint EX) > Other Settings > Setting Holidays A099 Setting Holidays You can set holidays to your calendar. Click Set Holidays... in the Page Setup screen - Canon PIXMA MG2120 | User Manual - Page 147
Setting Holidays Page 147 of 731 pages Enter the name in Holiday Name and specify the date. Select the Set as Holiday checkbox to display that day as a holiday in your calendar. Note See Help for details on each dialog box. Page top - Canon PIXMA MG2120 | User Manual - Page 148
Setting Calendar Display Page 148 of 731 pages Home > Printing > Printing from a Computer > Printing with the Bundled Application Software (EasyPhotoPrint EX) > Other Settings > Setting Calendar Display A100 Setting Calendar Display You can customize the calendar display (fonts, lines, colors, - Canon PIXMA MG2120 | User Manual - Page 149
149 of 731 pages Home > Printing > Printing from a Computer > Printing with the Bundled Application Software (EasyPhotoPrint EX) > Other . Capture still images in the Video Frame Capture window, then click Adjust Cropping Area in the Layout window. Drag the white squares on the image to adjust - Canon PIXMA MG2120 | User Manual - Page 150
of 731 pages Home > Printing > Printing from a Computer > Printing with the Bundled Application Software (EasyPhotoPrint EX) > Other Settings view (only for Windows 7/ Windows Vista) or thumbnail view. Important When using 64-bit editions of Windows 7, Windows Vista, or Windows XP, the contents - Canon PIXMA MG2120 | User Manual - Page 151
Opening Saved Files Page 151 of 731 pages Printing Layout Note Easy-PhotoPrint EX supports the following file formats (extensions). - Easy- file (.el7) - Easy-PhotoPrint EX Disc Label/Cover file (.el8) - CD-LabelPrint Converted Data (.cldcvt) You can open files created with Easy-PhotoPrint EX - Canon PIXMA MG2120 | User Manual - Page 152
Questions and Answers Page 152 of 731 pages Home > Printing > Printing from a Computer > Printing with the Bundled Application Software (EasyPhotoPrint EX) > Questions and Answers A200 Questions and Answers How Can I Move (or Copy) the Saved File? Which Side of the Displayed Image Does the - Canon PIXMA MG2120 | User Manual - Page 153
the album. Note The icons may vary depending on the items. Important Do not change the Data folder name; otherwise you will not be able to display the photos you edited with Easy-PhotoPrint EX. For PREMIUM Contents Print using premium content images, if you save the file and move it to another - Canon PIXMA MG2120 | User Manual - Page 154
Displayed Image Does the Printing Start from? As shown below, printing starts from the left side of the image displayed in the Layout/Print screen. Outputs the paper in the direction as the arrow indicates. Refer to your printer manual for details on how to load paper (to print on the front/back - Canon PIXMA MG2120 | User Manual - Page 155
Software (EasyPhotoPrint EX) > Questions and Answers > How Do I Print with Even Margins? A097 How Do I Print with Even Margins? When you print on a bordered layout, the margins on the left and right or the top and bottom may become wider than the other, depending on the image and printer - Canon PIXMA MG2120 | User Manual - Page 156
156 of 731 pages Home > Printing > Printing from a Computer > Printing with the Bundled Application Software (EasyPhotoPrint EX) > Questions and Answers > What Is "C1" or "C4"? A098 What Is "C1" or "C4"? When an album is printed, labels such as "C1" and "C4" are printed as page numbers. The "C1 - Canon PIXMA MG2120 | User Manual - Page 157
157 of 731 pages Home > Printing > Printing from a Computer > Printing with Application Software (Printing with the Printer Driver) Printing with Application Software (Printing with the Printer Driver) Printing with Easy Setup Various Printing Methods Changing the Print Quality and Correcting Image - Canon PIXMA MG2120 | User Manual - Page 158
on Confirming that the Power Is On 2. Load paper on the machine Loading Paper 3. Open the printer driver setup window How to Open the Printer Driver Setup Window 4. Select a frequently used profile In Commonly Used Settings on the Quick Setup tab, select a printing profile suited for the purpose - Canon PIXMA MG2120 | User Manual - Page 159
settings specified on the Quick Setup, Main, Page Setup, and Effects tabs are saved, and you can print with the same settings from the next time as well. (Effects tab cannot be used when the XPS printer driver is used.) Click Save... to register the specified settings. Registering a Frequently Used - Canon PIXMA MG2120 | User Manual - Page 160
Photo Paper Media Type in the printer driver Photo Paper Pro Platinum Glossy Photo Paper Glossy Photo Paper Photo Paper Plus Glossy II Photo Paper Plus Semi-gloss Matte Photo Paper Canon genuine papers (Business Letter Printing) Media name Media Type in the printer driver - Canon PIXMA MG2120 | User Manual - Page 161
161 of 731 pages Home > Printing > Printing from a Computer > Printing with Application Software (Printing with the Printer Driver) > Various Printing Methods Various Printing Methods Setting a Page Size and Orientation Setting the Number of Copies and Printing Order Setting the Stapling Margin - Canon PIXMA MG2120 | User Manual - Page 162
162 of 731 pages Home > Printing > Printing from a Computer > Printing with Application Software (Printing with the Printer Driver) > Various Printing Methods > Setting a Page Size and Orientation P400 Setting a Page Size and Orientation The paper size and orientation are essentially determined - Canon PIXMA MG2120 | User Manual - Page 163
Setting a Page Size and Orientation printed on the printer, uncheck the check box. Page 163 of 731 pages Page top - Canon PIXMA MG2120 | User Manual - Page 164
Setting the Number of Copies and Printing Order Page 164 of 731 pages Home > Printing > Printing from a Computer > Printing with Application Software (Printing with the Printer Driver) > Various Printing Methods > Setting the Number of Copies and Printing Order P001 Setting the Number of Copies - Canon PIXMA MG2120 | User Manual - Page 165
, specify the settings on the printer driver. However, if the print results are not acceptable, specify the function settings on the application software. When you specify the number of copies and the printing order with both the application software and this printer driver, the number of copies may - Canon PIXMA MG2120 | User Manual - Page 166
> Printing with Application Software (Printing with the Printer Driver) > Various Printing Methods > Setting the Stapling Margin P002 Setting the Stapling Margin The procedure for setting the staple side and the margin width is as follows: 1. Open the printer driver setup window 2. Specify - Canon PIXMA MG2120 | User Manual - Page 167
printer automatically reduces the print area depending on the staple position margin. 4. Complete the setup Click OK on the Page Setup tab. When you execute print, the data is printed selected for Page Layout (When Duplex Printing (Manual) is also selected, only Staple Side can be specified) Page top - Canon PIXMA MG2120 | User Manual - Page 168
Quick Setup tab. Setting Borderless Printing 1. Open the printer driver setup window 2. Set borderless printing Select Borderless from the Page Layout list on the Page Setup tab. Click OK when the confirmation message appears. When a message prompting you to change the media type appears, select - Canon PIXMA MG2120 | User Manual - Page 169
large amount of extension allows you to perform borderless printing with no problems. However, the portion of the document extending off the paper range will not be printed. Subjects around the perimeter of a photo may not be printed. Try borderless printing once. When you are not satisfied with the - Canon PIXMA MG2120 | User Manual - Page 170
Execute Borderless Printing Page 170 of 731 pages full size. When Preview before printing is checked on the Main tab, you can confirm whether there will be no border before printing. Page top - Canon PIXMA MG2120 | User Manual - Page 171
Application Software (Printing with the Printer Driver) > Various Printing Methods > Fit-to-Page Printing P004 Fit-to-Page Printing The procedure for printing a document that is automatically enlarged or reduced to fit the page size to be used is as follows: 1. Open the printer driver setup window - Canon PIXMA MG2120 | User Manual - Page 172
than the Page Size, the page image will be enlarged. The current settings are displayed in the settings preview on the left side of the printer driver. 5. Complete the setup Click OK. When you execute print, the document will be enlarged or reduced to fit to the page size. Page top - Canon PIXMA MG2120 | User Manual - Page 173
: 1. Open the printer driver setup window 2. Set scaled printing Select Scaled from the Page Layout list on the Page Setup tab. 3. Select the paper size of the document Using Page Size, select the page size that is set with your application software. 4. Set the scaling rate by using one of the - Canon PIXMA MG2120 | User Manual - Page 174
preview on the left side of the printer driver. 5. Complete the setup Click OK. When you execute print, the document will be printed with the specified scale. Important When the application software which you created the original has the scaled printing function, configure the settings on your - Canon PIXMA MG2120 | User Manual - Page 175
Scaled Printing Selecting Scaled changes the printable area of the document. Page 175 of 731 pages Page top - Canon PIXMA MG2120 | User Manual - Page 176
176 of 731 pages Home > Printing > Printing from a Computer > Printing with Application Software (Printing with the Printer Driver) > Various Printing Methods > Page Layout Printing P006 Page Layout Printing The page layout printing function allows you to print more than one page image on a single - Canon PIXMA MG2120 | User Manual - Page 177
Specify..., specify the following settings in the Page Layout Printing dialog box, and click OK. Pages To change the number of pages to be printed on a single sheet of paper, select the number of pages from the list. Page Order To change the page arrangement order, select a method from the list - Canon PIXMA MG2120 | User Manual - Page 178
Page 178 of 731 pages Home > Printing > Printing from a Computer > Printing with Application Software (Printing with the Printer Driver) > Various Printing Methods > Tiling/Poster Printing P401 Tiling/Poster Printing The tiling/poster printing function allows you to enlarge image data, divide - Canon PIXMA MG2120 | User Manual - Page 179
check box. Note This feature may be unavailable when certain printer drivers or operating environments are used. Print "Cut/Paste" lines in margins To leave out cut lines, uncheck this check box. Print page range Specifies the printing range. Select All under normal circumstances. To reprint only - Canon PIXMA MG2120 | User Manual - Page 180
preview to select Print all pages or Delete all pages. 2. Complete the setup After completing the page selection, click OK. When you execute print, only specified pages will be printed. Important Since tiling/poster printing enlarges the document when printing it, the print results may become - Canon PIXMA MG2120 | User Manual - Page 181
of 731 pages Home > Printing > Printing from a Computer > Printing with Application Software (Printing with the Printer Driver) > Various Printing Methods > Booklet Printing P402 Booklet Printing The booklet printing function allows you to print data for a booklet. Data is printed on both sides of - Canon PIXMA MG2120 | User Manual - Page 182
Page Setup tab. When you execute print, the document will be printed on one side of a sheet of paper. When the printing of one side is complete, set the paper correctly by following the message and click OK. When the printing of the other side is complete, fold the paper at the center of the margin - Canon PIXMA MG2120 | User Manual - Page 183
data on both sides of a sheet of paper is as follows: You can also set duplex printing in Additional Features on the Quick Setup tab. 1. Open the printer driver setup window 2. Set duplex printing Check the Duplex Printing (Manual) check box on the Page Setup tab. 3. Select the layout Select - Canon PIXMA MG2120 | User Manual - Page 184
is first printed on one side of a sheet of paper. After one side is printed, reload the paper correctly according to the message. Then click OK to print the opposite side. Important When a media type other than Plain Paper is selected from Media Type on the Main tab, Duplex Printing (Manual) appears - Canon PIXMA MG2120 | User Manual - Page 185
185 of 731 pages Home > Printing > Printing from a Computer > Printing with Application Software (Printing with the Printer Driver) > Various Printing Methods > Stamp/Background Printing P403 Stamp/Background Printing Stamp or Background may be unavailable when certain printer drivers or operating - Canon PIXMA MG2120 | User Manual - Page 186
button To change the stamp text, bitmap, or position, click this (see " Registering a Stamp "). Place stamp over text To print the stamp print, the data is printed with the specified stamp. Printing a Background Two bitmap files are pre-registered as samples. 1. Open the printer driver setup window - Canon PIXMA MG2120 | User Manual - Page 187
then click OK. Select Background... button To use another background or change the layout or density of a background, click this (see " Registering Click OK on the Page Setup tab. When you execute print, the data is printed with the specified background. Important When Borderless is selected, the - Canon PIXMA MG2120 | User Manual - Page 188
Registering a Stamp Page 188 of 731 pages Home > Printing > Printing from a Computer > Printing with Application Software (Printing with the Printer Driver) > Various Printing Methods > Stamp/Background Printing > Registering a Stamp P404 Registering a Stamp This feature may be unavailable when - Canon PIXMA MG2120 | User Manual - Page 189
of 731 pages With the XPS printer driver, the Stamp/Background... button has become the Stamp... button and only the stamp function can be used. 3. Click Define Stamp... The Stamp Settings dialog box opens. 4. Configure the stamp while viewing the preview window Stamp tab Select Text, Bitmap, or - Canon PIXMA MG2120 | User Manual - Page 190
(Stamp) dialog box, and then select the title of the stamp to be changed from the Stamp list. 2. Click Define Stamp... The Stamp Settings dialog box opens. 3. Configure the stamp while viewing the preview window 4. Overwrite save the stamp Click Save overwrite on the Save settings tab. When - Canon PIXMA MG2120 | User Manual - Page 191
to be Used as a Background Page 191 of 731 pages Home > Printing > Printing from a Computer > Printing with Application Software (Printing with the Printer Driver) > Various Printing Methods > Stamp/Background Printing > Registering Image Data to be Used as a Background P405 Registering Image - Canon PIXMA MG2120 | User Manual - Page 192
printer driver change the background position by dragging the image in the preview window . Intensity Set the intensity of the background image data with the Intensity slider. To lighten the background, move the slider to the left. To darken the background, move the slider to the right. To print - Canon PIXMA MG2120 | User Manual - Page 193
of 731 pages 2. Click Select Background... The Background Settings dialog box opens. 3. Specify the items on the Background tab while viewing the preview window 4. Save the background Click Save overwrite on the Save settings tab. When you want to save the background with a different title, enter - Canon PIXMA MG2120 | User Manual - Page 194
731 pages Home > Printing > Printing from a Computer > Printing with Application Software (Printing with the Printer Driver) > Various Printing Methods > Setting Up Envelope Printing P406 Setting Up Envelope Printing If you are using the XPS printer driver, replace "Canon IJ Status Monitor" with - Canon PIXMA MG2120 | User Manual - Page 195
, check the Do not show this message again. check box. To show the guide again, click the View Printer Status... button on the Maintenance tab, and start the Canon IJ Status Monitor. Then click Envelope Printing from Display Guide Message of the Option menu, and change the setting to on. Page top - Canon PIXMA MG2120 | User Manual - Page 196
Home > Printing > Printing from a Computer > Printing with Application Software (Printing with the Printer Driver) > Various Printing Methods > Displaying the Print Results before Printing P009 Displaying the Print Results before Printing If you are using the XPS printer driver, replace "Canon IJ - Canon PIXMA MG2120 | User Manual - Page 197
width values, use the application software to set the values. When the application software does not have such a function or if the document does not print correctly, use the printer driver to set the values. 2. Open the printer driver setup window 3. Select the paper size Select Custom... for Page - Canon PIXMA MG2120 | User Manual - Page 198
(Custom Size) Page 198 of 731 pages 4. Set the custom paper size Specify Units, and enter the Width and Height of the paper to be used. Then click OK. 5. Complete the setup Click OK on the Page Setup tab. When you execute print, the data is printed with the specified paper size. Page top - Canon PIXMA MG2120 | User Manual - Page 199
when the standard IJ printer driver is used. In the Canon IJ XPS preview window, you can edit the print document or retrieve the document print history to print the document. The procedure for using the Canon IJ XPS Preview is as follows: Print Combine Documents Delete Document Reset Documents View - Canon PIXMA MG2120 | User Manual - Page 200
can combine documents, change the print sequence of the documents or pages, or delete documents or pages. 1. Open the printer driver setup window 2. Set the preview Check the Preview before printing check box on the Quick Setup tab or the Main tab. 3. Complete the setup Click OK. The Canon IJ XPS - Canon PIXMA MG2120 | User Manual - Page 201
may not be available in the Canon IJ XPS preview. Note You can rename Document Name to any name. 5. Executing print Click Print. When you execute print, the printer uses the specified settings to print the data. Reprinting from the Print History When you click Save Print History on the File menu - Canon PIXMA MG2120 | User Manual - Page 202
Application Software (Printing with the Printer Driver) > Changing the Print Quality and Correcting Image Data Changing the Print Quality and Correcting Image Data Setting the Print Quality Level (Custom) Printing a Color Document in Monochrome Specifying Color Correction Optimal Photo Printing of - Canon PIXMA MG2120 | User Manual - Page 203
731 pages Home > Printing > Printing from a Computer > Printing with Application Software (Printing with the Printer Driver) > Changing the Print Quality and Correcting Image Data > Setting the Print Quality Level (Custom) P011 Setting the Print Quality Level (Custom) The print quality level can - Canon PIXMA MG2120 | User Manual - Page 204
Setting the Print Quality Level (Custom) Important Depending on the Media Type setting, you may not be able to select certain print quality levels. Page 204 of 731 pages Related Topics Specifying Color Correction Adjusting Color Balance Adjusting Brightness Adjusting Intensity Adjusting Contrast - Canon PIXMA MG2120 | User Manual - Page 205
Page 205 of 731 pages Home > Printing > Printing from a Computer > Printing with Application Software (Printing with the Printer Driver) > Changing the Print Quality and Correcting Image Data > Printing a Color Document in Monochrome P012 Printing a Color Document in Monochrome The procedure - Canon PIXMA MG2120 | User Manual - Page 206
Printing a Color Document in Monochrome Page 206 of 731 pages When using the grayscale printing function to print Adobe RGB data, convert the data to sRGB data using an application software. Note During Grayscale Printing, color inks may be used as well as black ink. Page top - Canon PIXMA MG2120 | User Manual - Page 207
the Quick Setup tab by choosing Photo Printing under Commonly Used Settings, and then choosing Color/Intensity Manual Adjustment under Additional Features. 1. Open the printer driver setup window 2. Select the manual color adjustment On the Main tab, select Manual for Color/Intensity, and click Set - Canon PIXMA MG2120 | User Manual - Page 208
of 731 pages Driver Matching With Canon Digital Photo Color, you can print sRGB data with color tints that most people prefer. ICM (ICC Profile Matching) Adjusts the colors by using an ICC profile when printing. Specify the input profile to be used. None The printer driver does not perform color - Canon PIXMA MG2120 | User Manual - Page 209
of 731 pages Home > Printing > Printing from a Computer > Printing with Application Software (Printing with the Printer Driver) > Changing the Print Quality and Correcting Image Data > Specifying Color Correction > Optimal Photo Printing of Image Data P014 Optimal Photo Printing of Image Data When - Canon PIXMA MG2120 | User Manual - Page 210
with the Printer Driver P015 Adjusting Colors with the Printer Driver You can specify the color correction function of the printer driver to print sRGB data with color tints that most people prefer through the use of Canon Digital Photo Color. When printing from an application software that can - Canon PIXMA MG2120 | User Manual - Page 211
OK. 7. Complete the setup Click OK on the Main tab. When you execute print, the printer driver adjusts the colors when printing the data. Related Topics Setting the Print Quality Level (Custom) Specifying Color Correction Adjusting Color Balance Adjusting Brightness Adjusting Intensity Adjusting - Canon PIXMA MG2120 | User Manual - Page 212
you print using a printing ICC profile that you created yourself from your application software, be sure to select color management items from your application software. For instructions, refer to the manual of the application software you are using. 1. Open the printer driver setup window 2. Select - Canon PIXMA MG2120 | User Manual - Page 213
you to specify one by using the color space of the input ICC profile (sRGB) found in the data. When printing Adobe RGB data, you can print the data with the Adobe RGB color space even if the application software does not support Adobe RGB. 1. Open the printer driver setup window 2. Select the media - Canon PIXMA MG2120 | User Manual - Page 214
Profiles Page 214 of 731 pages 3. Select the print quality For Print Quality, select High, Standard, or Fast according to your purpose. 4. Select the manual color adjustment Select Manual for Color/Intensity, and click Set.... Manual Color Adjustment dialog box opens. 5. Select color correction - Canon PIXMA MG2120 | User Manual - Page 215
Important When the application software specifies an input profile, the input profile setting of the printer driver becomes invalid. When no input ICC profiles are installed on your computer, Adobe RGB (1998) will not be displayed. You can install ICC profiles from the Setup CD-ROM that accompanies - Canon PIXMA MG2120 | User Manual - Page 216
the Quick Setup tab by choosing Photo Printing under Commonly Used Settings, and then choosing Color/Intensity Manual Adjustment under Additional Features. 1. Open the printer driver setup window 2. Select the manual color adjustment On the Main tab, select Manual for Color/Intensity, and click Set - Canon PIXMA MG2120 | User Manual - Page 217
and Yellow appear grayed out and are unavailable. Related Topics Setting the Print Quality Level (Custom) Specifying Color Correction Adjusting Color Balance Using Sample Patterns (Printer Driver) Adjusting Brightness Adjusting Intensity Adjusting Contrast Adjusting Intensity/Contrast Using Sample - Canon PIXMA MG2120 | User Manual - Page 218
Page 218 of 731 pages Home > Printing > Printing from a Computer > Printing with Application Software (Printing with the Printer Driver) > Changing the Print Quality and Correcting Image Data > Adjusting Color Balance Using Sample Patterns (Printer Driver) P416 Adjusting Color Balance Using Sample - Canon PIXMA MG2120 | User Manual - Page 219
, Large, or Small to set the number of patterns to be printed. Note Largest and Large cannot be selected when certain paper sizes or output paper sizes are selected. Color Variation Between Instances Set the amount of color change between neighboring patterns. Note Large is about double the size of - Canon PIXMA MG2120 | User Manual - Page 220
Printer Driver) Page 220 of 731 pages 5. Checking the print results of pattern print On the Color Adjustment tab, select OK to close the Manual Color Adjustment dialog box. On the Main tab, select OK, and then execute printing. The machine then prints . Clear the Print a pattern for color adjustment - Canon PIXMA MG2120 | User Manual - Page 221
the Main tab Staple Side and Specify Margin... on the Page Setup tab (When Duplex Printing (Manual) is set, only Staple Side can be set.) Apply Throughout Page in Photo Optimizer PRO on the Effects tab When the Grayscale Printing check box on the Main tab is checked, Cyan, Magenta, and Yellow appear - Canon PIXMA MG2120 | User Manual - Page 222
on the Quick Setup tab by choosing Photo Printing under Commonly Used Settings, and then choosing Color/Intensity Manual Adjustment under Additional Features. 1. Open the printer driver setup window 2. Select the manual color adjustment On the Main tab, select Manual for Color/Intensity, and click - Canon PIXMA MG2120 | User Manual - Page 223
settings preview on the left side of the printer driver. Page 223 of 731 pages 4. Complete the setup Click OK on the Main tab. When you execute print, the data is printed at the specified brightness. Related Topics Setting the Print Quality Level (Custom) Specifying Color Correction Adjusting - Canon PIXMA MG2120 | User Manual - Page 224
intensity on the Quick Setup tab by choosing Photo Printing under Commonly Used Settings, and then choosing Color/Intensity Manual Adjustment under Additional Features. 1. Open the printer driver setup window 2. Select the manual color adjustment Select Manual for Color/Intensity on the Main tab - Canon PIXMA MG2120 | User Manual - Page 225
preview on the left side of the printer driver. After adjusting each color, click OK. Page 225 of 731 pages Important Adjust the slider gradually. 4. Complete the setup Click OK on the Main tab. When you execute print, the image data is printed with the adjusted intensity. Related Topics Setting - Canon PIXMA MG2120 | User Manual - Page 226
on the Quick Setup tab by choosing Photo Printing under Commonly Used Settings, and then choosing Color/Intensity Manual Adjustment under Additional Features. 1. Open the printer driver setup window 2. Select the manual color adjustment On the Main tab, select Manual for Color/Intensity, and click - Canon PIXMA MG2120 | User Manual - Page 227
tab. When you execute print, the image is printed with the adjusted contrast. Related Topics Setting the Print Quality Level (Custom) Specifying Color Correction Adjusting Color Balance Adjusting Color Balance Using Sample Patterns (Printer Driver) Adjusting Brightness Adjusting Intensity Adjusting - Canon PIXMA MG2120 | User Manual - Page 228
Adjusting Intensity/Contrast Using Sample Patterns (Printer Driver) Page 228 of 731 pages Home > Printing > Printing from a Computer > Printing with Application Software (Printing with the Printer Driver) > Changing the Print Quality and Correcting Image Data > Adjusting Intensity/Contrast Using - Canon PIXMA MG2120 | User Manual - Page 229
Intensity/Contrast Using Sample Patterns (Printer Driver) Page 229 of 731 pages 4. Setting pattern print When the Pattern Print dialog box opens, set the items to be checked, and then click OK. Parameters to Adjust Select Intensity/Contrast. Printer Paper Size Select the paper size to be used for - Canon PIXMA MG2120 | User Manual - Page 230
Printer Driver) intensity/contrast that you set is the center value. Page 230 of 731 pages 6. Adjusting the intensity/contrast Look at the print the Intensity and Contrast fields on the Color Adjustment tab. Clear the Print a pattern for color adjustment check box, and click OK. Note You can - Canon PIXMA MG2120 | User Manual - Page 231
the Page Setup tab (When Duplex Printing (Manual) is set, only Staple Side can be set.) Apply Throughout Page in Photo Optimizer PRO on the Effects tab Related Topics Adjusting Color Balance Adjusting Color Balance Using Sample Patterns (Printer Driver) Adjusting Intensity Adjusting Contrast Page - Canon PIXMA MG2120 | User Manual - Page 232
Simulating an Illustration Page 232 of 731 pages Home > Printing > Printing from a Computer > Printing with Application Software (Printing with the Printer Driver) > Changing the Print Quality and Correcting Image Data > Simulating an Illustration P021 Simulating an Illustration This feature is - Canon PIXMA MG2120 | User Manual - Page 233
Simulating an Illustration Page 233 of 731 pages Page top - Canon PIXMA MG2120 | User Manual - Page 234
Home > Printing > Printing from a Computer > Printing with Application Software (Printing with the Printer Driver) > Changing the Print Quality and changing a photograph to a sepia tone image. The procedure for performing Monochrome Effects is as follows: 1. Open the printer driver setup window - Canon PIXMA MG2120 | User Manual - Page 235
Representing Image Data with a Single Color Page 235 of 731 pages Click OK. When you execute print, the image will be printed with a single color. Important When the Grayscale Printing check box on the Main tab is checked, Monochrome Effects appears grayed out and is unavailable. Page top - Canon PIXMA MG2120 | User Manual - Page 236
Software (Printing with the Printer Driver) > Changing the Print Quality and Correcting Image Data > Presenting Image Data with Vivid Colors P023 Presenting Image Data with Vivid Colors This feature is unavailable when the XPS printer driver is used. The Vivid Photo function allows you to print - Canon PIXMA MG2120 | User Manual - Page 237
Presenting Image Data with Vivid Colors Page 237 of 731 pages Page top - Canon PIXMA MG2120 | User Manual - Page 238
when photos and graphics are enlarged with your application software. It allows you to print smooth outlines. This feature is especially useful when printing low-resolution images from Web pages. The procedure for performing Image Optimizer is as follows: 1. Open the printer driver setup window - Canon PIXMA MG2120 | User Manual - Page 239
Smoothing Jagged Outlines Page 239 of 731 pages Depending on application software or resolution of image data, the image optimizer may have no discernible effects. It may take longer to complete printing when the image optimizer is used. Page top - Canon PIXMA MG2120 | User Manual - Page 240
Application Software (Printing with the Printer Driver) > Changing the Print Quality and Correcting Image Data > Changing Color Properties to Improve Coloration P408 Changing Color Properties to Improve Coloration This feature is unavailable when the XPS printer driver is used. The Photo Optimizer - Canon PIXMA MG2120 | User Manual - Page 241
Changing Color Properties to Improve Coloration Page 241 of 731 pages 3. Complete the setup Click OK. When you execute print, the printer corrects the photo coloring and prints out the photos. Important Photo Optimizer PRO does not function when: Background is set in the Stamp/Background dialog - Canon PIXMA MG2120 | User Manual - Page 242
731 pages Home > Printing > Printing from a Computer > Printing with Application Software (Printing with the Printer Driver) > Changing the Print Quality and Correcting Image Data > Reducing Photo Noise P024 Reducing Photo Noise This feature is unavailable when the XPS printer driver is used. With - Canon PIXMA MG2120 | User Manual - Page 243
Photo Noise Page 243 of 731 pages When you execute print, the image will be printed with the digital camera noise being reduced. Note It is recommended to select Normal for most cases. Select Strong if you have selected Normal and the noise still bothers you. Depending on application software - Canon PIXMA MG2120 | User Manual - Page 244
with the Printer Driver) > Overview of the Printer Driver Overview of the Printer Driver Printer Driver Operations Canon IJ Printer Driver How to Open the Printer Driver Setup Window Maintenance Tab Canon IJ Status Monitor Canon IJ Preview Deleting the Undesired Print Job Instructions for Use - Canon PIXMA MG2120 | User Manual - Page 245
Smoothing Jagged Outlines Changing Color Properties to Improve Coloration Reducing Photo Noise Overview of the Printer Driver Canon IJ Printer Driver How to Open the Printer Driver Setup Window Maintenance Tab Canon IJ Status Monitor Canon IJ Preview Deleting the Undesired Print Job Updating the - Canon PIXMA MG2120 | User Manual - Page 246
Printer Driver Operations Restrictions on Printer Sharing Page 246 of 731 pages - Canon PIXMA MG2120 | User Manual - Page 247
are using. Printer Driver Types On Windows Vista SP1 or later, you can install the XPS printer driver in addition to the regular printer driver. The XPS printer driver is suited to print from an application software that supports XPS printing. Important To use the XPS printer driver, the standard - Canon PIXMA MG2120 | User Manual - Page 248
Canon IJ Printer Driver Related Topic How to Open the Printer Driver Setup Window Page 248 of 731 pages Page top - Canon PIXMA MG2120 | User Manual - Page 249
more steps. For details, refer to the user's manual of your application software. Open the Printer Driver Setup Window through the Start Menu Follow the procedure below to perform maintenance operations such as print head cleaning, or to configure printing profile that are common for all application - Canon PIXMA MG2120 | User Manual - Page 250
with Application Software (Printing with the Printer Driver) > Overview of the Printer Driver > Canon IJ Printer Driver > Maintenance Tab P410 Maintenance Tab The Maintenance tab allows you to perform machine maintenance or change the settings of the machine. Features Cleaning the Print Heads from - Canon PIXMA MG2120 | User Manual - Page 251
of 731 pages Home > Printing > Printing from a Computer > Printing with Application Software (Printing with the Printer Driver) > Overview of the Printer Driver > Canon IJ Status Monitor P411 Canon IJ Status Monitor If you are using the XPS printer driver, replace "Canon IJ Status Monitor" with - Canon PIXMA MG2120 | User Manual - Page 252
Canon IJ Status Monitor In such cases, take the appropriate action as described. Page 252 of 731 pages Page top - Canon PIXMA MG2120 | User Manual - Page 253
731 pages Home > Printing > Printing from a Computer > Printing with Application Software (Printing with the Printer Driver) > Overview of the Printer Driver > Canon IJ Preview P412 Canon IJ Preview The Canon IJ Preview is an application software that displays what the print result will look like - Canon PIXMA MG2120 | User Manual - Page 254
731 pages Home > Printing > Printing from a Computer > Printing with Application Software (Printing with the Printer Driver) > Overview of the Printer Driver > Deleting the Undesired Print Job P037 Deleting the Undesired Print Job If you are using the XPS printer driver, replace "Canon IJ Status - Canon PIXMA MG2120 | User Manual - Page 255
is not printed correctly, display the Print Options dialog box from the Page Setup tab and change the setting of Disable ICM required from the application software. This may solve the problem. Note Disable ICM required from the application software cannot be used when the XPS printer driver is used - Canon PIXMA MG2120 | User Manual - Page 256
Instructions for Use (Printer Driver) Page 256 of 731 pages 3. Without starting printing, close the Print dialog box. 4. Open Word's Print dialog box again. 5. Open the printer driver setup window and click OK. 6. Start printing. If bitmap printing is enabled in Adobe Illustrator (Adobe Systems - Canon PIXMA MG2120 | User Manual - Page 257
Home > Printing > Printing from a Computer > Printing with Application Software (Printing with the Printer Driver) > Updating the MP Drivers Updating the MP Drivers Obtaining the Latest MP Drivers Deleting the Unnecessary MP Drivers Before Installing the MP Drivers Installing the MP Drivers Page - Canon PIXMA MG2120 | User Manual - Page 258
of 731 pages Home > Printing > Printing from a Computer > Printing with Application Software (Printing with the Printer Driver) > Updating the MP Drivers > Obtaining the Latest MP Drivers P038 Obtaining the Latest MP Drivers The MP Drivers include a printer driver and scanner driver (ScanGear). By - Canon PIXMA MG2120 | User Manual - Page 259
Page 259 of 731 pages Home > Printing > Printing from a Computer > Printing with Application Software (Printing with the Printer Driver) > Updating the MP Drivers > Deleting the Unnecessary MP Drivers P039 Deleting the Unnecessary MP Drivers The MP Drivers which you no longer use can be deleted - Canon PIXMA MG2120 | User Manual - Page 260
bar, click Print server properties, and then click the Drivers tab. If the Change Driver Settings button is displayed, click that button. When the User Account Control dialog box appears, click Yes. In the Installed printer drivers list, click the printer to delete. If you are using Windows Vista - Canon PIXMA MG2120 | User Manual - Page 261
if the MP Drivers cannot be installed. Checking the Machine Status Confirm that the USB port of this machine and the computer are firmly connected with the USB cable. Turn off the machine. Checking the Personal Computer Settings Terminate all running applications. In Windows 7, Windows Vista, log on - Canon PIXMA MG2120 | User Manual - Page 262
Printing > Printing from a Computer > Printing with Application Software (Printing with the Printer Driver) > Updating the MP Drivers > Installing the MP Drivers P041 Installing the MP Drivers You can access our web site through the Internet and download the latest MP Drivers and XPS printer driver - Canon PIXMA MG2120 | User Manual - Page 263
to one computer with the other computers. The Windows versions of the computers connected to the network do not necessarily have to be the same. Settings on Print Server This section describes the procedure for setting a computer that connects with this printer directly through a USB cable - Canon PIXMA MG2120 | User Manual - Page 264
procedure for setting up the print server systems is as follows: 1. Install the printer driver on the print server system For installation instructions, see " Installing the MP Drivers ." 2. Select items from the Start menu as shown below: If you are using Windows 7, select the Start menu -> Devices - Canon PIXMA MG2120 | User Manual - Page 265
Settings on Print Server Page 265 of 731 pages Page top - Canon PIXMA MG2120 | User Manual - Page 266
as follows: If you are using Windows 7 or Windows Vista 1. Install the printer driver on the client systems For installation instructions, see " Installing the MP Drivers ." Note During the installation, a screen prompting you to turn the printer on appears. Click Manual Selection and then select an - Canon PIXMA MG2120 | User Manual - Page 267
click Next. 3. Add a printer Select A network printer, or a printer attached to another computer, then click Next. On the Specify a Printer window, click Next and then search for the print server system. Click the icon for the printer that you have configured on the print server system to be shared - Canon PIXMA MG2120 | User Manual - Page 268
> Printing > Printing from a Computer > Printing with Application Software (Printing with the Printer Driver) > Updating the MP Drivers > Sharing the Printer on a Network > Restrictions on Printer Sharing P415 Restrictions on Printer Sharing If you are using the XPS printer driver, replace "Canon - Canon PIXMA MG2120 | User Manual - Page 269
Restrictions on Printer Sharing Page 269 of 731 pages Page top - Canon PIXMA MG2120 | User Manual - Page 270
Copying Home Copying Copying Making Copies Reducing or Enlarging a Copy According to the Paper Size Switching the Page Size between A4 and Letter Page 270 of 731 pages Page top - Canon PIXMA MG2120 | User Manual - Page 271
media type. Note You can select the following page sizes and media types. A4 or 8.5" x 11" Plain Paper A4 or 8.5" x 11" Photo Paper 10 x 15 cm or 4" x 6" Photo Paper You can switch the size of paper loaded in the front tray between A4 and 8.5" x 11" (Letter) regardless of the size indicated on the - Canon PIXMA MG2120 | User Manual - Page 272
when all of the loaded paper runs out. Press the Stop/Reset button to release the error. Important Do not open the document cover or remove the original from the platen glass until scanning is completed. Note To cancel copying, press the Stop/Reset button. To set the print quality to "Fast" (speed - Canon PIXMA MG2120 | User Manual - Page 273
Power Is On 2. Load the plain paper. Loading Paper paper loaded in step 2. The Paper lamp indicates the selected page size and media type. Note When the plain paper is selected for the media type, the original is copied with borders. When the photo paper the LED increases by one. When the LED displays - Canon PIXMA MG2120 | User Manual - Page 274
when all of the loaded paper runs out. Press the Stop/Reset button to release the error. Important Do not open the document cover or remove the original from the platen glass until scanning is completed. Note To cancel copying, press the Stop/Reset button. To set the print quality to "Fast" (speed - Canon PIXMA MG2120 | User Manual - Page 275
paper in the front tray regardless of the page size indication "A4" on the operation panel, or vice versa. 1. Make sure that the machine is turned on. Confirming that the Power A4 plain paper or photo paper. When the page size is set to Letter, load Letter-sized plain paper or photo paper. This - Canon PIXMA MG2120 | User Manual - Page 276
Scanning Home Scanning Scanning Scanning with Using the Operation Panel of the Machine Scanning from a Computer Page 276 of 731 pages Page top - Canon PIXMA MG2120 | User Manual - Page 277
with Using the Operation Panel of the Machine Page 277 of 731 pages Home > Scanning > Scanning with Using the Operation Panel of the Machine Scanning with Using the Operation Panel of the Machine Forwarding Scanned Data to the Computer Using the Operation Panel of the Machine Selecting a Response - Canon PIXMA MG2120 | User Manual - Page 278
Originals on thin white paper Long and narrow originals such as panoramic photographs Before forwarding scanned data to the computer, confirm the following: The necessary application software (MP Drivers and MP Navigator EX) is installed. If the application software (MP Drivers and MP Navigator EX - Canon PIXMA MG2120 | User Manual - Page 279
trimming. In addition, you can edit or print the scanned images using the bundled application software to make better use of them. Let's Try Scanning Note You can use a WIA-compliant application software and the Control Panel (Windows XP only) to scan originals with this machine. For details: Other - Canon PIXMA MG2120 | User Manual - Page 280
Using MP Navigator EX MP Navigator EX enables you to specify how to respond when scanning using the operation panel of the machine. 1. Start MP Navigator EX. Starting MP can also be opened by clicking Preferences in the One-click Mode screen. 3. On the Scanner Button Settings tab, specify Actions. - Canon PIXMA MG2120 | User Manual - Page 281
from the Operation Panel Using MP Naviga... Page 281 of 731 pages Note See the section below for details. Scanner Button Settings Tab (Save to PC) 4. Click OK. The operation will be performed according to the settings when you start scanning using the operation panel of the machine. Page top - Canon PIXMA MG2120 | User Manual - Page 282
a Computer Home > Scanning > Scanning from a Computer Scanning from a Computer Scanning with the Bundled Application Software (MP Navigator EX) Scanning with Other Application Software (ScanGear) Useful Information on Scanning Other Scanning Methods Placing Documents (When Scanning from a Computer - Canon PIXMA MG2120 | User Manual - Page 283
283 of 731 pages Home > Scanning > Scanning from a Computer > Scanning with the Bundled Application Software (MP Navigator EX) Scanning with the Bundled Application Software (MP Navigator EX) What Is MP Navigator EX (Supplied Scanner Software)? Let's Try Scanning Useful MP Navigator EX Functions - Canon PIXMA MG2120 | User Manual - Page 284
to e-mail or print them. Screens There are two types of MP Navigator EX Main Menu: Navigation Mode screen and One-click Mode screen. Navigation Mode Screen You can start various tasks from the Navigation Mode screen, including simple scanning, scanning using ScanGear (scanner driver), and enhancing - Canon PIXMA MG2120 | User Manual - Page 285
(Supplied Scanner Software)? Scan/Import Window Use the Scan/Import window to scan photos and documents. Page 285 of 731 pages View & Use Window Use the View & Use window to select what you want to do with the scanned images. Note See "File Formats" for data formats (extensions) supported by MP - Canon PIXMA MG2120 | User Manual - Page 286
simple operation Easy Scanning with Auto Scan Scanning documents, photos, magazines, etc. from the Platen Scanning Photos and Documents Scanning two or more photos (small documents) at one time Scanning Multiple Documents at One Time Scanning images larger than the Platen Scanning Images Larger than - Canon PIXMA MG2120 | User Manual - Page 287
Software (MP Navigator EX) > Let's Try Scanning > Starting MP Navigator EX S111 Starting MP Navigator EX Starting MP Navigator EX Click Here: MP Navigator EX MP Navigator EX starts. Note To display from the Start menu, follow these steps: From the Start menu, select All Programs > Canon - Canon PIXMA MG2120 | User Manual - Page 288
MP Navigator EX Page 288 of 731 pages Note Select the Show this window at startup checkbox in the Navigation Mode screen to always open the Navigation appears at startup. Click (Switch Mode) at the bottom left of the One-click Mode screen to display the Navigation Mode screen. Page top - Canon PIXMA MG2120 | User Manual - Page 289
document type. Important Supported document types are photos, postcards, business cards, magazines, newspapers, text documents, and BD/DVD/CD. To scan other documents, specify the document type. Scanning Photos and Documents 1. Make sure that the machine is turned on. Confirming that the Power Is On - Canon PIXMA MG2120 | User Manual - Page 290
documents appears. Click Instructions to open this guide, or click OK to start scanning. Note Click Cancel to cancel the scan. Set from Specify... if you want to apply suitable corrections based on the document type. Scan Settings Dialog Box (Auto Scan) 6. When the Scan Complete dialog box opens - Canon PIXMA MG2120 | User Manual - Page 291
Easy Scanning with Auto Scan Page 291 of 731 pages Page top - Canon PIXMA MG2120 | User Manual - Page 292
and Documents Page 292 of 731 pages Home > Scanning > Scanning from a Computer > Scanning with the Bundled Application Software (MP Navigator EX) > Let's Try Scanning > Scanning Photos and Documents S102 Scanning Photos and Documents Scan photos and documents placed on the Platen. 1. Place the - Canon PIXMA MG2120 | User Manual - Page 293
One-click Mode screen and scan with Color Mode set to Color. 5. Click Specify... to set the document size and scanning resolution as required. When setting is completed, click OK. Scan Settings Dialog Box (Photos/Documents) Important When scanning a large document (such as an A4 size photo), align - Canon PIXMA MG2120 | User Manual - Page 294
images as required. Use Edit Tools to rotate images, select a part of an image, etc. See the Edit Tools in " Photos/Documents (Platen) Screen (Scan/Import Window) " for details. Note First select images to edit. (Selected images are outlined in orange.) Drag the mouse or use Shift + arrow keys - Canon PIXMA MG2120 | User Manual - Page 295
image view of ScanGear (scanner driver) and scan again. - Photos that have a whitish border - Documents printed on white paper, hand-written text, business cards, etc. - Thin documents - Thick documents Scanning Multiple Documents at One Time with ScanGear (Scanner Driver) 1. Place the documents on - Canon PIXMA MG2120 | User Manual - Page 296
Scanning Multiple Documents at One Time Page 296 of 731 pages 5. Click Specify.... Select Auto Detect (Multiple Documents) for Document Size. When setting is completed, click OK. Scan Settings Dialog Box (Photos/Documents) 6. Click Scan. - Canon PIXMA MG2120 | User Manual - Page 297
images as required. Use Edit Tools to rotate images, select a part of an image, etc. See the Edit Tools in " Photos/Documents (Platen) Screen (Scan/Import Window) " for details. Note First select images to edit. (Selected images are outlined in orange.) Drag the mouse or use Shift + arrow keys - Canon PIXMA MG2120 | User Manual - Page 298
Scanning Multiple Documents at One Time Saving as PDF Files Note If you want to preview the images before scanning, use ScanGear. Scanning Multiple Documents at One Time with ScanGear (Scanner Driver) Page 298 of 731 pages Page top - Canon PIXMA MG2120 | User Manual - Page 299
Mode screen. Stitch Assist is available from the One-click Mode screen as well, by changing the document size. Click the corresponding icon and select Stitch Assist for Document Size. Then skip ahead to Step 5. 2. In Scan/Import, click Photos/Documents (Platen). 3. Select Document Type according to - Canon PIXMA MG2120 | User Manual - Page 300
Scanning Images Larger than the Platen (Stitch Assist) Page 300 of 731 pages 4. Click Specify.... Select Stitch Assist for Document Size, then specify the scanning resolution as required. When setting is completed, click OK. Scan Settings Dialog Box (Photos/Documents) 5. Click Scan. - Canon PIXMA MG2120 | User Manual - Page 301
Larger than the Platen (Stitch Assist) Page 301 of 731 pages The Stitch-assist 1/4 window opens. 6. Place the left half of the document face-down on the Platen. 7. Click Scan. The left half of the document is scanned and appears in the Stitch-assist 2/4 window. Note Click Cancel to cancel the - Canon PIXMA MG2120 | User Manual - Page 302
302 of 731 pages 8. Place the right half of the document face-down on the Platen. 9. Click Scan. The right half of the document is scanned. Note Click Cancel to cancel the scan. 10. Adjust the scanned image as required. Use the icons to swap the left and right halves, rotate the image 180 - Canon PIXMA MG2120 | User Manual - Page 303
(Full-screen) Displays the entire image. Note Enlarge/Reduce does not affect the actual size of the scanned image. When the document is scanned upside down, the image displayed in the Stitch-assist 3/4 window will also be upside down. Click Rotate 180° to rotate the image to the correct orientation - Canon PIXMA MG2120 | User Manual - Page 304
Scanning Images Larger than the Platen (Stitch Assist) Page 304 of 731 pages 13. Save the scanned images. Saving Saving as PDF Files Page top - Canon PIXMA MG2120 | User Manual - Page 305
305 of 731 pages Home > Scanning > Scanning from a Computer > Scanning with the Bundled Application Software (MP Navigator EX) > Let's Try Scanning > Easy Scanning with One-click S104 Easy Scanning with One-click You can complete from scanning to saving, etc. at one time by simply clicking the - Canon PIXMA MG2120 | User Manual - Page 306
306 of 731 pages 4. Click the corresponding icon. Custom Scan with One-click Tab One-click Mode Screen 5. Select Document Type according to the document to be scanned. 6. Set the document size and scanning resolution as required. 7. Start scanning. Starts scanning. Note Click Cancel to cancel the - Canon PIXMA MG2120 | User Manual - Page 307
Bundled Application Software (MP Navigator EX) > Useful MP Navigator EX Functions S400 Useful MP Navigator EX Functions Trimming scanned images Trimming Scanned Images Correcting/enhancing images automatically Correcting/Enhancing Images Automatically Correcting/enhancing images manually Correcting - Canon PIXMA MG2120 | User Manual - Page 308
selecting the area you want to keep in a photo and discarding the rest. Select the image you want to trim in the Scan/Import or Correct/Enhance Images window and click (Trimming) on the Toolbar to open the Crop window. Note See "Let's Try Scanning" to scan images into MP Navigator EX. You can also - Canon PIXMA MG2120 | User Manual - Page 309
731 pages Home > Scanning > Scanning from a Computer > Scanning with the Bundled Application Software (MP Navigator EX) open the View & Use window from the Navigation Mode screen and select the photos you want to correct/ enhance. Note See "Let's Try Scanning" to scan images into MP Navigator EX. - Canon PIXMA MG2120 | User Manual - Page 310
one image in the View & Use window, the thumbnail list does not appear and only the preview image appears. 4. Make sure that Auto is selected. 5. Click Auto Photo be changed using the slider that appears by clicking the corresponding buttons. When you apply Auto Photo Fix, dark backlit photos will - Canon PIXMA MG2120 | User Manual - Page 311
image is corrected/enhanced automatically and the upper left of the thumbnail and preview image. (Correct/Enhance) mark appears on Note Click Reset Selected Image to undo the correction/enhancement. Select the Apply to all images checkbox to correct/enhance all selected images. 7. Click Save - Canon PIXMA MG2120 | User Manual - Page 312
Functions > Correcting/Enhancing Images Manually S402 Correcting/Enhancing Images Manually You can correct/enhance scanned images manually. 1. Scan documents into MP Navigator EX and save them, then open the View & Use window from the Navigation Mode screen and select the photos you want to correct - Canon PIXMA MG2120 | User Manual - Page 313
selected only one image in the View & Use window, the thumbnail list does not appear and only the preview image appears. 4. Select Manual, then click can be changed using the slider that appears by clicking the corresponding buttons. Move the cursor over the image. The shape of the cursor changes to - Canon PIXMA MG2120 | User Manual - Page 314
Correcting/Enhancing Images Manually Page 314 of 731 pages The portion in and around can also drag to rotate the rectangle. Click Undo to undo the latest correction/enhancement. Click Reset Selected Image to cancel all corrections, enhancements, and adjustments applied to the selected image. 7. - Canon PIXMA MG2120 | User Manual - Page 315
315 of 731 pages Home > Scanning > Scanning from a Computer > Scanning with the Bundled Application Software (MP Navigator EX) > Useful the View & Use window from the Navigation Mode screen and select the photos you want to adjust. Note See "Let's Try Scanning" to scan images into MP Navigator EX - Canon PIXMA MG2120 | User Manual - Page 316
If you selected only one image in the View & Use window, the thumbnail list does not appear and only the preview image appears. 4. Select Manual, then click Adjust. of the Correct/Enhance Images window for details. Click Defaults to reset all adjustments. Click Reset Selected Image to cancel all - Canon PIXMA MG2120 | User Manual - Page 317
Adjusting Images To save only the images you like, select them and click Save Selected Image. To save all images, click Save All Corrected Images. The file format of adjusted images is JPEG/Exif. Page 317 of 731 pages 7. Click Exit. Important The adjustments will be lost if you exit before saving - Canon PIXMA MG2120 | User Manual - Page 318
Searching Images Page 318 of 731 pages Home > Scanning > Scanning from a Computer > Scanning with the Bundled Application Software (MP Navigator EX) > Useful MP Navigator EX Functions > Searching Images S407 Searching Images In the View & Use window of the Navigation Mode screen, you can search - Canon PIXMA MG2120 | User Manual - Page 319
Searching Images Page 319 of 731 pages Search in If you know where to look for, select the drive, folder or network from Specify Folder. File Name If you know the file name, enter it. A word or phrase in the file Enter a word or phrase included in the items selected in More Advanced Options. - Canon PIXMA MG2120 | User Manual - Page 320
all the specified criteria. Match any criteria Searches for files that meet any of the specified criteria. Start Search Starts search. Related Topic View & Use Window Page top - Canon PIXMA MG2120 | User Manual - Page 321
of 731 pages Home > Scanning > Scanning from a Computer > Scanning with the Bundled Application Software (MP Navigator EX) > and save them, then open the View & Use window from the Navigation Mode screen. Note See "Let's Try Scanning" to scan images into MP Navigator EX. You can also select images - Canon PIXMA MG2120 | User Manual - Page 322
731 pages Photo: Portrait, classify images saved in removable media such as USB flash drive and external hard disk, the Saved Images is selected in the View & Use window. Note Some images may not be detected correctly Change Category Name dialog box in which you can change the category name. Select a - Canon PIXMA MG2120 | User Manual - Page 323
Classifying Images into Categories Related Topic View & Use Window Page 323 of 731 pages Page top - Canon PIXMA MG2120 | User Manual - Page 324
Home > Scanning > Scanning from a Computer > Scanning with the Bundled Application Software (MP scanned images Creating/Editing PDF Files Printing multiple scanned images at one time or printing at specific size, quality, etc. Printing Documents Printing scanned photos Printing Photos Sending scanned - Canon PIXMA MG2120 | User Manual - Page 325
JPEG/Exif when Black and White is selected for Color Mode on the Advanced Mode tab of ScanGear (scanner driver). Note By default, the scanned images are saved in the following folders. Windows 7: MP Navigator EX folder in My Pictures folder Windows Vista: MP Navigator EX folder in Pictures folder - Canon PIXMA MG2120 | User Manual - Page 326
images on MP Navigator EX, click Open saved location in the Save Complete dialog box. Creating/Editing PDF Files Printing Documents Printing Photos Sending via E-mail Correcting/Enhancing Images Automatically Correcting/Enhancing Images Manually Extracting Text from Scanned Images (OCR) Page top - Canon PIXMA MG2120 | User Manual - Page 327
as PDF Files Page 327 of 731 pages Home > Scanning > Scanning from a Computer > Scanning with the Bundled Application Software (MP Navigator EX) > Utilizing Images in MP Navigator EX > Saving as PDF Files S113 Saving as PDF Files Save images scanned with MP Navigator EX as PDF files. 1. Select - Canon PIXMA MG2120 | User Manual - Page 328
images on MP Navigator EX, click Open saved location in the Save Complete dialog box. Creating/Editing PDF Files Printing Documents Printing Photos Sending via E-mail Correcting/Enhancing Images Automatically Correcting/Enhancing Images Manually Extracting Text from Scanned Images (OCR) Page top - Canon PIXMA MG2120 | User Manual - Page 329
Home > Scanning > Scanning from a Computer > Scanning with the Bundled Application Software (MP Navigator scanning documents and saving them, open the View & Use window to create PDF files and add/delete pages, rearrange the page order, etc. Important You can create or edit up to 99 pages at one - Canon PIXMA MG2120 | User Manual - Page 330
PDF file Window " for details on the Create/Edit PDF file window. 5. Click scanned at 10501 pixels or more in the vertical and horizontal directions. If a password-protected PDF file is edited, the passwords will be deleted. Reset an associated application and edit or print them. 1. Select PDF files - Canon PIXMA MG2120 | User Manual - Page 331
cannot be opened in applications not supporting PDF security. Files may not open if an application that can be associated with PDF files is not installed. 3. Use the application to edit/print the file. For details, refer to the application's manual. Important In some applications, the commands - Canon PIXMA MG2120 | User Manual - Page 332
332 of 731 pages Home > Scanning > Scanning from a Computer > Scanning with the Bundled Application Software (MP Navigator EX) > Utilizing Images in MP Navigator EX > Printing Documents S502 Printing Documents You can print multiple scanned images at one time, print at specific quality, etc. using - Canon PIXMA MG2120 | User Manual - Page 333
select Auto to resize the print in proportion to the paper size. 4. Click Print. Starts printing. Note When printing a multiple-page PDF file via Print Document, printing may take time depending on your computer. In that case, follow these steps and change settings. Windows 7: 1. From the Start menu - Canon PIXMA MG2120 | User Manual - Page 334
Software (MP Navigator EX) > Utilizing Images in MP Navigator EX > Printing Photos S503 Printing Photos You can print photos using MP Navigator EX or an application that accompanies the machine. After scanning documents and saving them, open the View & Use window to select how you want to print - Canon PIXMA MG2120 | User Manual - Page 335
. Print Photo Dialog Box Page 335 of 731 pages 4. Click Print. Starts printing. Note To cancel while spooling, click Cancel. To cancel while printing, click Cancel Printing in the confirmation window for the printer status. To open a confirmation window for the printer status, click printer icon - Canon PIXMA MG2120 | User Manual - Page 336
. To enable MAPI, refer to the manual of the e-mail software program.) Note If an e-mail software program is not selected, manually attach the scanned and saved image to email. 1. Scan documents into MP Navigator EX and save them, then open the View & Use window from the Navigation Mode screen and - Canon PIXMA MG2120 | User Manual - Page 337
and file save options as required. Specify the e-mail software program, destination folder and file name. Send via Compression). 4. Click OK. Files are saved according to the settings, and the e-mail software program starts. 5. Specify the recipient, enter the subject and message, then send e-mail. - Canon PIXMA MG2120 | User Manual - Page 338
Mode screen and select the image you want to convert to text. Note See "Let's Try Scanning" to scan images into MP Navigator EX. In the Photos/Documents (Platen) screen of the Scan/Import window, select Text(OCR) for Document Type. Text conversion may not be performed correctly if you select - Canon PIXMA MG2120 | User Manual - Page 339
Extracting Text from Scanned Images (OCR) Page 339 of 731 pages General Tab Text displayed in Notepad (included with Windows) is for guidance - Documents containing multiple languages Note You can also scan a text document from the OCR dialog box in One-click Mode and extract the text in the image - Canon PIXMA MG2120 | User Manual - Page 340
for PDF Files Set passwords for opening, editing, and printing PDF files. You can set two passwords: one for opening the file and one for editing/printing it. This section explains how to set passwords for images scanned into the Scan/Import window of MP Navigator EX and how to set passwords for - Canon PIXMA MG2120 | User Manual - Page 341
-Settings dialog box opens. Setting Passwords for Existing Files 1. In the View & Use window, select image/PDF files and click PDF. 2. Click Create/Edit PDF file on the document or Use a password to restrict printing and editing of the document and its security settings checkbox, then enter a - Canon PIXMA MG2120 | User Manual - Page 342
box without clicking Save, the settings in the Password Security -Settings dialog box will be deleted. Passwords are deleted once the file is edited. Reset the passwords when saving edited files. Note If you set the passwords via the PDF Settings dialog box, the PDF Settings dialog box returns - Canon PIXMA MG2120 | User Manual - Page 343
Setting Passwords for PDF Files Files are saved according to the settings. Related Topic Opening/Editing Password-protected PDF Files Page 343 of 731 pages Page top - Canon PIXMA MG2120 | User Manual - Page 344
EX version 1.1 and 2.0 or later supports opening, editing, and printing password-protected PDF files. Passwords are case sensitive. You can create or edit up to 99 pages at one time using MP Navigator EX. Entering a Password to Open a File 1. In the View & Use window, select the PDF file you want - Canon PIXMA MG2120 | User Manual - Page 345
box opens. Enter the password and click OK. The PDF file opens in the Zoom in window. Note To reopen the file after closing the Zoom in window, re-enter the password. Entering a Password (Permissions Password) to Edit or Print a File 1. In the View & Use window, select PDF files and click PDF or - Canon PIXMA MG2120 | User Manual - Page 346
file or edit the file, select Create/Edit PDF file on the list. To print the file, click Print Document. In the Password dialog box, you will be prompted to enter a PDF file is edited, the passwords will be deleted. Reset the passwords. Setting Passwords for PDF Files Related Topic Setting Passwords for - Canon PIXMA MG2120 | User Manual - Page 347
Create/Edit PDF file Window Print Document Dialog Box Print Photo Dialog Box Send via E-mail Dialog Box Correct/Enhance Images Window Custom Scan with One-click Tab / One-click Mode Screen Auto Scan Dialog Box Save Dialog Box (One-click Mode Screen) Scan Settings Dialog Box (One-click Mode Screen - Canon PIXMA MG2120 | User Manual - Page 348
You can scan photos and documents. Scan/Import Documents or Images Tab View & Use You can open images saved on a computer and edit/print them or attach them to e-mail. View & Use Images on your Computer Tab One-click You can complete from scanning to saving, etc. at one time by simply clicking - Canon PIXMA MG2120 | User Manual - Page 349
document type. Auto Scan Screen (Scan/Import Window) Photos/Documents (Platen) Opens the Scan/Import window with Photos/Documents (Platen) selected. Scan photos and documents placed on the Platen. Photos/Documents (Platen) Screen (Scan/Import Window) (Switch Mode) Switches to One-click Mode screen - Canon PIXMA MG2120 | User Manual - Page 350
350 of 731 pages Home > Scanning > Scanning from a Computer > Scanning with the Bundled Application Software (MP Navigator EX) > MP computer and edit/print them or attach them to e-mail. My Box (Scanned/Imported Images) Opens the View & Use window with My Box (Scanned/Imported Images) selected - Canon PIXMA MG2120 | User Manual - Page 351
pages Preferences The Preferences dialog box opens. In the Preferences dialog box, you can make advanced settings to MP Navigator EX functions. Preferences Dialog Box (Guide) Opens this guide. Related Topic Opening Images Saved on a Computer Page top - Canon PIXMA MG2120 | User Manual - Page 352
e-mail software program settings. Mail Dialog Box OCR Scan text documents then extract text in the image and display it in Notepad (included with Windows). When you click this icon, the OCR dialog box opens and you can specify the scan/save settings. OCR Dialog Box Custom Scan documents/photos and - Canon PIXMA MG2120 | User Manual - Page 353
start scanning immediately. (Switch Mode) Switches to One-click Mode. The One-click Mode screen appears. One-click Mode Screen Show this window at EX functions. Preferences Dialog Box (Guide) Opens this guide. Important The following restrictions apply when you scan with Document Type set to Auto - Canon PIXMA MG2120 | User Manual - Page 354
and Operation Buttons (2) Toolbar (3) Thumbnail Window (4) Selected Images Area Supported Documents Photos, postcards, business cards, magazines, newspapers, text documents, and BD/DVD/CD. Important The following types of documents cannot be scanned correctly. To scan other documents, specify the - Canon PIXMA MG2120 | User Manual - Page 355
detecting the document type, etc. Photos/Documents (Platen) Click this when you want to scan photos, documents, magazines, and other printed materials. The screen for scanning photos and documents appears. Photos/Documents (Platen) Screen (Scan/Import Window) Document Type Auto Mode is set - Canon PIXMA MG2120 | User Manual - Page 356
the image by doubleclicking it. (Display Size) Changes the size of images in the Thumbnail window. (Sort by) Sorts the images in the Thumbnail window by category or by date (ascending or descending). (3) Thumbnail Window Thumbnail Window Scanned images are displayed. When you select the checkbox - Canon PIXMA MG2120 | User Manual - Page 357
Auto Scan Screen (Scan/Import Window) Selected Images Area Images selected in the Thumbnail window are displayed. Related Topic Easy Scanning with Auto Scan Page 357 of 731 pages Page top - Canon PIXMA MG2120 | User Manual - Page 358
> Scanning > Scanning from a Computer > Scanning with the Bundled Application Software (MP Navigator EX) > MP Navigator EX Screens > Scan Settings Dialog Box (Auto Scan) S745 Scan Settings Dialog Box (Auto Scan) The Scan Settings dialog box opens when you click Specify... in the Scan/Import window - Canon PIXMA MG2120 | User Manual - Page 359
scanning with Auto Scan appears. Auto Scan Screen (Scan/Import Window) Photos/Documents (Platen) Displays the screen for scanning photos, documents, and other printed materials. Document Type Select the type of document to be scanned. Scanning photos: Color Photo or Black and White Photo Scanning - Canon PIXMA MG2120 | User Manual - Page 360
the Use the scanner driver checkbox. Open Scanner Driver ScanGear starts. See "ScanGear (Scanner Driver) Screens " for details on ScanGear screens. Note This button changes to Scan when you deselect the Use the scanner driver checkbox. Clear Delete all images in the Thumbnail window. Note Images not - Canon PIXMA MG2120 | User Manual - Page 361
the image by doubleclicking it. (Display Size) Changes the size of images in the Thumbnail window. (Sort by) Sorts the images in the Thumbnail window by category or by date (ascending or descending). (3) Thumbnail Window Thumbnail Window Scanned images are displayed. When you select the checkbox - Canon PIXMA MG2120 | User Manual - Page 362
(Platen) Screen (Scan/Import Window) Page 362 of 731 pages (Cancel Selection) Cancels the selection of the target image (outlined in orange) in the Selected Images area. Selected Images Area Images selected in the Thumbnail window are displayed. Related Topic Scanning Photos and Documents Page - Canon PIXMA MG2120 | User Manual - Page 363
with the Bundled Application Software (MP Navigator EX) > MP Navigator EX Screens > Scan Settings Dialog Box (Photos/Documents) S713 Scan Settings Dialog Box (Photos/Documents) The Scan Settings dialog box opens when you click Specify... in the Scan/Import window. In the Scan Settings dialog box - Canon PIXMA MG2120 | User Manual - Page 364
Stitch Assist is selected for Document Size. When scanning, align a corner of the document with the corner at the arrow (alignment mark) of the Platen. Note Use ScanGear (scanner driver)'s Advanced Mode tab to correct gutter shadows when scanning non-standard size documents or when custom cropping - Canon PIXMA MG2120 | User Manual - Page 365
from Document Language are supported. The orientation of the following types of documents may not be corrected, as the text cannot be detected correctly. In that case, select the scanned image in the Thumbnail window of the " Photos/Documents (Platen) Screen (Scan/Import Window) " and rotate it with - Canon PIXMA MG2120 | User Manual - Page 366
Displays the folder in which to save the scanned images. To change the folder, click Browse... to specify another one. By default, the scanned images are saved in the following folders. Windows 7: MP Navigator EX folder in My Pictures folder Windows Vista: MP Navigator EX folder in Pictures folder - Canon PIXMA MG2120 | User Manual - Page 367
as PDF files. You can save multiple documents as one PDF file or add pages to a PDF file created with MP Navigator EX. Important You cannot save images scanned at 10501 pixels or more in the vertical and horizontal directions. When Opened from the Scan/Import Window When Opened from the View & Use - Canon PIXMA MG2120 | User Manual - Page 368
you can set passwords for opening, editing, and printing created PDF files. Setting Passwords for PDF Files Add change the folder, click Browse... to specify another one. By default, the scanned images are saved in the following folders. Windows 7: MP Navigator EX folder in My Pictures folder Windows - Canon PIXMA MG2120 | User Manual - Page 369
PDF Settings Dialog Box Page 369 of 731 pages Home > Scanning > Scanning from a Computer > Scanning with the Bundled Application Software (MP Navigator EX) > MP Navigator EX Screens > PDF Settings Dialog Box S736 PDF Settings Dialog Box In the PDF Settings dialog box, you can specify - Canon PIXMA MG2120 | User Manual - Page 370
Color Mode is Black and White. Security Set passwords for opening, editing, and printing the created PDF files. Important This function is not available when images are automatically saved after scanning. Note Select Password Security and set passwords in the Password Security -Settings dialog box - Canon PIXMA MG2120 | User Manual - Page 371
applications. PDF files edited in other applications cannot be displayed as well. (1) Display Setting Items (Scan/Import) Click this when you want to scan photos, documents, magazines, and other printed materials. The Scan/Import window opens. Photos/Documents (Platen) Screen (Scan/Import Window) - Canon PIXMA MG2120 | User Manual - Page 372
when the window is Printing Documents Printing Photos Sending via E-mail Correcting/Enhancing Images Automatically Correcting/Enhancing Images Manually Extracting Text from Scanned Images (OCR) Note The buttons in Image Handling Buttons are displayed when the corresponding applications are installed - Canon PIXMA MG2120 | User Manual - Page 373
is searched. Note Search images in My Box (Scanned/Imported Images), Recently Saved Images or a selected folder and its subfolders. (Refresh) Refreshes the Thumbnail window contents. (Display Size) Changes the size of images in the Thumbnail window. (Sort by) Sorts the images in the Thumbnail - Canon PIXMA MG2120 | User Manual - Page 374
View Use Window Page 374 of 731 pages Important You cannot change the extension (.jpg, .pdf, etc.) when renaming a file. You cannot move or copy images to the date folders displayed in tree view in My Box (Scanned/ Imported Images) or Recently Saved Images. Note A lock icon appears for PDF files - Canon PIXMA MG2120 | User Manual - Page 375
Immediately after opening the View & Use window, categories containing images appear along with the contained images, and All Categories is displayed. Click All Categories, to changes to Specific Categories. Edit Custom Categories When My Box (Scanned/Imported Images) or Specify Folder is displayed - Canon PIXMA MG2120 | User Manual - Page 376
Page 376 of 731 pages Home > Scanning > Scanning from a Computer > Scanning with the Bundled Application Software (MP Navigator EX) > MP Navigator EX Screens > Create/Edit PDF file Window S715 Create/Edit PDF file Window Click PDF in the View & Use window, then click Create/Edit PDF file on - Canon PIXMA MG2120 | User Manual - Page 377
Window Page 377 of 731 pages Deletes the selected image. Add Page Allows you to select and add an existing PDF file. Note A password will be required to add a password-protected PDF file. Undo Cancels the latest change made. Reset Cancels all the changes pages in the list as one PDF file or save - Canon PIXMA MG2120 | User Manual - Page 378
Create/Edit PDF file Window (Reduce) Reduces the image displayed in Preview. (Full-screen) Displays the entire image. (Thumbnail Mode) Switches to Thumbnail Mode. The pages are displayed in thumbnail view. Page 378 of 731 pages Page top - Canon PIXMA MG2120 | User Manual - Page 379
Click Print in the View & Use window, then click Print Document on the list to open the Print Document dialog box. In the Print Document dialog box, you can make advanced settings for printing multiple scanned images at one time. Printer Select the printer to use. Paper Source Select paper source - Canon PIXMA MG2120 | User Manual - Page 380
on the selected printer. Print Quality Select the print quality. Density Click Copies (Density adjustment) to select the print density. Click (Copy setting) to select the number of copies to be printed. Important You can print up to 99 pages at one time. Grayscale Printing Print the document - Canon PIXMA MG2120 | User Manual - Page 381
Page 381 of 731 pages Home > Scanning > Scanning from a Computer > Scanning with the Bundled Application Software (MP Navigator EX) > MP Navigator EX Screens > Print Photo Dialog Box S729 Print Photo Dialog Box Click Print in the View & Use window, then click Print Photo on the list to open the - Canon PIXMA MG2120 | User Manual - Page 382
ratio of the paper. Copies Specify the number of copies to print. Important You can print up to 99 pages at one time. Vivid Photo Print the image in vivid colors. Preview before printing Preview the print result. Print Starts printing. Note Only the images in the Thumbnail window with the checkbox - Canon PIXMA MG2120 | User Manual - Page 383
in which to save the images. To change the folder, click Browse... to specify another one. If resized, the resized images are saved. By default, the scanned images are saved in the following folders. Windows 7: MP Navigator EX folder in My Pictures folder Windows Vista: MP Navigator EX folder in - Canon PIXMA MG2120 | User Manual - Page 384
Send via E-mail Dialog Box Low(High Compression). Page 384 of 731 pages Page top - Canon PIXMA MG2120 | User Manual - Page 385
> Scanning with the Bundled Application Software (MP Navigator EX) > MP Navigator EX Screens > Correct/Enhance Images Window S712 Correct/Enhance Images Window Click (Image Correction/Enhancement) in the View & Use window or click Edit/Convert in Image Handling Buttons, then click Fix photo images - Canon PIXMA MG2120 | User Manual - Page 386
Window Page 386 of 731 pages Auto Photo Fix Applies automatic corrections suitable for photos Reset one). Save All Corrected Images Saves all the corrected/enhanced images displayed in the thumbnail list. Exit Closes the Correct/Enhance Images window. Manual Tab There are two menus on the Manual - Canon PIXMA MG2120 | User Manual - Page 387
Correct/Enhance Images Window See "Correcting/Enhancing Images Manually " for details. Adjust Page 387 of 731 pages Sharpness Emphasizes the outline of the subjects to sharpen the image. Adjust the sharpness when the photo is out of focus or text is blurred. Move the slider to the right to sharpen - Canon PIXMA MG2120 | User Manual - Page 388
Window Page . It is usually difficult to correct the image completely by adjusting only one color pair. It is recommended that you find a portion in the Resets all adjustments. Close Closes the Advanced Adjustment dialog box. Note The Brightness and Contrast values set in Adjust do not change - Canon PIXMA MG2120 | User Manual - Page 389
Correct/Enhance Images window. Correct/Enhance specified area. Undo Cancels the latest correction/enhancement. Reset Selected Image Cancels all corrections, enhancements, and Saves the corrected/enhanced/adjusted image (the selected one). Save All Corrected Images Saves all the corrected - Canon PIXMA MG2120 | User Manual - Page 390
the image 90 degrees clockwise. (Invert) Inverts the image horizontally. (Trimming) Click this button to open the Crop window and specify the trimming frame. Trimming Scanned Images (Enlarge) Enlarges the displayed image. (Reduce) Reduces the displayed image. (Full-screen) Displays the entire image - Canon PIXMA MG2120 | User Manual - Page 391
e-mail software program settings. Mail Dialog Box OCR Scan text documents then extract text in the image and display it in Notepad (included with Windows). When you click this icon, the OCR dialog box opens and you can specify the scan/save settings. OCR Dialog Box Custom Scan documents/photos and - Canon PIXMA MG2120 | User Manual - Page 392
guide. Important The following restrictions apply when you scan with Document Type set to Auto Mode in the Save dialog box or Custom dialog box. When you want to convert text in the scanned image to text data, specify Document Type (do not select Auto Mode). Related Topic Easy Scanning with One - Canon PIXMA MG2120 | User Manual - Page 393
Scanning with the Bundled Application Software (MP Navigator EX) > MP Navigator EX Screens > Auto Scan Dialog Box S742 Auto Scan Dialog Box Click Auto Scan on the Custom Scan with One-click tab or click Auto in the One-click Mode screen to open the Auto Scan dialog box. Supported Documents Photos - Canon PIXMA MG2120 | User Manual - Page 394
Displays the folder in which to save the scanned images. To change the folder, click Browse... to specify another one. By default, the scanned images are saved in the following folders. Windows 7: MP Navigator EX folder in My Pictures folder Windows Vista: MP Navigator EX folder in Pictures folder - Canon PIXMA MG2120 | User Manual - Page 395
settings. Cancel Cancels the specified settings. The current screen closes. Defaults Returns all settings in the screen to their defaults. Scan Scans and saves documents with the specified settings. When Save as type is Auto, a confirmation appears. Click Instructions to open this guide. Page top - Canon PIXMA MG2120 | User Manual - Page 396
supported by Auto Mode are photos, postcards, business cards, magazines, newspapers, text documents, and BD/DVD/CD. The following types of documents cannot be scanned Documents printed on thin white paper - Long narrow documents such as panoramic photos Reflective disc labels may not be scanned - Canon PIXMA MG2120 | User Manual - Page 397
size. In that case, change the size to the actual document size (A4, Letter, etc.) and align a corner of the document with the corner at the arrow (alignment mark) of the Platen. Resolution Select the resolution at which to scan documents. Resolution Use the scanner driver Select this checkbox to - Canon PIXMA MG2120 | User Manual - Page 398
scanned images. To change the folder, click Browse... to specify another one. By default, the scanned images are saved in the following folders. Windows 7: MP Navigator EX folder in My Pictures folder Windows not installed. Note You cannot select this setting if the Use the scanner driver checkbox - Canon PIXMA MG2120 | User Manual - Page 399
Settings Open with You can select whether to open the View & Use window or Explorer after saving the images. Start scanning by clicking the one-click button Select this checkbox to start scanning when you click an icon in One-click Mode. Apply Saves and applies the specified settings. Click Cancel - Canon PIXMA MG2120 | User Manual - Page 400
400 of 731 pages Home > Scanning > Scanning from a Computer > Scanning with the Bundled Application Software (MP Navigator EX) > MP Navigator EX Screens > Scan Settings Dialog Box (One-click Mode Screen) S734 Scan Settings Dialog Box (One-click Mode Screen) The Scan Settings dialog box opens when - Canon PIXMA MG2120 | User Manual - Page 401
is not available when Color Mode is Black and White. The color tone may change from the source image due to corrections. In that case, deselect the checkbox and scan. Descreen Reduce moire patterns. Printed photos and pictures are displayed as a collection of fine dots. "Moire" is a phenomenon where - Canon PIXMA MG2120 | User Manual - Page 402
Settings Dialog Box (One-click Mode Screen) Page 402 of 731 pages Note Use ScanGear (scanner driver)'s Advanced Mode tab to correct gutter shadows when scanning non-standard size documents or when custom cropping frames (scan areas) are set. See "Gutter Shadow Correction " for details. Reduce Show - Canon PIXMA MG2120 | User Manual - Page 403
Scan Settings Dialog Box (One-click Mode Screen) Page 403 of 731 pages Page top - Canon PIXMA MG2120 | User Manual - Page 404
Save each of the selected images as a separate PDF file. PDF(Multiple Pages) Save multiple images in one PDF file. Note PDF(Multiple Pages) is displayed when multiple images are scanned. PDF(Add Page) Add the scanned images to a PDF file. The images are added to the end of the PDF file. You - Canon PIXMA MG2120 | User Manual - Page 405
set passwords for opening, editing, and printing created PDF files. Setting Passwords for scanned images. To change the folder, click Browse... to specify another one. By default, the scanned images are saved in the following folders. Windows 7: MP Navigator EX folder in My Pictures folder Windows - Canon PIXMA MG2120 | User Manual - Page 406
406 of 731 pages Home > Scanning > Scanning from a Computer > Scanning with the Bundled Application Software (MP Navigator EX) > MP digital camera images (JPEG). Embedding Exif information into scanned images allows you to organize and print them along with digital camera images. The Exif Settings - Canon PIXMA MG2120 | User Manual - Page 407
of 731 pages Home > Scanning > Scanning from a Computer > Scanning with the Bundled Application Software (MP Navigator EX) > MP Navigator EX Screens > PDF Dialog Box S725 PDF Dialog Box Click Save as PDF file on the Custom Scan with One-click tab or click PDF in the One-click Mode screen to open - Canon PIXMA MG2120 | User Manual - Page 408
Displays the folder in which to save the scanned images. To change the folder, click Browse... to specify another one. By default, the scanned images are saved in the following folders. Windows 7: MP Navigator EX folder in My Pictures folder Windows Vista: MP Navigator EX folder in Pictures folder - Canon PIXMA MG2120 | User Manual - Page 409
added. To change the file, click Browse... to specify another one. Important Images manual. Reset Cancels the application setting. Set... Allows you to select an application to start. Start scanning by clicking the one-click button Select this checkbox to start scanning when you click an icon in One - Canon PIXMA MG2120 | User Manual - Page 410
from a Computer > Scanning with the Bundled Application Software (MP Navigator EX) > MP Navigator EX Screens > Save as PDF file Dialog Box S730 Save as PDF file Dialog Box The Save as PDF file dialog box opens when you scan from the PDF dialog box of the One-click Mode screen after selecting - Canon PIXMA MG2120 | User Manual - Page 411
will be deleted. Reset the passwords. Setting Passwords opening, editing, and printing created PDF files. change the folder, click Browse... to specify another one. By default, the scanned images are saved in the following folders. Windows 7: MP Navigator EX folder in My Pictures folder Windows - Canon PIXMA MG2120 | User Manual - Page 412
, then enter the Width and Height and click OK. Important When you select Auto Detect, the image may not be scanned at the correct position and size. In that case, change the size to the actual document size (A4, Letter, etc.) and align a corner of the document with the corner at the arrow - Canon PIXMA MG2120 | User Manual - Page 413
Displays the folder in which to save the scanned images. To change the folder, click Browse... to specify another one. By default, the scanned images are saved in the following folders. Windows 7: MP Navigator EX folder in My Pictures folder Windows Vista: MP Navigator EX folder in Pictures folder - Canon PIXMA MG2120 | User Manual - Page 414
program. If the e-mail software program you want to use is not listed, click Add to List and select it. Start scanning by clicking the one-click button Select this checkbox to start scanning when you click an icon in One-click Mode. Important Start scanning by clicking the one-click button is not - Canon PIXMA MG2120 | User Manual - Page 415
Box Page 415 of 731 pages Home > Scanning > Scanning from a Computer > Scanning with the Bundled Application Software (MP Navigator EX) > MP Navigator EX Screens > OCR Dialog Box S724 OCR Dialog Box Click OCR on the Custom Scan with One-click tab or in the One-click Mode screen to open the OCR - Canon PIXMA MG2120 | User Manual - Page 416
Displays the folder in which to save the scanned images. To change the folder, click Browse... to specify another one. By default, the scanned images are saved in the following folders. Windows 7: MP Navigator EX folder in My Pictures folder Windows Vista: MP Navigator EX folder in Pictures folder - Canon PIXMA MG2120 | User Manual - Page 417
. Reset Cancels the application setting. Set... Allows you to select an application. Important Depending on the specified application, the text may not be extracted correctly or the application may not start. Start scanning by clicking the one-click button Select this checkbox to start scanning when - Canon PIXMA MG2120 | User Manual - Page 418
supported by Auto Mode are photos, postcards, business cards, magazines, newspapers, text documents, and BD/DVD/CD. The following types of documents cannot be scanned Documents printed on thin white paper - Long narrow documents such as panoramic photos Reflective disc labels may not be scanned - Canon PIXMA MG2120 | User Manual - Page 419
size. In that case, change the size to the actual document size (A4, Letter, etc.) and align a corner of the document with the corner at the arrow (alignment mark) of the Platen. Resolution Select the resolution at which to scan documents. Resolution Use the scanner driver Select this checkbox to - Canon PIXMA MG2120 | User Manual - Page 420
scanned images. To change the folder, click Browse... to specify another one. By default, the scanned images are saved in the following folders. Windows 7: MP Navigator EX folder in My Pictures folder Windows not installed. Note You cannot select this setting if the Use the scanner driver checkbox - Canon PIXMA MG2120 | User Manual - Page 421
further procedures, refer to the application's manual. Reset Cancels the application setting. Set... Allows you to select an application to start. Start scanning by clicking the one-click button Select this checkbox to start scanning when you click an icon in One-click Mode. Apply Saves and applies - Canon PIXMA MG2120 | User Manual - Page 422
422 of 731 pages Home > Scanning > Scanning from a Computer > Scanning with the Bundled Application Software (MP Navigator EX) > MP Navigator EX settings and how to respond when scanning using the operation panel of the machine, via the General and Scanner Button Settings tabs. Note See the - Canon PIXMA MG2120 | User Manual - Page 423
in which to save images temporarily. To change the folder, click Browse... to specify another one. Important An error may occur if you set the destination to the root directory of the drive on which the operating system is installed. Be sure to specify a folder. An error may occur if you set the - Canon PIXMA MG2120 | User Manual - Page 424
change which items are installed during installation from the Setup CD-ROM by selecting Custom Install. If you choose not to install some applications with Custom Install results (text) into one file. When the checkbox is selected, you can scan up to 99 pages at one time. Deselect the checkbox - Canon PIXMA MG2120 | User Manual - Page 425
Page 425 of 731 pages Home > Scanning > Scanning from a Computer > Scanning with the Bundled Application Software (MP Navigator EX) > MP Navigator EX Screens > Scanner Button Settings Tab (Save to PC) S707 Scanner Button Settings Tab (Save to PC) On the Scanner Button Settings tab, you can specify - Canon PIXMA MG2120 | User Manual - Page 426
Displays the folder in which to save the scanned images. To change the folder, click Browse... to specify another one. By default, the scanned images are saved in the following folders. Windows 7: MP Navigator EX folder in My Pictures folder Windows Vista: MP Navigator EX folder in Pictures folder - Canon PIXMA MG2120 | User Manual - Page 427
Scanner Button Settings Tab (Save to PC) Page 427 of 731 pages Save to a Subfolder with Current Date Select this checkbox to create a subfolder in the folder specified in Save in with the current date and save scanned files in it. A subfolder with a name such as "2011_01_01" (Year_Month_Date) will - Canon PIXMA MG2120 | User Manual - Page 428
of 731 pages Home > Scanning > Scanning from a Computer > Scanning with the Bundled Application Software (MP Navigator EX) > MP Navigator EX Screens > Scan Settings Dialog Box (Scanner Button Settings) S743 Scan Settings Dialog Box (Scanner Button Settings) The Scan Settings dialog box opens when - Canon PIXMA MG2120 | User Manual - Page 429
Images Page 429 of 731 pages Home > Scanning > Scanning from a Computer > Scanning with the Bundled Application Software (MP Navigator EX) > Appendix: Opening Files Other than Scanned Images S011 Appendix: Opening Files Other than Scanned Images Using images saved on a computer Opening Images - Canon PIXMA MG2120 | User Manual - Page 430
Home > Scanning > Scanning from a Computer > Scanning with the Bundled Application Software (MP Navigator EX) > Appendix: Opening Files Other than Scanned Images > Opening Images Saved on a Computer S507 Opening Images Saved on a Computer You can open images saved on a computer and edit/print them - Canon PIXMA MG2120 | User Manual - Page 431
want to do with them. See the corresponding sections below for details on using images. Creating/Editing PDF Files Printing Documents Printing Photos Sending via E-mail Correcting/Enhancing Images Automatically Correcting/Enhancing Images Manually Extracting Text from Scanned Images (OCR) Page top - Canon PIXMA MG2120 | User Manual - Page 432
ScanGear) Scanning with Other Application Software (ScanGear) What Is ScanGear (Scanner Driver)? Scanning with Advanced Settings Using ScanGear (Scanner Driver) Correcting Images and Adjusting Colors with ScanGear (Scanner Driver) ScanGear (Scanner Driver) Screens General Notes (Scanner Driver) Page - Canon PIXMA MG2120 | User Manual - Page 433
Page 433 of 731 pages Home > Scanning > Scanning from a Computer > Scanning with Other Application Software (ScanGear) > What Is ScanGear (Scanner Driver)? S201 What Is ScanGear (Scanner Driver)? ScanGear (scanner driver) is software required for scanning documents. It enables you to specify the - Canon PIXMA MG2120 | User Manual - Page 434
What Is ScanGear (Scanner Driver)? Page 434 of 731 pages Auto Scan Mode Use the Auto Scan Mode tab to scan easily by simply placing the document on the Platen and clicking Scan. Page top - Canon PIXMA MG2120 | User Manual - Page 435
from a Computer > Scanning with Other Application Software (ScanGear) > Scanning with Advanced Settings Using ScanGear (Scanner Driver) S200 Scanning with Advanced Settings Using ScanGear (Scanner Driver) Starting ScanGear (scanner driver) Starting ScanGear (Scanner Driver) Scanning documents after - Canon PIXMA MG2120 | User Manual - Page 436
Navigation Mode screen. Starting MP Navigator EX 2. In Scan/Import, click Photos/Documents (Platen). The Scan/Import window opens. 3. Select the Use the scanner driver checkbox, then click Open Scanner Driver. The ScanGear screen appears. One-click Mode Screen Follow these steps to start ScanGear - Canon PIXMA MG2120 | User Manual - Page 437
Use the scanner driver is not displayed in the Auto Scan dialog box or PDF dialog box. Starting from an Application Follow these steps (example) to start ScanGear from an application. The procedure varies depending on the application. For details, refer to the application's manual. 1. Start the - Canon PIXMA MG2120 | User Manual - Page 438
(Scanner Driver) " to scan multiple documents at one time. Important The following types of documents may not be cropped correctly. In that case, click (Thumbnail) on the Toolbar to switch to whole image view and scan. - Photos that have a whitish border - Documents printed on white paper, hand - Canon PIXMA MG2120 | User Manual - Page 439
Select Source. 4. Set Destination. 5. Set Output Size. Output size options vary by the item selected in Destination. 6. Adjust the cropping frames (scan areas) as required. Adjust the size and position of the cropping frames on the preview image. Adjusting Cropping Frames 7. Set Image corrections - Canon PIXMA MG2120 | User Manual - Page 440
(Scanner Driver) " to scan multiple documents at one time. Important The following types of documents may not be cropped correctly. In that case, click (Thumbnail) on the Toolbar to switch to whole image view and scan. - Photos that have a whitish border - Documents printed on white paper, hand - Canon PIXMA MG2120 | User Manual - Page 441
Settings 4. Click Preview. Preview image appears in the Preview area. Page 441 of 731 pages 5. Set Output Settings. Output Settings 6. Adjust the cropping frame (scan area), correct image and adjust colors as required. Adjusting Cropping Frames Image Settings Color Adjustment Buttons 7. Click - Canon PIXMA MG2120 | User Manual - Page 442
Application Software (ScanGear) > Scanning with Advanced Settings Using ScanGear (Scanner Driver) > Scanning in Auto Scan Mode S207 Scanning in Auto Scan Mode Use the Auto Scan Mode tab to scan easily by automatically detecting the type of document placed on the Platen. Important Supported document - Canon PIXMA MG2120 | User Manual - Page 443
Scanning in Auto Scan Mode Scan Tab Related Topic Auto Scan Mode Tab Page 443 of 731 pages Page top - Canon PIXMA MG2120 | User Manual - Page 444
Scanning with Other Application Software (ScanGear) > Scanning with Advanced Settings Using ScanGear (Scanner Driver) > Scanning Multiple Documents at One Time with ScanGear (Scanner Driver) S208 Scanning Multiple Documents at One Time with ScanGear (Scanner Driver) You can scan two or more photos - Canon PIXMA MG2120 | User Manual - Page 445
Scanning Multiple Documents at One Time with ScanGear (Scanner Driver) Page 445 of 731 pages 3. Click Preview. Thumbnails of the preview images appear in the Preview area. Cropping frames are specified automatically according to the - Canon PIXMA MG2120 | User Manual - Page 446
Multiple Documents at One Time with ScanGear (Scanner Driver) 8. Click Scan. Page 446 of 731 pages Scanning Multiple Documents in Whole Image View Follow these steps if thumbnails are not displayed correctly when previewed or if you want to scan multiple documents as a single image. Note Positions - Canon PIXMA MG2120 | User Manual - Page 447
Documents at One Time with ScanGear (Scanner Driver) Page 447 of 731 pages 6. Click Scan. Areas framed by broken lines are scanned. Note A response of ScanGear after scanning can be specified in Status of ScanGear dialog after scanning on the Scan tab of the Preferences dialog box. Scan Tab Page - Canon PIXMA MG2120 | User Manual - Page 448
pages Home > Scanning > Scanning from a Computer > Scanning with Other Application Software (ScanGear) > Correcting Images and Adjusting Colors with ScanGear (Scanner Driver) S300 Correcting Images and Adjusting Colors with ScanGear (Scanner Driver) Sharpening out-of-focus photos, reducing dust - Canon PIXMA MG2120 | User Manual - Page 449
Dust and Scratches, Fading Correct... Page 449 of 731 pages Home > Scanning > Scanning from a Computer > Scanning with Other Application Software (ScanGear) > Correcting Images and Adjusting Colors with ScanGear (Scanner Driver) > Correcting Images (Unsharp Mask, Reduce Dust and Scratches, Fading - Canon PIXMA MG2120 | User Manual - Page 450
displayed as a collection of fine dots. "Moire" is a phenomenon where uneven gradation or a stripe pattern appears when such photos or pictures printed with fine dots are scanned. Descreen is the function for reducing this moire effect. Reducing dust and scratches Set Reduce Dust and Scratches to - Canon PIXMA MG2120 | User Manual - Page 451
images Set Backlight Correction to Low, Medium, or High according to the degree of backlight. None Medium Correcting shadows that appear between pages when scanning open booklets Set Gutter Shadow Correction to Low, Medium, or High according to the degree of shadows. None Medium Page top - Canon PIXMA MG2120 | User Manual - Page 452
from a Computer > Scanning with Other Application Software (ScanGear) > Correcting Images and Adjusting Colors with ScanGear (Scanner Driver) > Adjusting Colors Using a Color Pattern S301 Adjusting Colors Using a Color Pattern You can preview color changes and reproduce natural colors by using - Canon PIXMA MG2120 | User Manual - Page 453
the portion turns white. Preview image appears in the center. Preview image colors change as you adjust them. Below is an example of correcting a bluish image. After Note Color adjustments are applied only to the cropping frames (scan areas) or the frame selected in thumbnail view. You can select - Canon PIXMA MG2120 | User Manual - Page 454
Scanning > Scanning from a Computer > Scanning with Other Application Software (ScanGear) > Correcting Images and Adjusting Colors with ScanGear (Scanner Driver (scanner driver)'s Advanced Mode tab, click (Saturation/Color Balance). Note Click Defaults to reset all adjustments in the current window - Canon PIXMA MG2120 | User Manual - Page 455
of the scene by reducing the cast color and increasing the complementary color. It is usually difficult to correct the image completely by adjusting only one color pair. It is recommended that you find a portion in the image where it should be white, and adjust all three color pairs so that - Canon PIXMA MG2120 | User Manual - Page 456
Brightness and Contrast Page 456 of 731 pages Home > Scanning > Scanning from a Computer > Scanning with Other Application Software (ScanGear) > Correcting Images and Adjusting Colors with ScanGear (Scanner Driver) > Adjusting Brightness and Contrast S304 Adjusting Brightness and Contrast - Canon PIXMA MG2120 | User Manual - Page 457
Adjusting Brightness and Contrast Adjust the Blue channel. Note Only Grayscale will be displayed in Channel when Color Mode is Grayscale. Page 457 of 731 pages Brightness Adjust the image brightness. Move (Slider) under Brightness to the left to darken and right to brighten the image. You can also - Canon PIXMA MG2120 | User Manual - Page 458
Application Software (ScanGear) > Correcting Images and Adjusting Colors with ScanGear (Scanner Driver) > Adjusting Histogram S305 Adjusting Histogram In ScanGear (scanner driver)'s Advanced Mode tab, click (Histogram). Note Click Defaults to reset all adjustments in the current window. Channel - Canon PIXMA MG2120 | User Manual - Page 459
Adjusting Histogram Page 459 of 731 pages (1) Bright area (2) Dark area (3) Whole image More data is distributed to the More data is distributed to the Data is widely distributed between the highlight side. shadow side. highlight and shadow. Adjusting Histograms (Using the Slider) Select a - Canon PIXMA MG2120 | User Manual - Page 460
point Dropper, the mouse pointer on the preview image changes to a dropper. Click a Dropper displayed below the histogram to change the setting. - The point clicked with to 245). For instance, if snow in a photo appears bluish, click the bluish part to adjust the whole image and reproduce natural - Canon PIXMA MG2120 | User Manual - Page 461
Software (ScanGear) > Correcting Images and Adjusting Colors with ScanGear (Scanner Driver) > Adjusting Tone Curve S306 Adjusting Tone Curve In ScanGear (scanner driver)'s Advanced Mode tab, click (Tone Curve Settings). Note Click Defaults to reset all adjustments in the current window - Canon PIXMA MG2120 | User Manual - Page 462
Adjusting Tone Curve Page 462 of 731 pages Adjusting Tone Curve In Select Tone Curve, select a tone curve from No correction, Overexposure, Underexposure, High contrast, Reverse the negative/positive image and Edit custom curve. No correction (No adjustment) Overexposure (Convex curve) The midtone - Canon PIXMA MG2120 | User Manual - Page 463
Adjusting Tone Curve Page 463 of 731 pages Edit custom curve You can drag specific points on the Tone Curve to freely adjust the brightness of the corresponding areas. Page top - Canon PIXMA MG2120 | User Manual - Page 464
Scanning > Scanning from a Computer > Scanning with Other Application Software (ScanGear) > Correcting Images and Adjusting Colors with ScanGear (Scanner Driver ScanGear (scanner driver)'s Advanced Mode tab, click (Threshold). Note Click Defaults to reset all adjustments in the current window. - Canon PIXMA MG2120 | User Manual - Page 465
Screens Page 465 of 731 pages Home > Scanning > Scanning from a Computer > Scanning with Other Application Software (ScanGear) > ScanGear (Scanner Driver) Screens S800 ScanGear (Scanner Driver) Screens Basic Mode Tab Advanced Mode Tab Input Settings Output Settings Image Settings Color Adjustment - Canon PIXMA MG2120 | User Manual - Page 466
Basic Mode Tab Page 466 of 731 pages Home > Scanning > Scanning from a Computer > Scanning with Other Application Software (ScanGear) > ScanGear (Scanner Driver) Screens > Basic Mode Tab S801 Basic Mode Tab This mode allows you to scan easily by following the on-screen steps. This section - Canon PIXMA MG2120 | User Manual - Page 467
you want to do with the scanned image. Print Select this to print the scanned image on a printer. Image display Select this to view the scanned image on a monitor. OCR Select this to use the scanned image with OCR software. "OCR software" is software that converts text scanned as an image into text - Canon PIXMA MG2120 | User Manual - Page 468
within the cropping frame will be scanned. You can drag the cropping sizes and save them at one time. Saved items will be can select inches or mm when Destination is Print but you can only select pixels when Destination Note Save up to 10 items. An error message appears when you enter a value outside - Canon PIXMA MG2120 | User Manual - Page 469
. Important When this checkbox is selected in ScanGear (scanner driver) started from MP Navigator EX, the files can be saved in JPEG/Exif or PDF format only. Scanning may take longer than usual when this checkbox is selected. The color tone may change from the source image due to corrections. In - Canon PIXMA MG2120 | User Manual - Page 470
frames. (Remove Cropping Frame) Removes the selected cropping frame. (Information) Displays the version of ScanGear and the current scan settings (document type, etc.). (Open Guide) This page appears. (3) Preview Area Preview Area This is where a trial image is displayed after you click Preview - Canon PIXMA MG2120 | User Manual - Page 471
and displayed as a single image. All portions in the cropping frames will be scanned. Note You can specify the cropping frame on the displayed image. In thumbnail view, you can only create one cropping frame per image. In whole image view, you can create multiple cropping frames. Adjusting Cropping - Canon PIXMA MG2120 | User Manual - Page 472
Basic Mode Tab Related Topic Scanning in Basic Mode Page 472 of 731 pages Page top - Canon PIXMA MG2120 | User Manual - Page 473
Tab Page 473 of 731 pages Home > Scanning > Scanning from a Computer > Scanning with Other Application Software (ScanGear) > ScanGear (Scanner Driver) Screens > Advanced Mode Tab S803 Advanced Mode Tab This mode allows you to make advanced scan settings such as the color mode, output resolution - Canon PIXMA MG2120 | User Manual - Page 474
) or balance (tone curve). Color Adjustment Buttons Zoom Zooms in on an image or the portion within the cropping frame (scan area). When the image is zoomed in, Zoom changes to Undo. Click Undo to return the display to its non-magnified state. In thumbnail view When multiple images are displayed - Canon PIXMA MG2120 | User Manual - Page 475
in whole image view. Preferences... The Preferences dialog box opens and you can make scan/preview settings. Preferences Dialog Box Close Closes ScanGear (scanner driver). (2) Toolbar Toolbar You can adjust or rotate preview images. The buttons displayed on the Toolbar vary by view. In thumbnail - Canon PIXMA MG2120 | User Manual - Page 476
/ (Whole Image) Switches the view in the Preview area. Preview Area (Clear) Delete the preview image. It also resets the Toolbar and color adjustment settings. (Crop) Allows you to specify the scan area by dragging the mouse. (Move Image) If an enlarged image is too large to fit in the Preview - Canon PIXMA MG2120 | User Manual - Page 477
Advanced Mode Tab Removes the selected cropping frame. (Information) Displays the version of ScanGear and the current scan settings (document type, etc.). (Open Guide) This page appears. Page 477 of 731 pages (3) Preview Area Preview Area This is where a trial image is displayed after you click - Canon PIXMA MG2120 | User Manual - Page 478
Tab Page 478 of 731 pages Note You can specify the cropping frame on the displayed image. In thumbnail view, you can only create one cropping frame per image. In whole image view, you can create multiple cropping frames. Adjusting Cropping Frames Related Topic Scanning in Advanced Mode Page top - Canon PIXMA MG2120 | User Manual - Page 479
accordingly. Important Some applications have a limit to the amount of scan data they can receive. ScanGear (scanner driver) can scan data that is of: - 21000 pixels x 30000 pixels or less If you change Paper Size after previewing, the preview image will be deleted. Note If you are not sure which - Canon PIXMA MG2120 | User Manual - Page 480
Select this mode to scan photos and documents in black and Paper Size is displayed before preview, and the cropping frame (scan area) size is displayed after preview. You can adjust the cropping frame size by entering the values into (Width) and (Height). Click (Change Aspect Ratio) and change - Canon PIXMA MG2120 | User Manual - Page 481
pages Home > Scanning > Scanning from a Computer > Scanning with Other Application Software (ScanGear) > ScanGear (Scanner Driver) Screens > an output size. Select Flexible to set custom sizes or select a size for printing or displaying. Select Add/Delete... to set custom size and save it as a - Canon PIXMA MG2120 | User Manual - Page 482
frame will be scanned at the size of the selected paper/monitor size. multiple output sizes and save them at one time. Saved items will be registered inches or mm when Destination is Print but you can only select pixels when 10 items for each destination. An error message appears when you enter a - Canon PIXMA MG2120 | User Manual - Page 483
Output Settings Page 483 of 731 pages When the file size exceeds a certain size, the value appears in red. In that case, a warning message appears when you click Scan. It is recommended that you adjust the settings to reduce Data Size. To continue, scan in whole image view. Page top - Canon PIXMA MG2120 | User Manual - Page 484
Page 484 of 731 pages Home > Scanning > Scanning from a Computer > Scanning with Other Application Software (ScanGear) > ScanGear (Scanner Driver) Screens > Image Settings S806 Image Settings . It is recommended that you normally select this setting. Photo Applies Image Adjustment suitable for - Canon PIXMA MG2120 | User Manual - Page 485
tone may change from photos or pictures printed with fine dots are scanned Scanned photos may contain white dots caused by dust or scratches. Use this function to reduce such noise. None Dust and scratches will not be reduced. Low Select this to reduce small dust particles and scratches. Large ones - Canon PIXMA MG2120 | User Manual - Page 486
and sharpness of the image. Important Grain Correction may not be effective if the scan area is too small. Backlight Correction Use this function to correct photos that have been shot against light. When you change the Backlight Correction setting, the result will be reflected in the preview image - Canon PIXMA MG2120 | User Manual - Page 487
lbs (2.0 kg). If you press heavily, the scanner may not work correctly or you might break the glass. Align the document with the edge of the Platen. If document to be scanned. Note Cover the document with black cloth if white spots, streaks, or colored patterns appear in scan results due to - Canon PIXMA MG2120 | User Manual - Page 488
Color Adjustment Buttons Page 488 of 731 pages Home > Scanning > Scanning from a Computer > Scanning with Other Application Software (ScanGear) > ScanGear (Scanner Driver) Screens > Color Adjustment Buttons S807 Color Adjustment Buttons The Color Adjustment Buttons allow you to make fine - Canon PIXMA MG2120 | User Manual - Page 489
the balance of tone input and output. You can make fine adjustments to the brightness of a specific area. Adjusting Tone Curve (Final Review) Make a final check of color adjustments. The final synthesized tone curve and the histogram derived from the subsequent image processing will be displayed - Canon PIXMA MG2120 | User Manual - Page 490
and click Delete. Click Save to save settings displayed in Tone Curve Settings List or Threshold Settings List. Note Save up to 20 items. Defaults Reset all adjustments (saturation/color balance, brightness/contrast, histogram, and tone curve). Page top - Canon PIXMA MG2120 | User Manual - Page 491
such as paperback pages with the spine cut off - Documents printed on thin white paper - Long narrow documents such as panoramic photos Scanning in Basic Mode Scanning in Advanced Mode Reflective disc labels may not be scanned properly. Place documents correctly according to the type of document to - Canon PIXMA MG2120 | User Manual - Page 492
dialog box. The color tone may change from the source image due to corrections. In that case, deselect the checkbox and scan. View scanned images Display the thumbnails of scanned images in a different window. Scan Scanning starts. Note When scanning starts, the progress will be displayed - Canon PIXMA MG2120 | User Manual - Page 493
493 of 731 pages Home > Scanning > Scanning from a Computer > Scanning with Other Application Software (ScanGear) > ScanGear (Scanner Driver) Screens > Preferences Dialog Box S808 Preferences Dialog Box Click Preferences... in the ScanGear (scanner driver) screen to open Preferences dialog box - Canon PIXMA MG2120 | User Manual - Page 494
> Scanning with Other Application Software (ScanGear) > ScanGear (Scanner Driver) Screens > Scanner Tab S812 Scanner Tab On the Scanner tab, you can specify the following settings. Select Folder Where Temporary Files are Saved Displays the folder in which to save images temporarily. To change the - Canon PIXMA MG2120 | User Manual - Page 495
Preview Tab Page 495 of 731 pages Home > Scanning > Scanning from a Computer > Scanning with Other Application Software (ScanGear) > ScanGear (Scanner Driver) Screens > Preview Tab S809 Preview Tab On the Preview tab, you can specify the following settings. Preview at Start of ScanGear Select - Canon PIXMA MG2120 | User Manual - Page 496
Size for Thumbnail View Select the cropping size for thumbnails of scanned documents. Larger Displays 105% (in width and height) of and height) of the area displayed for the standard size. Note When you change the Cropping Size for Thumbnail View setting, the preview images will be refreshed - Canon PIXMA MG2120 | User Manual - Page 497
497 of 731 pages Home > Scanning > Scanning from a Computer > Scanning with Other Application Software (ScanGear) > ScanGear (Scanner Driver) Screens > Scan Tab S810 Scan Tab On the Scan tab, you can specify the following settings. Status of ScanGear dialog after scanning Select what to do with - Canon PIXMA MG2120 | User Manual - Page 498
from a Computer > Scanning with Other Application Software (ScanGear) > ScanGear (Scanner Driver) Screens > Color Settings Tab S811 Color Settings Tab On the Color Settings tab, you can specify the following settings. Color Adjustment Select either of the following. You can select one when Color - Canon PIXMA MG2120 | User Manual - Page 499
the original image are not accurately reflected in the monitor. Click Defaults to return to the default Monitor Gamma value (2.20). Note Refer to the manual of your monitor to check its gamma value. If it is not written in the - Canon PIXMA MG2120 | User Manual - Page 500
, refer to the application's manual and change the settings accordingly. Some applications do not support continuous scanning of multiple documents. In some cases, only the first scanned image is accepted, or multiple images are scanned as one image. To import scanned images into Microsoft Office - Canon PIXMA MG2120 | User Manual - Page 501
General Notes (Scanner Driver) Page 501 of 731 pages When scanning platen size images into Microsoft Office 2003 (Word, Excel, PowerPoint, etc.), click Custom Insert in the Insert Picture from Scanner or Camera screen. Otherwise, images may not be scanned correctly. When scanning images into - Canon PIXMA MG2120 | User Manual - Page 502
Useful Information on Scanning Home > Scanning > Scanning from a Computer > Useful Information on Scanning Useful Information on Scanning Adjusting Cropping Frames Resolution File Formats Color Matching Page 502 of 731 pages Page top - Canon PIXMA MG2120 | User Manual - Page 503
scanner driver) screen. "Cropping" is the act of selecting the area you want to keep in an image and discarding the rest when scanning it. When you click Scan, only the portion within the cropping frame will be scanned and passed to the application. You can edit or print the scanned will change into - Canon PIXMA MG2120 | User Manual - Page 504
Cropping Frames Page 504 of 731 pages The cursor will change into (Crosshair arrow) when it is positioned within when Output Size is Flexible. Creating Multiple Cropping Frames In thumbnail view You can only create one cropping frame per image. In whole image view Click and drag the mouse in a - Canon PIXMA MG2120 | User Manual - Page 505
pages You can create multiple cropping frames and apply different scan settings to each cropping frame. You can also select multiple cropping frames by clicking them while pressing the Ctrl key. If you select multiple cropping frames and change the settings on a tab at the right of ScanGear, the - Canon PIXMA MG2120 | User Manual - Page 506
the resolution at half the resolution of the printer should be fine. For example, if you want to print scanned paper/photos using a 600 dpi color printer, you should set the resolution to 300 dpi. However, with a high-resolution printer, printing takes longer than usual if you set the resolution - Canon PIXMA MG2120 | User Manual - Page 507
at 600 dpi, and the resolution of the scanned image will be 300 dpi. You can print the document with sufficient quality using a 600 dpi color printer. When Printing L Size (3.5 inches x 5 inches) (89 mm x 127 mm) Photos at Twice the Size Document resolution: 300 dpi Output resolution: 300 dpi - Canon PIXMA MG2120 | User Manual - Page 508
Resolution Page 508 of 731 pages dpi Important If you double the resolution, the file size quadruples. If the file is too large, the processing speed will slow down significantly, and you will experience inconvenience such as lack of memory. Set the minimum required resolution according to the use - Canon PIXMA MG2120 | User Manual - Page 509
) A file format supported by many digital cameras. It adds information such as the date of image capture, camera model, shutter speed, shooting mode, and comments to JPEG files. The file format version must be Exif 2.2 or later in order to print on a Direct Print compatible printer. TIFF (Standard - Canon PIXMA MG2120 | User Manual - Page 510
File Formats Page 510 of 731 pages Page top - Canon PIXMA MG2120 | User Manual - Page 511
monitor or a printed image with the colors of the original document. Example: When sRGB is selected as the output profile (target) Input Profile (Source) Scanner ScanGear (Scanner Driver) Output Profile (Target) sRGB OS Application Application Printer Driver Monitor Printer ScanGear converts - Canon PIXMA MG2120 | User Manual - Page 512
Other Scanning Methods Home > Scanning > Scanning from a Computer > Other Scanning Methods Other Scanning Methods Scanning with WIA Driver Scanning Using the Control Panel (Windows XP Only) Page 512 of 731 pages Page top - Canon PIXMA MG2120 | User Manual - Page 513
/print the scanned image. WIA is a driver model implemented in Windows XP or later. It allows you to scan documents without using an application. The procedure varies depending on the application. The following procedures are examples only. For details, refer to the application's manual. Scanning - Canon PIXMA MG2120 | User Manual - Page 514
. 5. Click Scan. When scanning is completed, the scanned image appears in the application. Scanning with WIA Driver 1.0 The following is an example of scanning using "Paint." 1. Place the document on the Platen. Placing Documents (When Scanning from a Computer) 2. Click From scanner or camera - Canon PIXMA MG2120 | User Manual - Page 515
Scanning with WIA Driver Page 515 of 731 pages Brightness Move the slider to Specify a value between 50 dpi and 600 dpi. Resolution Picture type Select the type of scan you want for your document. Reset Click to restore the original settings. 5. Click Preview to preview the image. The preview - Canon PIXMA MG2120 | User Manual - Page 516
XP Only) S605 Scanning Using the Control Panel (Windows XP Only) You can scan images via the Control Panel of Windows XP using the WIA driver. 1. From the Start menu, select Control Panel. 2. Click Printers and Other Hardware > Scanners and Cameras, then double-click WIA Canon XXX series (where - Canon PIXMA MG2120 | User Manual - Page 517
Scanning Using the Control Panel (Windows XP Only) Page 517 of 731 pages Move the a value between 50 dpi and 600 dpi. Resolution Picture type Select the type of scan you want for your document. Reset Click to restore the original settings. 6. Click Preview to preview the image. The preview - Canon PIXMA MG2120 | User Manual - Page 518
detect the document type or size automatically. Important When scanning by specifying the document size in MP Navigator EX or ScanGear (scanner driver), align an upper corner of the document with the corner at the arrow (alignment mark) of the Platen. Photos that have been cut to various shapes and - Canon PIXMA MG2120 | User Manual - Page 519
519 of 731 pages Important Large documents (such as A4 size photos) that cannot be placed away from the edges/ arrow (alignment mark) of the Platen may be saved as PDF files. To save in a format other than PDF, scan by specifying the file format. Placing Multiple Documents Allow 0.4 inches (1 cm - Canon PIXMA MG2120 | User Manual - Page 520
Home Troubleshooting Troubleshooting Machine Cannot Be Powered On/Machine Cannot Connect with Computer Cannot Install the Software About Errors Displayed Problems with Scanning Print Results Not Satisfactory/Printing Speed Is Not as Fast as Expected Cannot Print Paper Jams/No Paper/Paper Does - Canon PIXMA MG2120 | User Manual - Page 521
On/Machine Cannot Connect with Computer Page 521 of 731 pages Home > Troubleshooting > Machine Cannot Be Powered On/Machine Cannot Connect with Computer Machine Cannot Be Powered On/Machine Cannot Connect with Computer The Machine Cannot Be Powered On Cannot Connect to Computer Properly Page top - Canon PIXMA MG2120 | User Manual - Page 522
plugged into the power cord connector of the machine, then turn it back on. Check 3: Unplug the machine from the power supply, then plug the machine back in and turn the machine back on after leaving it for at least 2 minutes. If the problem is not resolved, contact the service center. Page top - Canon PIXMA MG2120 | User Manual - Page 523
use a certified Hi-Speed USB cable. We recommend that the cable is no longer than around 10 feet / 3 meters. Does the operating system of your computer support Hi-Speed USB connection? Obtain and install the latest update for your computer. Does the Hi-Speed USB driver operate properly? Obtain the - Canon PIXMA MG2120 | User Manual - Page 524
Cannot Install the Software Home > Troubleshooting > Cannot Install the Software Cannot Install the Software Cannot Install the MP Drivers Cannot Install the Application Program Page 524 of 731 pages Page top - Canon PIXMA MG2120 | User Manual - Page 525
discs are displayed, there is a problem with the Setup CD-ROM. In this case, contact the service center. If you are unable to proceed beyond the Printer Connection screen: If you are unable to proceed beyond the Printer Connection screen, make sure that the USB cable is securely plugged into the - Canon PIXMA MG2120 | User Manual - Page 526
, restart your computer, and then reinstall the MP Drivers. Deleting the Unnecessary MP Drivers If you reinstall the MP Drivers, install the MP Drivers on the Setup CD-ROM. Note If the installer was forced to be terminated due to a Windows error, the system may be in an unstable condition and you - Canon PIXMA MG2120 | User Manual - Page 527
the Application Program Page 527 of 731 pages Home > Troubleshooting > Cannot Install the Software > Cannot Install the Application Program U347 Cannot Install the Application Program Easy-WebPrint EX Does Not Start Up or Easy-WebPrint EX Menu Does Not Appear If Easy-WebPrint EX does not start - Canon PIXMA MG2120 | User Manual - Page 528
About Errors Displayed Home > Troubleshooting > About Errors Displayed About Errors Displayed If an Error Occurs An Error Code Is Displayed on the LED Message Appears on the Computer Screen Page 528 of 731 pages Page top - Canon PIXMA MG2120 | User Manual - Page 529
Page 529 of 731 pages Home > Troubleshooting > About Errors Displayed > If an Error Occurs U302 If an Error Occurs When an error occurs in printing such as the machine is out of paper or paper is jammed, a troubleshooting message is displayed automatically. Take the appropriate action described - Canon PIXMA MG2120 | User Manual - Page 530
up the ink cartridge lock lever to confirm that the FINE cartridges are installed properly. After that, close the paper output cover. If the error is not resolved, remove the FINE cartridges, then install them again. Refer to Replacing a FINE Cartridge for how to install the FINE cartridges. The - Canon PIXMA MG2120 | User Manual - Page 531
correct position. Make sure that each FINE cartridge is installed in the correct position. Replacing a FINE Cartridge (LED display) E, 0, 8 Ink absorber is almost full. Press the machine's Black or Color button to continue printing. Contact the service center. (LED display) E, 1, 2 (LED display - Canon PIXMA MG2120 | User Manual - Page 532
front tray is closed. The ink has run out. Replace the ink cartridge and close the paper output cover. If printing is in progress and you want to continue printing, press the machine's Stop/Reset button for at least 5 seconds with the ink cartridge installed. Then printing can continue under the - Canon PIXMA MG2120 | User Manual - Page 533
the computer with a USB cable. (LED display) E, 4, 0 The protective material for the FINE cartridge or the tape Scanning the print head alignment sheet has failed. Press the Stop/Reset button to dismiss the error, then take the actions described below. Make sure that the print head alignment - Canon PIXMA MG2120 | User Manual - Page 534
follows is displayed on the LED, an error requiring servicing might have occurred. P, 0, 2 Error Code (LED display) P, 1, 0 Action Cancel printing, turn off the machine. Then clear the jammed paper or protective material that is preventing the FINE cartridge holder from moving, and turn on the - Canon PIXMA MG2120 | User Manual - Page 535
Error Messages The Inkjet Printer/Scanner/Fax Extended Survey Program Screen Is Displayed To Canon Solution Menu EX Users Screen Is Displayed Error Number: B200 A printer error has occurred. Turn the printer off and unplug the power cord of the printer from the power supply. Then contact the service - Canon PIXMA MG2120 | User Manual - Page 536
There could also be a problem with the USB cable. Replace the USB cable and try printing again. Check 4: Make sure that the MP Drivers are installed correctly. Uninstall the MP Drivers following the procedure described in Deleting the Unnecessary MP Drivers, insert the Setup CD-ROM into the computer - Canon PIXMA MG2120 | User Manual - Page 537
MP Drivers , and then reinstall it. "Could not print Application name - File name" Try printing again once the current job is complete. The Inkjet Printer/Scanner/Fax Extended Survey Program Screen Is Displayed If the Inkjet Printer/Scanner/Fax Extended Survey Program is installed, a confirmation - Canon PIXMA MG2120 | User Manual - Page 538
the Inkjet Printer/Scanner/Fax Extended Survey Program: To uninstall the Inkjet Printer/Scanner/Fax Extended Survey Program, click Uninstall, then follow the on-screen instructions. Changing the confirmation screen setting: 1. Select items from the Start menu as shown below. In Windows 7 or Windows - Canon PIXMA MG2120 | User Manual - Page 539
in Windows XP), the Inkjet Printer/Scanner/Fax Extended Survey Program is uninstalled. Follow the on-screen instructions. Page 539 of 731 pages To Canon Solution Menu EX Users Screen Is Displayed If Solution Menu EX is installed, you can download the updated version of application software or - Canon PIXMA MG2120 | User Manual - Page 540
Problems with Scanning Home > Troubleshooting > Problems with Scanning Problems with Scanning Problems with Scanning Scan Results Not Satisfactory Software Problems Page 540 of 731 pages Page top - Canon PIXMA MG2120 | User Manual - Page 541
> Troubleshooting > Problems with Scanning > Problems with Scanning Problems with Scanning Scanner Does Not Work ScanGear (Scanner Driver) Does Not Start Error Message Appears and the ScanGear (Scanner Driver) Screen Does Not Appear Cannot Scan Multiple Documents at One Time Cannot Scan Properly - Canon PIXMA MG2120 | User Manual - Page 542
Does Not Work Page 542 of 731 pages Home > Troubleshooting > Problems with Scanning > Problems with Scanning > Scanner Does Not Work S902 Scanner Does Not Work Check 1: Make sure that the machine is turned on. Check 2: Connect the USB cable to a different USB port on the computer. Check 3: If the - Canon PIXMA MG2120 | User Manual - Page 543
543 of 731 pages Home > Troubleshooting > Problems with Scanning > Problems with Scanning > ScanGear (Scanner Driver) Does Not Start S903 ScanGear (Scanner Driver) Does Not Start Check 1: Make sure that the MP Drivers is installed. If it is not installed, insert the Setup CD-ROM into the computer - Canon PIXMA MG2120 | User Manual - Page 544
Does Not Appear S904 Error Message Appears and the ScanGear (Scanner Driver) Screen Does Not Appear Check 1: Make sure that the machine is turned on. Check 2: Turn off the machine, then reconnect the USB cable and replug the power cord. Check 3: Connect the USB cable to a different USB port on the - Canon PIXMA MG2120 | User Manual - Page 545
Cannot Scan Multiple Documents at One Time Page 545 of 731 pages Home > Troubleshooting > Problems with Scanning > Problems with Scanning > Cannot Scan Multiple Documents at One Time S907 Cannot Scan Multiple Documents at One Time Check 1: Make sure that the documents are placed correctly on the - Canon PIXMA MG2120 | User Manual - Page 546
731 pages Home > Troubleshooting > Problems with Scanning > Problems with Scanning > Cannot Scan Properly in Auto Scan Mode S916 Cannot Scan Properly in Auto Scan Mode Check 1: Make sure that the documents are placed correctly on the Platen. Placing Documents (When Scanning from a Computer) Check - Canon PIXMA MG2120 | User Manual - Page 547
Speed Page 547 of 731 pages Home > Troubleshooting > Problems with Scanning > Problems with Scanning > Slow Scanning Speed S908 Slow Scanning Speed Check 1: To view the image on a monitor, set the output resolution to around 150 dpi. To print, set it to around 300 dpi. Resolution Check 2: Set - Canon PIXMA MG2120 | User Manual - Page 548
"There is not enough memory." Message Is Displayed Page 548 of 731 pages Home > Troubleshooting > Problems with Scanning > Problems with Scanning > "There is not enough memory." Message Is Displayed S909 "There is not enough memory." Message Is Displayed Check 1: Exit other applications and try - Canon PIXMA MG2120 | User Manual - Page 549
computer, reduce the output resolution in ScanGear (scanner driver) and scan again. Output Settings Check 2: Delete unnecessary files to obtain sufficient free hard disk space, then scan again. Error message may appear if there is not enough hard disk space to scan and save, when the image size is - Canon PIXMA MG2120 | User Manual - Page 550
Page 550 of 731 pages Home > Troubleshooting > Problems with Scanning > Problems with Scanning > Scanner Does Not Work After Upgrading Windows S911 Scanner Does Not Work After Upgrading Windows Check: Disconnect the USB cable, then uninstall and reinstall the MP Drivers and MP Navigator EX. Step - Canon PIXMA MG2120 | User Manual - Page 551
Image Does Not Open Page 551 of 731 pages Home > Troubleshooting > Problems with Scanning > Problems with Scanning > Scanned Image Does Not Open S934 Scanned Image Does Not Open Check: If the file format is not supported by the application, scan the image again and save it in a popular file - Canon PIXMA MG2120 | User Manual - Page 552
Satisfactory Page 552 of 731 pages Home > Troubleshooting > Problems with Scanning > Scan Results Not Satisfactory Scan Results Not Satisfactory Scan Quality (Image Displayed on the Monitor) Is Poor Scanned Image Is Surrounded by Extra White Areas Cannot Scan at the Correct Size Position or Size - Canon PIXMA MG2120 | User Manual - Page 553
Mode tab of ScanGear (scanner driver), select Magazine (Color) in Select Source. Basic Mode Tab On the Advanced Mode tab of ScanGear, set Descreen in Image Settings to ON. Image Settings Note If moire appears when you scan a digital print photo, take the above measures and scan again. If you use - Canon PIXMA MG2120 | User Manual - Page 554
Scan Quality (Image Displayed on the Monitor) Is Poor Page 554 of 731 pages Image Settings On the Color Settings tab in the Preferences dialog box of ScanGear, set Color Matching. Color Settings Tab Page top - Canon PIXMA MG2120 | User Manual - Page 555
) in whole image view of ScanGear (scanner driver) to automatically display the cropping frame (scan area) according to the document size. You can also manually specify the scan area in thumbnail view or when there are white margins along the document (for example, in photos), or when you want to - Canon PIXMA MG2120 | User Manual - Page 556
556 of 731 pages Home > Troubleshooting > Problems with Scanning > Scan Results Not Satisfactory > Cannot Scan at the Correct Size S941 Cannot Scan at the Correct Size Check 1: Make sure that the documents are placed correctly on the Platen. Placing Documents (When Scanning from a Computer) Check - Canon PIXMA MG2120 | User Manual - Page 557
Size of the Image Cannot be Detected Correctly When Scanning Usi... Page 557 of 731 pages Home > Troubleshooting > Problems with Scanning > Scan Results Not Satisfactory > Position or Size of the Image Cannot be Detected Correctly When Scanning Using the Operation Panel of the Machine S942 Position - Canon PIXMA MG2120 | User Manual - Page 558
Image Is Slanted Page 558 of 731 pages Home > Troubleshooting > Problems with Scanning > Scan Results Not Satisfactory > Document Is Placed Correctly, but the Scanned Image Is Slanted S943 Document Is Placed Correctly, but the Scanned Image Is Slanted Check: In MP Navigator EX, deselect the - Canon PIXMA MG2120 | User Manual - Page 559
Document Is Placed Correctly, but the Orientation Changes in the Scanned Im... Page 559 of 731 pages Home > Troubleshooting > Problems with Scanning > Scan Results Not Satisfactory > Document Is Placed Correctly, but the Orientation Changes in the Scanned Image S944 Document Is Placed Correctly, but - Canon PIXMA MG2120 | User Manual - Page 560
to the application's manual. If you have any questions, contact the manufacturer of the application. Note You cannot reduce the image size in Paint. To reduce the display size, open the images in an application. Check 2: Change the resolution setting in ScanGear (scanner driver) and scan again. The - Canon PIXMA MG2120 | User Manual - Page 561
Navigator EX Is Too Light Page 561 of 731 pages Home > Troubleshooting > Problems with Scanning > Scan Results Not Satisfactory > Text in a Text Document Scanned with MP Navigator EX Is Too Light S975 Text in a Text Document Scanned with MP Navigator EX Is Too Light Check: Adjust the brightness - Canon PIXMA MG2120 | User Manual - Page 562
Document Scanned with MP Navigator EX Is Too Light Page 562 of 731 pages 4. If show-through remains, use Show-through Removal to reduce it. 5. Click (Compare) to compare the images before and after the correction. Adjust the correction level while checking the result in the Compare Images window - Canon PIXMA MG2120 | User Manual - Page 563
Text in a Text Document Scanned with MP Navigator EX Is Too Light Page 563 of 731 pages In some images, colors such as the text color and background color (base - Canon PIXMA MG2120 | User Manual - Page 564
Software Problems Page 564 of 731 pages Home > Troubleshooting > Problems with Scanning > Software Problems Software Problems Scanned Image Is Printed Enlarged (Reduced) E-mail Software Program You Want to Use Does Not Appear in the Screen for Selecting an E-mail Software Program Page top - Canon PIXMA MG2120 | User Manual - Page 565
Scanned Image Is Printed Enlarged (Reduced) Page 565 of 731 pages Home > Troubleshooting > Problems with Scanning > Software Problems > Scanned Image Is Printed Enlarged (Reduced) S932 Scanned Image Is Printed Enlarged (Reduced) Check: Set the printing size in the application. Page top - Canon PIXMA MG2120 | User Manual - Page 566
in the Screen for ... Page 566 of 731 pages Home > Troubleshooting > Problems with Scanning > Software Problems > E-mail Software Program You Want to Use Does Not Appear in the Screen for Selecting an E-mail Software Program S931 E-mail Software Program You Want to Use Does Not Appear in the Screen - Canon PIXMA MG2120 | User Manual - Page 567
Not as Fast as Expected Page 567 of 731 pages Home > Troubleshooting > Print Results Not Satisfactory/Printing Speed Is Not as Fast as Expected Print Results Not Satisfactory/Printing Speed Is Not as Fast as Expected Print Results Not Satisfactory Printing Speed Is Not as Fast as Expected Page top - Canon PIXMA MG2120 | User Manual - Page 568
. If you notice blurs or uneven colors, increase the print quality setting and try printing again. You can confirm the print quality setting using the printer driver. Changing the Print Quality and Correcting Image Data Check 3: If the problem is not resolved, there may be other causes. See also - Canon PIXMA MG2120 | User Manual - Page 569
the size of the print data extremely large? Click Print Options on the Page Setup sheet on the printer driver. Then, set Prevention of Print Data Loss in the displayed dialog to On. Check 2: Is the space of your computer's hard disk sufficient? Delete unnecessary files to free disk space. Page top - Canon PIXMA MG2120 | User Manual - Page 570
Page 570 of 731 pages Home > Troubleshooting > Print Results Not Satisfactory/Printing Speed Is Not as Fast as Expected > Print Results Not Satisfactory > No Printing Results/Printing Is Blurred/Colors Are Wrong/White Streaks U313 No Printing Results/Printing Is Blurred/Colors Are Wrong/White - Canon PIXMA MG2120 | User Manual - Page 571
after 24 hours. If the problem is not resolved after performing the Print Head Deep Cleaning twice: Ink may have run out. Replace the FINE cartridge. Check 3: When a FINE cartridge runs out of ink, replace it with a new one. Check 4: When using paper with one printable surface, make sure that - Canon PIXMA MG2120 | User Manual - Page 572
No Printing Results/Printing Is Blurred/Colors Are Wrong/White Streaks Page 572 of 731 pages After confirming that the FINE cartridge is installed properly, close the paper output cover. If the problem is not resolved, remove the FINE cartridges, then install them again. Refer to Replacing a FINE - Canon PIXMA MG2120 | User Manual - Page 573
of ink, replace it with a new one. Check 3: Enable color correction. When printing photographs or other graphics, enabling color correction in the printer driver may improve color. Select Vivid Photo in the Effects sheet in the printer driver setup window. Check 4: Is the FINE cartridge installed - Canon PIXMA MG2120 | User Manual - Page 574
Head Alignment. If printed lines are misaligned or print results are otherwise unsatisfactory, adjust the print head position. Aligning the Print Head Note If the problem is not resolved after performing the Print Head Alignment, perform Print Head Alignment manually referring to Aligning the Print - Canon PIXMA MG2120 | User Manual - Page 575
printer driver. Then, set Prevention of Print Data Loss in the displayed dialog to On. Check 2: Is the Page Layout Printing performed or the Binding margin function used? When the Page Layout Printing or Binding margin function is being used, thin lines may not be printed. Follow the instructions - Canon PIXMA MG2120 | User Manual - Page 576
in the printer driver and try printing again. If you are using plain paper to print images with high intensity, the paper may absorb too much ink and become wavy, causing paper abrasion. You can confirm the intensity using the printer driver. Adjusting Intensity Check 3: Is Photo Paper used for - Canon PIXMA MG2120 | User Manual - Page 577
are using is not suitable for Borderless Printing, the print quality may be reduced at the top and bottom edges of the paper. Printing Area Check 3: Load the paper after correcting its curl. When using Photo Paper Plus Semi-gloss, even if the sheet is curled, load one sheet at a time as it is. If - Canon PIXMA MG2120 | User Manual - Page 578
the printer driver setup window, see How to Open the Printer Driver Setup Window . Check 5: If the intensity is set high, reduce the intensity setting in the printer driver and try printing again. If you are using plain paper to print images with high intensity, the paper may absorb too much ink and - Canon PIXMA MG2120 | User Manual - Page 579
in the printer driver and try printing again. 1. Open the printer driver setup window. How to Open the Printer Driver Setup Window Click Here: Printer Driver * Before clicking here to open the printer driver setup window, quit the running application software. 2. On the Main sheet, select Manual for - Canon PIXMA MG2120 | User Manual - Page 580
Paper Is Smudged/Printed Surface Is Scratched Page 580 of 731 pages 5. Confirm the message and click OK. Check 11: Is the paper scratched by other loaded paper? Depending on the media type, the paper may be scratched by other loaded paper when feeding from the front tray. In this case, load one - Canon PIXMA MG2120 | User Manual - Page 581
pages Home > Troubleshooting > Print Results Not Satisfactory/Printing Speed Is Not as Fast as Expected > Print Results Not Satisfactory > Back of the Paper Is Smudged U318 Back of the Paper Is Smudged Check 1: Did you confirm the paper and print quality settings? Print Results Not Satisfactory - Canon PIXMA MG2120 | User Manual - Page 582
on the image data or the print setting. This machine performs automatic cleaning when necessary to keep printouts clean. A small amount of ink is ejected for cleaning. Although ink is usually ejected on the ink absorber, it may be ejected on the paper if you load paper larger than that you have - Canon PIXMA MG2120 | User Manual - Page 583
. If the problem is not resolved after performing the Print Head Deep Cleaning, turn off the machine and perform another Print Head Deep Cleaning after 24 hours. If the problem is not resolved after performing the Print Head Deep Cleaning twice: Ink may have run out. Replace the FINE cartridge. - Canon PIXMA MG2120 | User Manual - Page 584
Uneven or Streaked Page 584 of 731 pages Check 3: Perform Print Head Alignment. Aligning the Print Head Note If the problem is not resolved after performing the Print Head Alignment, perform Print Head Alignment manually referring to Aligning the Print Head Position from Your Computer . Page top - Canon PIXMA MG2120 | User Manual - Page 585
in the printer driver. Setting to prioritize speed makes printing faster. 1. Open the printer driver setup window. How to Open the Printer Driver Setup Window Click Here: Printer Driver * Before clicking here to open the printer driver setup window, quit the running application software. 2. On the - Canon PIXMA MG2120 | User Manual - Page 586
Cannot Print Home > Troubleshooting > Cannot Print Cannot Print Printing Does Not Start Copying/Printing Stops Before It Is Completed Machine Moves But Ink Is Not Ejected Page 586 of 731 pages Page top - Canon PIXMA MG2120 | User Manual - Page 587
directly to the computer, and try printing again. If printing starts normally, there is a problem with the relay device. Consult the reseller of the relay device for details. There could also be a problem with the USB cable. Replace the USB cable and try printing again. Check 3: Make sure that the - Canon PIXMA MG2120 | User Manual - Page 588
: Reinstall the MP Drivers. Printing does not start even though the machine is connected to the computer using a USB cable and the port named "USBnnn" is selected: Launch Canon My Printer from the task tray, select Diagnose and Repair Printer. Follow the on-screen instructions to set the correct - Canon PIXMA MG2120 | User Manual - Page 589
. Never touch the print head or nearby components. Check 2: Is the paper loaded? Make sure that paper is loaded. If the machine has run out of paper, load paper. Check 3: Do the printing documents have lots of photographs or illustrations? As printing large data such as photos or graphics takes time - Canon PIXMA MG2120 | User Manual - Page 590
Cleaning after 24 hours. If the problem is not resolved after performing the Print Head Deep Cleaning twice: Ink may have run out. Replace the FINE cartridge. Check 2: When a FINE cartridge runs out of ink, replace it with a new one. Check 3: Is the FINE cartridge installed properly? If the FINE - Canon PIXMA MG2120 | User Manual - Page 591
Paper Jams/No Paper/Paper Does Not Feed Properly Page 591 of 731 pages Home > Troubleshooting > Paper Jams/No Paper/Paper Does Not Feed Properly Paper Jams/No Paper/Paper Does Not Feed Properly Paper Jams Paper Does Not Feed Properly/"No Paper" Error Occurs Page top - Canon PIXMA MG2120 | User Manual - Page 592
Home > Troubleshooting > Paper Jams/No Paper/Paper Does Not Feed Properly > Paper Jams U328 Paper Jams Note If you need to turn off the machine to remove jammed paper during printing, press the Stop/Reset button to cancel print jobs before turning off the machine. If the paper is jammed, remove it - Canon PIXMA MG2120 | User Manual - Page 593
other than A5 sized one to print documents with photos or graphics; otherwise, the printout may curl and cause paper exit jams. If you cannot remove the paper or the paper tears inside the machine, or if the paper jam error continues after removing the paper, contact the service center. Page top - Canon PIXMA MG2120 | User Manual - Page 594
or from the transport unit, or the jammed paper remains inside the machine, remove the paper following the procedure below. 1. Turn off the machine, and unplug the power cord of the machine from the power supply. 2. Open the paper output cover. Remove the paper on the front tray if any. Important - Canon PIXMA MG2120 | User Manual - Page 595
the queue are canceled. Reprint if necessary. Note If the message about paper jam is displayed on the computer screen or an error code is displayed on the LED when you resume printing after removing all the jammed paper, a piece of paper may remain inside the machine. In this case, confirm that no - Canon PIXMA MG2120 | User Manual - Page 596
Paper Is Jammed inside the Machine Page 596 of 731 pages If you cannot remove the paper or the paper tears inside the machine, or if the paper jam error continues after removing the paper, contact the service center. Page top - Canon PIXMA MG2120 | User Manual - Page 597
you can see the jammed paper at the front tray, or you cannot see the paper either at the paper output slot or at the front tray, remove the paper from the transport unit. Remove the paper following the procedure below. 1. Turn the machine off, then unplug the power cord. 2. Stand the machine with - Canon PIXMA MG2120 | User Manual - Page 598
machine back in and turn the machine back on. 7. Reload the paper. All print jobs in the queue are canceled. Reprint if necessary. If you cannot remove the paper or the paper tears inside the machine, or if the paper jam error continues after removing the paper, contact the service center. Page top - Canon PIXMA MG2120 | User Manual - Page 599
In Other Cases Page 599 of 731 pages Home > Troubleshooting > Paper Jams/No Paper/Paper Does Not Feed Properly > Paper Jams > In Other Cases U353 In Other Cases Make sure of the following: Check 1: Are there any foreign objects around the paper output slot? Check 2: Are there any foreign objects - Canon PIXMA MG2120 | User Manual - Page 600
Page 600 of 731 pages Home > Troubleshooting > Paper Jams/No Paper/Paper Does Not Feed Properly > Paper Does Not Feed Properly/"No Paper" Error Occurs U326 Paper Does Not Feed Properly/"No Paper" Error Occurs Check 1: Make sure that paper is loaded. Loading Paper Check 2: Make sure of the following - Canon PIXMA MG2120 | User Manual - Page 601
using your computer Open the printer driver setup window, and in Custom Settings in the Maintenance sheet, select the Prevent paper double-feed check box, and then click OK. To open the printer driver setup window, see How to Open the Printer Driver Setup Window . Note Printing speed will be reduced - Canon PIXMA MG2120 | User Manual - Page 602
Other Problems Home > Troubleshooting > Other Problems Other Problems LED Cannot Be Seen At All The Machine Cannot Work Well with Application Software Cannot Use the Contents on CREATIVE PARK PREMIUM When the Protective Material or the Tape Remains Attached Page 602 of 731 pages Page top - Canon PIXMA MG2120 | User Manual - Page 603
All Page 603 of 731 pages Home > Troubleshooting > Other Problems > LED Cannot Be Seen At All U343 LED Cannot Be Seen At All If all the Paper lamp is off: The machine is not powered on. Connect the power cord and press the ON button. If one of the Paper lamp is lit: The LED may be in - Canon PIXMA MG2120 | User Manual - Page 604
Page 604 of 731 pages Home > Troubleshooting > Other Problems > The Machine Cannot Work Well with Application Software U333 The Machine Cannot Work Well with Application Software Printer Status Monitor Is Not Displayed Check: Is the printer status monitor enabled? Make sure that Enable Status - Canon PIXMA MG2120 | User Manual - Page 605
Work Well with Application Software Page 605 of 731 pages Cameras. 3. Select "WIA Canon XXX series" (where "XXX" is your machine's name), then click the Properties button. If the User Account Control screen appears, click Continue. 4. Click the Events tab on the "WIA Canon XXX series Properties - Canon PIXMA MG2120 | User Manual - Page 606
7: Is bidirectional support of the printer driver enabled? If bidirectional support of the printer driver is not enabled, an error message is displayed on the computer screen. Follow the instructions on the computer screen, make sure that bidirectional support of the printer driver is enabled, then - Canon PIXMA MG2120 | User Manual - Page 607
of the printer driver enabled? If bidirectional support of the printer driver is not enabled, an error message is displayed on the computer screen. Follow the instructions on the computer screen, make sure that bidirectional support of the printer driver is enabled, then print the contents on - Canon PIXMA MG2120 | User Manual - Page 608
Attached Page 608 of 731 pages Home > Troubleshooting > Other Problems > When the Protective Material or the Tape cartridge holder. If you find the protective material or the tape remains attached, remove it, then close the paper output cover. If the problem is not resolved, contact the service - Canon PIXMA MG2120 | User Manual - Page 609
Streaks Machine Moves But Ink Is Not Ejected Cannot Install the MP Drivers Printing Does Not Start Copying/Printing Stops Before It Is Completed Writing Error/Output Error/Communication Error Print Results Not Satisfactory Paper Jams Paper Does Not Feed Properly/"No Paper" Error Occurs Page 609 of - Canon PIXMA MG2120 | User Manual - Page 610
If You Cannot Resolve the Problem Home > Troubleshooting > If You Cannot Resolve the Problem If You Cannot Resolve the Problem If You Cannot Resolve the Problem Page 610 of 731 pages Page top - Canon PIXMA MG2120 | User Manual - Page 611
contact the seller of the machine or the service center. Canon support staff are trained to be able to provide technical support to satisfy customers. Caution If the machine emits any unusual sound, smoke, or odor, turn it off immediately. Unplug the power cord from the outlet and contact the seller - Canon PIXMA MG2120 | User Manual - Page 612
Overview of the Machine Home Overview of the Machine Overview of the Machine Main Components and Basic Operations Loading Paper / Originals Maintenance Changing the Machine Settings Tips on How to Use Your Machine Legal Limitations on Use of Your Product and Use of Images Page 612 of 731 - Canon PIXMA MG2120 | User Manual - Page 613
Main Components and Basic Operations Home > Overview of the Machine > Main Components and Basic Operations Main Components and Basic Operations Main Components LED Display and Basic Operations Page 613 of 731 pages Page top - Canon PIXMA MG2120 | User Manual - Page 614
Main Components Page 614 of 731 pages Home > Overview of the Machine > Main Components and Basic Operations > Main Components Main Components Front View Rear View Inside View Operation Panel Page top - Canon PIXMA MG2120 | User Manual - Page 615
paper output support Extend to support ejected paper. (2) paper output tray Printed paper is ejected. (3) paper output cover Open to replace the FINE cartridge or remove jammed paper inside the machine. (4) document cover Open to load an original on the platen glass. (5) paper guides Slide to align - Canon PIXMA MG2120 | User Manual - Page 616
LED (Light Emitting Diode) display and lamps on the operation panel other than the Paper lamp will go out if the machine is not operated for about 5 minutes. To restore them, press any button except the ON button or perform the print operation. (11) platen glass Load an original to copy or - Canon PIXMA MG2120 | User Manual - Page 617
> Rear View C002 Rear View (12) transport unit Open to remove jammed paper. Paper Is Jammed inside the Machine at the Transport Unit (13) power cord connector Plug in the supplied power cord. (14) USB port Plug in the USB cable to connect the machine with a computer. Important Do not touch the - Canon PIXMA MG2120 | User Manual - Page 618
Inside View (15) ink cartridge lock lever Locks the FINE cartridge into place. (16) FINE cartridge (ink cartridges) A replaceable cartridge that integrates print head and ink tank. (17) FINE cartridge holder Install the FINE cartridge. The color FINE cartridge should be installed into the left slot - Canon PIXMA MG2120 | User Manual - Page 619
Inside View Page 619 of 731 pages Page top - Canon PIXMA MG2120 | User Manual - Page 620
on how to change the auto power off setting, see below. From the machine Turning off the Machine Automatically From the computer Managing the Machine Power (2) LED (Light Emitting Diode) Displays the number of copies, Maintenance code, or operational status such as an error code. (3) [+] button - Canon PIXMA MG2120 | User Manual - Page 621
lamp Lights to indicate the page size and media type selected with the Paper button. (14) Alarm lamp Lights or flashes orange when an error occurs, such as paper-out or ink-out. * In the software applications or manuals, the Color and Black buttons are collectively called the "Start" or "OK" button - Canon PIXMA MG2120 | User Manual - Page 622
the paper output cover is open P and numbers are displayed in order. An error that requires contacting the service center may have occurred. For details, see "Alarm Lamp Flashes Orange" in An Error Code Is Displayed on the LED. The FINE cartridge holder is being moved to the replacement position - Canon PIXMA MG2120 | User Manual - Page 623
head alignment sheet. Scans the print head alignment sheet to align the print head automatically. Prints the current head position adjustment values. Cleans the paper feed roller. Aligning the Print Head Aligning the Print Head Aligning the Print Head Cleaning the Paper Feed Roller Error Codes - Canon PIXMA MG2120 | User Manual - Page 624
"E, 1, 6" Page 624 of 731 pages (displayed in order) Note For details on the error codes, see An Error Code Is Displayed on the LED . If an error code with P is displayed, an error that requires contacting the service center may have occurred. For details, see "Alarm Lamp Flashes Orange" in An - Canon PIXMA MG2120 | User Manual - Page 625
Loading Paper / Originals Home > Overview of the Machine > Loading Paper / Originals Loading Paper / Originals Loading Paper Loading Originals Page 625 of 731 pages Page top - Canon PIXMA MG2120 | User Manual - Page 626
Loading Paper Home > Overview of the Machine > Loading Paper / Originals > Loading Paper Loading Paper Loading Plain Paper / Photo Paper Loading Envelopes Media Types You Can Use Media Types You Cannot Use Printing Area Page 626 of 731 pages Page top - Canon PIXMA MG2120 | User Manual - Page 627
cm), 4" x 8" (101.6 x 203.2 mm), or 5" x 7" (13 x 18 cm) to perform trial print, it can cause paper jams. Note Advice for printing on plain paper We recommend Canon genuine photo paper for printing photos. For details on the Canon genuine paper, see Media Types You Can Use . You can use general copy - Canon PIXMA MG2120 | User Manual - Page 628
paper guide (A) to align the paper guides with both sides of the paper stack. Do not slide the paper guides too hard against the paper. The paper may not be fed properly. Important Always load paper in the portrait orientation (B). Loading paper in the landscape orientation (C) can cause paper jams - Canon PIXMA MG2120 | User Manual - Page 629
, and extend the paper output support. Important Be sure to open the paper output tray when printing. If not open, the machine cannot start printing. Note After loading paper Select the size and type of the loaded paper on the print settings screen of the operation panel or printer driver. Page top - Canon PIXMA MG2120 | User Manual - Page 630
printed according to the envelope's direction by specifying with the printer driver properly. Important You can only print on envelopes with the computer. Do not use the following envelopes. They could jam envelopes may jam in the machine if they are not flat or the edges are not aligned. Make sure - Canon PIXMA MG2120 | User Manual - Page 631
Push the envelopes all the way to the back of the front tray. Up to 5 envelopes can be loaded at once. (4) Slide the right paper guide (A) to align the paper guides with both sides of the envelopes. Do not slide the paper guides too hard against the envelopes. The envelopes may not be fed properly. - Canon PIXMA MG2120 | User Manual - Page 632
until the top of the stack touches the paper guides. (5) Open the output tray extension. 3. Open the paper output tray. (1) Open the paper output tray gently, and extend the paper output support. Important Be sure to open the paper output tray when printing. If not open, the machine cannot start - Canon PIXMA MG2120 | User Manual - Page 633
Loading Envelopes Page 633 of 731 pages Page top - Canon PIXMA MG2120 | User Manual - Page 634
the use of Canon genuine paper for printing your important photos. Media Types Commercially available papers Plain Paper (including recycled paper)*1*2 Envelopes Canon genuine papers The Model Number of Canon genuine paper is shown in brackets. Refer to the instruction manual supplied with the - Canon PIXMA MG2120 | User Manual - Page 635
) Do not use heavier or lighter paper (except for Canon genuine paper), as it could jam in the machine. Notes on Storing Paper Take out only the necessary number of paper from the package, just before printing. To avoid curling, when you do not print, put unused paper back into the package and keep - Canon PIXMA MG2120 | User Manual - Page 636
sheets *2 Canon Genuine Papers Note We recommend that you remove the previously printed sheet from the paper output tray before continuously printing to avoid blurs and discoloration (except for High Resolution Paper ). Paper for printing photos: Name of Paper Photo Paper Pro - Canon PIXMA MG2120 | User Manual - Page 637
Paper Load Limit Page 637 of 731 pages *3 When loading paper in stacks, the print side may become marked as it is fed or paper may not feed properly. In this case, load one sheet at a time. Page top - Canon PIXMA MG2120 | User Manual - Page 638
more than 28 lb (105 g /m2), except for Canon genuine paper) Paper thinner than a postcard, including plain paper or notepad paper cut to a small size (when printing on paper smaller than A5) Picture postcards Postcards affixed with photos or stickers Envelopes with a double flap (or sticker flaps - Canon PIXMA MG2120 | User Manual - Page 639
Printing Area Page 639 of 731 pages Home > Overview of the Machine > Loading Paper / Originals > Loading Paper > Printing Area Printing Area Printing Area Other Sizes than Letter, Legal, Envelopes Letter, Legal Envelopes Page top - Canon PIXMA MG2120 | User Manual - Page 640
Printing, use the following paper: - Photo Paper Pro Platinum * - Glossy Photo Paper "Everyday Use" - Photo Paper Glossy - Photo Paper Plus Glossy II - Photo Paper Plus Semi-gloss - Matte Photo Paper * * This paper can be used only when printing - Canon PIXMA MG2120 | User Manual - Page 641
Other Sizes than Letter, Legal, Envelopes Page 641 of 731 pages Home > Overview of the Machine > Loading Paper / Originals > Loading Paper > Printing Area > Other Sizes than Letter, Legal, Envelopes C052 Other Sizes than Letter, Legal, Envelopes Size A5* Printable Area (width x height) 5.56 x - Canon PIXMA MG2120 | User Manual - Page 642
Letter, Legal Page 642 of 731 pages Home > Overview of the Machine > Loading Paper / Originals > Loading Paper > Printing Area > Letter, Legal C053 Letter, Legal Size Printable Area (width x height) Letter 8.00 x 10.69 inches (203.2 x 271.4 mm) Legal* 8.00 x 13.69 inches (203.2 x - Canon PIXMA MG2120 | User Manual - Page 643
Envelopes Page 643 of 731 pages Home > Overview of the Machine > Loading Paper / Originals > Loading Paper > Printing Area > Envelopes C055 Envelopes Size European DL* Recommended Printing Area (width x height) 3.88 x 7.06 inches (98.8 x 179.5 mm) US Comm. Env. #10* 3.68 x 7.90 inches (93.5 - Canon PIXMA MG2120 | User Manual - Page 644
Loading Originals Home > Overview of the Machine > Loading Paper / Originals > Loading Originals Loading Originals Loading Originals on the Platen Glass Originals You Can Load How to Detach / Attach the Document Cover Page 644 of 731 pages Page top - Canon PIXMA MG2120 | User Manual - Page 645
original WITH THE SIDE TO SCAN FACING DOWN on the platen glass. Align the corner of the original with the alignment mark . Important Be sure to observe the above may cause the scanner to malfunction or the platen glass to break. The machine cannot scan the shaded area (A) (0.04 inches (1 mm - Canon PIXMA MG2120 | User Manual - Page 646
Loading Originals on the Platen Glass Page 646 of 731 pages 2. Close the document cover gently. Important After loading the original on the platen glass, be sure to close the document cover before starting to copy or scan. Page top - Canon PIXMA MG2120 | User Manual - Page 647
the Machine > Loading Paper / Originals > Loading Originals > Originals You Can Load C072 Originals You Can Load You can copy or scan the following originals. Types of originals: Text document, magazine, or newspaper Printed photo, postcard, business card, or disc (BD/DVD/CD, etc.) Size (width - Canon PIXMA MG2120 | User Manual - Page 648
How to Detach / Attach the Document Cover Page 648 of 731 pages Home > Overview of the Machine > Loading Paper / Originals > Loading Originals > How to Detach / Attach the Document Cover C073 How to Detach / Attach the Document Cover Detaching the document cover: Hold up the - Canon PIXMA MG2120 | User Manual - Page 649
Maintenance Home > Overview of the Machine > Maintenance Maintenance Replacing a FINE Cartridge When Printing Becomes Faint or Colors Are Incorrect Performing Maintenance from a Computer Cleaning the Machine Page 649 of 731 pages Page top - Canon PIXMA MG2120 | User Manual - Page 650
Replacing a FINE Cartridge Home > Overview of the Machine > Maintenance > Replacing a FINE Cartridge Replacing a FINE Cartridge Replacing a FINE Cartridge Checking the Ink Status Page 650 of 731 pages Page top - Canon PIXMA MG2120 | User Manual - Page 651
of the print head, which may be necessary to maintain the performance of the machine. When ink runs out, replace the FINE cartridge immediately with a new one. Ink Is Used for Various Purposes 1. Make sure that the power is turned on, open the front cover (C), then open the paper output tray - Canon PIXMA MG2120 | User Manual - Page 652
move it forcibly. Do not touch the FINE cartridge holder until it stops completely. Important The head cover will open automatically after you open the paper output cover. If you have closed the head cover while replacing a FINE cartridge, close the paper output cover, then open it again. Trying to - Canon PIXMA MG2120 | User Manual - Page 653
Replacing a FINE Cartridge Page 653 of 731 pages (2) Remove the FINE cartridge. Important Handle the FINE cartridge carefully to avoid staining of clothing or the surrounding area. Discard the empty FINE cartridge according to the local laws and regulations regarding disposal of consumables. 4. - Canon PIXMA MG2120 | User Manual - Page 654
of consumables. Do not touch the electrical contacts or print head nozzle on a FINE cartridge. The machine may not print properly if you touch them. 5. Install the FINE cartridge. (1) Insert the new FINE cartridge straight into the FINE cartridge holder all the way until it touches the back - Canon PIXMA MG2120 | User Manual - Page 655
FINE cartridge are installed. Be sure to install both cartridges. 6. Close the paper output cover (H). Note If the Alarm lamp lights or flashes orange after the paper output cover is closed, take appropriate action. An Error Code Is Displayed on the LED When you start printing after replacing the - Canon PIXMA MG2120 | User Manual - Page 656
656 of 731 pages Home > Overview of the Machine > Maintenance > Replacing a FINE Cartridge > Checking the Ink Status Checking the Ink Status Checking the Ink Status with the Ink Lamps on the Operation Panel You can also check the ink status on the computer screen. Canon IJ Status Monitor Page top - Canon PIXMA MG2120 | User Manual - Page 657
, and then starts to detect a remaining ink level. If you install a used FINE cartridge, the indicated ink level of it may not be correct. In such case, refer to the ink level information only as a guide. When remaining ink cautions or errors occur, the error code will be displayed on the LED (Light - Canon PIXMA MG2120 | User Manual - Page 658
> Maintenance > When Printing Becomes Faint or Colors Are Incorrect When Printing Becomes Faint or Colors Are Incorrect Maintenance Procedure Printing the Nozzle Check Pattern Examining the Nozzle Check Pattern Cleaning the Print Head Cleaning the Print Head Deeply Aligning the Print Head Page top - Canon PIXMA MG2120 | User Manual - Page 659
if the FINE cartridge is installed correctly. Also check if the protective tape on the bottom of the FINE cartridge is removed. Replacing Procedure If the Alarm lamp lights or flashes orange, see An Error Code Is Displayed on the LED . Increasing the print quality in the printer driver settings may - Canon PIXMA MG2120 | User Manual - Page 660
the power and clean the print head deeply again after 24 hours. If the problem is still not resolved: Step 4 Replace a FINE cartridge. Replacing a FINE Cartridge Page 660 of 731 pages Note If the problem is still not resolved after replacing the FINE cartridge, contact the service center. When - Canon PIXMA MG2120 | User Manual - Page 661
from the print head nozzle. Note If the remaining ink level is low, the nozzle check pattern will not be printed correctly. Replace the FINE cartridge whose ink is low. Replacing a FINE Cartridge You need to prepare: a sheet of A4 or Letter-sized plain paper 1. Make sure that the power is turned - Canon PIXMA MG2120 | User Manual - Page 662
or Colors Are Incorrect > Examining the Nozzle Check Pattern C099 Examining the Nozzle Check Pattern Examine the nozzle check pattern, and clean the print head if necessary. 1. Check if there are missing lines in the pattern (1) or horizontal white streaks in the pattern (2). If there are missing - Canon PIXMA MG2120 | User Manual - Page 663
check pattern. Cleaning unclogs the nozzles and restores the print head condition. Cleaning the print head consumes ink, so clean the print head only when necessary. 1. Make sure that the power is turned on. 2. Clean the print head. (1) Press the (Maintenance) button repeatedly until H is displayed - Canon PIXMA MG2120 | User Manual - Page 664
resolved, turn off the power and clean the print head deeply again after 24 hours. If the problem is still not resolved, replace the FINE cartridge with a new one. Replacing a FINE Cartridge If the problem is still not resolved after replacing the FINE cartridge, contact the service center. Page top - Canon PIXMA MG2120 | User Manual - Page 665
will not be printed correctly. Replace the FINE cartridge whose ink is low. Replacing a FINE Cartridge You need to prepare: a sheet of A4 or Letter-sized plain paper (including recycled paper)* * Be sure to use paper that is white and clean on both sides. 1. Make sure that the power is turned on - Canon PIXMA MG2120 | User Manual - Page 666
or wrinkled, it may not be scanned properly. 5. Scan the print head alignment sheet to adjust the print head position. (1) Load the print head alignment sheet on the platen glass. Load the print head alignment sheet WITH THE PRINTED SIDE FACING DOWN and align the mark on the upper left corner - Canon PIXMA MG2120 | User Manual - Page 667
/Reset button to release the error, then take appropriate action. An Error Code Is Displayed on the LED Note If the print results are still not satisfactory after adjusting the print head position as described above, adjust the print head position manually from the computer. Aligning the Print Head - Canon PIXMA MG2120 | User Manual - Page 668
from a Computer Performing Maintenance from a Computer Cleaning the Print Heads from Your Computer Cleaning the Paper Feed Rollers from Your Computer Aligning the Print Head Position from Your Computer Use Your Computer to Print a Nozzle Check Pattern Cleaning Inside the Machine Page top - Canon PIXMA MG2120 | User Manual - Page 669
. Perform deep cleaning when two Cleaning attempts do not resolve the print head problem. 1. Open the printer driver setup window 2. Click Deep Cleaning on the Maintenance tab The Deep Cleaning dialog box opens. Follow the instruction shown in the dialog box. Click Initial Check Items to display - Canon PIXMA MG2120 | User Manual - Page 670
Pattern. To cancel the check process, click Cancel. Important Deep Cleaning consumes a larger amount of ink than Cleaning. Cleaning the print head frequently will rapidly deplete your printer's ink supply. Consequently, perform cleaning only when necessary. Note If there is no sign of improvement - Canon PIXMA MG2120 | User Manual - Page 671
is as follows: Roller Cleaning 1. Prepare the machine Remove all sheets of paper from the front tray. 2. Open the printer driver setup window 3. Click Roller Cleaning on the Maintenance tab The confirmation message appears. 4. Execute paper feed roller cleaning Make sure that the machine is on and - Canon PIXMA MG2120 | User Manual - Page 672
. The procedure for performing manual print head alignment is as follows: Print Head Alignment 1. Open the printer driver setup window 2. Click Custom Settings on the Maintenance tab The Custom Settings dialog box opens. 3. Switch head alignment to manual Check the Align heads manually check box - Canon PIXMA MG2120 | User Manual - Page 673
Aligning the Print Head Position from Your Computer Page 673 of printing is in progress. 10. Check the printed pattern Enter the numbers of the patterns with the least amount of streaks in the associated boxes. Even if the patterns with the least amount of streaks are clicked in the preview window - Canon PIXMA MG2120 | User Manual - Page 674
Aligning the Print Head Position from Your Computer Page 674 of 731 pages When printed pattern Enter the numbers of the patterns with the least noticeable horizontal stripes in the associated boxes. Even if the patterns with the least noticeable horizontal stripes are clicked in the preview window - Canon PIXMA MG2120 | User Manual - Page 675
the setting that produces the least noticeable horizontal white stripes. (A) Less noticeable horizontal white stripes (B) More noticeable horizontal white stripes Note To print and check the current setting, open the Start Print Head Alignment dialog box, and click Print Alignment Value. Page top - Canon PIXMA MG2120 | User Manual - Page 676
whether the print head is working properly by printing a nozzle check pattern. Print the pattern if printing becomes faint, or if a specific color fails to print. The procedure for printing a nozzle check pattern is as follows: Nozzle Check 1. Open the printer driver setup window 2. Click Nozzle - Canon PIXMA MG2120 | User Manual - Page 677
driver setup window 2. Click Bottom Plate Cleaning on the Maintenance tab The Bottom Plate Cleaning dialog box opens. 3. Load paper in the machine As instructed in the dialog box, fold the A4 size or Letter size plain paper in half horizontally, and then unfold the sheet. Fold one side of the paper - Canon PIXMA MG2120 | User Manual - Page 678
> Maintenance > Cleaning the Machine Cleaning the Machine Cleaning the Exterior of the Machine Cleaning the Platen Glass and Document Cover Cleaning the Paper Feed Roller Cleaning the Inside of the Machine (Bottom Plate Cleaning) Cleaning the Protrusions inside the Machine Page 678 of 731 pages - Canon PIXMA MG2120 | User Manual - Page 679
. Smooth out wrinkles on the cloth if necessary before cleaning. Important Be sure to turn off the power and disconnect the power plug before cleaning the machine. Do not use tissue paper, paper towels, rough-textured cloth, or similar materials for cleaning so as not to scratch the surface. Be - Canon PIXMA MG2120 | User Manual - Page 680
to turn off the power and disconnect the power plug before cleaning the machine. Do not use tissue paper, paper towels, rough-textured cloth a malfunction or damage the surface of the machine. With a clean, soft, lint-free cloth, wipe the platen glass (A) and the inner side of the document cover - Canon PIXMA MG2120 | User Manual - Page 681
The machine starts cleaning. The cleaning will be complete when the paper is ejected. Note After the cleaning is complete, press the Stop/Reset button to return the LED to the copy standby mode. If the problem is not resolved after cleaning the paper feed roller, contact the service center. Page top - Canon PIXMA MG2120 | User Manual - Page 682
a new piece of paper. 1. Make sure that the power is turned on and remove any paper from the front tray. 2. Prepare paper. (1) Fold a single sheet of A4 or Letter-sized plain paper in half widthwise, then unfold the paper. (2) Fold one side of the opened paper in another half, aligning the edge with - Canon PIXMA MG2120 | User Manual - Page 683
Check the folded parts of the ejected paper. If they are smudged with ink, perform Bottom Plate Cleaning again. If the problem is not resolved after performing cleaning again, the protrusions inside the machine may be stained. Clean them according to instructions. Cleaning the Protrusions inside the - Canon PIXMA MG2120 | User Manual - Page 684
the Machine > Cleaning the Protrusions inside the Machine C155 Cleaning the Protrusions inside the Machine Important Be sure to turn off the power and disconnect the power plug before cleaning the machine. You need to prepare: cotton swab If the protrusions inside the machine are stained, wipe off - Canon PIXMA MG2120 | User Manual - Page 685
Changing the Machine Settings Home > Overview of the Machine > Changing the Machine Settings Changing the Machine Settings Changing Machine Settings from Your Computer Changing the Machine Settings Using the Operation Panel Page 685 of 731 pages Page top - Canon PIXMA MG2120 | User Manual - Page 686
of the Machine > Changing the Machine Settings > Changing Machine Settings from Your Computer Changing Machine Settings from Your Computer Changing the Print Options Registering a Frequently Used Printing Profile Setting the Ink Cartridge to be Used Managing the Machine Power Reducing the Machine - Canon PIXMA MG2120 | User Manual - Page 687
data that is sent from an application software. Specify this option if you encounter print failures such as part of an image data being cut off. The procedure for changing the print options is as follows: 1. Open the printer driver setup window 2. Click Print Options... on the Page Setup tab The - Canon PIXMA MG2120 | User Manual - Page 688
Changing the Print Options If necessary, change the setting of each item, and then click OK. The Page Setup tab is displayed again. Page 688 of 731 pages Page top - Canon PIXMA MG2120 | User Manual - Page 689
profile is as follows: Registering a Printing Profile 1. Open the printer driver setup window 2. Set the necessary items From Commonly Used Settings on the Quick Setup tab, select the printing profile to be used and if necessary, change the settings after Additional Features. You can also register - Canon PIXMA MG2120 | User Manual - Page 690
sheet, click Options..., and check each item. Note When you install the printer driver again or upgrade the version of the printer driver, the print settings you registered will be deleted from Commonly Used Settings. Registered print settings cannot be saved and preserved. If a profile is deleted - Canon PIXMA MG2120 | User Manual - Page 691
and cannot be replaced immediately by a new one, you can specify the other FINE cartridge that still has ink and continue printing. The procedure for specifying the FINE cartridge is as follows: Ink Cartridge Settings 1. Open the printer driver setup window 2. Click Ink Cartridge Settings on the - Canon PIXMA MG2120 | User Manual - Page 692
tab is displayed again. Auto Power Auto Power allows you to set Auto Power Off. The Auto Power Off function automatically turns off the machine when print data has not been received from the computer for a specified period of time. 1. Open the printer driver setup window 2. Make sure that the - Canon PIXMA MG2120 | User Manual - Page 693
Managing the Machine Power Page 693 of 731 pages Page top - Canon PIXMA MG2120 | User Manual - Page 694
Home > Overview of the Machine > Changing the Machine Settings > Changing Machine Settings from Your Computer > Reducing printer at night, etc. Using this function may lower the print speed. The procedure for using the quiet mode is as follows: Quiet Settings 1. Open the printer driver setup window - Canon PIXMA MG2120 | User Manual - Page 695
Reducing the Machine Noise Page 695 of 731 pages Page top - Canon PIXMA MG2120 | User Manual - Page 696
the print head and the paper during high-density printing to prevent paper abrasion. Check this check box to use this function. Align heads manually Usually, the Print Head Alignment function on the Maintenance tab is set to automatic head alignment, but you can change it to manual head alignment - Canon PIXMA MG2120 | User Manual - Page 697
Changing the Machine Operation Mode Click OK and when the confirmation message appears, click OK. The machine operates with the modified settings hereafter. Page 697 of 731 pages Page top - Canon PIXMA MG2120 | User Manual - Page 698
Settings Using the Operation Panel Page 698 of 731 pages Home > Overview of the Machine > Changing the Machine Settings > Changing the Machine Settings Using the Operation Panel Changing the Machine Settings Using the Operation Panel About Quiet setting Turning off the Machine Automatically Page - Canon PIXMA MG2120 | User Manual - Page 699
noise, such as when printing at night. Follow the procedure below to perform setting. 1. Make sure that the machine is turned on. Confirming that the Power Is On 2. Press sheet in the printer driver to reduce the operating noise while printing is in progress. Reducing the Machine Noise Page top - Canon PIXMA MG2120 | User Manual - Page 700
> Changing the Machine Settings > Changing the Machine printing data is sent to the machine for a specified period of time. Note The time before turning off the machine can be specified from Auto Power Off on Auto Power in the Maintenance sheet of the printer driver. Managing the Machine Power - Canon PIXMA MG2120 | User Manual - Page 701
Paper Settings after Loading Paper Use the Stop/Reset Button to Cancel Printing! Does the Machine Need to Be Handled with Care When Using? How to Maintain the Optimal Printing Quality? Colors Are Uneven, and Print Results Are Blurred Notice for the Power Plug/Power Cord Confirming that the Power - Canon PIXMA MG2120 | User Manual - Page 702
cleaning is limited to a small amount. Does black-and-white printing use color ink? Black-and-white printing may use ink other than black ink depending on the type of printing paper or the settings of the printer driver. So, color ink is consumed even when printing in black-and-white. Page top - Canon PIXMA MG2120 | User Manual - Page 703
correct orientation? To load paper in the front tray, load paper WITH THE PRINTING SIDE FACING DOWN. Is the paper curled? The curled paper causes paper jam. Flatten the curled paper, then reload it. "Load the paper after correcting its curl." in Paper Is Smudged/Printed Surface Is Scratched Page - Canon PIXMA MG2120 | User Manual - Page 704
loaded paper with the Paper button or printer driver. If the selected media type is not the one for the loaded paper, printing results may not be satisfactory. Print Results Not Satisfactory There are various types of paper: paper with special coating on the surface for printing photos with optimal - Canon PIXMA MG2120 | User Manual - Page 705
not be able to continue to print. Press the Stop/Reset button to cancel printing. Note If you cannot cancel printing by pressing the Stop/Reset button while printing from a computer, open the printer driver setup window to delete the unnecessary print jobs from the printer status monitor. Page top - Canon PIXMA MG2120 | User Manual - Page 706
not use or transport the machine vertically or slanted! If the machine is used or transported vertically or slanted, the machine may become damaged or ink may leak from the machine. Be sure not to use or transport the machine vertically or slanted. Tip!: Carefully choose the area to place the - Canon PIXMA MG2120 | User Manual - Page 707
is turned off (while the Paper lamp is lit or flashing), the print head will not be capped properly and this will cause drying or clogging. When disconnecting the power plug, make sure that the Paper lamp is not lit. Notice for Unplugging the Power Cord Print periodically! Just as the tip of a felt - Canon PIXMA MG2120 | User Manual - Page 708
the nozzle check pattern to check if the nozzles are clogged If a print head nozzle is clogged, colors may become uneven or the print results may be blurred. In this case Print the nozzle check pattern Check the printed check pattern to see if the nozzles are clogged. Maintenance Procedure Page - Canon PIXMA MG2120 | User Manual - Page 709
The power plug/power cord is rusty. The power plug/power cord is bent. The power plug/power cord is worn. The power plug/power cord is split. Caution If you find anything unusual with the power plug/power cord described above, unplug the power cord and call for service. Using the machine with one of - Canon PIXMA MG2120 | User Manual - Page 710
Confirming that the Power Is On Page 710 of 731 pages Home > Overview of the Machine > Tips on How to Use Your Machine > Confirming that the Power Is On Confirming that the Power Is On The Paper lamp is lit green when the machine is turned on. Page top - Canon PIXMA MG2120 | User Manual - Page 711
is still on may cause drying or clogging of the print head and print quality may be reduced. 1. Press the ON button to turn the machine off. 2. Confirm that the Paper lamp is off. 3. Unplug the power cord. The specification of the power cord differs depending on the country or region of use. Page - Canon PIXMA MG2120 | User Manual - Page 712
down, using sufficient protective material to ensure safe transport. With the FINE cartridge left installed in the machine, press the ON button to turn off the power. This allows the machine to automatically cap the print head, thus preventing it from drying. After packing, do not tilt the box - Canon PIXMA MG2120 | User Manual - Page 713
of Images It may be unlawful to make copies of, scan, print, or use reproductions of the following documents. The list provided badges or insignias Selective service or draft papers Checks or drafts issued checks Food stamps Passports Immigration papers Internal revenue stamps (canceled or - Canon PIXMA MG2120 | User Manual - Page 714
Page 714 of 731 pages Home How to Use the On-Screen Manuals, Printing Procedures How to Use the On-Screen Manuals, Printing Procedures Operating the Contents Pane Operating the Explanation Window Printing the On-Screen Manuals Using Keywords to Find a Document Registering Documents to My - Canon PIXMA MG2120 | User Manual - Page 715
to Use the On-Screen Manuals, Printing Procedures > Operating the Contents Pane Operating the Contents Pane When you click a document title displayed in the contents pane found to the left of the on-screen manual, the documents of that title are displayed in the explanation window on the right side - Canon PIXMA MG2120 | User Manual - Page 716
to Use the On-Screen Manuals, Printing Procedures > Operating the Explanation Window Operating the Explanation Window Explanation Window (1) Click the green characters to jump to the corresponding document. (2) The cursor jumps to the top of this document. Window Used in Operation Explanation This - Canon PIXMA MG2120 | User Manual - Page 717
the On-Screen Manuals Printing the On-Screen Manuals Click to display the print pane to the left of the on-screen manual. Note Click to close or display the print pane. When you click and then click Page Setup, the Page Setup dialog box appears. You can then easily set up the paper to be used - Canon PIXMA MG2120 | User Manual - Page 718
Setup tab On the Page Setup tab, select the printer to be used and specify simple print settings, as necessary. 3. Click Start Printing A message confirming the number of print pages is displayed. 4. Execute print Confirm the number of pages to be printed, and then click Yes. The documents that are - Canon PIXMA MG2120 | User Manual - Page 719
All documents with selected check boxes are printed. Page 719 of 731 pages Print My Manual You can select and print documents registered in My Manual. For details about My Manual, see " Registering Documents to My Manual ." 1. From Select Target, select My Manual The titles of the documents that - Canon PIXMA MG2120 | User Manual - Page 720
the On-Screen Manuals Page 720 of 731 pages All documents are printed. Important A large amount of paper is necessary to print all documents. Before printing, be sure to check the number of print pages displayed in the Print Page Count Confirmation dialog box. The Print Preview dialog box allows - Canon PIXMA MG2120 | User Manual - Page 721
Using Keywords to Find a Document Page 721 of 731 pages Home > How to Use the On-Screen Manuals, Printing Procedures > Using Keywords to Find a Document Using Keywords to Find a Document You can enter a keyword to search for a target document. All documents in the currently - Canon PIXMA MG2120 | User Manual - Page 722
entered (perfect match) Documents Containing All Keywords Documents containing all keywords that were entered Documents Containing Any Keyword Documents containing at least one of the keywords that were entered 4. Display the document that you want to read From the search results list, double-click - Canon PIXMA MG2120 | User Manual - Page 723
-Screen Manuals, Printing Procedures > Registering Documents to My Manual Registering Documents to My Manual Register frequently read documents as My Manual documents the contents pane or right-click the explanation window, and then select Add to My Manual from the right-click menu In the contents - Canon PIXMA MG2120 | User Manual - Page 724
When you double-click a document title displayed in List of My Manual or select a document title and press the Enter key, that document is displayed in the explanation window. Note To delete a document from List of My Manual, select that document title from the list, and then click Delete (or press - Canon PIXMA MG2120 | User Manual - Page 725
Symbols Used in This Document Page 725 of 731 pages Home > How to Use the On-Screen Manuals, Printing Procedures > Symbols Used in This Document Symbols Used in This Document Warning Instructions that, if ignored, could result in death or serious personal injury caused by incorrect operation of - Canon PIXMA MG2120 | User Manual - Page 726
. Note The formal name of Windows Vista is Microsoft Windows Vista operating system. Exif Print This machine supports Exif Print. Exif Print is a standard for enhancing the communication between digital cameras and printers. By connecting to an Exif Print-compliant digital camera, the camera - Canon PIXMA MG2120 | User Manual - Page 727
the On-Screen Manuals, Printing Procedures > Uninstalling the On-Screen Manuals Uninstalling the On-Screen Manuals Follow the procedure below to uninstall all of the installed on-screen manuals from your computer. Before uninstalling the on-screen manuals, exit all on-screen manuals that are opening - Canon PIXMA MG2120 | User Manual - Page 728
Web Service Download content or materials for printing, from the website. CREATIVE PARK PREMIUM CREATIVE PARK PREMIUM is a premium content service available exclusively to users of genuine Canon inks for this machine. Make sure that genuine Canon FINE cartridges are all installed properly. Manual - Canon PIXMA MG2120 | User Manual - Page 729
printer/scanner and the installed applications. Starting Solution Menu EX Click Here: Solution Menu EX Note Unless the default setting has been changed My Printer With My Printer, you can display the printer driver setup window, and get information on what action to take if you have trouble with - Canon PIXMA MG2120 | User Manual - Page 730
Software Page 730 of 731 pages Starting My Printer From the Start menu, select All Programs > Canon Utilities > My Printer, then click My Printer. If you need to switch between users, be sure to exit My Printer beforehand. Easy-WebPrint EX Easy-WebPrint EX provides quick and easy printing installed - Canon PIXMA MG2120 | User Manual - Page 731
Useful Software Page 731 of 731 pages Note For details on operating Easy-WebPrint EX, refer to the online help. Select Help from Easy-WebPrint EX menu on the Easy-WebPrint EX toolbar to view the online help while running Internet Explorer. Page top
-
 1
1 -
 2
2 -
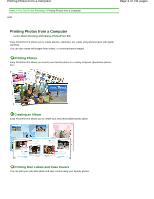 3
3 -
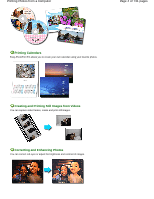 4
4 -
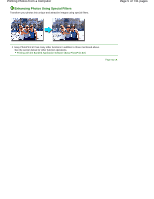 5
5 -
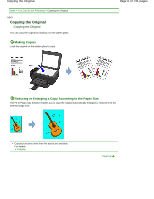 6
6 -
 7
7 -
8
-
9
-
10
-
11
-
12
-
13
-
14
-
15
-
16
-
17
-
18
-
19
-
20
-
21
-
22
-
23
-
24
-
25
-
26
-
27
-
28
-
29
-
30
-
31
-
32
-
33
-
34
-
35
-
36
-
37
-
38
-
39
-
40
-
41
-
42
-
43
-
44
-
45
-
46
-
47
-
48
-
49
-
50
-
51
-
52
-
53
-
54
-
55
-
56
-
57
-
58
-
59
-
60
-
61
-
62
-
63
-
64
-
65
-
66
-
67
-
68
-
69
-
70
-
71
-
72
-
73
-
74
-
75
-
76
-
77
-
78
-
79
-
80
-
81
-
82
-
83
-
84
-
85
-
86
-
87
-
88
-
89
-
90
-
91
-
92
-
93
-
94
-
95
-
96
-
97
-
98
-
99
-
100
-
101
-
102
-
103
-
104
-
105
-
106
-
107
-
108
-
109
-
110
-
111
-
112
-
113
-
114
-
115
-
116
-
117
-
118
-
119
-
120
-
121
-
122
-
123
-
124
-
125
-
126
-
127
-
128
-
129
-
130
-
131
-
132
-
133
-
134
-
135
-
136
-
137
-
138
-
139
-
140
-
141
-
142
-
143
-
144
-
145
-
146
-
147
-
148
-
149
-
150
-
151
-
152
-
153
-
154
-
155
-
156
-
157
-
158
-
159
-
160
-
161
-
162
-
163
-
164
-
165
-
166
-
167
-
168
-
169
-
170
-
171
-
172
-
173
-
174
-
175
-
176
-
177
-
178
-
179
-
180
-
181
-
182
-
183
-
184
-
185
-
186
-
187
-
188
-
189
-
190
-
191
-
192
-
193
-
194
-
195
-
196
-
197
-
198
-
199
-
200
-
201
-
202
-
203
-
204
-
205
-
206
-
207
-
208
-
209
-
210
-
211
-
212
-
213
-
214
-
215
-
216
-
217
-
218
-
219
-
220
-
221
-
222
-
223
-
224
-
225
-
226
-
227
-
228
-
229
-
230
-
231
-
232
-
233
-
234
-
235
-
236
-
237
-
238
-
239
-
240
-
241
-
242
-
243
-
244
-
245
-
246
-
247
-
248
-
249
-
250
-
251
-
252
-
253
-
254
-
255
-
256
-
257
-
258
-
259
-
260
-
261
-
262
-
263
-
264
-
265
-
266
-
267
-
268
-
269
-
270
-
271
-
272
-
273
-
274
-
275
-
276
-
277
-
278
-
279
-
280
-
281
-
282
-
283
-
284
-
285
-
286
-
287
-
288
-
289
-
290
-
291
-
292
-
293
-
294
-
295
-
296
-
297
-
298
-
299
-
300
-
301
-
302
-
303
-
304
-
305
-
306
-
307
-
308
-
309
-
310
-
311
-
312
-
313
-
314
-
315
-
316
-
317
-
318
-
319
-
320
-
321
-
322
-
323
-
324
-
325
-
326
-
327
-
328
-
329
-
330
-
331
-
332
-
333
-
334
-
335
-
336
-
337
-
338
-
339
-
340
-
341
-
342
-
343
-
344
-
345
-
346
-
347
-
348
-
349
-
350
-
351
-
352
-
353
-
354
-
355
-
356
-
357
-
358
-
359
-
360
-
361
-
362
-
363
-
364
-
365
-
366
-
367
-
368
-
369
-
370
-
371
-
372
-
373
-
374
-
375
-
376
-
377
-
378
-
379
-
380
-
381
-
382
-
383
-
384
-
385
-
386
-
387
-
388
-
389
-
390
-
391
-
392
-
393
-
394
-
395
-
396
-
397
-
398
-
399
-
400
-
401
-
402
-
403
-
404
-
405
-
406
-
407
-
408
-
409
-
410
-
411
-
412
-
413
-
414
-
415
-
416
-
417
-
418
-
419
-
420
-
421
-
422
-
423
-
424
-
425
-
426
-
427
-
428
-
429
-
430
-
431
-
432
-
433
-
434
-
435
-
436
-
437
-
438
-
439
-
440
-
441
-
442
-
443
-
444
-
445
-
446
-
447
-
448
-
449
-
450
-
451
-
452
-
453
-
454
-
455
-
456
-
457
-
458
-
459
-
460
-
461
-
462
-
463
-
464
-
465
-
466
-
467
-
468
-
469
-
470
-
471
-
472
-
473
-
474
-
475
-
476
-
477
-
478
-
479
-
480
-
481
-
482
-
483
-
484
-
485
-
486
-
487
-
488
-
489
-
490
-
491
-
492
-
493
-
494
-
495
-
496
-
497
-
498
-
499
-
500
-
501
-
502
-
503
-
504
-
505
-
506
-
507
-
508
-
509
-
510
-
511
-
512
-
513
-
514
-
515
-
516
-
517
-
518
-
519
-
520
-
521
-
522
-
523
-
524
-
525
-
526
-
527
-
528
-
529
-
530
-
531
-
532
-
533
-
534
-
535
-
536
-
537
-
538
-
539
-
540
-
541
-
542
-
543
-
544
-
545
-
546
-
547
-
548
-
549
-
550
-
551
-
552
-
553
-
554
-
555
-
556
-
557
-
558
-
559
-
560
-
561
-
562
-
563
-
564
-
565
-
566
-
567
-
568
-
569
-
570
-
571
-
572
-
573
-
574
-
575
-
576
-
577
-
578
-
579
-
580
-
581
-
582
-
583
-
584
-
585
-
586
-
587
-
588
-
589
-
590
-
591
-
592
-
593
-
594
-
595
-
596
-
597
-
598
-
599
-
600
-
601
-
602
-
603
-
604
-
605
-
606
-
607
-
608
-
609
-
610
-
611
-
612
-
613
-
614
-
615
-
616
-
617
-
618
-
619
-
620
-
621
-
622
-
623
-
624
-
625
-
626
-
627
-
628
-
629
-
630
-
631
-
632
-
633
-
634
-
635
-
636
-
637
-
638
-
639
-
640
-
641
-
642
-
643
-
644
-
645
-
646
-
647
-
648
-
649
-
650
-
651
-
652
-
653
-
654
-
655
-
656
-
657
-
658
-
659
-
660
-
661
-
662
-
663
-
664
-
665
-
666
-
667
-
668
-
669
-
670
-
671
-
672
-
673
-
674
-
675
-
676
-
677
-
678
-
679
-
680
-
681
-
682
-
683
-
684
-
685
-
686
-
687
-
688
-
689
-
690
-
691
-
692
-
693
-
694
-
695
-
696
-
697
-
698
-
699
-
700
-
701
-
702
-
703
-
704
-
705
-
706
-
707
-
708
-
709
-
710
-
711
-
712
-
713
-
714
-
715
-
716
-
717
-
718
-
719
-
720
-
721
-
722
-
723
-
724
-
725
-
726
-
727
-
728
-
729
-
730
-
731
 |
 |
Overview of the Machine
(Including Proper Care and Setting
Changes)
How to Use the On-Screen Manuals, Printing
Procedures
Useful Software
MC-5801-V1.10
Page 1 of 731 pages
Canon On-screen Manual - MG2100 series