Canon imageCLASS MF5850dn imageCLASS MF5880dn/5850dn Basic Operation Guide - Page 147
Basic Methods for Sending PC Faxes, Recall/Pause]
 |
View all Canon imageCLASS MF5850dn manuals
Add to My Manuals
Save this manual to your list of manuals |
Page 147 highlights
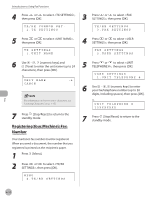
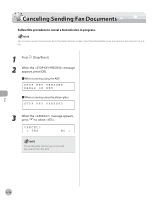
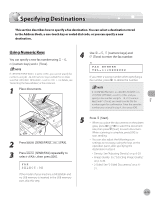
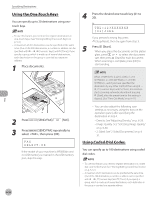
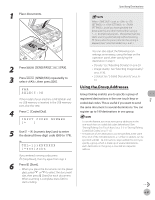
Sending Fax Documents 6 If necessary, press [Recall/Pause]/ [Redial/Pause] to insert a pause. Ex. FAX NUMBER TEL=012P - The letter is displayed between the numbers. - You can enter successive pauses within the number to make the pause time longer. - You can change the length of a pause inserted within the fax number in the menu. (See "Adjusting the Pause Time," on p. 6-40.) 7 Enter the country code, the area code, and the fax/telephone number of the recipient. Ex. FAX NUMBER TEL=012p345XXXXX 8 Press [Recall/Pause]/[Redial/Pause] to enter a pause at the end of the number. Ex. FAX NUMBER TEL=012p345XXXXXP - The letter appears at the end of the fax number. - Pauses entered at the end of fax numbers are always 10 seconds long. If in in is set to and you specify a fax number using - , [numeric keys] and [Tone], you must enter the fax number again for confirmation. Enter the same fax number you entered in steps 5 to 8, then press [OK]. 9 Press [Start]. When you place the documents on the platen glass, press or to select the document size, then press [Start] for each document. When scanning is complete, press [OK] to start sending. Basic Methods for Sending PC Faxes This section describes the flow of sending PC faxes. Make sure that the fax driver is installed. For details on the fax driver settings, see "PC Fax," in the e-Manual. - Faxing methods may differ depending on the application you are using. For details, see the instruction manuals provided with the application software. - You cannot access or edit the address book if you do not have access permission (default: Power Users or higher) to the destination folder of the address book. If this is the case, log on as user having access permission to the folder, or click [Specify a Folder] in the [Edit Address Book] sheet, and change the destination folder of the address book to a folder, such as the [My Documents] folder, that you have write permission to. For details about how to change the destination folder of the address book, see "Changing the Address Book Export Destination," in the e-Manual. - Up to 500 fax transmission destinations can be stored in the device. If the number of destinations exceeds 500 after a fax job has been sent to the device, the last job to be input will be erased. Be careful when sending a fax continuously to multiple groups. - The number of destinations that you can send to at one time depends on the conditions under which the cover sheet has been attached. For details, view the online help. (See "Viewing the Online Help (PC Fax)," in the e-Manual.) - The display may differ according to the operating system and system environment. - If an error occurs in the machine while sending a fax, send the document once more from the fax driver. The fax job sent from the fax driver for which an error occurred will be erased. Fax 6-16
-
 1
1 -
2
-
3
-
4
-
5
-
6
-
7
-
8
-
9
-
10
-
11
-
12
-
13
-
14
-
15
-
16
-
17
-
18
-
19
-
20
-
21
-
22
-
23
-
24
-
25
-
26
-
27
-
28
-
29
-
30
-
31
-
32
-
33
-
34
-
35
-
36
-
37
-
38
-
39
-
40
-
41
-
42
-
43
-
44
-
45
-
46
-
47
-
48
-
49
-
50
-
51
-
52
-
53
-
54
-
55
-
56
-
57
-
58
-
59
-
60
-
61
-
62
-
63
-
64
-
65
-
66
-
67
-
68
-
69
-
70
-
71
-
72
-
73
-
74
-
75
-
76
-
77
-
78
-
79
-
80
-
81
-
82
-
83
-
84
-
85
-
86
-
87
-
88
-
89
-
90
-
91
-
92
-
93
-
94
-
95
-
96
-
97
-
98
-
99
-
100
-
101
-
102
-
103
-
104
-
105
-
106
-
107
-
108
-
109
-
110
-
111
-
112
-
113
-
114
-
115
-
116
-
117
-
118
-
119
-
120
-
121
-
122
-
123
-
124
-
125
-
126
-
127
-
128
-
129
-
130
-
131
-
132
-
133
-
134
-
135
-
136
-
137
-
138
-
139
-
140
-
141
-
 142
142 -
 143
143 -
 144
144 -
 145
145 -
 146
146 -
 147
147 -
 148
148 -
 149
149 -
 150
150 -
 151
151 -
 152
152 -
153
-
154
-
155
-
156
-
157
-
158
-
159
-
160
-
161
-
162
-
163
-
164
-
165
-
166
-
167
-
168
-
169
-
170
-
171
-
172
-
173
-
174
-
175
-
176
-
177
-
178
-
179
-
180
-
181
-
182
-
183
-
184
-
185
-
186
-
187
-
188
-
189
-
190
-
191
-
192
-
193
-
194
-
195
-
196
-
197
-
198
-
199
-
200
-
201
-
202
-
203
-
204
-
205
-
206
-
207
-
208
-
209
-
210
-
211
-
212
-
213
-
214
-
215
-
216
-
217
-
218
-
219
-
220
-
221
-
222
-
223
-
224
-
225
-
226
-
227
-
228
-
229
-
230
-
231
-
232
-
233
-
234
-
235
-
236
-
237
-
238
-
239
-
240
-
241
-
242
-
243
-
244
-
245
-
246
-
247
-
248
-
249
-
250
-
251
-
252
-
253
-
254
-
255
-
256
-
257
-
258
-
259
-
260
-
261
-
262
-
263
-
264
-
265
-
266
-
267
-
268
-
269
-
270
-
271
-
272
-
273
-
274
-
275
-
276
-
277
-
278
-
279
-
280
-
281
-
282
-
283
-
284
-
285
-
286
-
287
-
288
-
289
-
290
-
291
-
292
-
293
-
294
-
295
-
296
-
297
-
298
-
299
-
300
-
301
-
302
 |
 |