Canon imageCLASS MF5850dn imageCLASS MF5880dn/5850dn Basic Operation Guide - Page 208
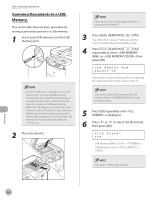
For Scanning Documents to a Computer (USB Connection)
 |
View all Canon imageCLASS MF5850dn manuals
Add to My Manuals
Save this manual to your list of manuals |
Page 208 highlights
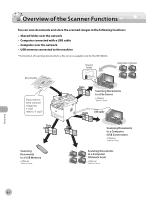
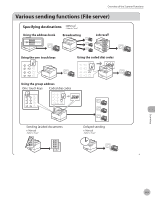
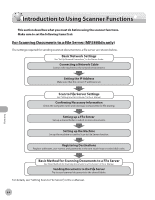
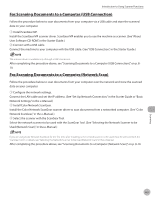
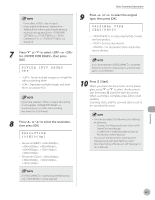
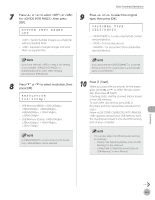
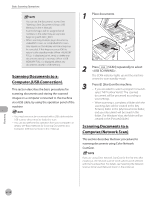
Introduction to Using Scanner Functions For Scanning Documents to a Computer (USB Connection) Follow the procedure below to scan documents from your computer via a USB cable and store the scanned data on your computer. ① Install ScanGear MF. Install the ScanGear MF scanner driver. ScanGear MF enables you to use the machine as scanner. (See "About User Software CD-ROM," in the Starter Guide.) ② Connect with a USB cable. Connect the machine to your computer with the USB cable. (See "USB Connection," in the Starter Guide.) The scanner driver is available only through a USB connection. After completing the procedure above, see "Scanning Documents to a Computer (USB Connection)," on p. 810. For Scanning Documents to a Computer (Network Scan) Follow the procedure below to scan documents from your computer over the network and store the scanned data on your computer. ① Configure the network settings. Connect the LAN cable and set the IP address. (See "Set Up Network Connection," in the Starter Guide or "Basic Network Settings," in the e-Manual.) ② Install Color Network ScanGear. Install the Color Network ScanGear scanner driver to scan documents from a networked computer. (See "Color Network ScanGear," in the e-Manual.) ③ Select the scanner with the ScanGear Tool. Select the network scanner to be used with the ScanGear Tool. (See "Selecting the Network Scanner to be Used (Network Scan)," in the e-Manual.) If you are using Color Network ScanGear for the first time after installing it, the network scanner to be used must be selected with the ScanGear Tool. For details, see "Selecting the Network Scanner to be Used (Network Scan)," in the e-Manual. After completing the procedure above, see "Scanning Documents to a Computer (Network Scan)," on p. 8-10. 8-5 Scanning
-
 1
1 -
2
-
3
-
4
-
5
-
6
-
7
-
8
-
9
-
10
-
11
-
12
-
13
-
14
-
15
-
16
-
17
-
18
-
19
-
20
-
21
-
22
-
23
-
24
-
25
-
26
-
27
-
28
-
29
-
30
-
31
-
32
-
33
-
34
-
35
-
36
-
37
-
38
-
39
-
40
-
41
-
42
-
43
-
44
-
45
-
46
-
47
-
48
-
49
-
50
-
51
-
52
-
53
-
54
-
55
-
56
-
57
-
58
-
59
-
60
-
61
-
62
-
63
-
64
-
65
-
66
-
67
-
68
-
69
-
70
-
71
-
72
-
73
-
74
-
75
-
76
-
77
-
78
-
79
-
80
-
81
-
82
-
83
-
84
-
85
-
86
-
87
-
88
-
89
-
90
-
91
-
92
-
93
-
94
-
95
-
96
-
97
-
98
-
99
-
100
-
101
-
102
-
103
-
104
-
105
-
106
-
107
-
108
-
109
-
110
-
111
-
112
-
113
-
114
-
115
-
116
-
117
-
118
-
119
-
120
-
121
-
122
-
123
-
124
-
125
-
126
-
127
-
128
-
129
-
130
-
131
-
132
-
133
-
134
-
135
-
136
-
137
-
138
-
139
-
140
-
141
-
142
-
143
-
144
-
145
-
146
-
147
-
148
-
149
-
150
-
151
-
152
-
153
-
154
-
155
-
156
-
157
-
158
-
159
-
160
-
161
-
162
-
163
-
164
-
165
-
166
-
167
-
168
-
169
-
170
-
171
-
172
-
173
-
174
-
175
-
176
-
177
-
178
-
179
-
180
-
181
-
182
-
183
-
184
-
185
-
186
-
187
-
188
-
189
-
190
-
191
-
192
-
193
-
194
-
195
-
196
-
197
-
198
-
199
-
200
-
201
-
202
-
 203
203 -
 204
204 -
 205
205 -
 206
206 -
 207
207 -
 208
208 -
 209
209 -
 210
210 -
 211
211 -
 212
212 -
 213
213 -
214
-
215
-
216
-
217
-
218
-
219
-
220
-
221
-
222
-
223
-
224
-
225
-
226
-
227
-
228
-
229
-
230
-
231
-
232
-
233
-
234
-
235
-
236
-
237
-
238
-
239
-
240
-
241
-
242
-
243
-
244
-
245
-
246
-
247
-
248
-
249
-
250
-
251
-
252
-
253
-
254
-
255
-
256
-
257
-
258
-
259
-
260
-
261
-
262
-
263
-
264
-
265
-
266
-
267
-
268
-
269
-
270
-
271
-
272
-
273
-
274
-
275
-
276
-
277
-
278
-
279
-
280
-
281
-
282
-
283
-
284
-
285
-
286
-
287
-
288
-
289
-
290
-
291
-
292
-
293
-
294
-
295
-
296
-
297
-
298
-
299
-
300
-
301
-
302
 |
 |