Cisco ESR10008 Hardware Installation Guide - Page 120
Replacing an AC PEM, Setting AC Power Switch to the Off Position
 |
UPC - 746320761510
View all Cisco ESR10008 manuals
Add to My Manuals
Save this manual to your list of manuals |
Page 120 highlights
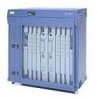
Removing and Replacing Field-Replaceable Units Chapter 5 Maintaining the Cisco 10008 Router Replacing an AC PEM Use the following procedure to replace an AC PEM: Figure 5-29 Setting AC Power Switch to the Off Position POWER FAULT POWER FAULT LOOP ALARM CARRIER RX TX LINK FANS OK FAFILAUNRE FMAFUILALUNTRI-E WrbseyemhsdetoeonvmnahelsoaihtnnCusduwtAdnarUodepwTeppnIrliaOntcwwgNeioltmlhmoiescnincftauumntre.utsrsaotyr, FAIL FAIL FAIL FAIL 1 CISCO 10000 2 C1I0S0C0O0 3 CISCO 10000 4 CC1IS00C0O0 160C0T030 FAIL LOOP CARALRAIERRM LOOP CARALRAIERRM 0 PO0RT0 CA ALARLMOOP 1 PO1RT1 2 PO2RT2 3 PO3RT3 4 PO4RT4 5 PO5RT5 0A PROCESSOR ONLY0B CISCO 10000 CISCO 10000 CONSOLE AUX ELAICTNHTKIEVRITNYET CONSOLE AUX ELAICTNHTKIEVRITNYET 5 CC1IS00C0O0 160C0T030 FAIL 6 CC1IS00C0O0 160C0T030 FAIL 7 CC1IS00C0O0 160C0T030 FAIL LOOP CARALRAIERRM LOOP CARALRAIERRM LOOP CARALRAIERRM PO0RT0 CA ALARLMOOP PO0RT0 CA ALARLMOOP PO0RT0 CA ALARLMOOP ACTIVITY LINK ACTIVITY LINK ALARMS ALARMS PO1RT1 PO2RT2 PO1RT1 PO2RT2 PO1RT1 PO2RT2 CRITICMAALJORMINOR ACO PO3RT3 PO3RT3 PO3RT3 PO4RT4 PO4RT4 PO4RT4 PO5RT5 PO5RT5 PO5RT5 RX TX CARRIER CRITICMAALJORMINOR ACO FAIL FAIL FAIL FAIL 8 CISCO 10000 SLOT 0 STATUFSAIL SLOT 0 STATUFSAIL BITS BITS CH OC-12-DSO SM-IR GIGABIT ETHERNET 6XCT3-DS0 6XCT3-DS0 6XCT3-DS0 PERFORMANCE ROUTING ENGINE P/N ESR-PRE3 PERFORMANCE ROUTING ENGINE P/N ESR-PRE3 6XCT3-DS0 6XCT3-DS0 POWER FAULT PROCESSOR ONLY OC-12/STM-4 POS SM-IR 30026 Step 1 Step 2 Remove the front cover if necessary (see Front Cover Procedures, page 5-4). If your system is configured with redundant PEMs, set only the power switch of the PEM you are replacing to the off (0) position (the example in Figure 5-29 shows the top PEM in the off position). Caution Do not power off both AC PEMs in a redundant system, or the system shuts down and all data traffic stops. Only power off the AC PEM you are replacing. Step 3 Remove the PEM power cable from its canoe and disconnect it from the AC input power cable. 5-28 Cisco 10008 Router Hardware Installation Guide OL-0659-13
-
 1
1 -
2
-
3
-
4
-
5
-
6
-
7
-
8
-
9
-
10
-
11
-
12
-
13
-
14
-
15
-
16
-
17
-
18
-
19
-
20
-
21
-
22
-
23
-
24
-
25
-
26
-
27
-
28
-
29
-
30
-
31
-
32
-
33
-
34
-
35
-
36
-
37
-
38
-
39
-
40
-
41
-
42
-
43
-
44
-
45
-
46
-
47
-
48
-
49
-
50
-
51
-
52
-
53
-
54
-
55
-
56
-
57
-
58
-
59
-
60
-
61
-
62
-
63
-
64
-
65
-
66
-
67
-
68
-
69
-
70
-
71
-
72
-
73
-
74
-
75
-
76
-
77
-
78
-
79
-
80
-
81
-
82
-
83
-
84
-
85
-
86
-
87
-
88
-
89
-
90
-
91
-
92
-
93
-
94
-
95
-
96
-
97
-
98
-
99
-
100
-
101
-
102
-
103
-
104
-
105
-
106
-
107
-
108
-
109
-
110
-
111
-
112
-
113
-
114
-
 115
115 -
 116
116 -
 117
117 -
 118
118 -
 119
119 -
 120
120 -
 121
121 -
 122
122 -
 123
123 -
 124
124 -
 125
125 -
126
-
127
-
128
-
129
-
130
-
131
-
132
-
133
-
134
-
135
-
136
-
137
-
138
-
139
-
140
-
141
-
142
-
143
-
144
-
145
-
146
-
147
-
148
-
149
-
150
-
151
-
152
-
153
-
154
-
155
-
156
-
157
-
158
-
159
-
160
-
161
-
162
-
163
-
164
-
165
-
166
-
167
-
168
-
169
-
170
-
171
-
172
 |
 |
