Cisco ESR10008 Hardware Installation Guide - Page 43
Installing the Cisco 10008 Router, Installation Methods
 |
UPC - 746320761510
View all Cisco ESR10008 manuals
Add to My Manuals
Save this manual to your list of manuals |
Page 43 highlights
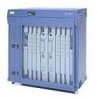
3 C H A P T E R Installing the Cisco 10008 Router This chapter describes the procedures for installing the Cisco 10008 router on a tabletop or in equipment racks. It also describes how to connect interface and power cables, the proper way to power on the system, and installation troubleshooting procedures. Note The illustrations in this guide depict the original Cisco 10008 chassis. Your chassis may appear or look slightly different, but the installation procedure is the same. This chapter contains the following sections: • Installation Methods, page 3-1 • Rack-Mounting the Chassis, page 3-2 • Non-Rack Installation, page 3-11 • Connecting the Chassis to Ground, page 3-13 • Connecting DC Power to the Cisco 10008 Router, page 3-17 • Connecting AC Power to the Cisco 10008 Router, page 3-22 • Connecting Alarm Indicators, page 3-26 • Connecting a Video Terminal to the PRE Console Port, page 3-30 • Connecting Network Management and Signal System Cables, page 3-32 Installation Methods Although rack-mounting is the preferred method of installation for the Cisco 10008 router, you can mount the router in an alternate location, such as on an equipment shelf or on a tabletop. A rack-mount and cable-management kit is shipped with the Cisco 10008 router. For mounting the chassis in a: • 19-inch wide (standard), 4-post equipment rack or telco-type equipment rack, use the rack-mount brackets in the kit. • 23-inch wide equipment rack, order optional rack-mount brackets to fit the 23-inch rack. The cable-management bracket relieves the strain on interface cables connected to the PRE and line card modules in the chassis. OL-0659-13 Cisco 10008 Router Hardware Installation Guide 3-1
-
 1
1 -
2
-
3
-
4
-
5
-
6
-
7
-
8
-
9
-
10
-
11
-
12
-
13
-
14
-
15
-
16
-
17
-
18
-
19
-
20
-
21
-
22
-
23
-
24
-
25
-
26
-
27
-
28
-
29
-
30
-
31
-
32
-
33
-
34
-
35
-
36
-
37
-
 38
38 -
 39
39 -
 40
40 -
 41
41 -
 42
42 -
 43
43 -
 44
44 -
 45
45 -
 46
46 -
 47
47 -
 48
48 -
49
-
50
-
51
-
52
-
53
-
54
-
55
-
56
-
57
-
58
-
59
-
60
-
61
-
62
-
63
-
64
-
65
-
66
-
67
-
68
-
69
-
70
-
71
-
72
-
73
-
74
-
75
-
76
-
77
-
78
-
79
-
80
-
81
-
82
-
83
-
84
-
85
-
86
-
87
-
88
-
89
-
90
-
91
-
92
-
93
-
94
-
95
-
96
-
97
-
98
-
99
-
100
-
101
-
102
-
103
-
104
-
105
-
106
-
107
-
108
-
109
-
110
-
111
-
112
-
113
-
114
-
115
-
116
-
117
-
118
-
119
-
120
-
121
-
122
-
123
-
124
-
125
-
126
-
127
-
128
-
129
-
130
-
131
-
132
-
133
-
134
-
135
-
136
-
137
-
138
-
139
-
140
-
141
-
142
-
143
-
144
-
145
-
146
-
147
-
148
-
149
-
150
-
151
-
152
-
153
-
154
-
155
-
156
-
157
-
158
-
159
-
160
-
161
-
162
-
163
-
164
-
165
-
166
-
167
-
168
-
169
-
170
-
171
-
172
 |
 |
