Cisco ESR10008 Hardware Installation Guide - Page 135
Tightening Captive Screws, Step 11, Caution
 |
UPC - 746320761510
View all Cisco ESR10008 manuals
Add to My Manuals
Save this manual to your list of manuals |
Page 135 highlights
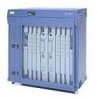
Chapter 5 Maintaining the Cisco 10008 Router Figure 5-45 Tightening Captive Screws POWER FAULT MISWIRE LOOP ALARM CARRIER RX TX LINK FANS OK FAN FAILURE MULTIFAN FAILURE WbrseyemhsdetoeonvmnahelsoaihtnnCusduwtAdnarUodepwTeppnIrliaOntcwwgNeioltmlhmoiescnincftauumntre.utsrsaotyr, FAIL FAIL FAIL FAIL 1 CC111I0S0G00CE00O00 FAIL 2 CCC1h1I0C0S0O0C001O002 FAIL 3 CC161I0CS00TC0003O00 FAIL 4 CC161I0CS00TC0003O00 FAIL LOOP CARALRAIERRM LOOP CARALRAIERRM PO0RT0 CA ALARLMOOP PO0RT0 CA ALARLMOOP PO1RT1 PO1RT1 0A PROCESSOR CISCO 10000 CISCO 10000 1 CONSOLE AUX ELAICTNHTKIEVRITNYET CONSOLE AUX ELAICTNHTKIEVRITNYET ACTIVITY LINK ACTIVITY LINK PO2RT2 LINK TX RX PO3RT3 CA ALARMLOOP PO4RT4 PO2RT2 PO3RT3 PO4RT4 CRITICMAALJORMINOR ACO ALARMS ALARMS CRITICMAALJORMINOR ACO PO5RT5 PO5RT5 Connecting Alarm Indicators SLOT 0 STATUFSAIL BITS SLOT 0 STATUFSAIL BITS CH OC-12-DSO SM-IR GIGABIT ETHERNET PERFORMANCE ROUTING ENGINE P/N ESR-PRE3 PERFORMANCE ROUTING ENGINE P/N ESR-PRE3 6XCT3-DS0 6XCT3-DS0 POWER FAULT MISWIRE 1 PROCESSOR 132833 1 Captive screw Step 11 Secure the PRE in the chassis by tightening the top and bottom captive screws (Figure 5-45). Caution Always tighten the captive screws on each newly installed PRE. These screws prevent accidental removal and provide proper grounding for electromagnetic interference (EMI) shielding. Step 12 Step 13 Step 14 Reconnect any interface cables to the PRE if necessary. Install the PCMCIA card in the PRE if necessary (see the "Removing and Installing a PCMCIA Flash Memory Card" section on page 5-44). See the Cisco 10000 Series Router Performance Routing Engine Installation for information about configuring the PRE if necessary. Note It is not necessary to configure the PRE if this is a second PRE installation for redundancy. The system automatically downloads the necessary configuration information from the primary PRE. Step 15 Replace the front cover if necessary (see the "Replacing the Front Cover" section on page 5-6). OL-0659-13 Cisco 10008 Router Hardware Installation Guide 5-43
-
 1
1 -
2
-
3
-
4
-
5
-
6
-
7
-
8
-
9
-
10
-
11
-
12
-
13
-
14
-
15
-
16
-
17
-
18
-
19
-
20
-
21
-
22
-
23
-
24
-
25
-
26
-
27
-
28
-
29
-
30
-
31
-
32
-
33
-
34
-
35
-
36
-
37
-
38
-
39
-
40
-
41
-
42
-
43
-
44
-
45
-
46
-
47
-
48
-
49
-
50
-
51
-
52
-
53
-
54
-
55
-
56
-
57
-
58
-
59
-
60
-
61
-
62
-
63
-
64
-
65
-
66
-
67
-
68
-
69
-
70
-
71
-
72
-
73
-
74
-
75
-
76
-
77
-
78
-
79
-
80
-
81
-
82
-
83
-
84
-
85
-
86
-
87
-
88
-
89
-
90
-
91
-
92
-
93
-
94
-
95
-
96
-
97
-
98
-
99
-
100
-
101
-
102
-
103
-
104
-
105
-
106
-
107
-
108
-
109
-
110
-
111
-
112
-
113
-
114
-
115
-
116
-
117
-
118
-
119
-
120
-
121
-
122
-
123
-
124
-
125
-
126
-
127
-
128
-
129
-
 130
130 -
 131
131 -
 132
132 -
 133
133 -
 134
134 -
 135
135 -
 136
136 -
 137
137 -
 138
138 -
 139
139 -
 140
140 -
141
-
142
-
143
-
144
-
145
-
146
-
147
-
148
-
149
-
150
-
151
-
152
-
153
-
154
-
155
-
156
-
157
-
158
-
159
-
160
-
161
-
162
-
163
-
164
-
165
-
166
-
167
-
168
-
169
-
170
-
171
-
172
 |
 |
