Cisco ESR10008 Hardware Installation Guide - Page 34
Rack-Mounting and Location Guidelines, Rack Selection Guidelines, Rack Configuration Guidelines
 |
UPC - 746320761510
View all Cisco ESR10008 manuals
Add to My Manuals
Save this manual to your list of manuals |
Page 34 highlights
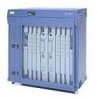
Site Planning Chapter 2 Preparing for Installation The electromagnetic pulse (EMP) generated by lightning or other high-energy phenomena can couple enough energy into unshielded conductors to damage or destroy electronic equipment. If you have previously experienced such problems, you should consult with RFI/EMI experts to ensure that you have adequate electrical surge suppression and shielding of signal cables in your Cisco 10008 series router operating environment. Rack-Mounting and Location Guidelines You can mount the Cisco 10008 router on an equipment shelf or tabletop. However, we recommend rack-mounting the Cisco 10008 router. The rack-mounting hardware included with chassis is suitable for most 19-inch equipment racks and telco-type racks. The sections that follow describe criteria for selecting a rack to mount the Cisco 10008 series router, and guidelines for placing the rack for reliable operation. Rack Selection Guidelines We recommend that you mount the Cisco 10008 router in an equipment rack, and includes the necessary rack-mounting hardware which is suitable for most 19-inch equipment and telco-type racks. Consider installing the Cisco 10008 router in a rack with the following features: • NEBS compliant, 19-inch (48.3 cm) wide rack; or NEBS compliant 23-inch (58.4 cm) wide rack. • EIA or ETSI hole patterns in the mounting rails. Required mounting hardware (screws, clip nuts, and dress washers) is shipped with the Cisco 10008 series router. If the rack that you plan to install the system in has metric-threaded rails, you must provide your own metric mounting hardware. • Perforated top and open bottom for ventilation to prevent overheating. • Leveling feet for stability. Rack Configuration Guidelines Several rack-mounting configurations are possible to provide maximum density. The following sections describe mounting configurations for the Cisco 10008 chassis. A standard 7-foot-high rack can accommodate three Cisco 10008 chassis mounted from the front. The Cisco 10008 chassis can be flush mounted, with the front of the chassis being flush with the rack's mounting rails, or mid-mounted to bring the front of the chassis half-way out from the mounting rails. Bracket extenders are required to mid-mount the Cisco 10008 chassis in a 23-inch telco rack. For more information on mid-mounting, see Chapter 3, "Installing the Cisco 10008 Router." You can double the port density of a 7 ft. rack by installing six Cisco 10008 chassis back-to-back using three High-Density Rack Kits (available from Cisco). Each kit includes all the necessary hardware to mount one pair of back-to-back 10008 chassis on a sliding tray that allows access to the rear of the chassis. The kit also includes a baffle kit to control the flow of exhaust air. The High-Density Rack Kit can only be used with racks with the features described below: • A rack with 3-inch or 6-inch U-channel • A four-post cabinet rack with front and rear RETMA rails installed Cisco 10008 Router Hardware Installation Guide 2-8 OL-0659-13
-
 1
1 -
2
-
3
-
4
-
5
-
6
-
7
-
8
-
9
-
10
-
11
-
12
-
13
-
14
-
15
-
16
-
17
-
18
-
19
-
20
-
21
-
22
-
23
-
24
-
25
-
26
-
27
-
28
-
 29
29 -
 30
30 -
 31
31 -
 32
32 -
 33
33 -
 34
34 -
 35
35 -
 36
36 -
 37
37 -
 38
38 -
 39
39 -
40
-
41
-
42
-
43
-
44
-
45
-
46
-
47
-
48
-
49
-
50
-
51
-
52
-
53
-
54
-
55
-
56
-
57
-
58
-
59
-
60
-
61
-
62
-
63
-
64
-
65
-
66
-
67
-
68
-
69
-
70
-
71
-
72
-
73
-
74
-
75
-
76
-
77
-
78
-
79
-
80
-
81
-
82
-
83
-
84
-
85
-
86
-
87
-
88
-
89
-
90
-
91
-
92
-
93
-
94
-
95
-
96
-
97
-
98
-
99
-
100
-
101
-
102
-
103
-
104
-
105
-
106
-
107
-
108
-
109
-
110
-
111
-
112
-
113
-
114
-
115
-
116
-
117
-
118
-
119
-
120
-
121
-
122
-
123
-
124
-
125
-
126
-
127
-
128
-
129
-
130
-
131
-
132
-
133
-
134
-
135
-
136
-
137
-
138
-
139
-
140
-
141
-
142
-
143
-
144
-
145
-
146
-
147
-
148
-
149
-
150
-
151
-
152
-
153
-
154
-
155
-
156
-
157
-
158
-
159
-
160
-
161
-
162
-
163
-
164
-
165
-
166
-
167
-
168
-
169
-
170
-
171
-
172
 |
 |
