Cisco ESR10008 Hardware Installation Guide - Page 57
Setting PEM Switches to the Off Position, Attaching Grounding Wire
 |
UPC - 746320761510
View all Cisco ESR10008 manuals
Add to My Manuals
Save this manual to your list of manuals |
Page 57 highlights
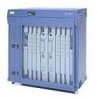
Chapter 3 Installing the Cisco 10008 Router Figure 3-12 Setting PEM Switches to the Off Position Connecting the Chassis to Ground POWER FAULT MISWIRE POWER FAULT MISWIRE LOOP ALARM CARRIER RX TX LINK FANS OK FAFILAUNRE FMAFUILALUNTRI-E WrbseyemhsdteoeonvmnahelsoaihtnnCusduwtAdnarUodepwTeppnIrliaOntcwwgNeioltmlhmoiescnincftauumntre.utsrsaotyr, FAIL FAIL FAIL FAIL 1 C1I0S0C0O0 2 C1I0S0C0O0 3 C1I0S0C0O0 4 CC161I0CS00T0C003O00 FAIL LOOP CARALRAIERRM LOOP CARALRAIERRM 0 PO0RT0 CA ALARLMOOP 1 PO1RT1 2 PO2RT2 3 PO3RT3 4 PO4RT4 5 PO5RT5 0A PROCESSOR ONLY0B CISCO 10000 CISCO 10000 CONSOLE AUX ELAICTNHTKIEVRITNYET CONSOLE AUX ELAICTNHTKIEVRITNYET 5 CC161I0CS00T0C003O00 FAIL 6 CC161I0CS00T0C003O00 FAIL 7 CC161I0CS00T0C003O00 FAIL LOOP CARALRAIERRM LOOP CARALRAIERRM LOOP CARALRAIERRM PO0RT0 CA ALARLMOOP PO0RT0 CA ALARLMOOP PO0RT0 CA ALARLMOOP ACTIVITY LINK ACTIVITY LINK ALARMS ALARMS PO1RT1 PO2RT2 PO1RT1 PO2RT2 PO1RT1 PO2RT2 CRITICMAALJORMINOR ACO PO3RT3 PO3RT3 PO3RT3 PO4RT4 PO4RT4 PO4RT4 PO5RT5 PO5RT5 PO5RT5 RX TX CARRIER CRITICMAALJORMINOR ACO FAIL FAIL FAIL FAIL 8 C1I0S0C0O0 SLOT 0 STATUFSAIL SLOT 0 STATUFSAIL BITS BITS CH OC-12-DSO SM-IR GIGABIT ETHERNET 6XCT3-DS0 6XCT3-DS0 6XCT3-DS0 PERFORMANCE ROUTING ENGINE P/N ESR-PRE3 PERFORMANCE ROUTING ENGINE P/N ESR-PRE3 6XCT3-DS0 6XCT3-DS0 POWER FAULT MISWIRE PROCESSOR ONLY OC-12/STM-4 POS SM-IR 30019 Step 1 Step 2 Step 3 Power off the chassis by setting the DC or AC PEM power switch (or switches) to the Off position (see Figure 3-12 for an example of the DC PEM power switches). Strip about 3/4 inch (2 cm) of the covering from the end of the grounding wire (see Figure 3-13). Insert the stripped end of the grounding wire into the open end of a grounding lug and crimp the grounding lug securely to the wire (Figure 3-13). Figure 3-13 Attaching Grounding Wire to Grounding Lug 0.75 in. (2cm) 132826 1 Wire 1 2 2 Grounding lug OL-0659-13 Cisco 10008 Router Hardware Installation Guide 3-15
-
 1
1 -
2
-
3
-
4
-
5
-
6
-
7
-
8
-
9
-
10
-
11
-
12
-
13
-
14
-
15
-
16
-
17
-
18
-
19
-
20
-
21
-
22
-
23
-
24
-
25
-
26
-
27
-
28
-
29
-
30
-
31
-
32
-
33
-
34
-
35
-
36
-
37
-
38
-
39
-
40
-
41
-
42
-
43
-
44
-
45
-
46
-
47
-
48
-
49
-
50
-
51
-
 52
52 -
 53
53 -
 54
54 -
 55
55 -
 56
56 -
 57
57 -
 58
58 -
 59
59 -
 60
60 -
 61
61 -
 62
62 -
63
-
64
-
65
-
66
-
67
-
68
-
69
-
70
-
71
-
72
-
73
-
74
-
75
-
76
-
77
-
78
-
79
-
80
-
81
-
82
-
83
-
84
-
85
-
86
-
87
-
88
-
89
-
90
-
91
-
92
-
93
-
94
-
95
-
96
-
97
-
98
-
99
-
100
-
101
-
102
-
103
-
104
-
105
-
106
-
107
-
108
-
109
-
110
-
111
-
112
-
113
-
114
-
115
-
116
-
117
-
118
-
119
-
120
-
121
-
122
-
123
-
124
-
125
-
126
-
127
-
128
-
129
-
130
-
131
-
132
-
133
-
134
-
135
-
136
-
137
-
138
-
139
-
140
-
141
-
142
-
143
-
144
-
145
-
146
-
147
-
148
-
149
-
150
-
151
-
152
-
153
-
154
-
155
-
156
-
157
-
158
-
159
-
160
-
161
-
162
-
163
-
164
-
165
-
166
-
167
-
168
-
169
-
170
-
171
-
172
 |
 |
