Dell 942 All In One Inkjet Printer Dell™ Photo All-In-One Printer 94 - Page 39
Saving Photos to Your Computer, Viewing a Slide Show, Resize, Select, Rotate 90 degrees, Preview
 |
View all Dell 942 All In One Inkjet Printer manuals
Add to My Manuals
Save this manual to your list of manuals |
Page 39 highlights
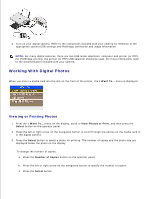
c. To resize the photo: a. Press the Resize button on the operator panel. b. Press the left or right arrow on the navigation button to specify the photo size. c. Press the Select button. To rotate the photo: a. Press the Menu button. b. Press the down arrow on the navigation button to scroll to Rotate 90 degrees. c. Press the Select button. To preview the photo before you print, press the Preview button. 4. Press the Color button to print the photos in color or press the Black button to print the photos in black and white. Saving Photos to Your Computer 1. From the I Want To... menu on the display, scroll to Save to Computer, and then press the Select button on the operator panel. 2. Press the left or right arrow on the navigation button to scroll through the photos on the media card or in the digital camera. 3. Press the Select button to select a photo to save to your computer. You can select more than one photo at once. 4. Press the Save to PC button on the operator panel. The Memory Card Manager automatically launches on your computer. 5. In the Memory Card Manager, verify that the photos you want to save are selected, and then click Next. 6. Browse to the folder in which you want to save your photos and make any changes to the Save/Launch Options, and then click Next. The photos are saved to your computer. Viewing a Slide Show From the I Want To... menu on the display, scroll to Slide Show, and then press the Select button on the operator panel. The printer displays each photo on the media card or digital camera.
-
 1
1 -
2
-
3
-
4
-
5
-
6
-
7
-
8
-
9
-
10
-
11
-
12
-
13
-
14
-
15
-
16
-
17
-
18
-
19
-
20
-
21
-
22
-
23
-
24
-
25
-
26
-
27
-
28
-
29
-
30
-
31
-
32
-
33
-
 34
34 -
 35
35 -
 36
36 -
 37
37 -
 38
38 -
 39
39 -
 40
40 -
 41
41 -
 42
42 -
 43
43 -
 44
44 -
45
-
46
-
47
-
48
-
49
-
50
-
51
-
52
-
53
-
54
-
55
-
56
-
57
-
58
-
59
-
60
-
61
-
62
-
63
-
64
-
65
-
66
-
67
-
68
-
69
-
70
-
71
-
72
-
73
-
74
-
75
-
76
-
77
 |
 |
