Dell OptiPlex GX1 Dell OptiPlex GX1/GX1p Managed PC and OptiPlex NX1 Net PC S - Page 113
until the DIMM is released from its socket.
 |
View all Dell OptiPlex GX1 manuals
Add to My Manuals
Save this manual to your list of manuals |
Page 113 highlights
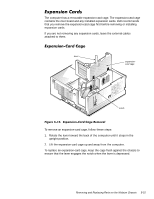
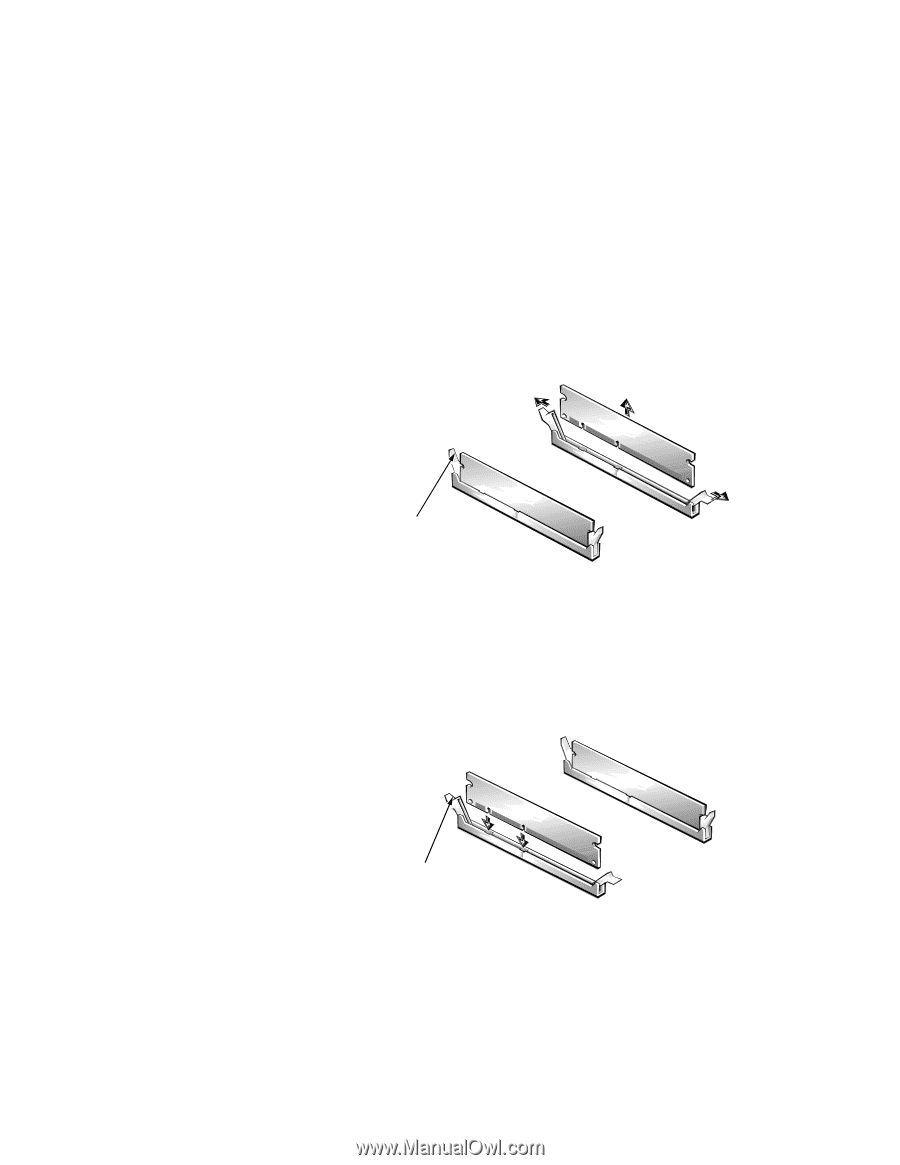
The following subsections contain procedures for removing/replacing system board components (see Figures 1-12 and 1-13) To remove a DIMM from one of the three DIMM sockets, follow these steps: 1. Remove the system power supply. 2. Locate the three DIMM sockets. 3. To remove a DIMM, push outward on the DIMM socket's securing clips until the DIMM is released from its socket. securing clips (2) 2. 1. 4. Lift the DIMM away from the socket. 5. Reinstall the replacement DIMM by pressing the DIMM fully into the socket while closing the securing clips to lock the DIMM into the socket. securing clips (2) 2. 1. 6. Replace all assemblies and cables previously removed. Removing and Replacing Parts on the Midsize Chassis 5-19
-
 1
1 -
2
-
3
-
4
-
5
-
6
-
7
-
8
-
9
-
10
-
11
-
12
-
13
-
14
-
15
-
16
-
17
-
18
-
19
-
20
-
21
-
22
-
23
-
24
-
25
-
26
-
27
-
28
-
29
-
30
-
31
-
32
-
33
-
34
-
35
-
36
-
37
-
38
-
39
-
40
-
41
-
42
-
43
-
44
-
45
-
46
-
47
-
48
-
49
-
50
-
51
-
52
-
53
-
54
-
55
-
56
-
57
-
58
-
59
-
60
-
61
-
62
-
63
-
64
-
65
-
66
-
67
-
68
-
69
-
70
-
71
-
72
-
73
-
74
-
75
-
76
-
77
-
78
-
79
-
80
-
81
-
82
-
83
-
84
-
85
-
86
-
87
-
88
-
89
-
90
-
91
-
92
-
93
-
94
-
95
-
96
-
97
-
98
-
99
-
100
-
101
-
102
-
103
-
104
-
105
-
106
-
107
-
 108
108 -
 109
109 -
 110
110 -
 111
111 -
 112
112 -
 113
113 -
 114
114 -
 115
115 -
 116
116 -
 117
117 -
 118
118 -
119
-
120
-
121
-
122
-
123
-
124
-
125
-
126
-
127
-
128
-
129
-
130
-
131
-
132
-
133
-
134
-
135
-
136
-
137
-
138
-
139
-
140
-
141
-
142
-
143
-
144
-
145
-
146
-
147
-
148
-
149
-
150
-
151
-
152
-
153
-
154
-
155
-
156
-
157
-
158
-
159
-
160
-
161
-
162
-
163
-
164
-
165
-
166
-
167
-
168
-
169
-
170
-
171
-
172
-
173
-
174
-
175
-
176
-
177
-
178
 |
 |
Removing and Replacing Parts on the Midsize Chassis
5-19
6\VWHP±%RDUG±&RPSRQHQWV
The following subsections contain procedures for removing/replacing system
board components (see Figures 1-12 and 1-13)
’,00V
To remove a DIMM from one of the three DIMM sockets, follow these steps:
1.
Remove the system power supply.
2.
Locate the three DIMM sockets.
3.
To remove a DIMM, push outward on the DIMM socket’s securing clips
until the DIMM is released from its socket.
)LJXUH±¸´²À³±±’,00±5HPRYDO
4.
Lift the DIMM away from the socket.
5.
Reinstall the replacement DIMM by pressing the DIMM fully into the
socket while closing the securing clips to lock the DIMM into the socket.
)LJXUH±¸´²Á³±±’,00±,QVWDOODWLRQ
6.
Replace all assemblies and cables previously removed.
2.
1.
securing clips (2)
2.
1.
securing clips (2)