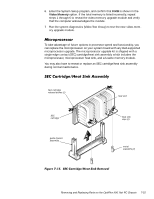
Dell OptiPlex GX1 Dell OptiPlex GX1/GX1p Managed PC and OptiPlex NX1 Net PC S - Page 155
Remove the riser-board mounting screw.
 |
View all Dell OptiPlex GX1 manuals
Add to My Manuals
Save this manual to your list of manuals |
Page 155 highlights
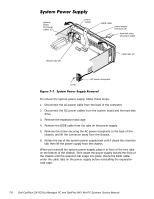
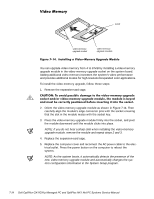
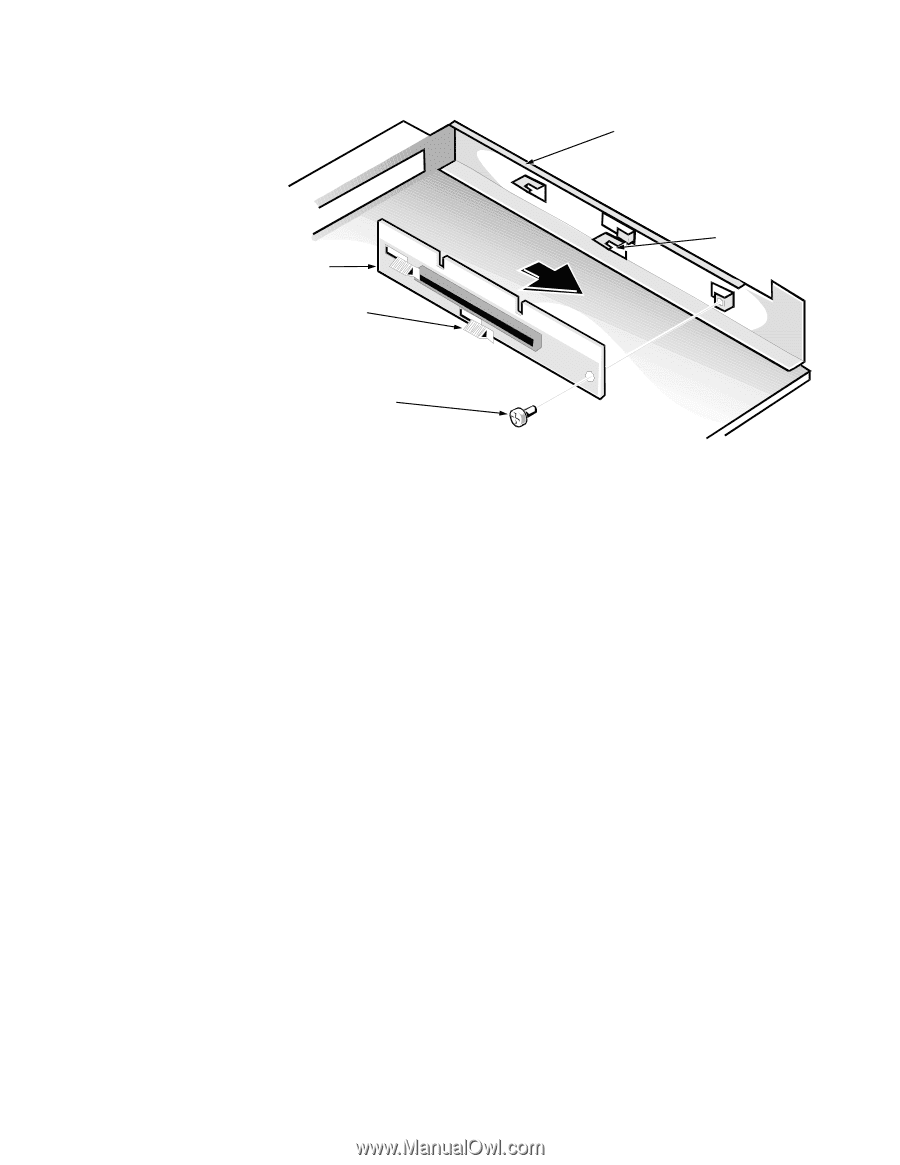
riser board slots (2) riser-board mounting screw expansion-card cage tabs (2) To remove the riser board, follow these steps: 1. Remove the expansion-card cage. 2. Remove the expansion card if one is installed. 3. Lay the expansion-card cage on a flat work surface, with the riser board facing up. 4. Remove the riser-board mounting screw. 5. Slide the riser board to the side as shown in Figure 7-10, and then remove the riser board from the expansion-card cage. When you replace the riser board, be sure that the two tabs on the expansioncard cage engage the riser board slots. Removing and Replacing Parts on the OptiPlex NX1 Net PC Chassis 7-11
-
 1
1 -
2
-
3
-
4
-
5
-
6
-
7
-
8
-
9
-
10
-
11
-
12
-
13
-
14
-
15
-
16
-
17
-
18
-
19
-
20
-
21
-
22
-
23
-
24
-
25
-
26
-
27
-
28
-
29
-
30
-
31
-
32
-
33
-
34
-
35
-
36
-
37
-
38
-
39
-
40
-
41
-
42
-
43
-
44
-
45
-
46
-
47
-
48
-
49
-
50
-
51
-
52
-
53
-
54
-
55
-
56
-
57
-
58
-
59
-
60
-
61
-
62
-
63
-
64
-
65
-
66
-
67
-
68
-
69
-
70
-
71
-
72
-
73
-
74
-
75
-
76
-
77
-
78
-
79
-
80
-
81
-
82
-
83
-
84
-
85
-
86
-
87
-
88
-
89
-
90
-
91
-
92
-
93
-
94
-
95
-
96
-
97
-
98
-
99
-
100
-
101
-
102
-
103
-
104
-
105
-
106
-
107
-
108
-
109
-
110
-
111
-
112
-
113
-
114
-
115
-
116
-
117
-
118
-
119
-
120
-
121
-
122
-
123
-
124
-
125
-
126
-
127
-
128
-
129
-
130
-
131
-
132
-
133
-
134
-
135
-
136
-
137
-
138
-
139
-
140
-
141
-
142
-
143
-
144
-
145
-
146
-
147
-
148
-
149
-
 150
150 -
 151
151 -
 152
152 -
 153
153 -
 154
154 -
 155
155 -
 156
156 -
 157
157 -
 158
158 -
 159
159 -
 160
160 -
161
-
162
-
163
-
164
-
165
-
166
-
167
-
168
-
169
-
170
-
171
-
172
-
173
-
174
-
175
-
176
-
177
-
178
 |
 |
Removing and Replacing Parts on the OptiPlex NX1 Net PC Chassis
7-11
5LVHU±%RDUG
)LJXUH±º´²Â³±±5LVHU±%RDUG±5HPRYDO
To remove the riser board, follow these steps:
1.
Remove the expansion-card cage.
2.
Remove the expansion card if one is installed.
3.
Lay the expansion-card cage on a flat work surface, with the riser board
facing up.
4.
Remove the riser-board mounting screw.
5.
Slide the riser board to the side as shown in Figure 7-10, and then remove
the riser board from the expansion-card cage.
When you replace the riser board, be sure that the two tabs on the expansion-
card cage engage the riser board slots.
riser board
riser-board
mounting screw
expansion-card
cage
tabs (2)
slots (2)