Dell PowerEdge R240 EMC PowerEdge R240 Installation and Service Manual - Page 61
Removing the expansion card riser
 |
View all Dell PowerEdge R240 manuals
Add to My Manuals
Save this manual to your list of manuals |
Page 61 highlights
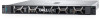
Removing the expansion card riser Prerequisites 1. Follow the safety guidelines listed in the Safety instructions. 2. Follow the procedure listed in the Before working inside your system. 3. Remove the air shroud. Steps 1. Open the blue expansion card riser retention-latch located on the system. 2. Holding the blue touch points, lift the expansion card riser out of the system. Figure 39. Removing the expansion card riser 3. If you are not replacing the expansion card riser, install a expansion card riser filler bracket by performing the following steps: a. Align the expansion card riser filler bracket with the slot on the system. b. Push the expansion card riser filler bracket downward until firmly seated. c. Close the blue expansion card retention latch by pushing the latch down until the latch snaps into place. d. Using a Phillips #2 screwdriver, tighten the screw to secure the expansion card riser filler to the chassis. Figure 40. Installing the expansion card riser filler PowerEdge R240 installing and removing system components 61
-
 1
1 -
2
-
3
-
4
-
5
-
6
-
7
-
8
-
9
-
10
-
11
-
12
-
13
-
14
-
15
-
16
-
17
-
18
-
19
-
20
-
21
-
22
-
23
-
24
-
25
-
26
-
27
-
28
-
29
-
30
-
31
-
32
-
33
-
34
-
35
-
36
-
37
-
38
-
39
-
40
-
41
-
42
-
43
-
44
-
45
-
46
-
47
-
48
-
49
-
50
-
51
-
52
-
53
-
54
-
55
-
 56
56 -
 57
57 -
 58
58 -
 59
59 -
 60
60 -
 61
61 -
 62
62 -
 63
63 -
 64
64 -
 65
65 -
 66
66 -
67
-
68
-
69
-
70
-
71
-
72
-
73
-
74
-
75
-
76
-
77
-
78
-
79
-
80
-
81
-
82
-
83
-
84
-
85
-
86
-
87
-
88
-
89
-
90
-
91
-
92
-
93
-
94
-
95
-
96
-
97
-
98
-
99
-
100
-
101
-
102
-
103
-
104
-
105
-
106
-
107
-
108
-
109
-
110
-
111
-
112
-
113
-
114
 |
 |
