Dell PowerEdge R240 EMC PowerEdge R240 Installation and Service Manual - Page 72
Removing the processor
 |
View all Dell PowerEdge R240 manuals
Add to My Manuals
Save this manual to your list of manuals |
Page 72 highlights
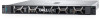
a. Loosen the first screw three turns. b. Loosen the screw diagonally opposite to the screw you loosened first. c. Return to the first screw and loosen it completely. d. Repeat the procedure for the remaining two screws. 2. Lift the heat sink away from the system. Figure 53. Removing the heat sink Next steps 1. If you are removing a faulty heat sink, replace the heat sink, if not, remove the processor. Removing the processor Prerequisites 1. Follow the safety guidelines listed in the Safety instructions. 2. Follow the procedure listed in the Before working inside your system. 3. Remove the air shroud. 4. Remove the heat sink module. Steps 1. Release the socket lever by pushing the lever down and out from under the tab on the processor shield. 2. Lift the lever until the processor shield is fully open. CAUTION: Do not touch the processor socket pins, they are fragile and can be permanently damaged. Be careful not to bend the pins in the processor socket when removing the processor out of the socket. 3. Lift the processor out of the socket. 72 PowerEdge R240 installing and removing system components
-
 1
1 -
2
-
3
-
4
-
5
-
6
-
7
-
8
-
9
-
10
-
11
-
12
-
13
-
14
-
15
-
16
-
17
-
18
-
19
-
20
-
21
-
22
-
23
-
24
-
25
-
26
-
27
-
28
-
29
-
30
-
31
-
32
-
33
-
34
-
35
-
36
-
37
-
38
-
39
-
40
-
41
-
42
-
43
-
44
-
45
-
46
-
47
-
48
-
49
-
50
-
51
-
52
-
53
-
54
-
55
-
56
-
57
-
58
-
59
-
60
-
61
-
62
-
63
-
64
-
65
-
66
-
 67
67 -
 68
68 -
 69
69 -
 70
70 -
 71
71 -
 72
72 -
 73
73 -
 74
74 -
 75
75 -
 76
76 -
 77
77 -
78
-
79
-
80
-
81
-
82
-
83
-
84
-
85
-
86
-
87
-
88
-
89
-
90
-
91
-
92
-
93
-
94
-
95
-
96
-
97
-
98
-
99
-
100
-
101
-
102
-
103
-
104
-
105
-
106
-
107
-
108
-
109
-
110
-
111
-
112
-
113
-
114
 |
 |
