Dell PowerEdge R6525 EMC Installation and Service Manual - Page 126
Removing a power supply unit blank, Installing a power supply unit blank, Removing a power supply
 |
View all Dell PowerEdge R6525 manuals
Add to My Manuals
Save this manual to your list of manuals |
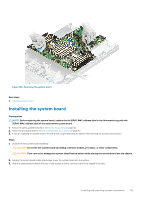
Page 126 highlights
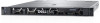
You can configure the hot spare feature by using the iDRAC settings. For more information, see the iDRAC User's Guide available at www.dell.com/poweredgemanuals. Removing a power supply unit blank Prerequisites Follow the safety guidelines listed in the Safety instructions on page 42. Steps Pull the blank out of the system. CAUTION: To ensure proper system cooling, the PSU blank must be installed in the second PSU bay in a non-redundant configuration. Remove the PSU blank only if you are installing a second PSU. Next steps 1. Replace the PSU blank or PSU. Installing a power supply unit blank Prerequisites 1. Follow the safety guidelines listed in the Safety instructions on page 42. NOTE: Install the power supply unit (PSU) blank only in the second PSU bay. 2. Remove the PSU. Steps Align the PSU blank with the PSU bay and push it into the PSU bay until it clicks into place. Removing a power supply unit Prerequisites CAUTION: The system requires one power supply unit (PSU) for normal operation. On power-redundant systems, remove and replace only one PSU at a time in a system that is powered on. 1. Follow the safety guidelines listed in the Safety instructions on page 42. 2. Disconnect the power cable from the power outlet and from the PSU you intend to remove. 3. Remove the cable from the strap on the PSU handle. 4. Unlatch and lift or remove the optional cable management accessory if it interferes with the PSU removal. For information about the cable management when the PSU is removed or installed while the system is in a rack, see the system's cable management arm documentation at https://www.dell.com/poweredgemanuals. Steps Press the release latch, and holding the PSU handle slide the PSU out of the PSU bay. 126 Installing and removing system components
-
 1
1 -
2
-
3
-
4
-
5
-
6
-
7
-
8
-
9
-
10
-
11
-
12
-
13
-
14
-
15
-
16
-
17
-
18
-
19
-
20
-
21
-
22
-
23
-
24
-
25
-
26
-
27
-
28
-
29
-
30
-
31
-
32
-
33
-
34
-
35
-
36
-
37
-
38
-
39
-
40
-
41
-
42
-
43
-
44
-
45
-
46
-
47
-
48
-
49
-
50
-
51
-
52
-
53
-
54
-
55
-
56
-
57
-
58
-
59
-
60
-
61
-
62
-
63
-
64
-
65
-
66
-
67
-
68
-
69
-
70
-
71
-
72
-
73
-
74
-
75
-
76
-
77
-
78
-
79
-
80
-
81
-
82
-
83
-
84
-
85
-
86
-
87
-
88
-
89
-
90
-
91
-
92
-
93
-
94
-
95
-
96
-
97
-
98
-
99
-
100
-
101
-
102
-
103
-
104
-
105
-
106
-
107
-
108
-
109
-
110
-
111
-
112
-
113
-
114
-
115
-
116
-
117
-
118
-
119
-
120
-
 121
121 -
 122
122 -
 123
123 -
 124
124 -
 125
125 -
 126
126 -
 127
127 -
 128
128 -
 129
129 -
 130
130 -
 131
131 -
132
-
133
-
134
-
135
-
136
-
137
-
138
-
139
-
140
-
141
-
142
-
143
-
144
-
145
-
146
-
147
-
148
-
149
-
150
-
151
-
152
-
153
-
154
-
155
-
156
-
157
-
158
-
159
-
160
-
161
-
162
-
163
-
164
 |
 |
