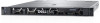
Dell PowerEdge R6525 EMC Installation and Service Manual - Page 87
Removing the processor
 |
View all Dell PowerEdge R6525 manuals
Add to My Manuals
Save this manual to your list of manuals |
Page 87 highlights
2. Follow the procedure listed in the Before working inside your system on page 43. 3. If installed, remove the air shroud. WARNING: The heat sink and processor are too hot to touch for some time after the system has been powered off. Allow the heat sink and processor to cool down before handling them. NOTE: The procedure to uninstall standard and L-type heat sink is similar. The image shows L-type heat sink configuration system. Steps 1. Using a Torx #T20 screwdriver, loosen the captive screws in the order that is mentioned on the heat sink: a. Partially loosen the captive screws 1 and 2 (approximately 3 turns). b. Partially loosen the captive screws 3 and 4 (approximately 3 turns). c. Loosen the captive screws 1 and 2 completely. d. Loosen the captive screws 3 and 4 completely. NOTE: The captive screw numbers are marked on the heat sink. 2. Lift the heat sink from the system. Figure 66. Removing a heat sink Next steps 1. If you are uninstalling a faulty heat sink, replace the heat sink, else remove the processor. Removing the processor Prerequisites WARNING: The heat sink may be hot to touch for some time after the system has been powered off. Allow the heat sink to cool before removing it. 1. Follow the safety guidelines listed in the Safety instructions on page 42. 2. Follow the procedure listed in the Before working inside your system on page 43. 3. Remove the heat sink. Installing and removing system components 87
-
 1
1 -
2
-
3
-
4
-
5
-
6
-
7
-
8
-
9
-
10
-
11
-
12
-
13
-
14
-
15
-
16
-
17
-
18
-
19
-
20
-
21
-
22
-
23
-
24
-
25
-
26
-
27
-
28
-
29
-
30
-
31
-
32
-
33
-
34
-
35
-
36
-
37
-
38
-
39
-
40
-
41
-
42
-
43
-
44
-
45
-
46
-
47
-
48
-
49
-
50
-
51
-
52
-
53
-
54
-
55
-
56
-
57
-
58
-
59
-
60
-
61
-
62
-
63
-
64
-
65
-
66
-
67
-
68
-
69
-
70
-
71
-
72
-
73
-
74
-
75
-
76
-
77
-
78
-
79
-
80
-
81
-
 82
82 -
 83
83 -
 84
84 -
 85
85 -
 86
86 -
 87
87 -
 88
88 -
 89
89 -
 90
90 -
 91
91 -
 92
92 -
93
-
94
-
95
-
96
-
97
-
98
-
99
-
100
-
101
-
102
-
103
-
104
-
105
-
106
-
107
-
108
-
109
-
110
-
111
-
112
-
113
-
114
-
115
-
116
-
117
-
118
-
119
-
120
-
121
-
122
-
123
-
124
-
125
-
126
-
127
-
128
-
129
-
130
-
131
-
132
-
133
-
134
-
135
-
136
-
137
-
138
-
139
-
140
-
141
-
142
-
143
-
144
-
145
-
146
-
147
-
148
-
149
-
150
-
151
-
152
-
153
-
154
-
155
-
156
-
157
-
158
-
159
-
160
-
161
-
162
-
163
-
164
 |
 |
