Dell Precision 610 Dell Precision WorkStation 610 Mini Tower Systems User's Gu - Page 55
NOTES:
 |
View all Dell Precision 610 manuals
Add to My Manuals
Save this manual to your list of manuals |
Page 55 highlights
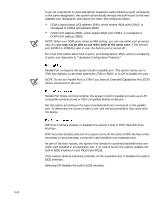
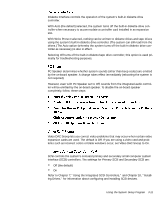
NOTES: The power management feature monitors activity of a mouse connected to the PS/2-compatible mouse port. Some 3D graphics cards do not support DPMS. Refer to the 3D graphics card documentation for DPMS compliance information. By setting Power Management to Maximum, Regular, or Minimum, you can set predefined time-out periods (see Table 3-2) for the two successive monitor shutdown stages, standby and off. NOTE: Each monitor manufacturer defines the details of the shutdown stages for its own monitors. However, in all cases power consumption decreases with each stage from "on" (full power) to "standby" (reduced power; the display image usually disappears) to "off" (where power consumption is minimal). To define these stages for your monitor, see the documentation that came with the monitor. For most DPMS-compliant monitors, any subsequent activity-including moving the mouse-should return full power to the monitor. Check your monitor documentation for information on how your monitor is designed to operate. For most systems, enabling Power Management at any level causes EIDE hard-disk drives to switch to low-power mode after about 20 minutes of system inactivity (see Table 3-2). NOTES: All EIDE drives shipped by Dell with your system support this feature. However, not all EIDE hard-disk drives support this feature. Enabling this feature for drives that do not support it may cause the EIDE drive to become inoperable until the computer is restarted and the Power Management option is disabled. In low-power mode, the disks inside the drive stop spinning. They remain idle until the next drive access, which causes them to start spinning again. (Because the disks take a few seconds to regain full speed, you may notice a slight delay the next time you access the hard-disk drive.) When Power Management is set to Disabled (the default), the disks spin constantly as long as the system is turned on. Using the System Setup Program 3-15
-
 1
1 -
2
-
3
-
4
-
5
-
6
-
7
-
8
-
9
-
10
-
11
-
12
-
13
-
14
-
15
-
16
-
17
-
18
-
19
-
20
-
21
-
22
-
23
-
24
-
25
-
26
-
27
-
28
-
29
-
30
-
31
-
32
-
33
-
34
-
35
-
36
-
37
-
38
-
39
-
40
-
41
-
42
-
43
-
44
-
45
-
46
-
47
-
48
-
49
-
 50
50 -
 51
51 -
 52
52 -
 53
53 -
 54
54 -
 55
55 -
 56
56 -
 57
57 -
 58
58 -
 59
59 -
 60
60 -
61
-
62
-
63
-
64
-
65
-
66
-
67
-
68
-
69
-
70
-
71
-
72
-
73
-
74
-
75
-
76
-
77
-
78
-
79
-
80
-
81
-
82
-
83
-
84
-
85
-
86
-
87
-
88
-
89
-
90
-
91
-
92
-
93
-
94
-
95
-
96
-
97
-
98
-
99
-
100
-
101
-
102
-
103
-
104
-
105
-
106
-
107
-
108
-
109
-
110
-
111
-
112
-
113
-
114
-
115
-
116
-
117
-
118
-
119
-
120
-
121
-
122
-
123
-
124
-
125
-
126
-
127
-
128
-
129
-
130
-
131
-
132
-
133
-
134
-
135
-
136
-
137
-
138
-
139
-
140
-
141
-
142
-
143
-
144
-
145
-
146
-
147
-
148
-
149
-
150
-
151
-
152
-
153
-
154
-
155
-
156
-
157
-
158
-
159
-
160
-
161
-
162
-
163
-
164
-
165
-
166
-
167
-
168
-
169
-
170
-
171
-
172
-
173
-
174
-
175
-
176
-
177
-
178
-
179
-
180
-
181
-
182
-
183
-
184
-
185
-
186
-
187
-
188
-
189
-
190
-
191
-
192
-
193
-
194
-
195
-
196
-
197
-
198
-
199
-
200
-
201
-
202
-
203
-
204
-
205
-
206
-
207
-
208
-
209
-
210
-
211
-
212
-
213
-
214
-
215
-
216
-
217
-
218
-
219
-
220
-
221
-
222
-
223
-
224
-
225
-
226
-
227
-
228
-
229
-
230
 |
 |
